Deploying a registry
- 1. General settings
- 2. Creating registry administrators
- 3. Registry deployment template
- 4. Mail server settings
- 5. Information about keys
- 6. Registry resources
- 7. DNS settings
- 8. Access restrictions
- 9. Officers (service providers) authentication
- 10. Citizens (service recipients) authentication
- 11. Backup settings
- 12. Confirmation and deployment
| 🌐 This document is available in both English and Ukrainian. Use the language toggle in the top right corner to switch between versions. |
After successfully deploying the Platform on a target environment, a Platform administrator can access the Control Plane admin console interface. In Control Plane, you can manage the configurations of the Platform infrastructure components (cluster-mgmt) and registry components.
|
You can find the link to Control Plane in the OpenShift console. Go to Networking > Routes and search for
|

|
Only a Platform administrator with appropriate permissions can deploy a registry using the Control Plane admin console. This action requires a For details, see Creating Platform administrators. |
- To deploy a new registry, perform these steps:
-
-
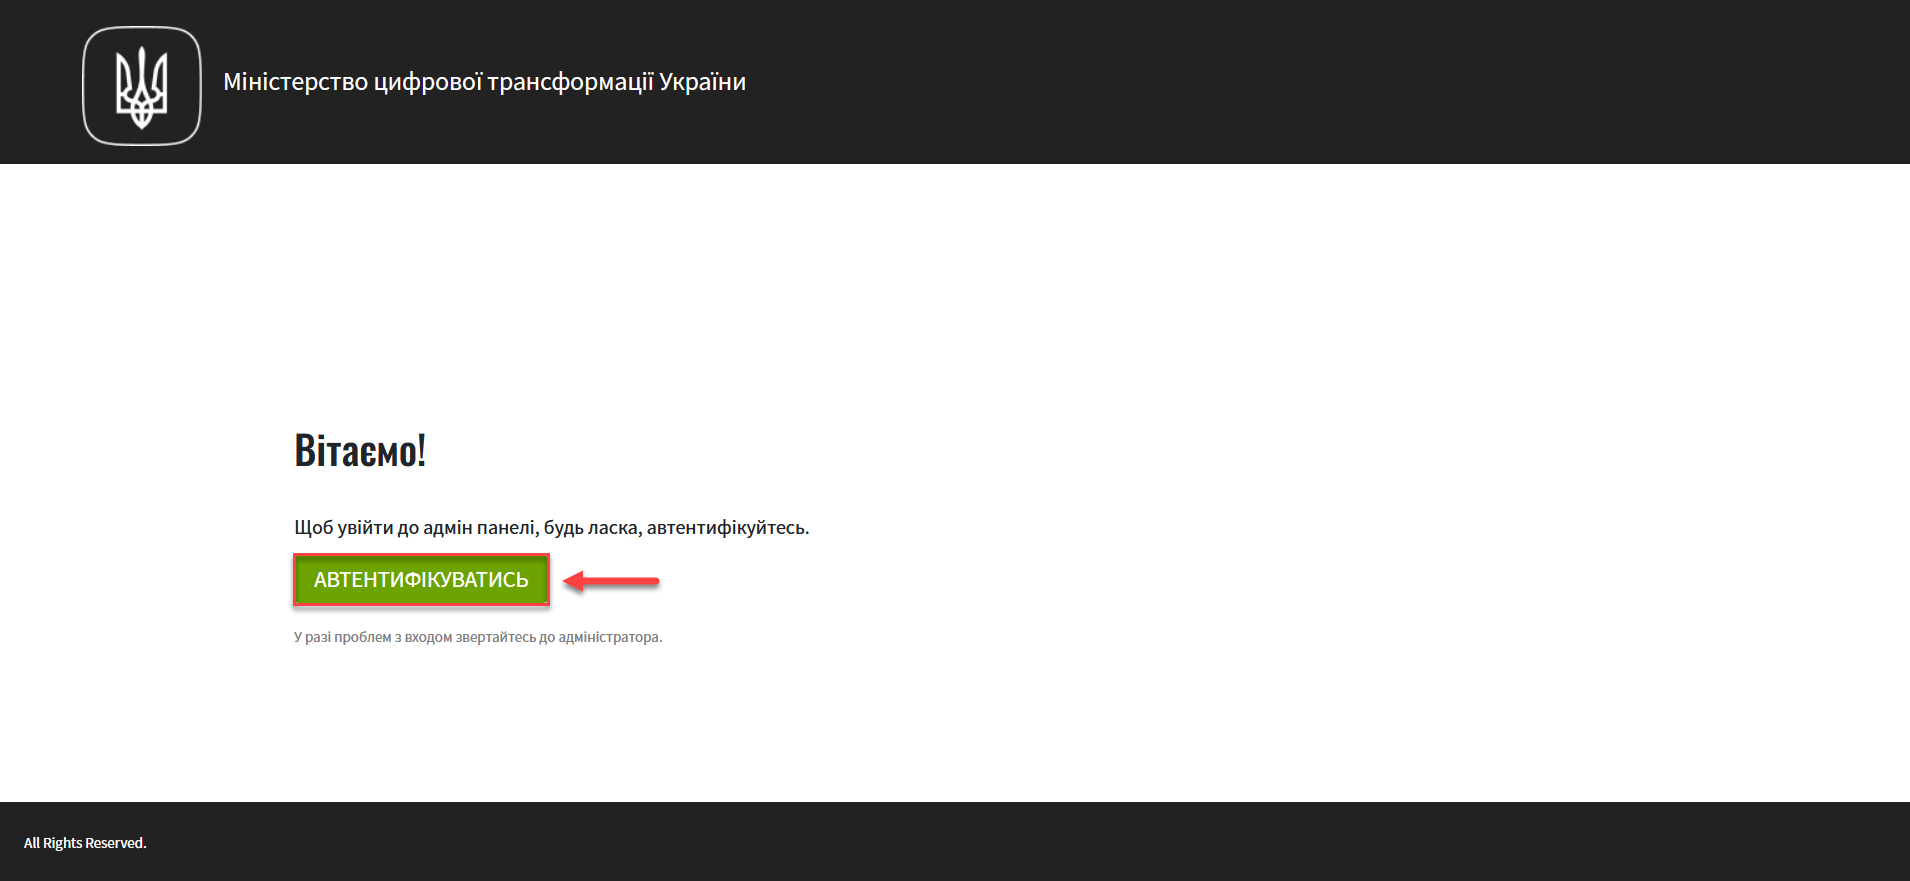
Sign in to Control Plane.
-
Open the Registries section and click the
Create Newbutton.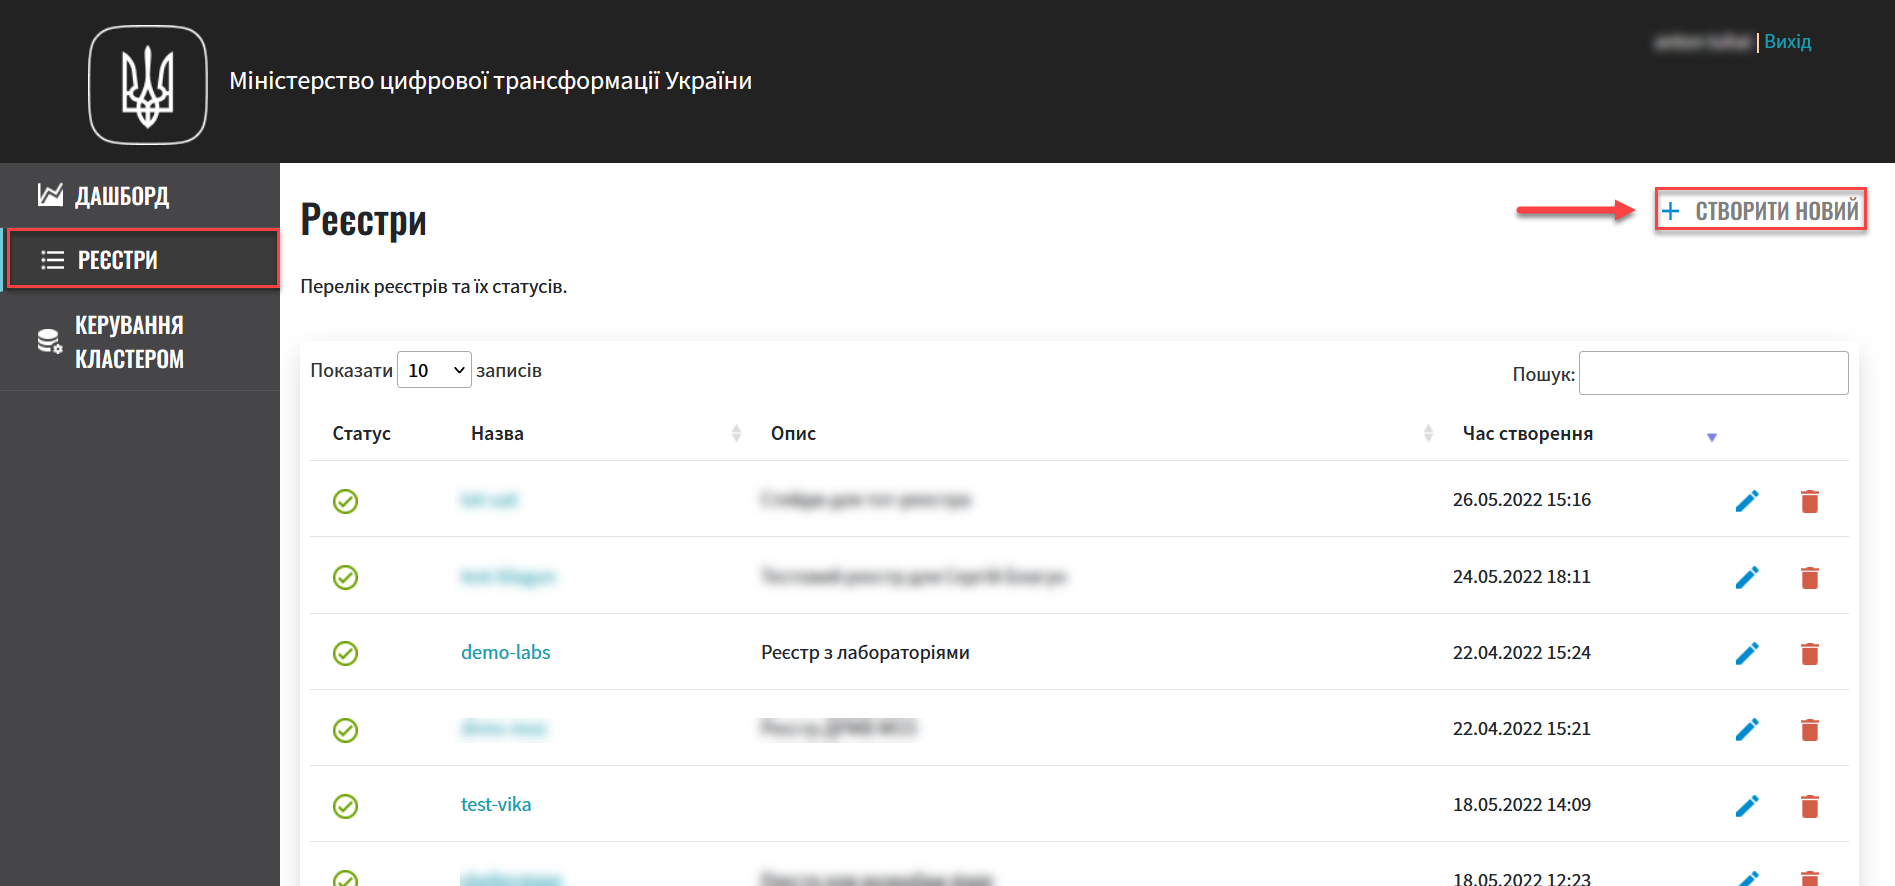
-
Configure your registry parameters.
Read on for details on each deployment step.
-
1. General settings
In this step, you can specify the registry’s system name, which is used in various data exchange operations on the Platform. The registry name cannot be changed once the registry is created.
|
You can describe the purpose of the registry or provide its official name in the Description field. This information may be helpful for business or legal reasons.
Click Confirm to go to the next step.

2. Creating registry administrators
In this step, you can assign registry administrators.
|
You can also add administrators by editing the registry soon after its deployment. For details, see Creating registry administrators. |
-
In the Administrators field, specify the administrators who will have access to the registry.
This is a required field. It means at least ONE admin must be added here. 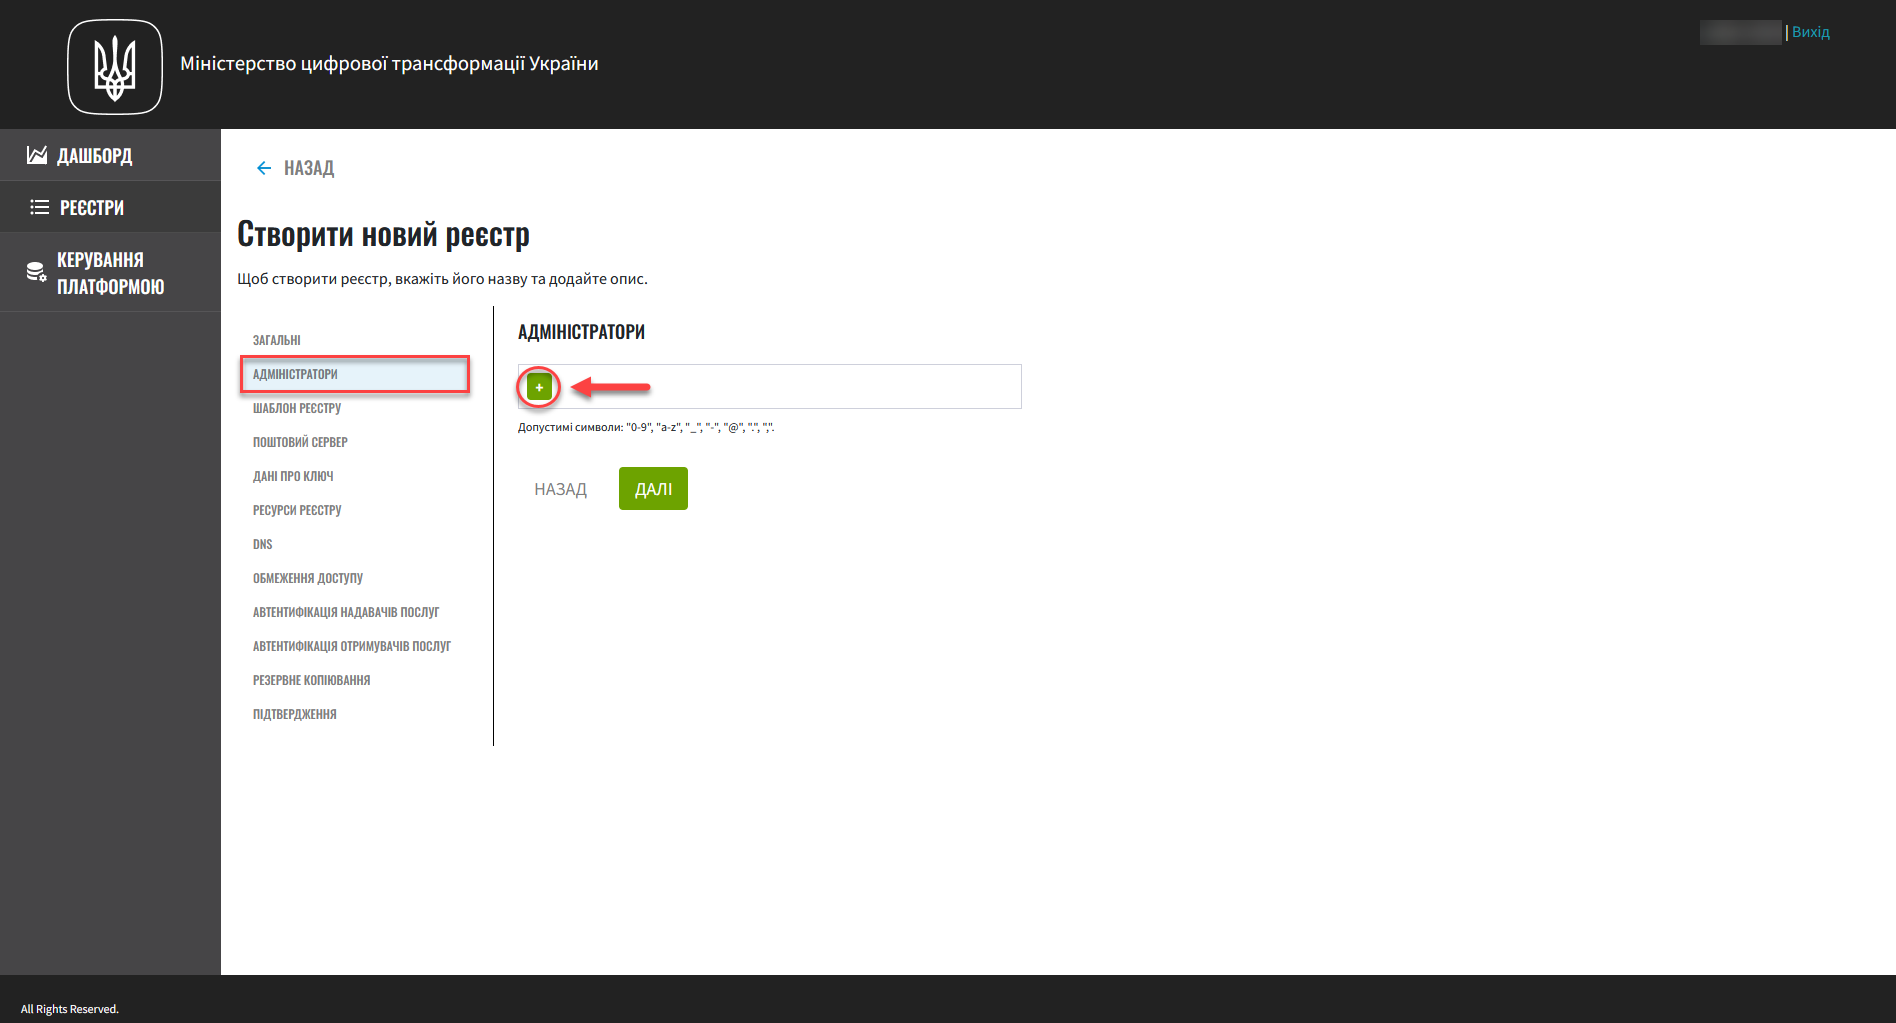
Click the
+(Add) button and provide the following details for each registry administrator:-
First name
-
Last name
-
Email address
-
Temporary password
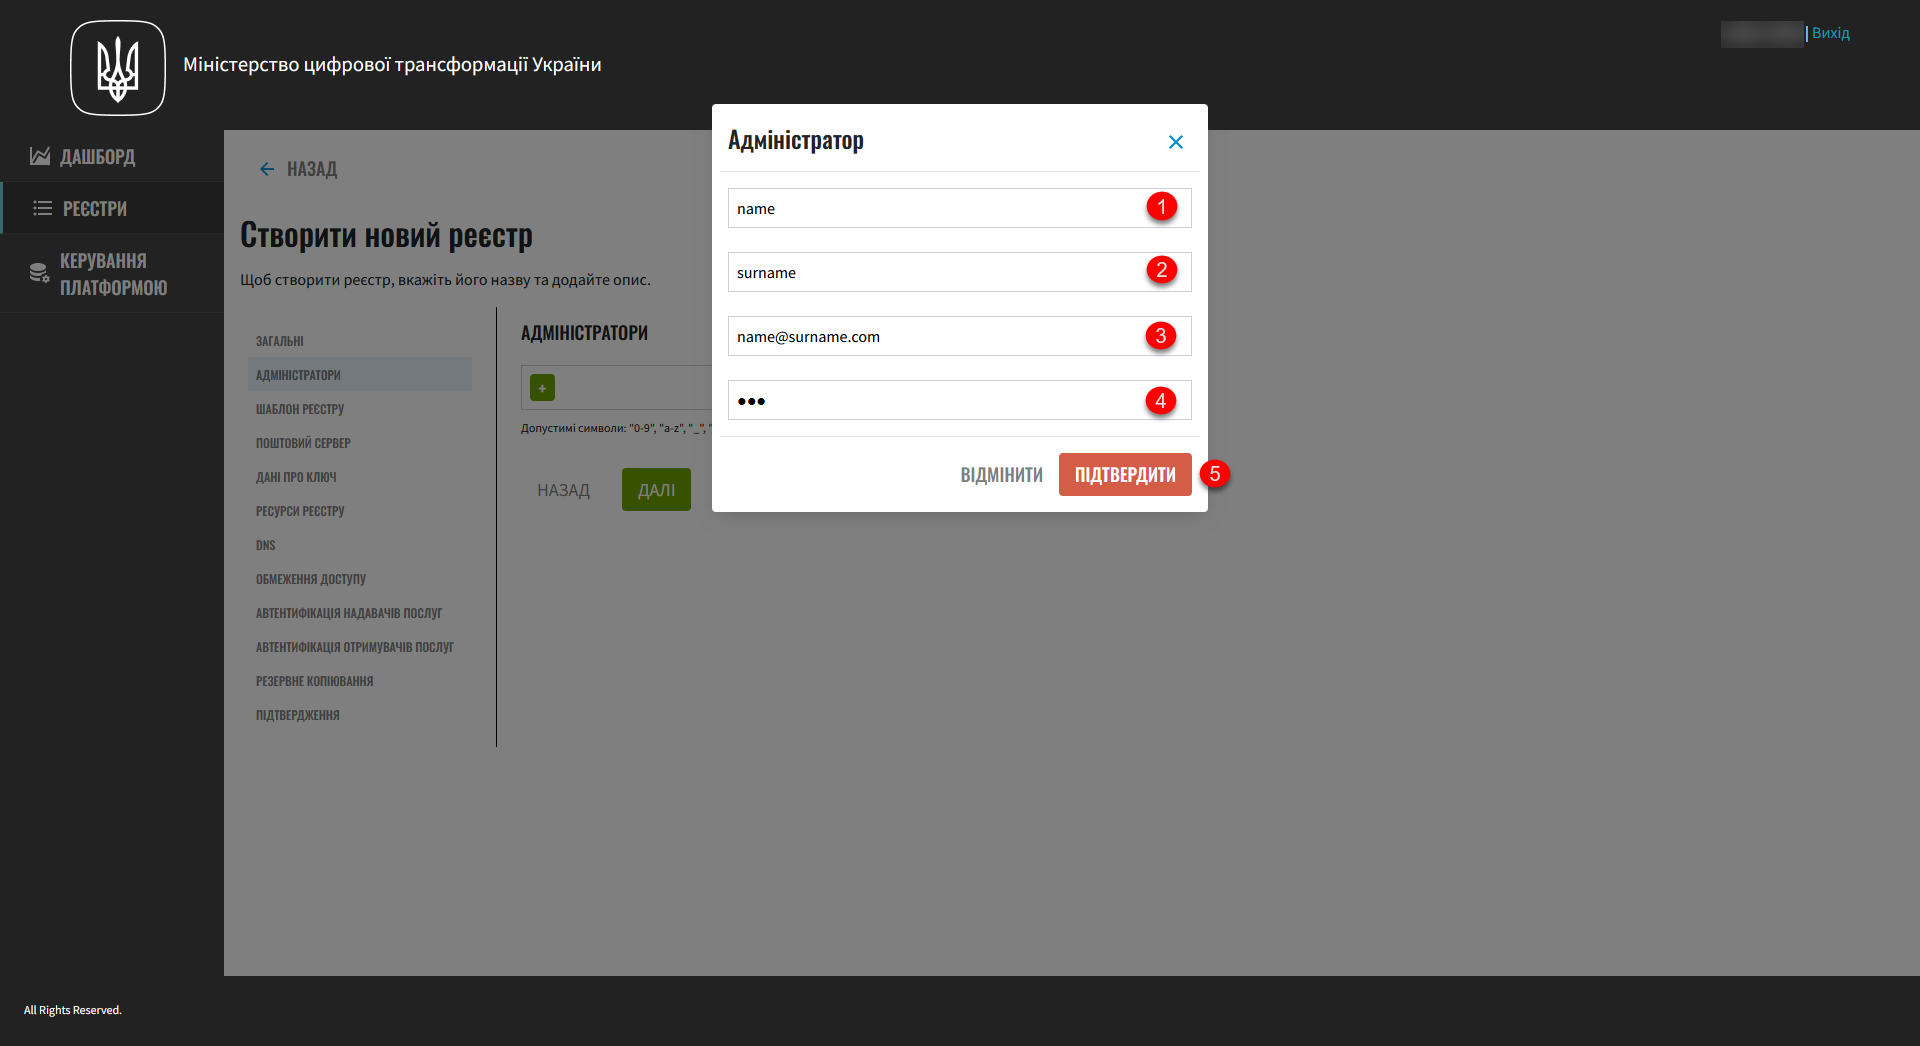
To add several administrators, repeat this step for each user separately (click
+> provide details >Confirm).Use a lower case for email addresses.
Allowed characters are: digits (
0-9), Latin letters (a-z), underscores (_), hyphens (-), at sign (@), dots (.), and commas (,). -
-
Click
Nextto go to the next step.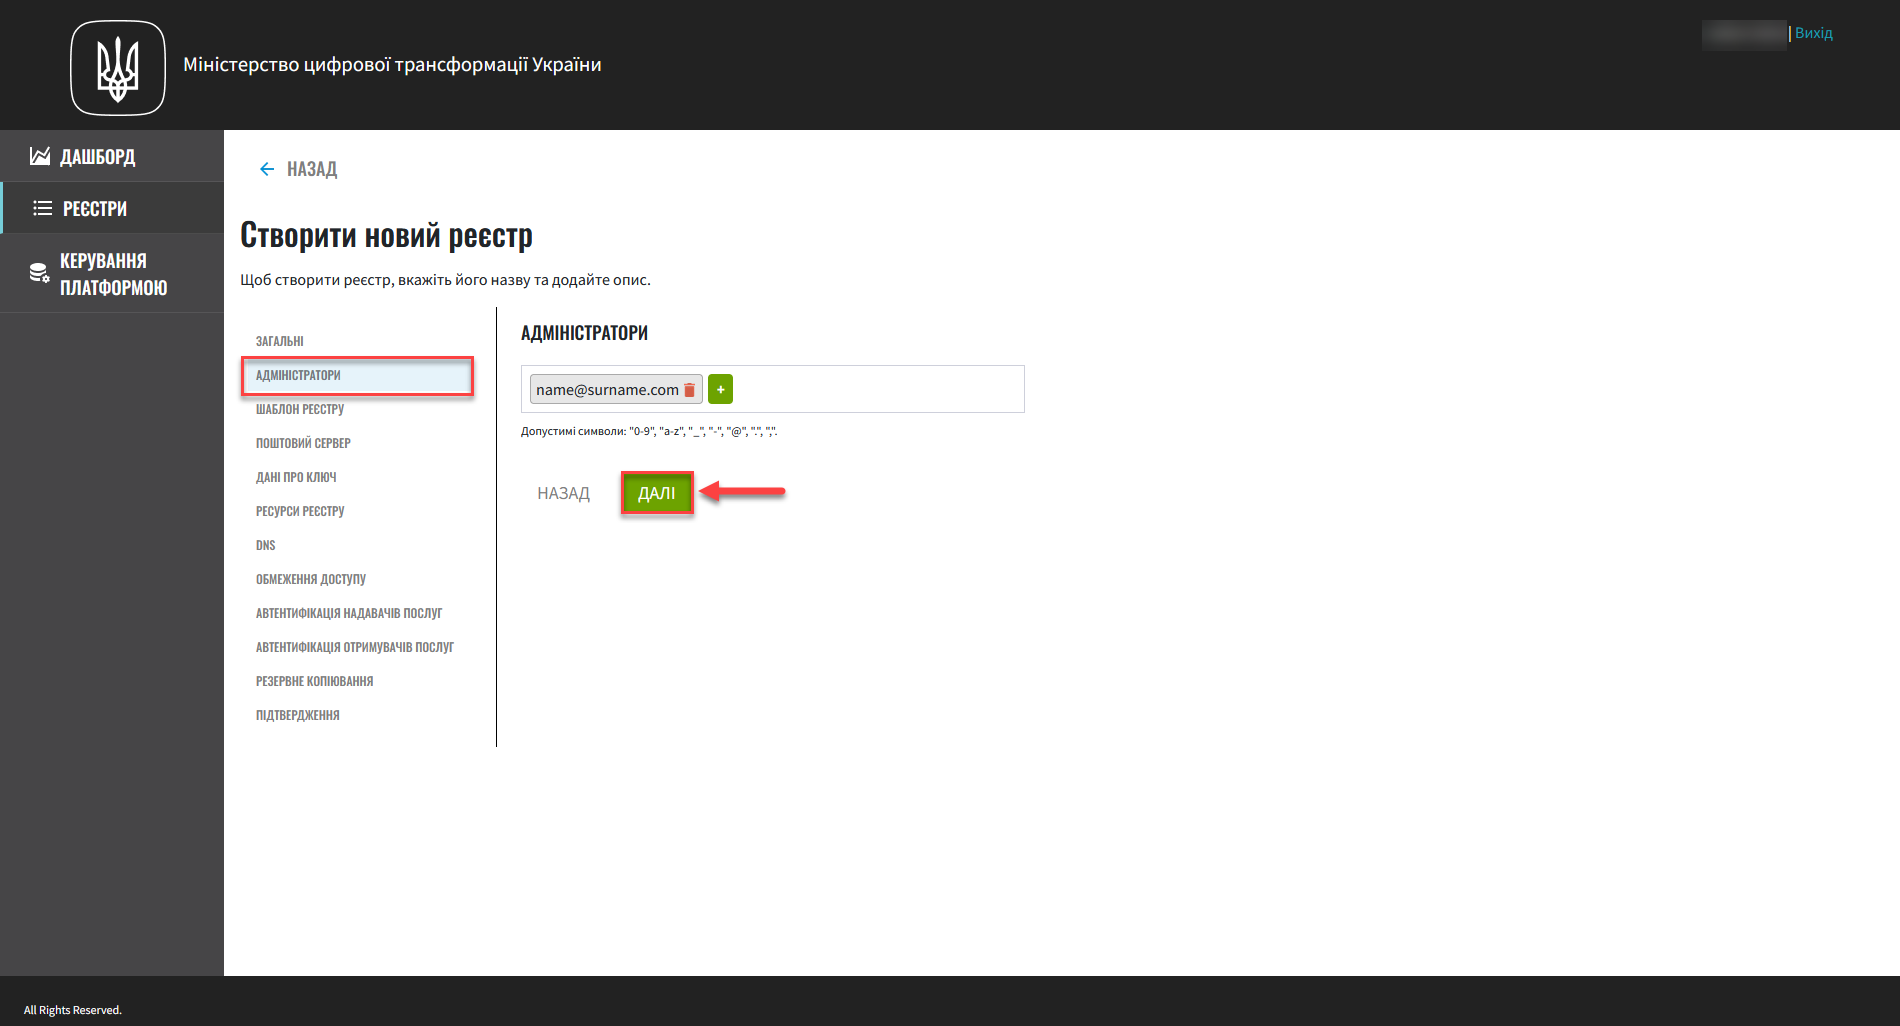
The registry administrator account is automatically created in the
openshiftrealm of the Keycloak service with thecp-registry-admin-<registry-name>role in the/cp-registry-admin-<registry-name>group, where<registry-name>is the name of your registry.
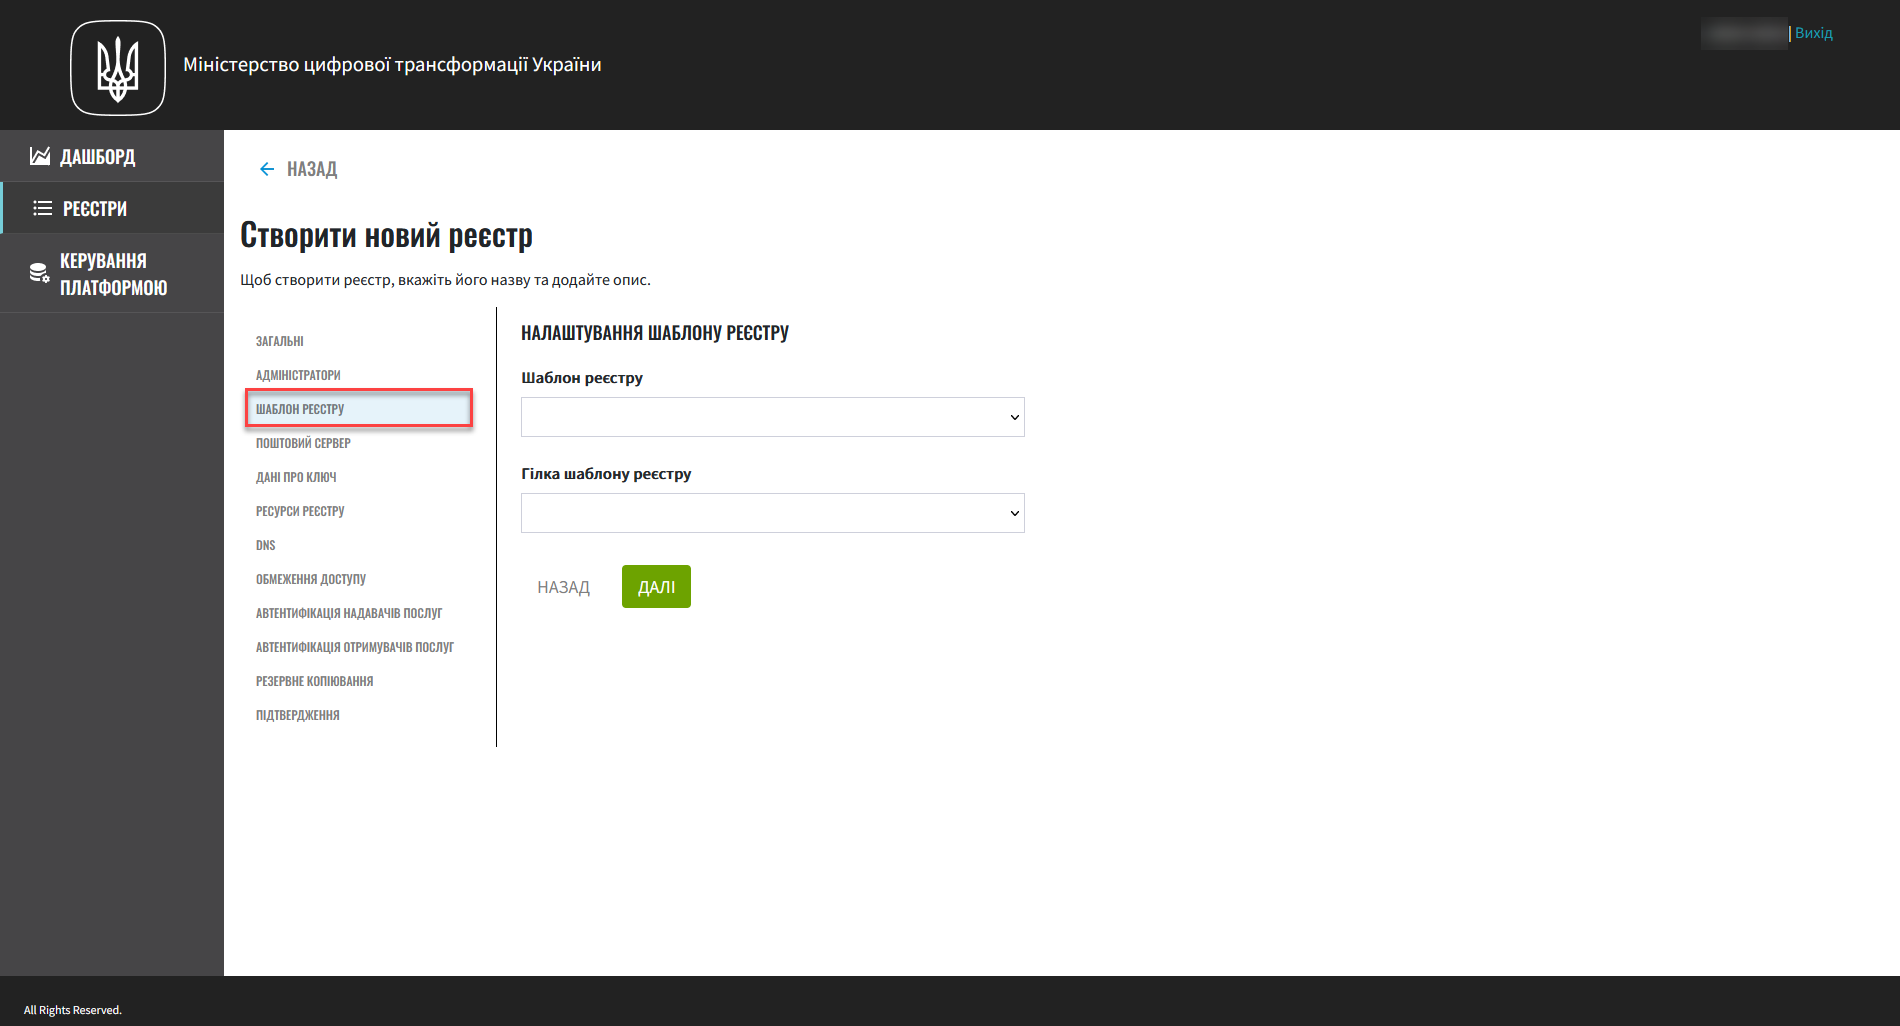
3. Registry deployment template
In this step, you can select a template for your registry. Templates are predefined registry configurations with a set number of resources that you can select depending on the expected workload. For example, you can choose between a minimum and recommended configuration, or select a configuration with GeoServer, and so on.
| To calculate the approximate cost of the resources your registry will need, use the Calculating the registry cost page or reach out to the Platform’s technical support team. |
-
Select the configuration template for your registry from the Registry template list.
A registry template defines the configuration options and the allocated resources, including CPU, RAM, the number of nodes in MachineSets, and so on.
This is a required field. 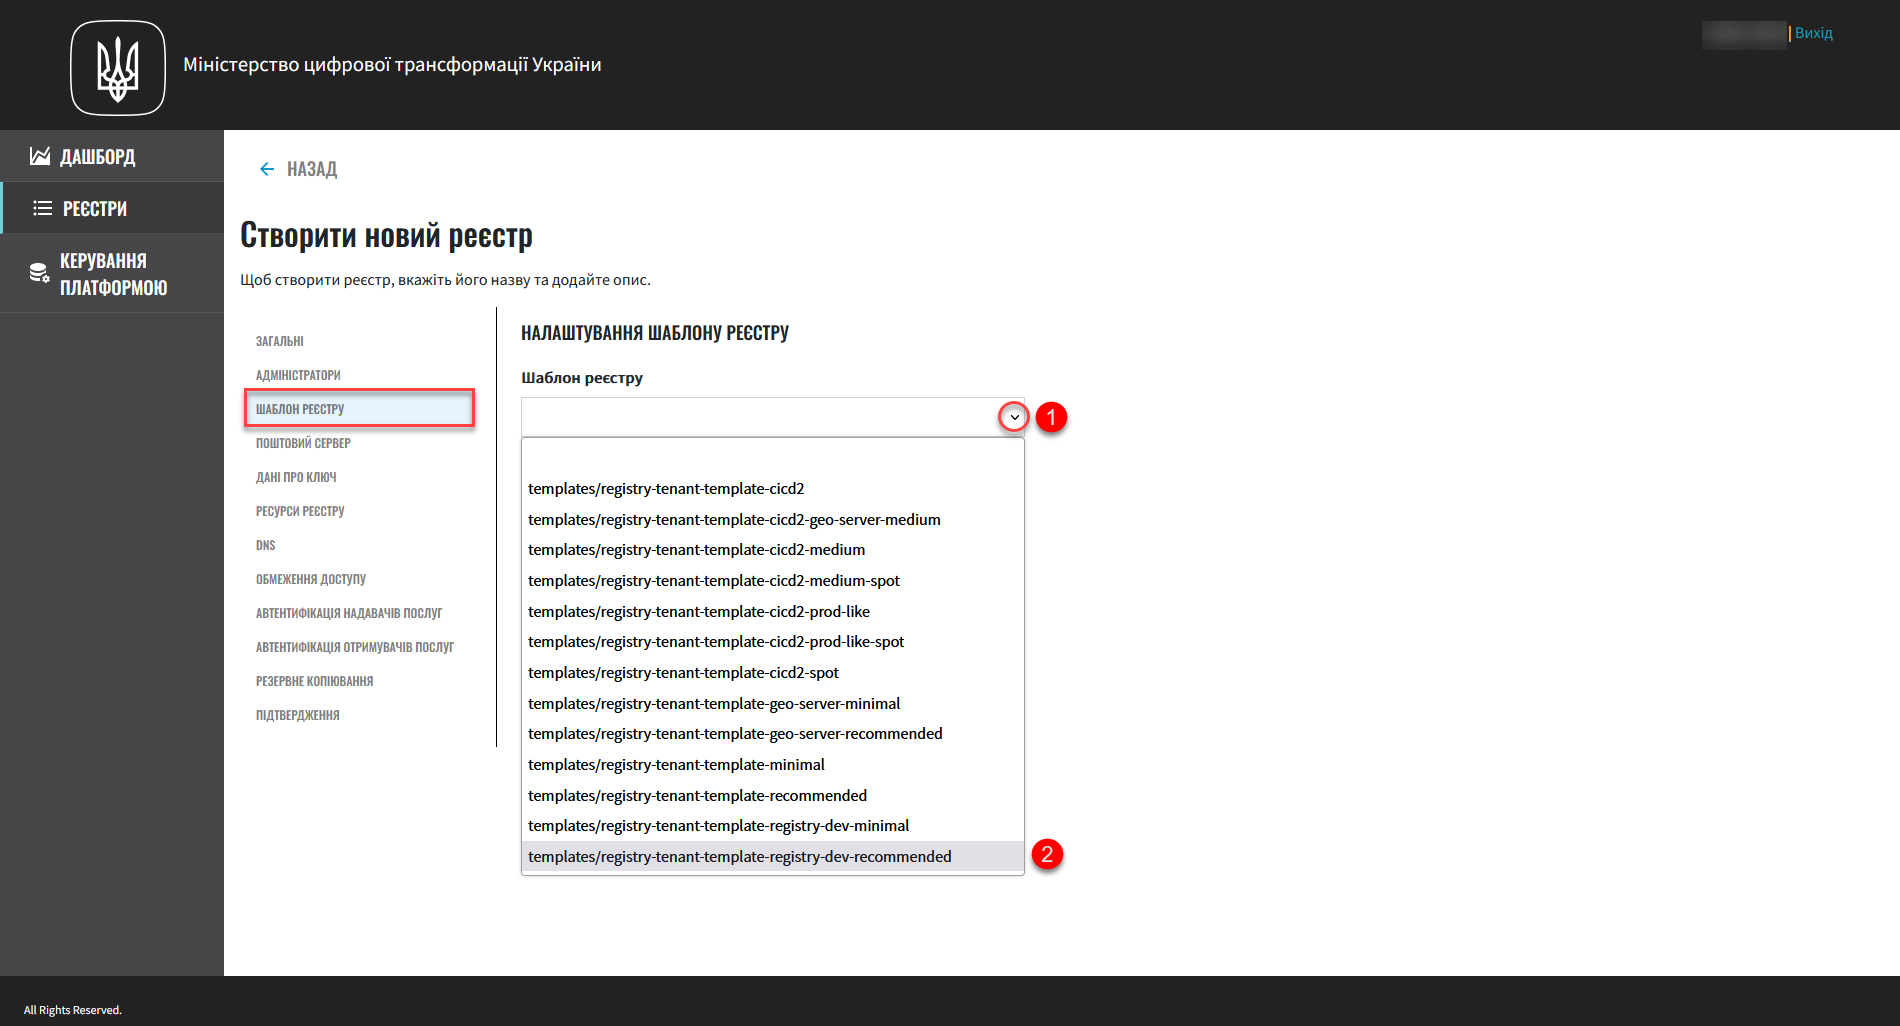
-
In the Registry template branch field, select the branch to use when deploying your registry.
This refers to the version of the component’s branch in the Gerrit repository containing the corresponding registry template version. This is a required field. 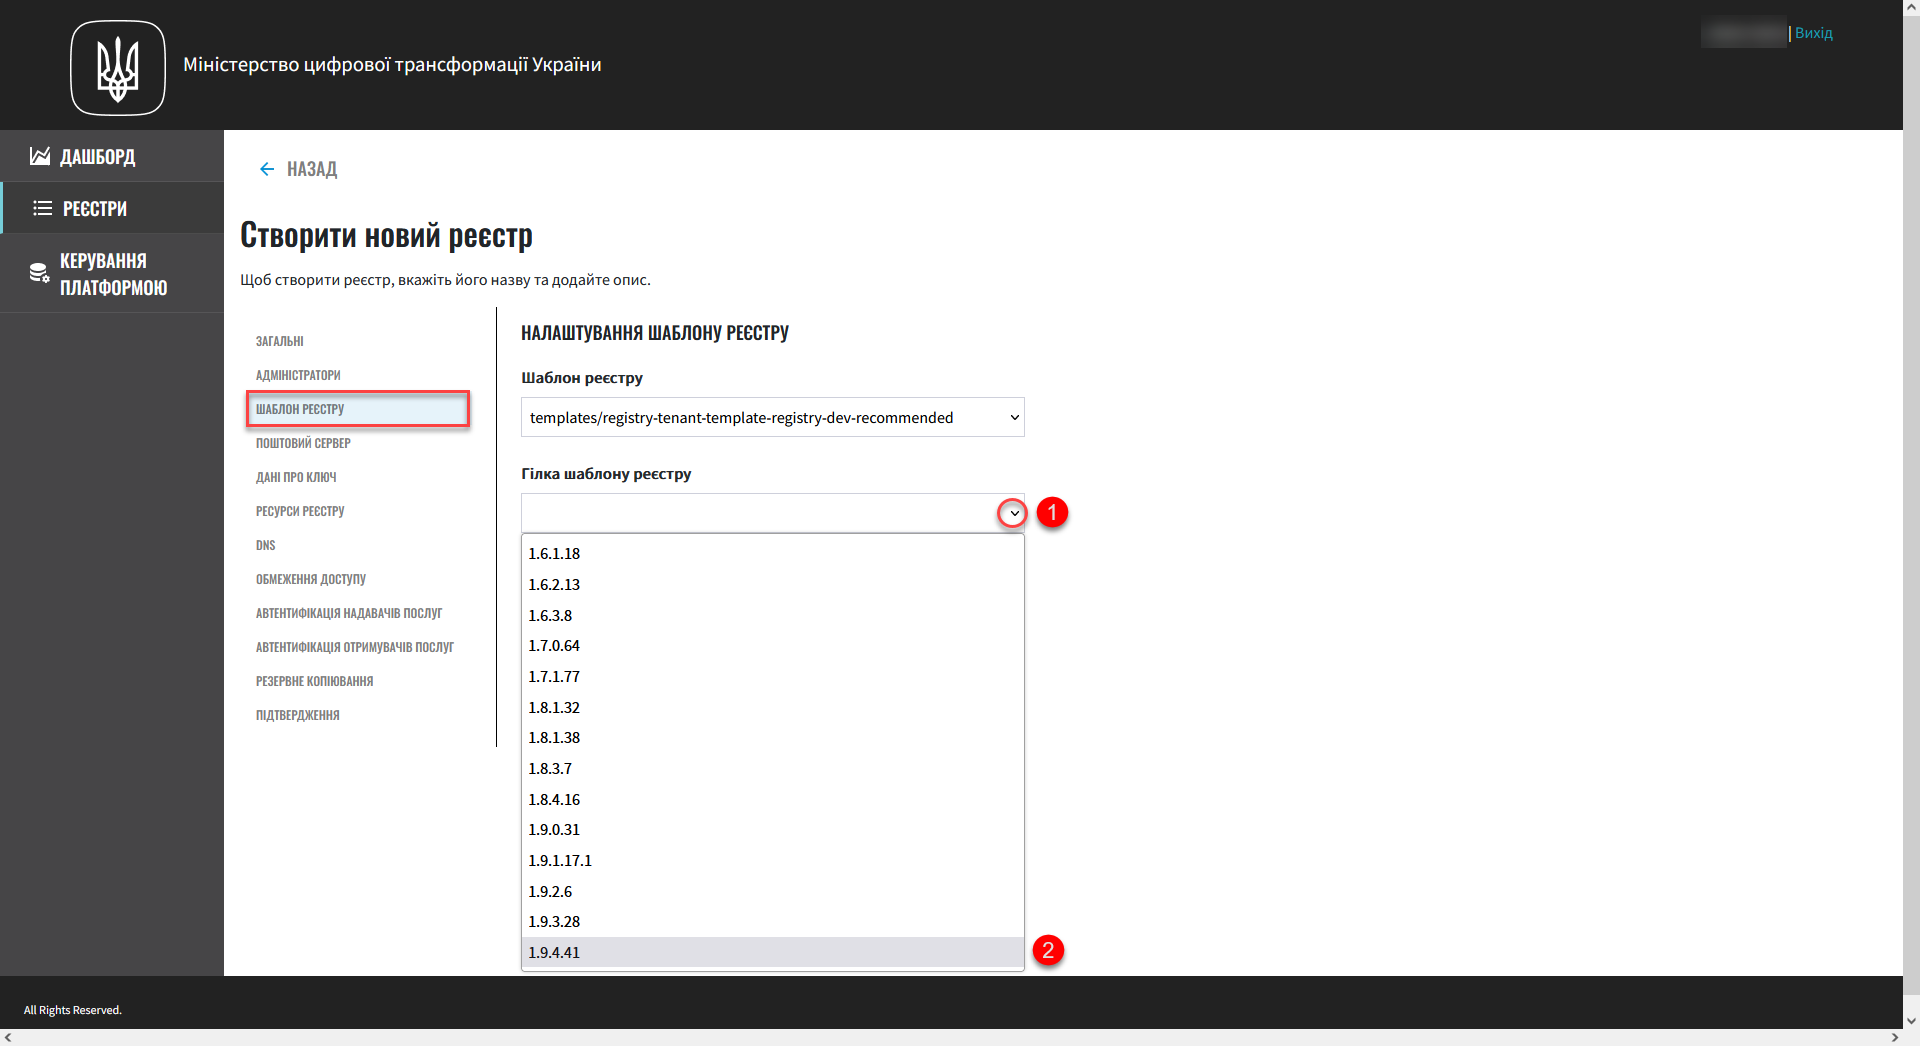
-
Click
Nextto go to the next step.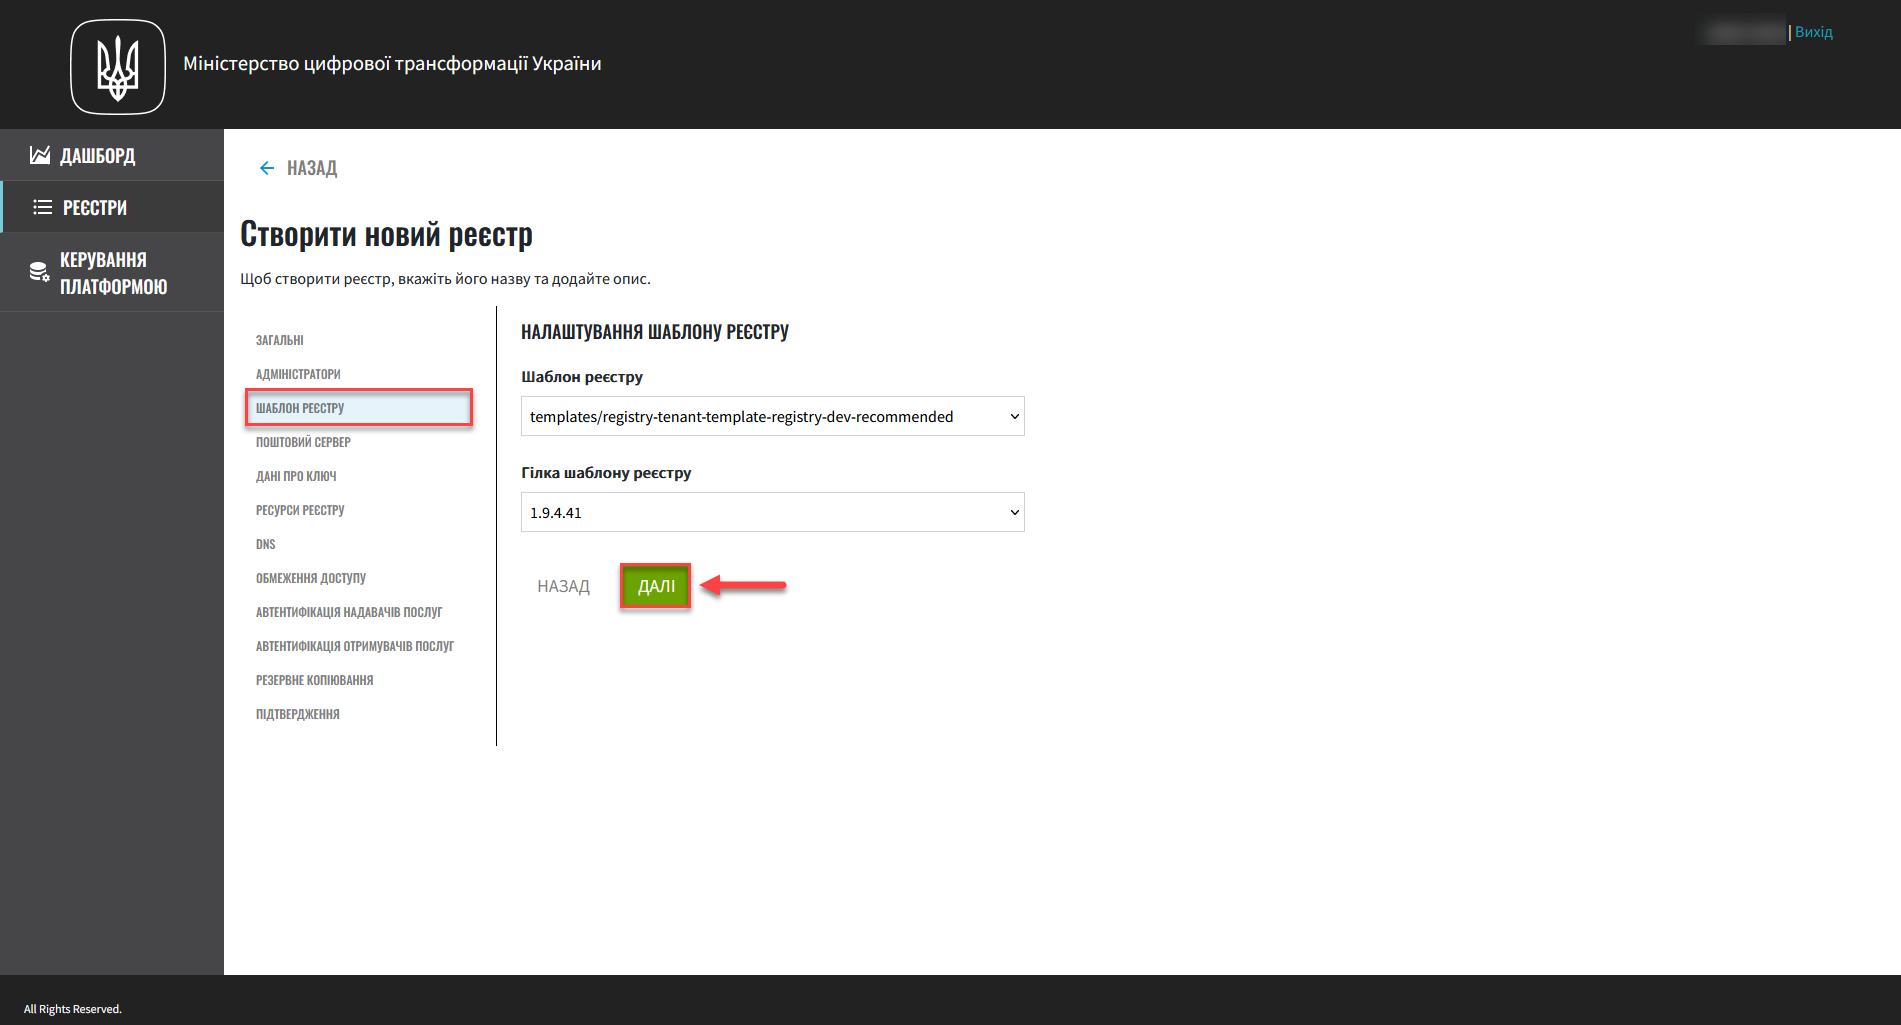
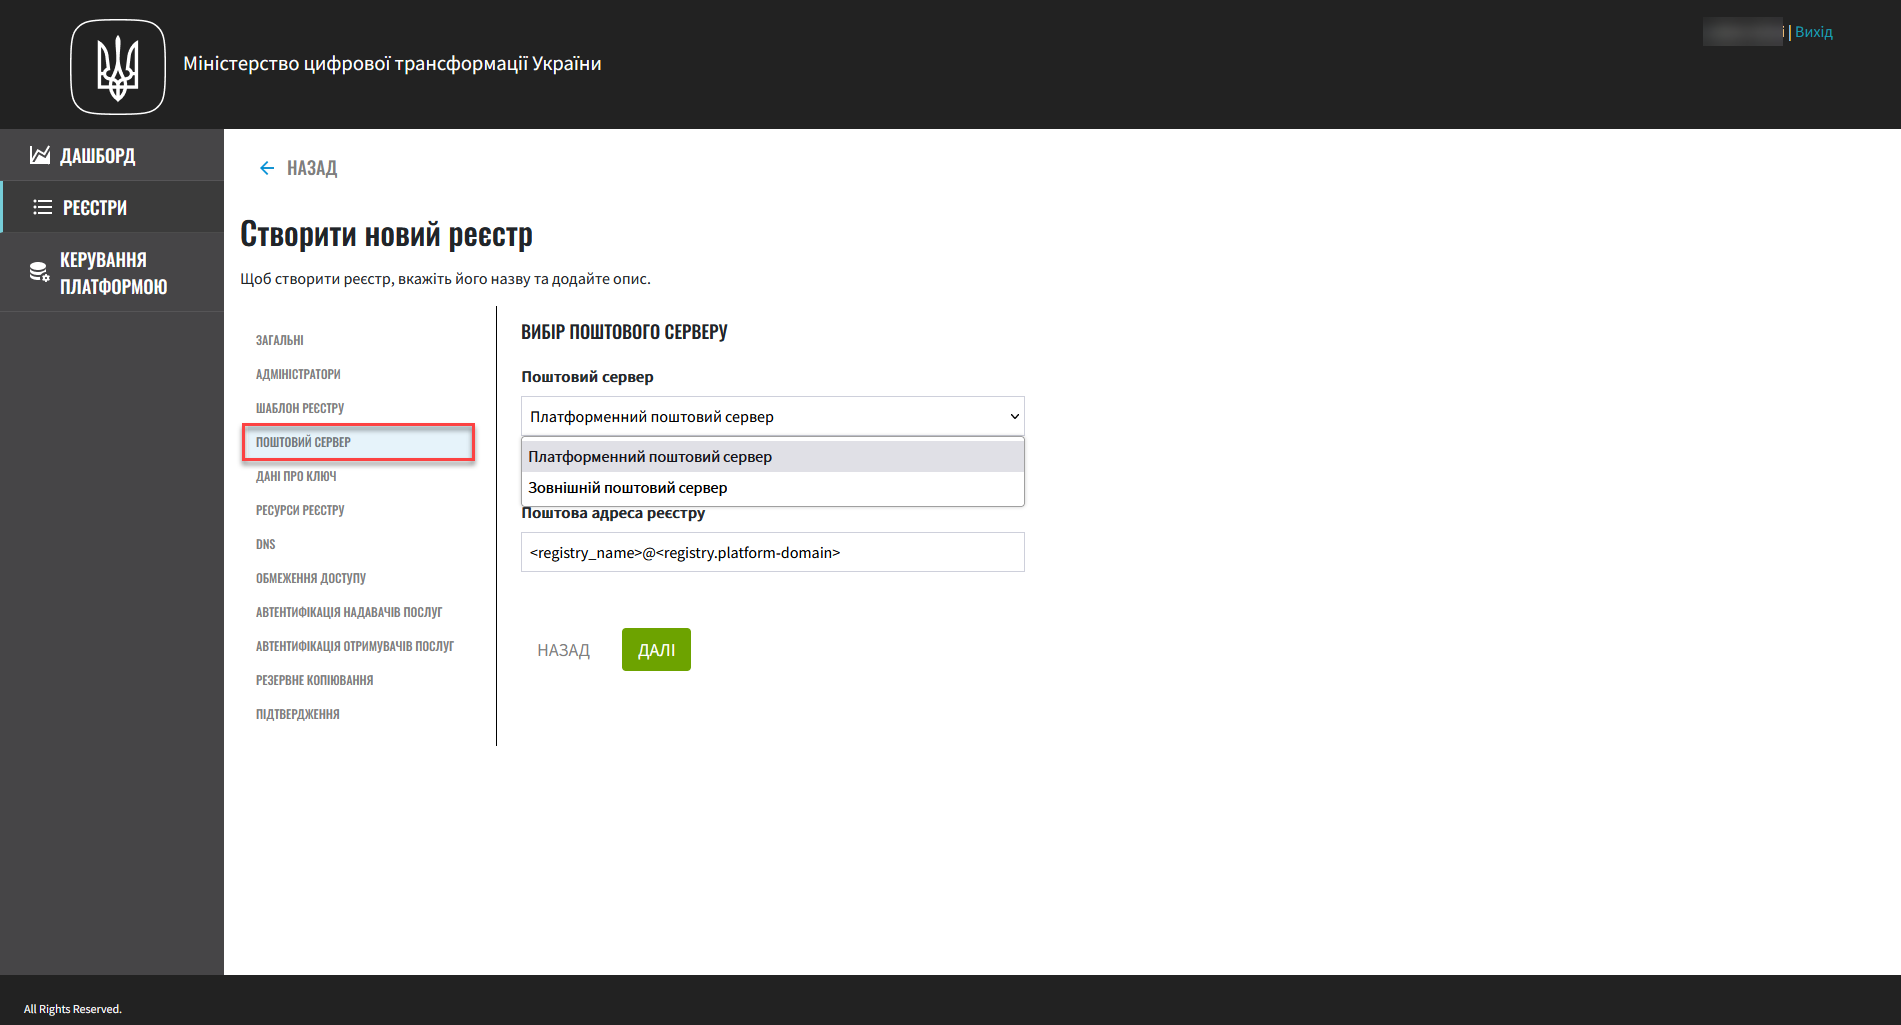
4. Mail server settings
In this step, you can select the type of mail server your registry will use for sending email messages.
| The step is optional. You can skip it when creating a registry and return to these settings when editing it. |
-
Platform mail server (
platform-mail-server) is a mail server distributed as part of the Platform. This service is available to all registries within a single instance of the Platform. -
External mail server (
external-mail-server) is a mail server outside the Platform (such as Gmail).
|
For details, see Configuring the mail server. |
Click Next to go to the next step.
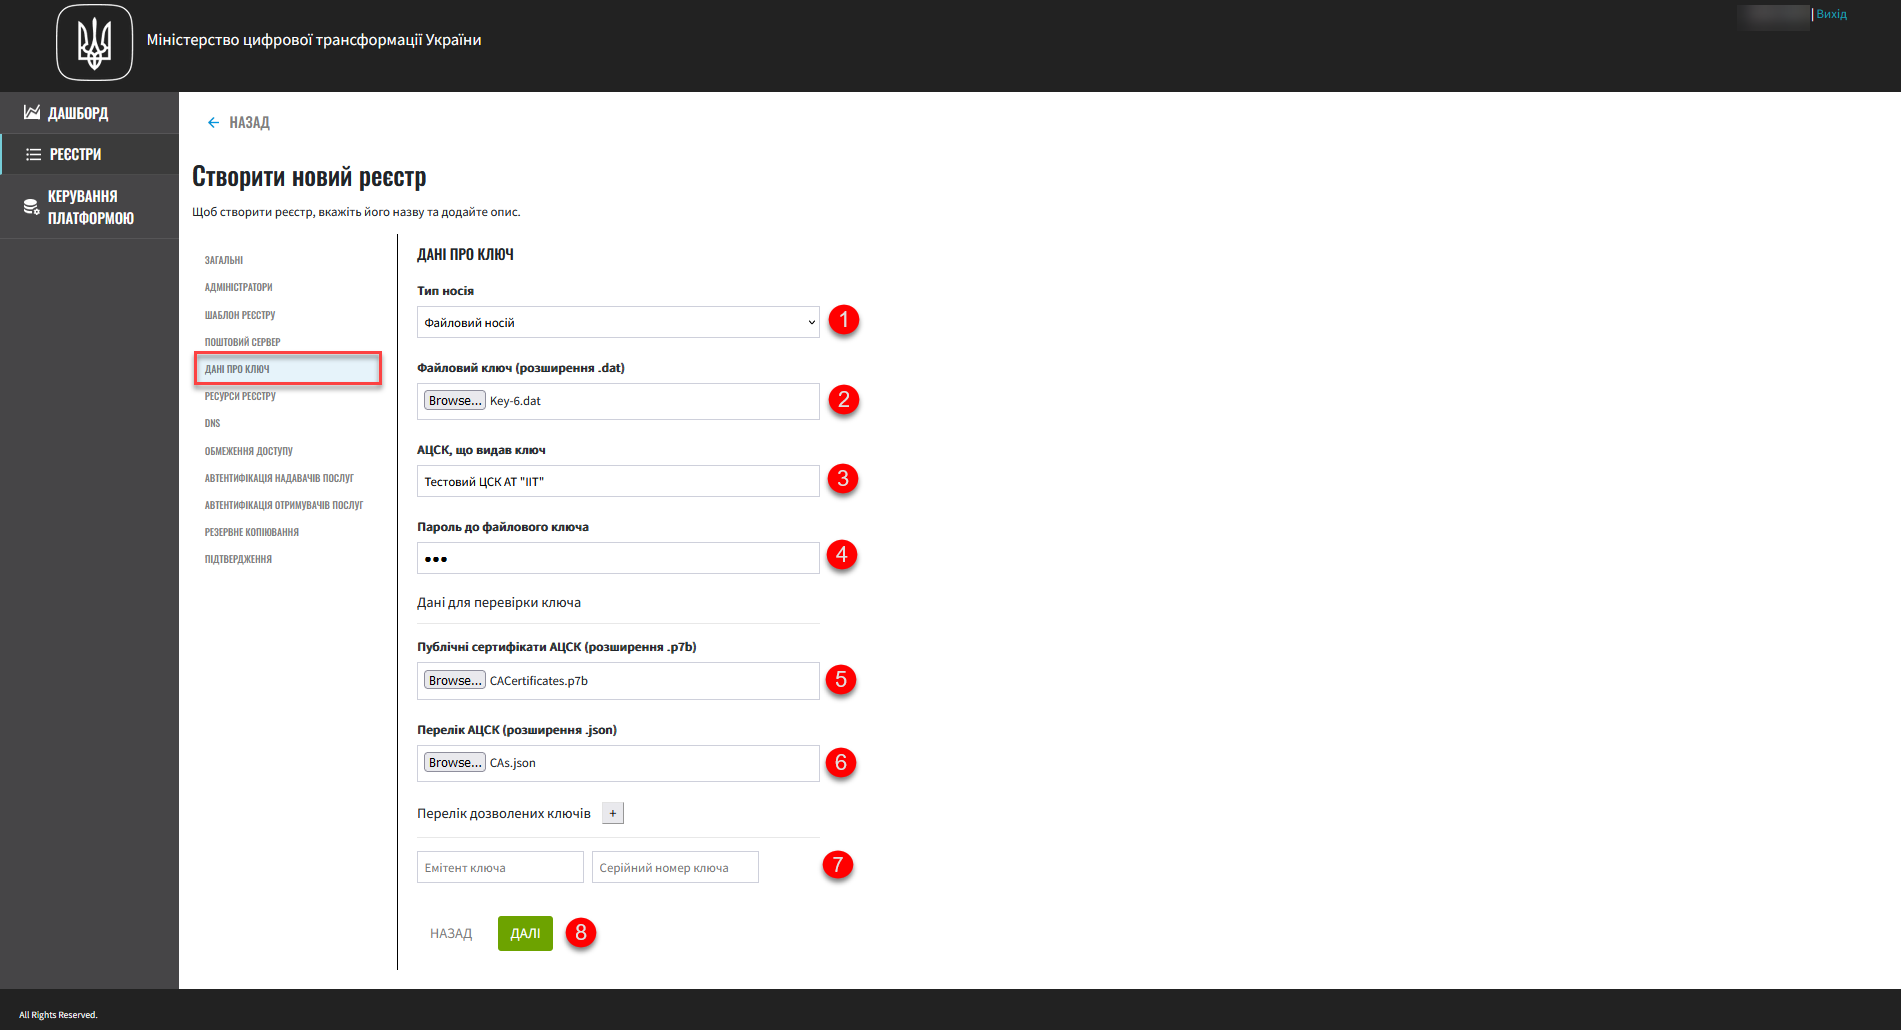
5. Information about keys
In this step, you can configure your registry’s digital signature keys and certificates. Once the registry is created, you will be able to update these settings by editing your registry.
|
This step is mandatory. Data in the Key info section is required to initialize the Encryption keys are used to sign excerpts generated by the Platform and to sign data that is modified according to the logic of the registry’s business processes. |
|
For details on configuring keys, see Updating registry digital signature keys and certificates. |
-
In the Media type field, select the type of key to use.
-
Provide the electronic key.
Upload the Platform administrator’s operational key file (Key-6.dat) using the File key (.dat) field. Click Browse, locate the key file on your computer, select it, and click Open.
-
The AKCC that issued the key field displays the full name of the AKCC (Accredited Key Certification Center).
-
In the File key password field, enter the password for the key you uploaded.
-
The Key validation info section contains public certificates data and a list of AKCCs:
-
Upload the CACertificates.p7b file that contains a list of certificates of compatible AKCCs using the Public AKCC certificates (.p7b) field. You can download this file from the IIT website: https://iit.com.ua/downloads.
-
Upload the CAs.json file that contains interaction parameters for compatible AKCCs using the AKCCs list (.json) field. You can download this file from the IIT website: https://iit.com.ua/downloads.
-
-
In the Allowed keys list, specify the keys whose signatures are considered valid.
This section contains a list of all keys, including old ones (for example, when rotating keys), so that everything previously signed with an old key is still considered validated. That is, the list of allowed keys should contain the data history of all the keys used in the system to apply a signature.
-
Click
Nextto go to the next step.
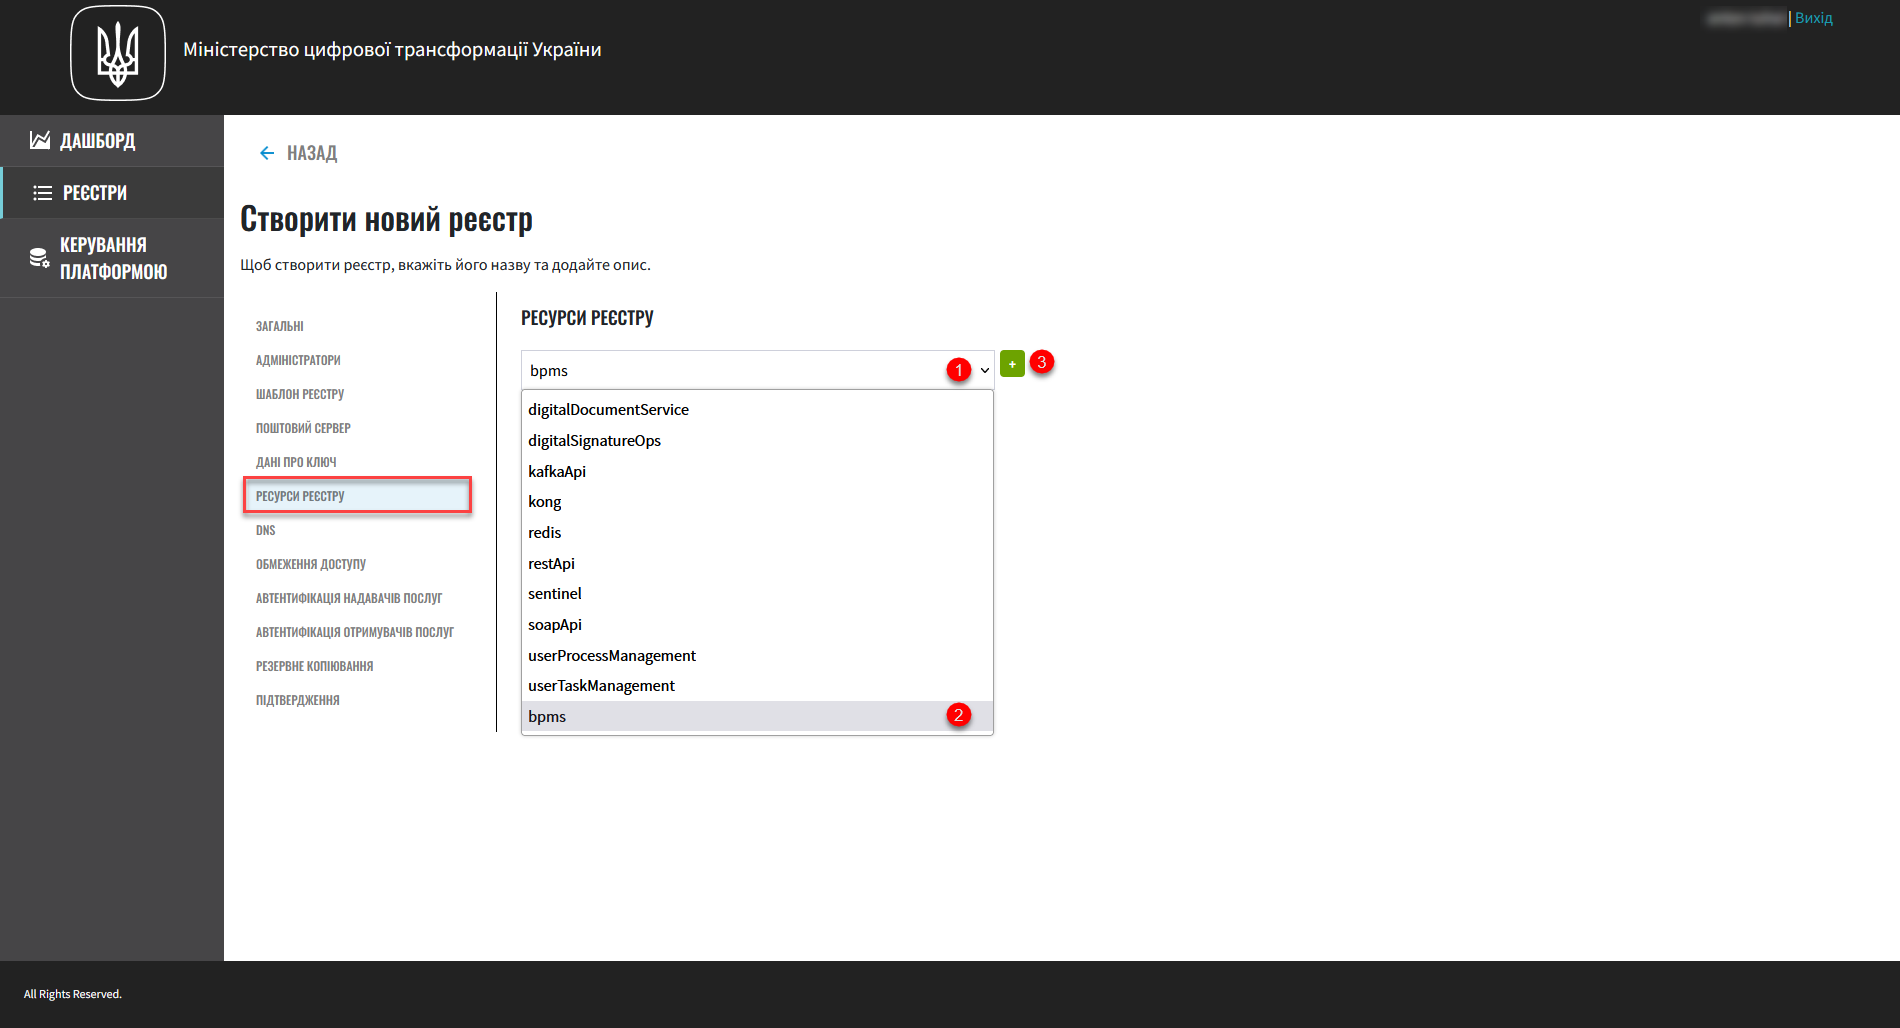
6. Registry resources
In this step, you can configure registry resources for specific services that are deployed in it. Properly managing the resources used by containers within your registry instance ensures optimal performance and efficiency.
-
Select the service you wish to configure from the list and click
+(Add).This step is optional.
When the registry is deployed, all its services are configured using the default values for requests, limits, and environment variables.
Even if services are removed from the list, the Platform will apply the standard configuration when deploying the registry.
-
Customize resource parameters.
-
Click
Nextto go to the next step.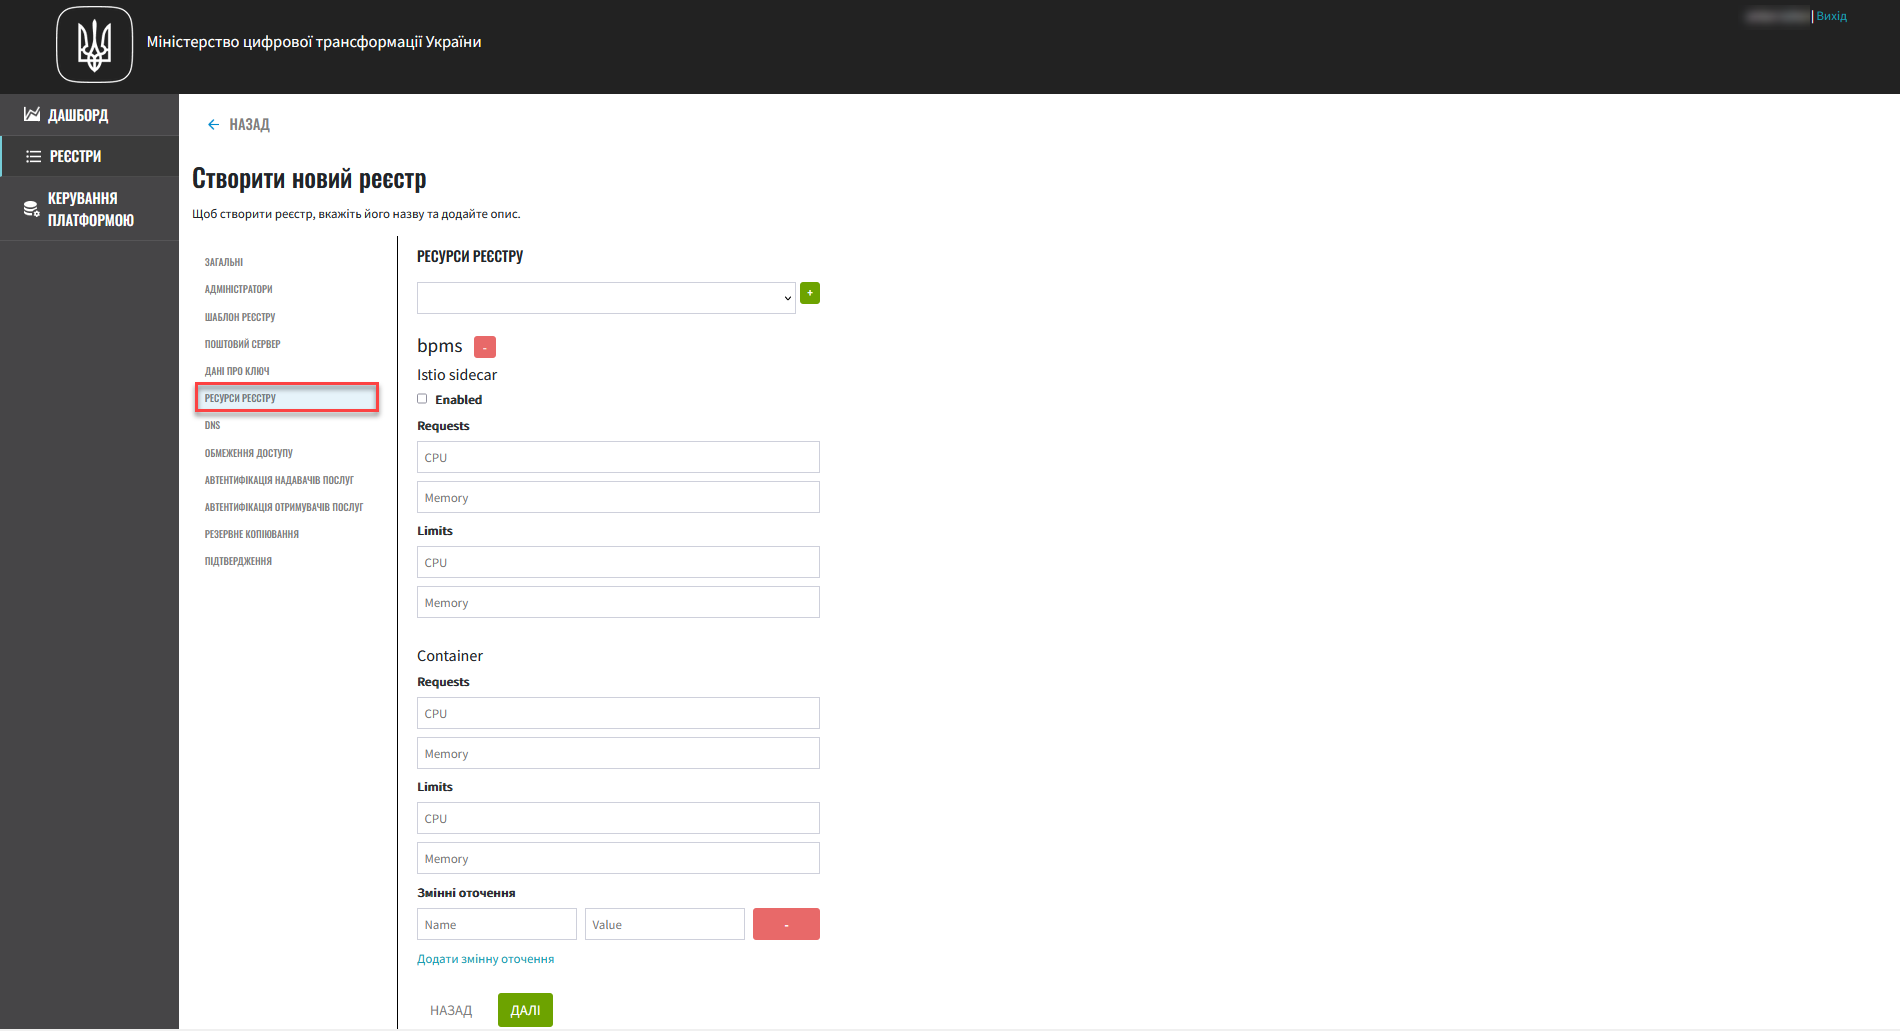
| For details on configuring the resources, see Managing registry resources. |
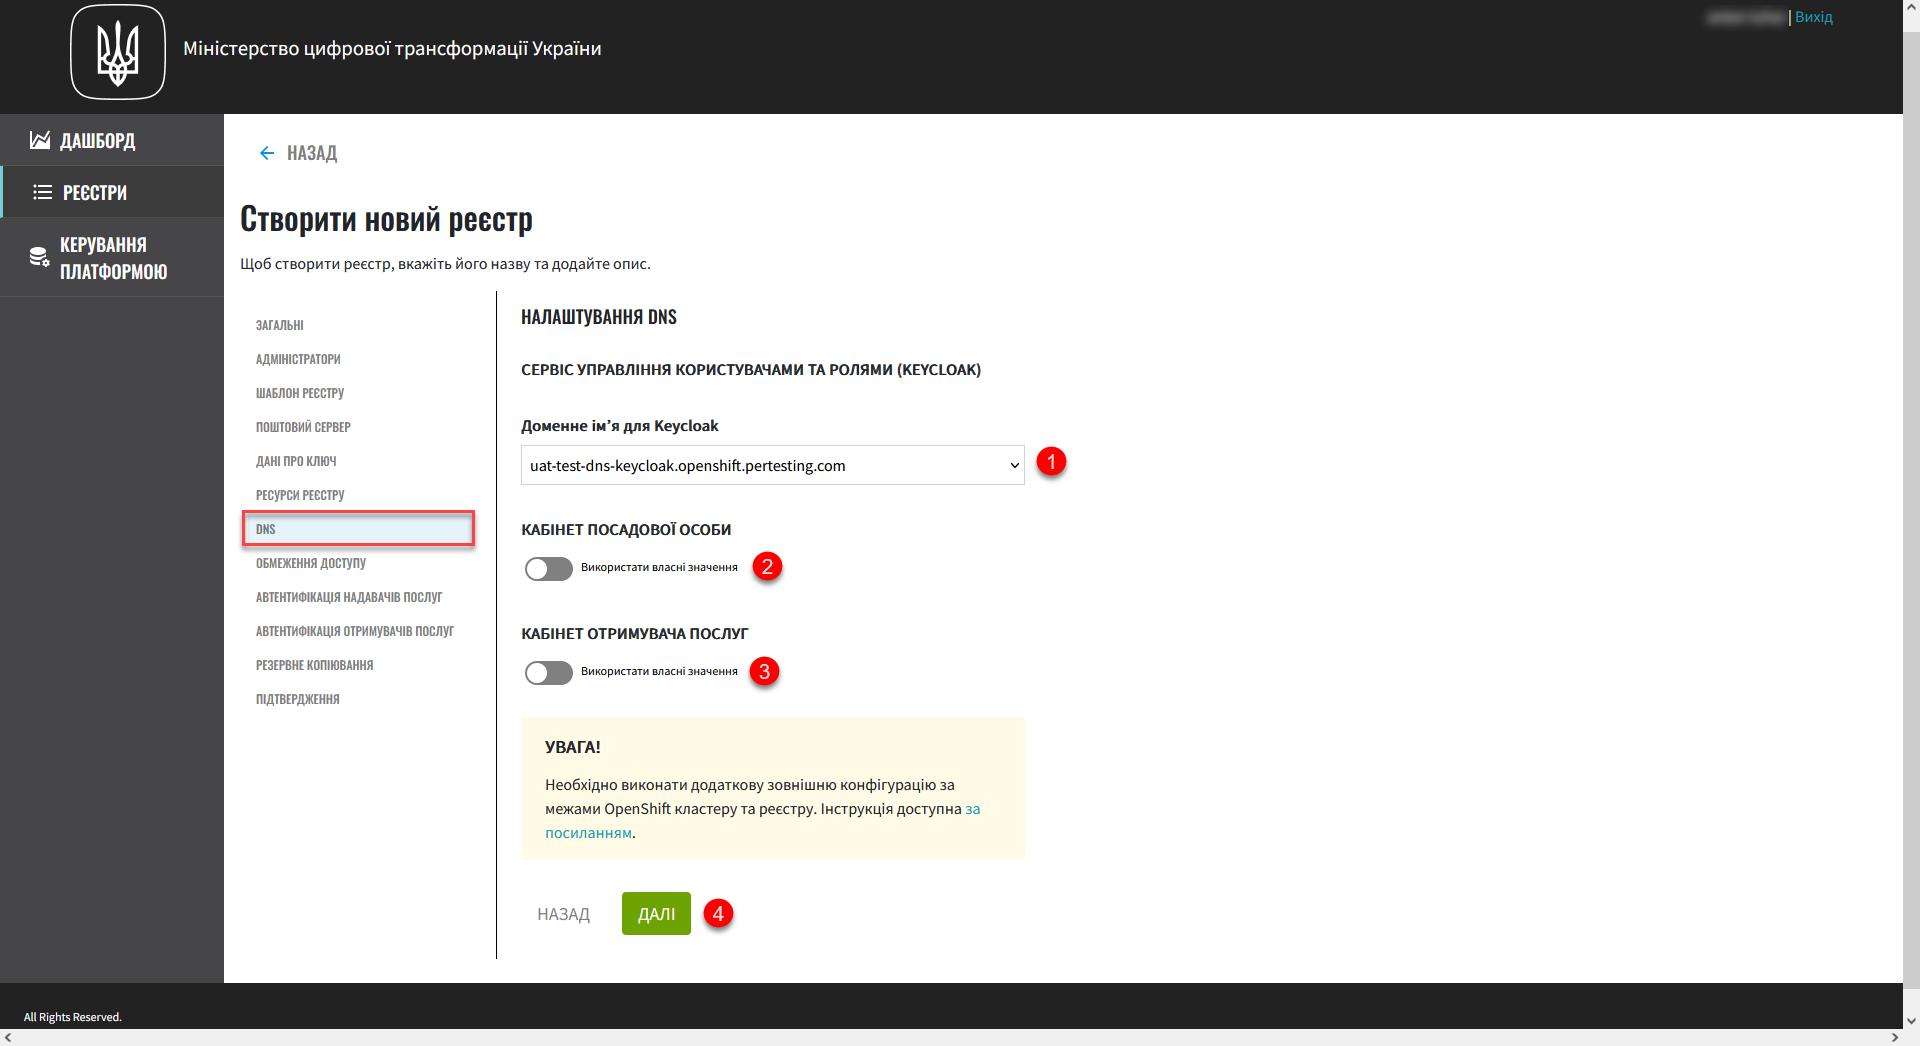
7. DNS settings
In this step, you can set custom DNS names and upload SSL certificates in .pem format for the Keycloak service and user portals.
|
This step is optional. If you do not configure anything here, the system will use the default values. |
| For details on configuring DNS, see Configuring custom DNS. |
Click Next to go to the next step.
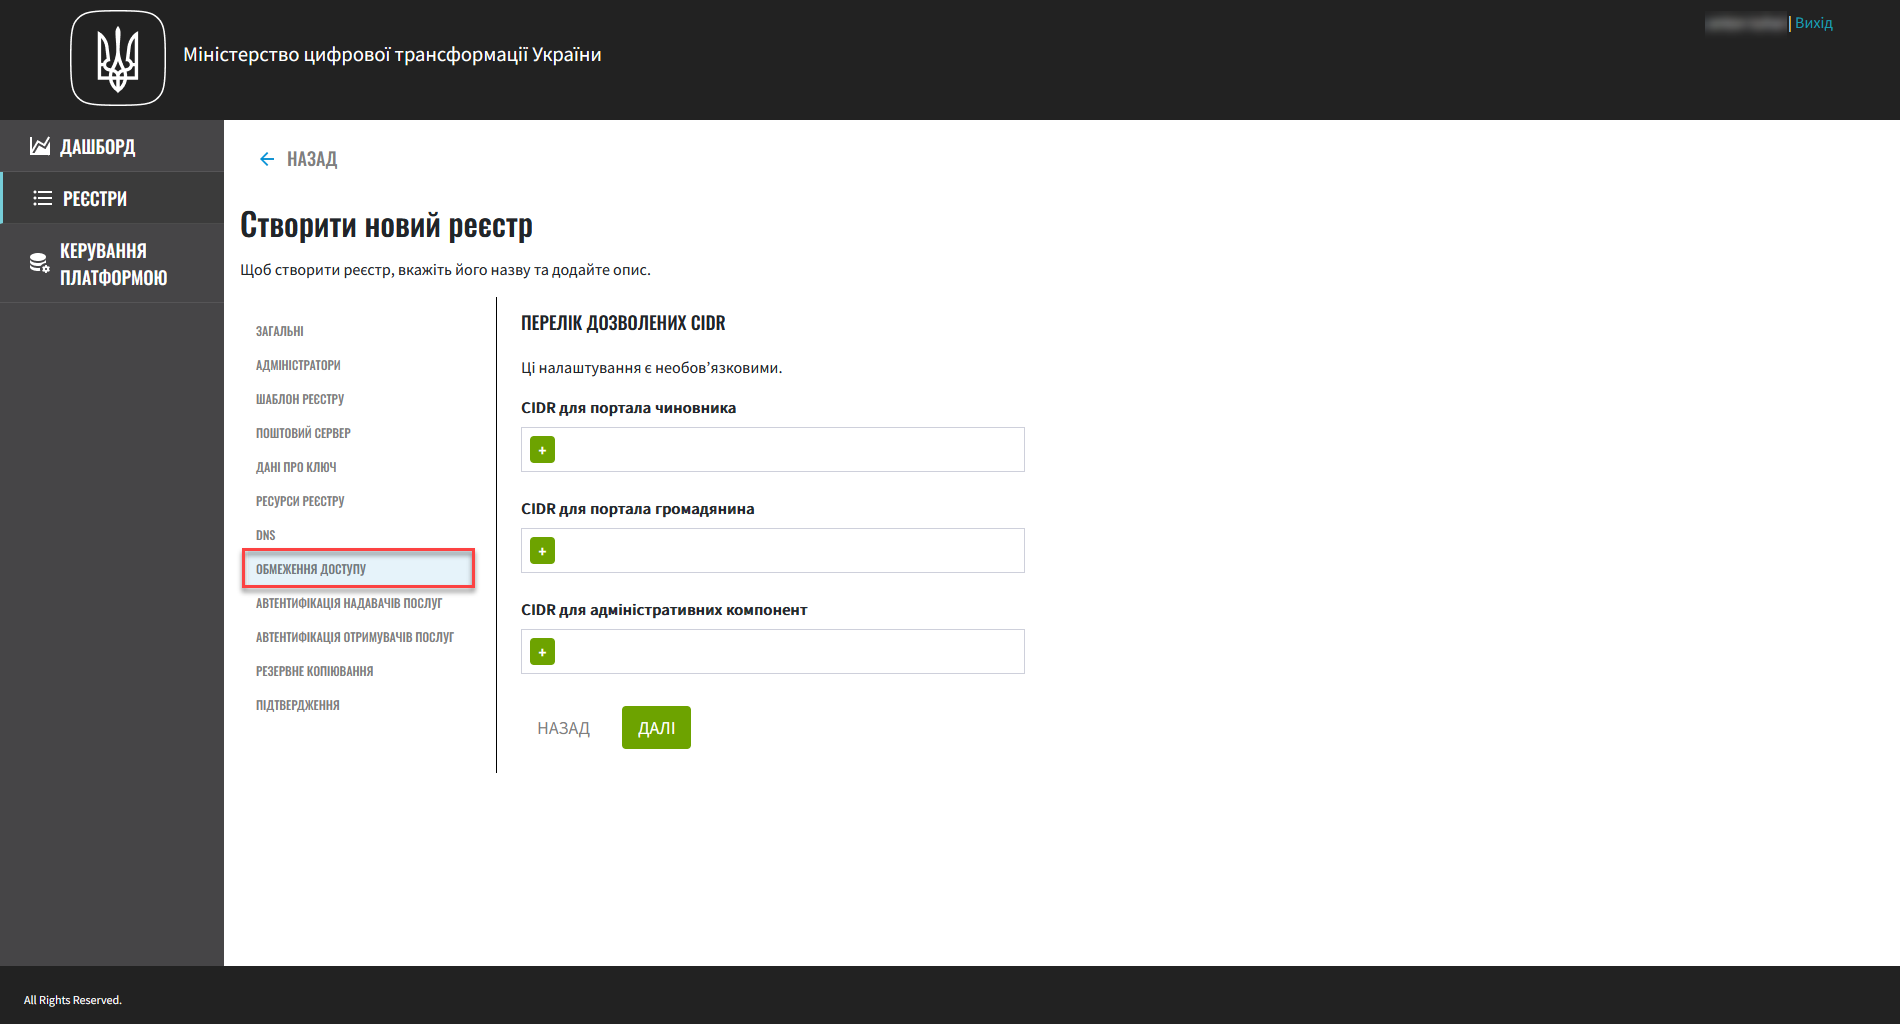
8. Access restrictions
In this step, you can restrict access to specific registry components, such as user portals and administrative components.
|
This step is optional, but we recommend configuring CIDR for these components for security purposes. |
| For details, see CIDR: Restricting access to Platform and registry components. |
Click Next to go to the next step.
9. Officers (service providers) authentication
In this step, you can configure authentication for service providers (officers) and enable or disable self-registration.
|
This step is optional. If you do not configure anything here, the system will use the default values: authentication using Qualified Electronic Signature (QES) and disabled self-registration. |
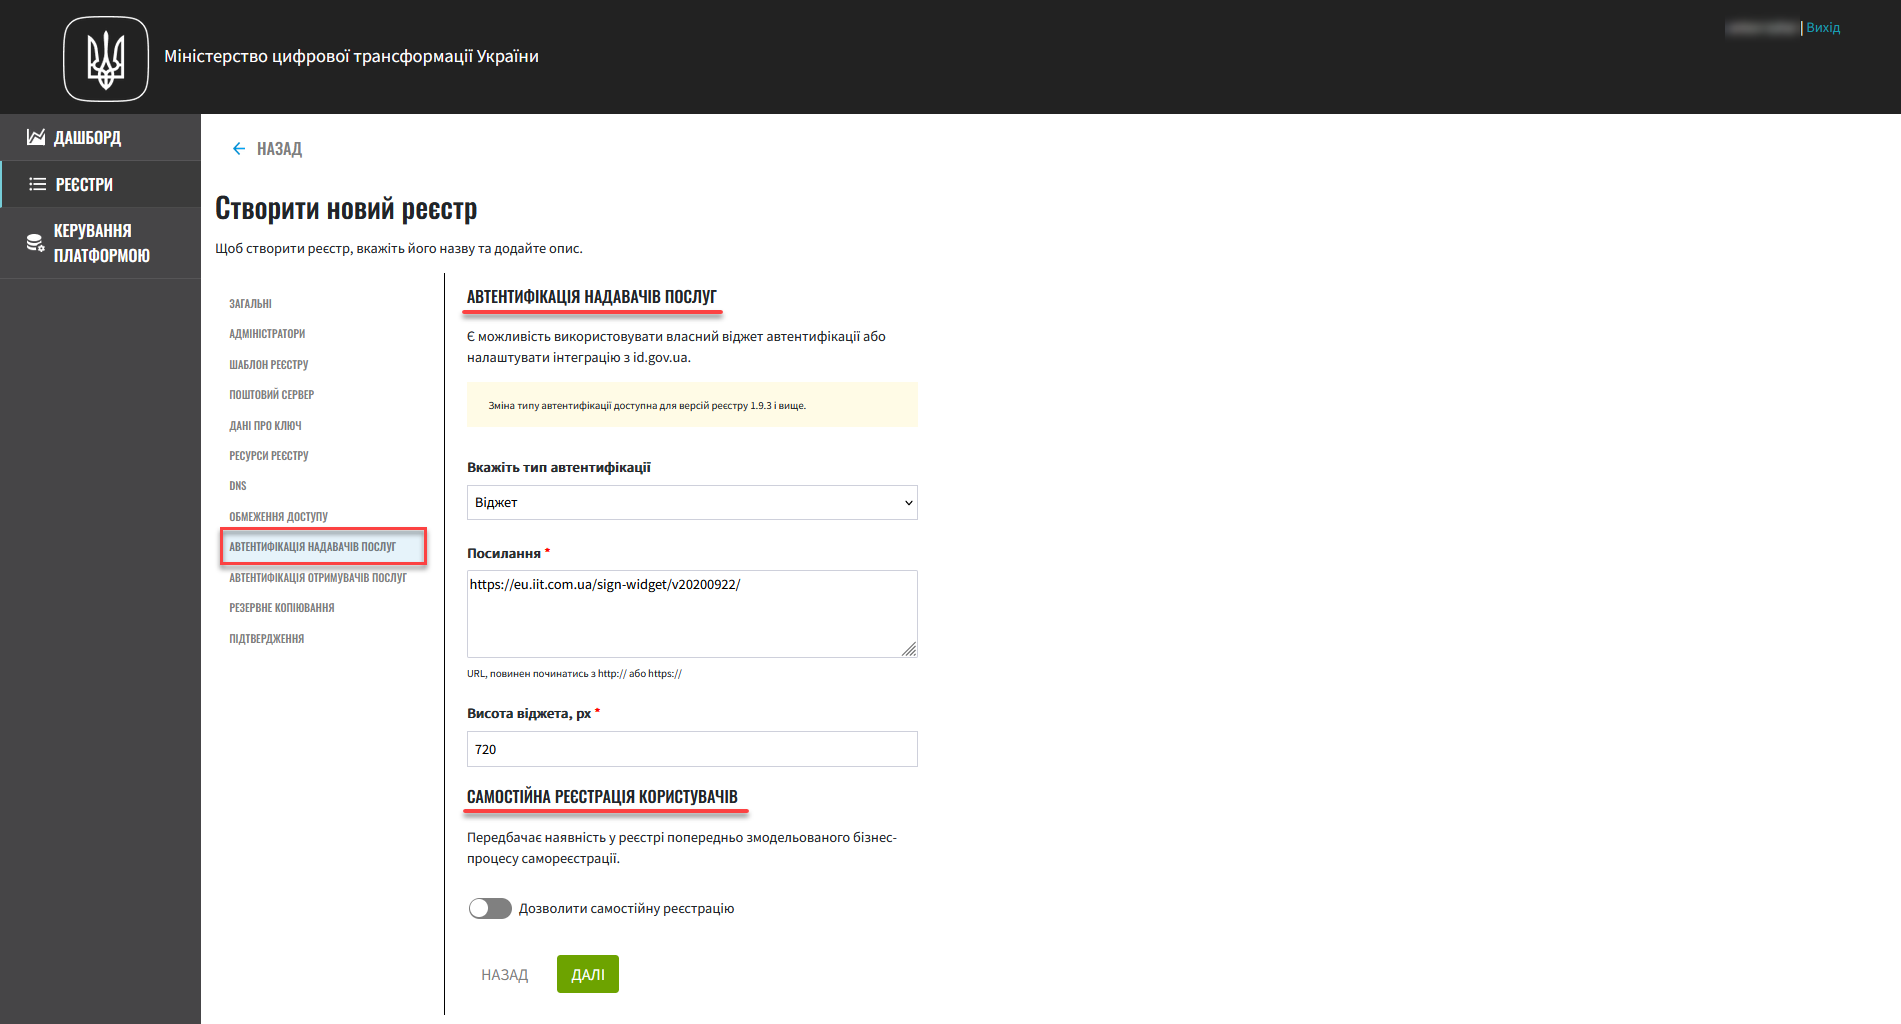
Select the authentication type to use when identifying users in the system:
-
QES — a widget to authenticate users via Qualified electronic signatures.
-
id.gov.ua — a widget to authenticate users via third-party digital identification providers.
| This functionality is specific to the Ukrainian implementation and may not apply or function as described in other contexts or regions. Please consult the local guidelines or documentation if you are implementing this outside Ukraine. |
| For details, see Configuring authentication for officers. |
You can enable the self-registration option for officers to simplify the user registration process by removing the need to involve an administrator.
| For details, see Configuring self-registration for officers. |
Click Next to go to the next step.
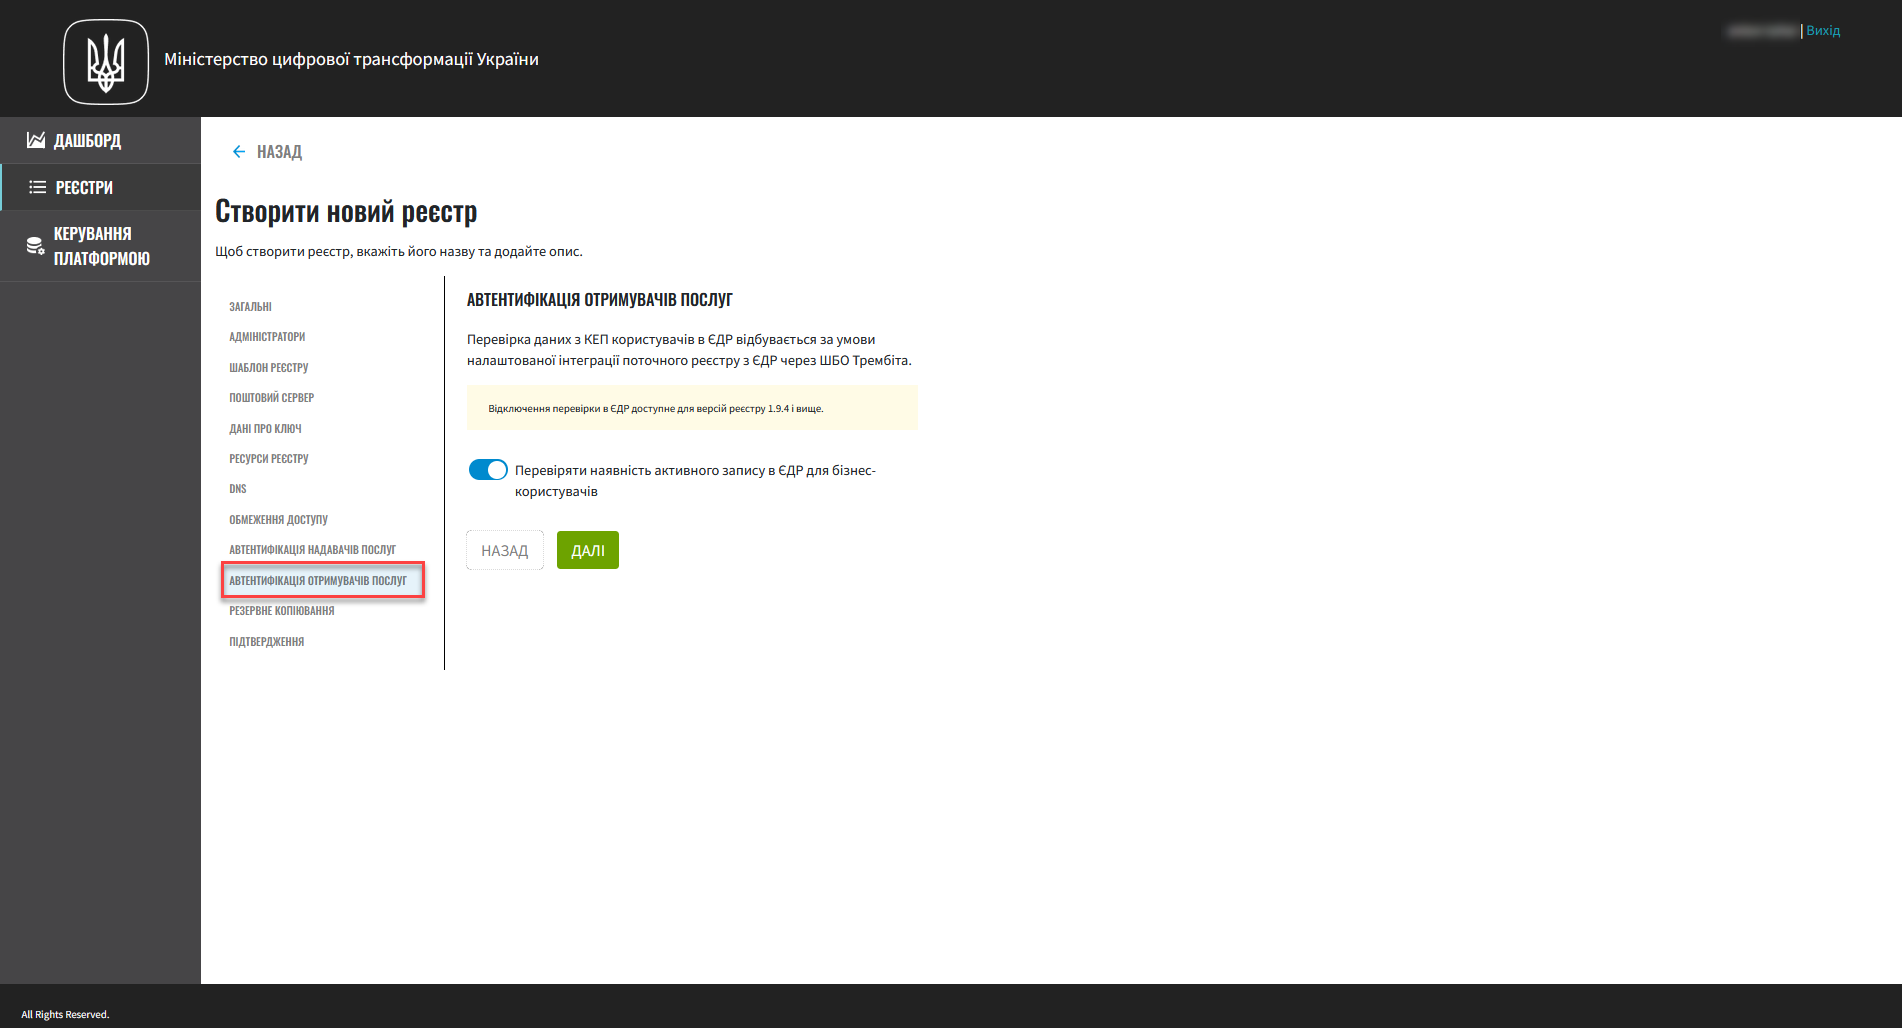
10. Citizens (service recipients) authentication
| This functionality is specific to the Ukrainian implementation and may not apply or function as described in other contexts or regions. Please consult the local guidelines or documentation if you are implementing this outside Ukraine. |
In this step, you can set up validation to check whether business users have an active entry in the Unified state register (EDR). This allows the system to connect the user’s QES with their legal records in the state register. This is an important aspect of the system’s security and reliability that helps validate user data and confirm their identity.
|
This step is optional. If you do not configure anything here, the system will use the default value: validation disabled. |
Click Next to go to the next step.
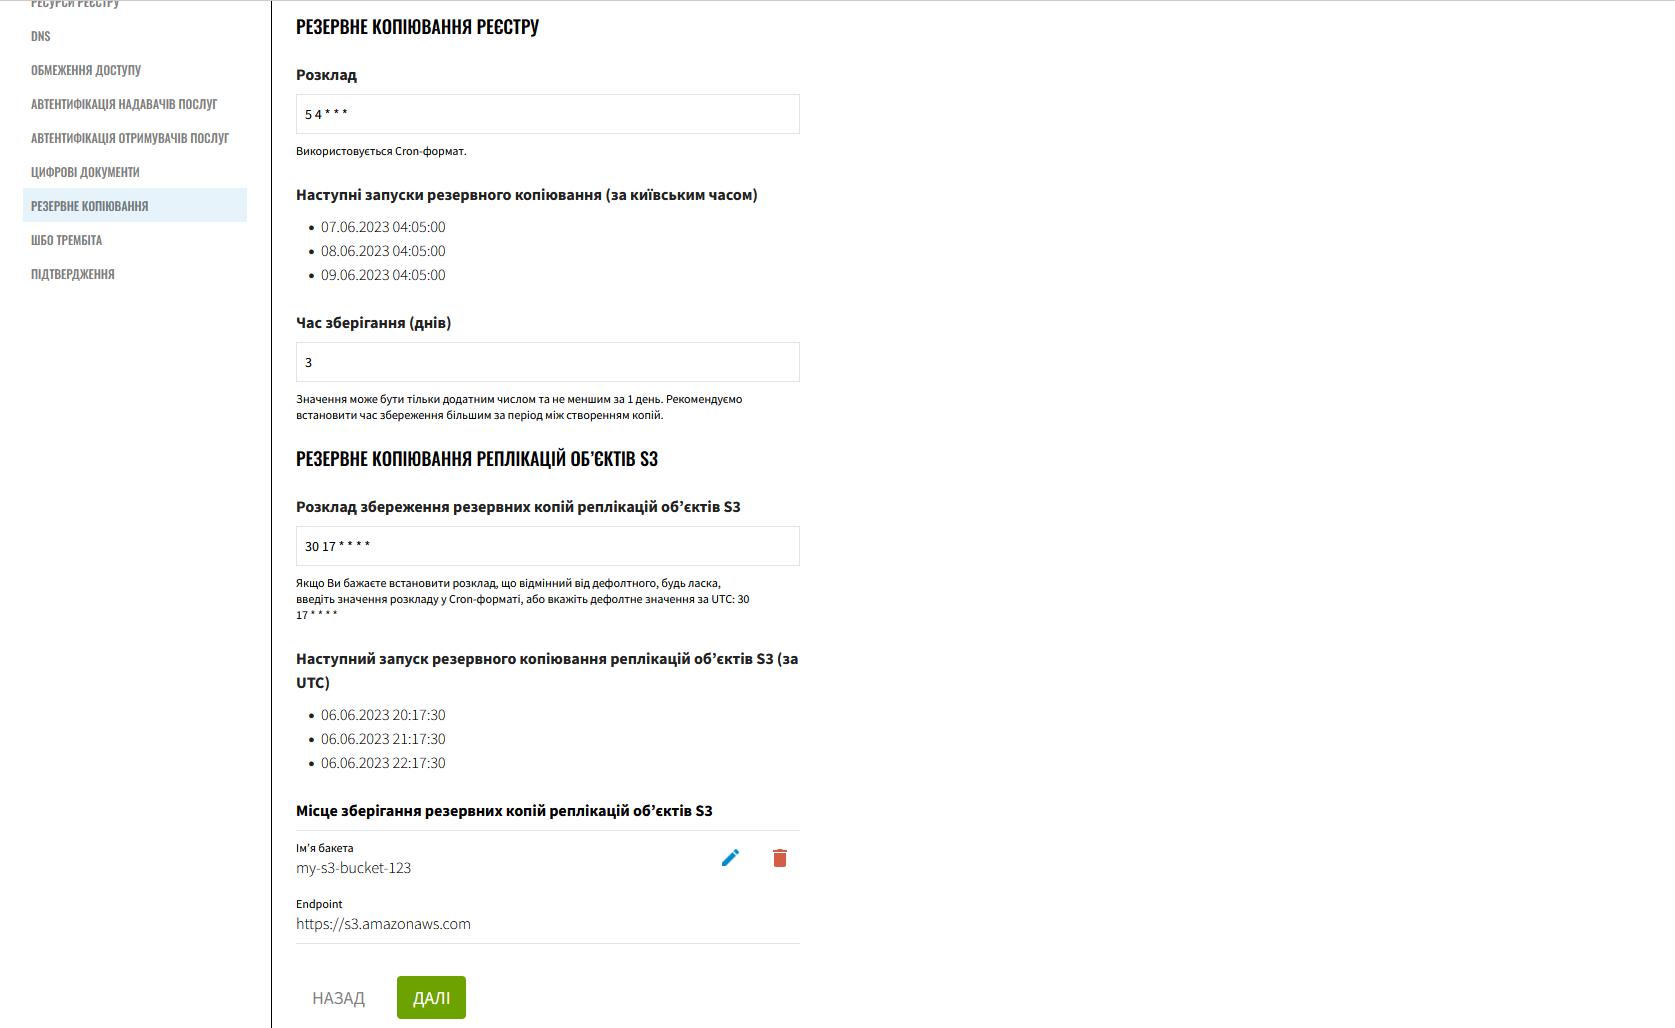
11. Backup settings
In this step, you can set the backup schedule for your registry components and define the retention period for backup copies in the backup repository.
Component backup copies are created using the Velero tool and stored in the MinIO secure backup storage outside the Platform cluster.
The backup schedule is configured using the unix-cron format in the Control Plane admin console interface.
The system also performs automatic replication of data stored in S3 buckets. You can configure a backup schedule for these replications.
|
Click Next to go to the next step.
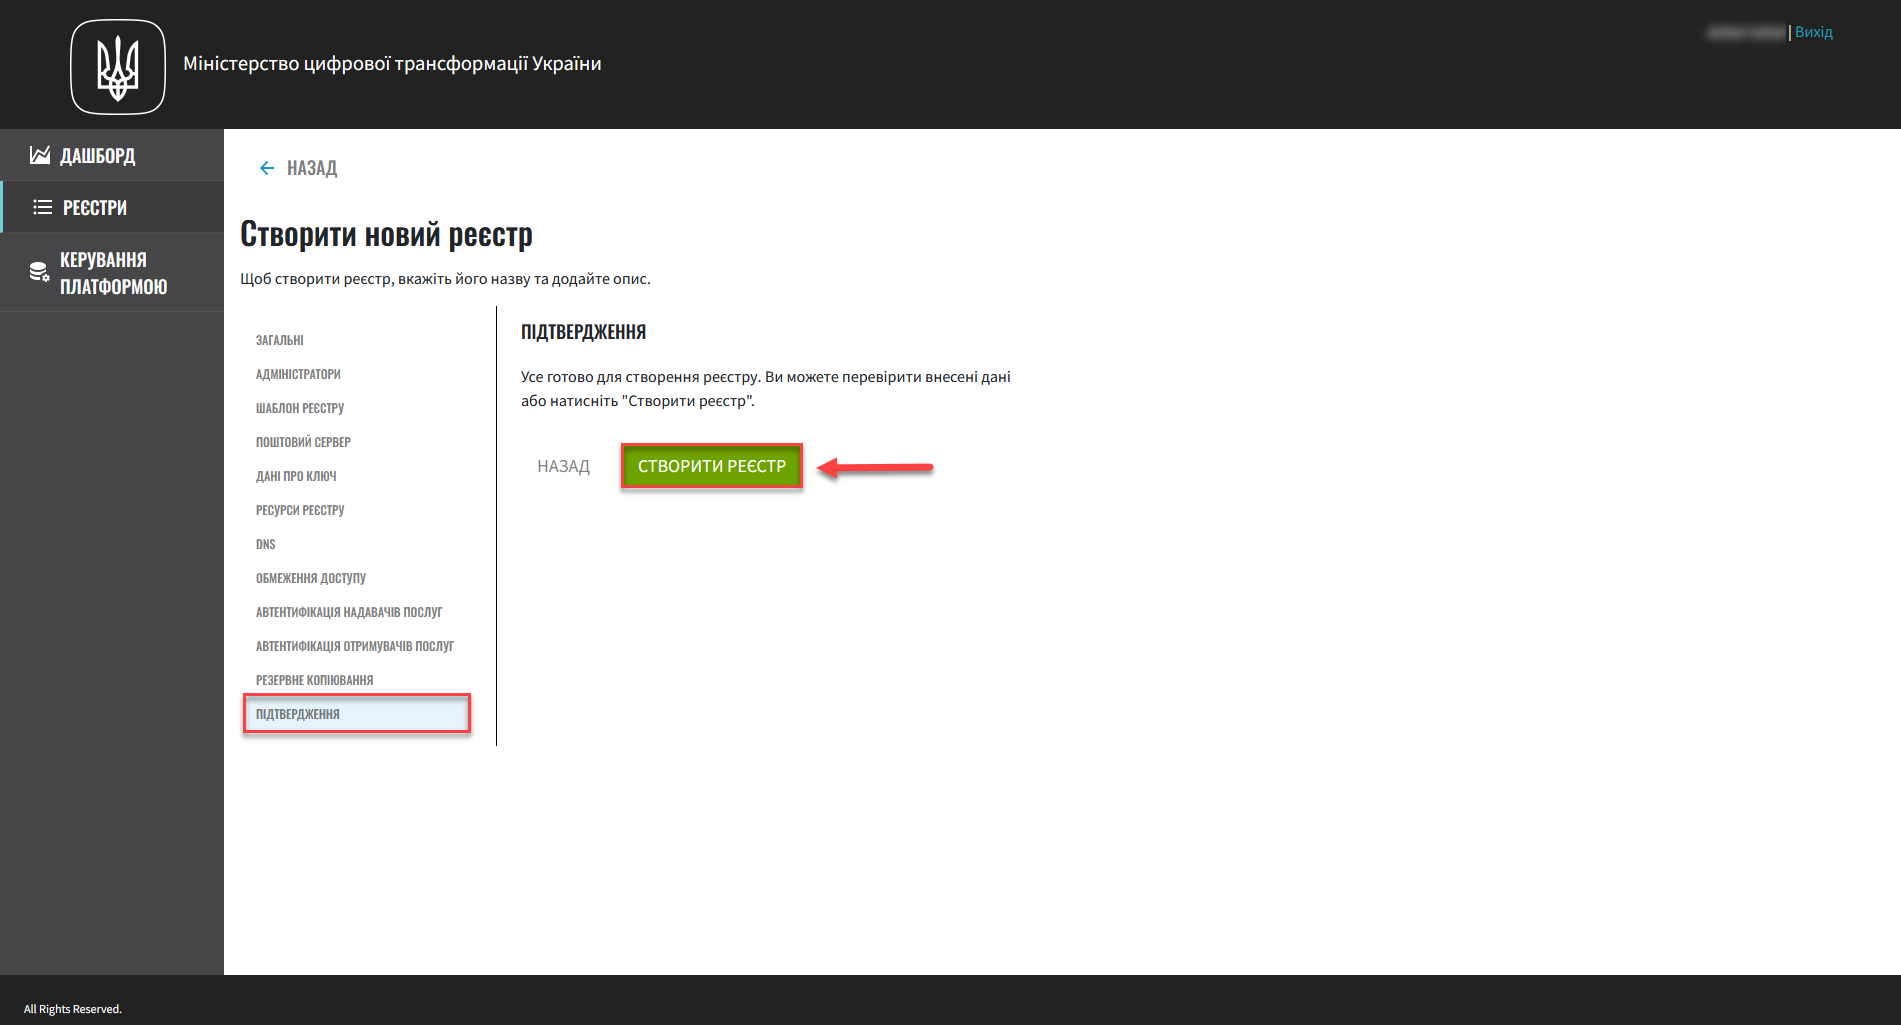
12. Confirmation and deployment
To complete the procedure, click the Create registry button.
You can go back to any of the settings tabs to double-check the data you provided.
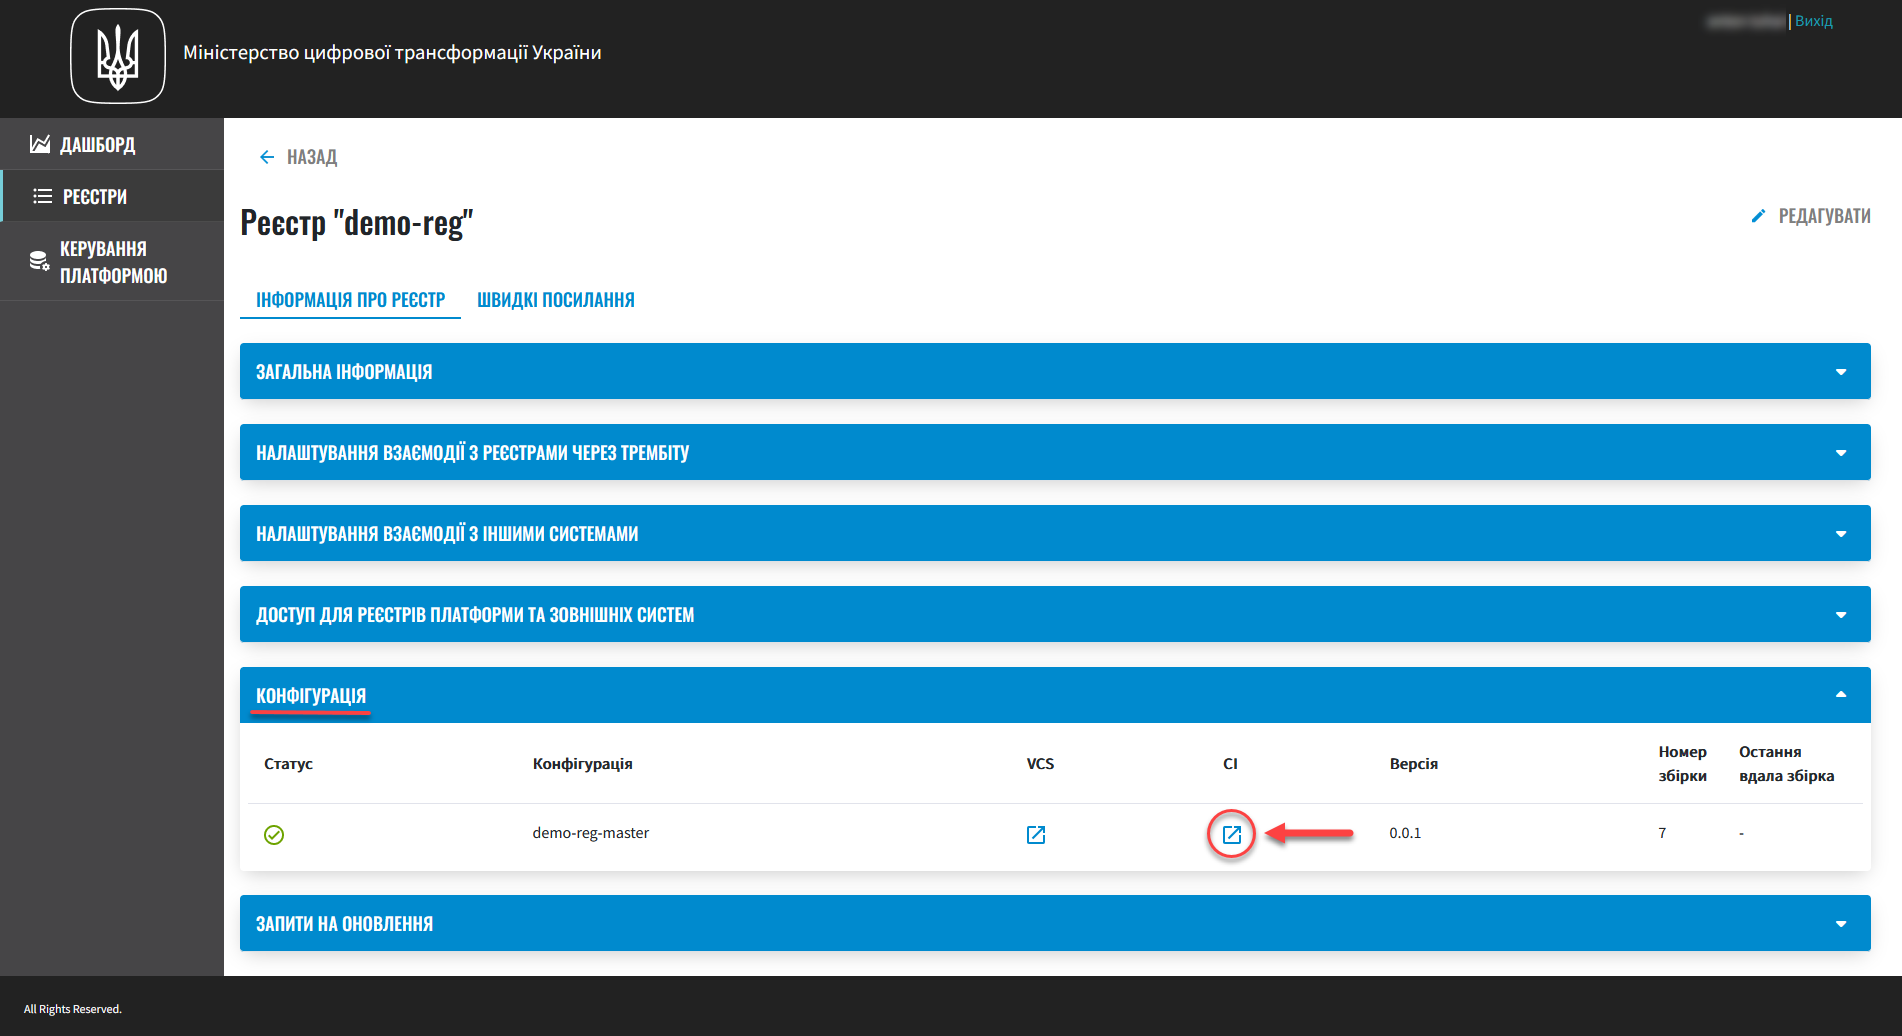
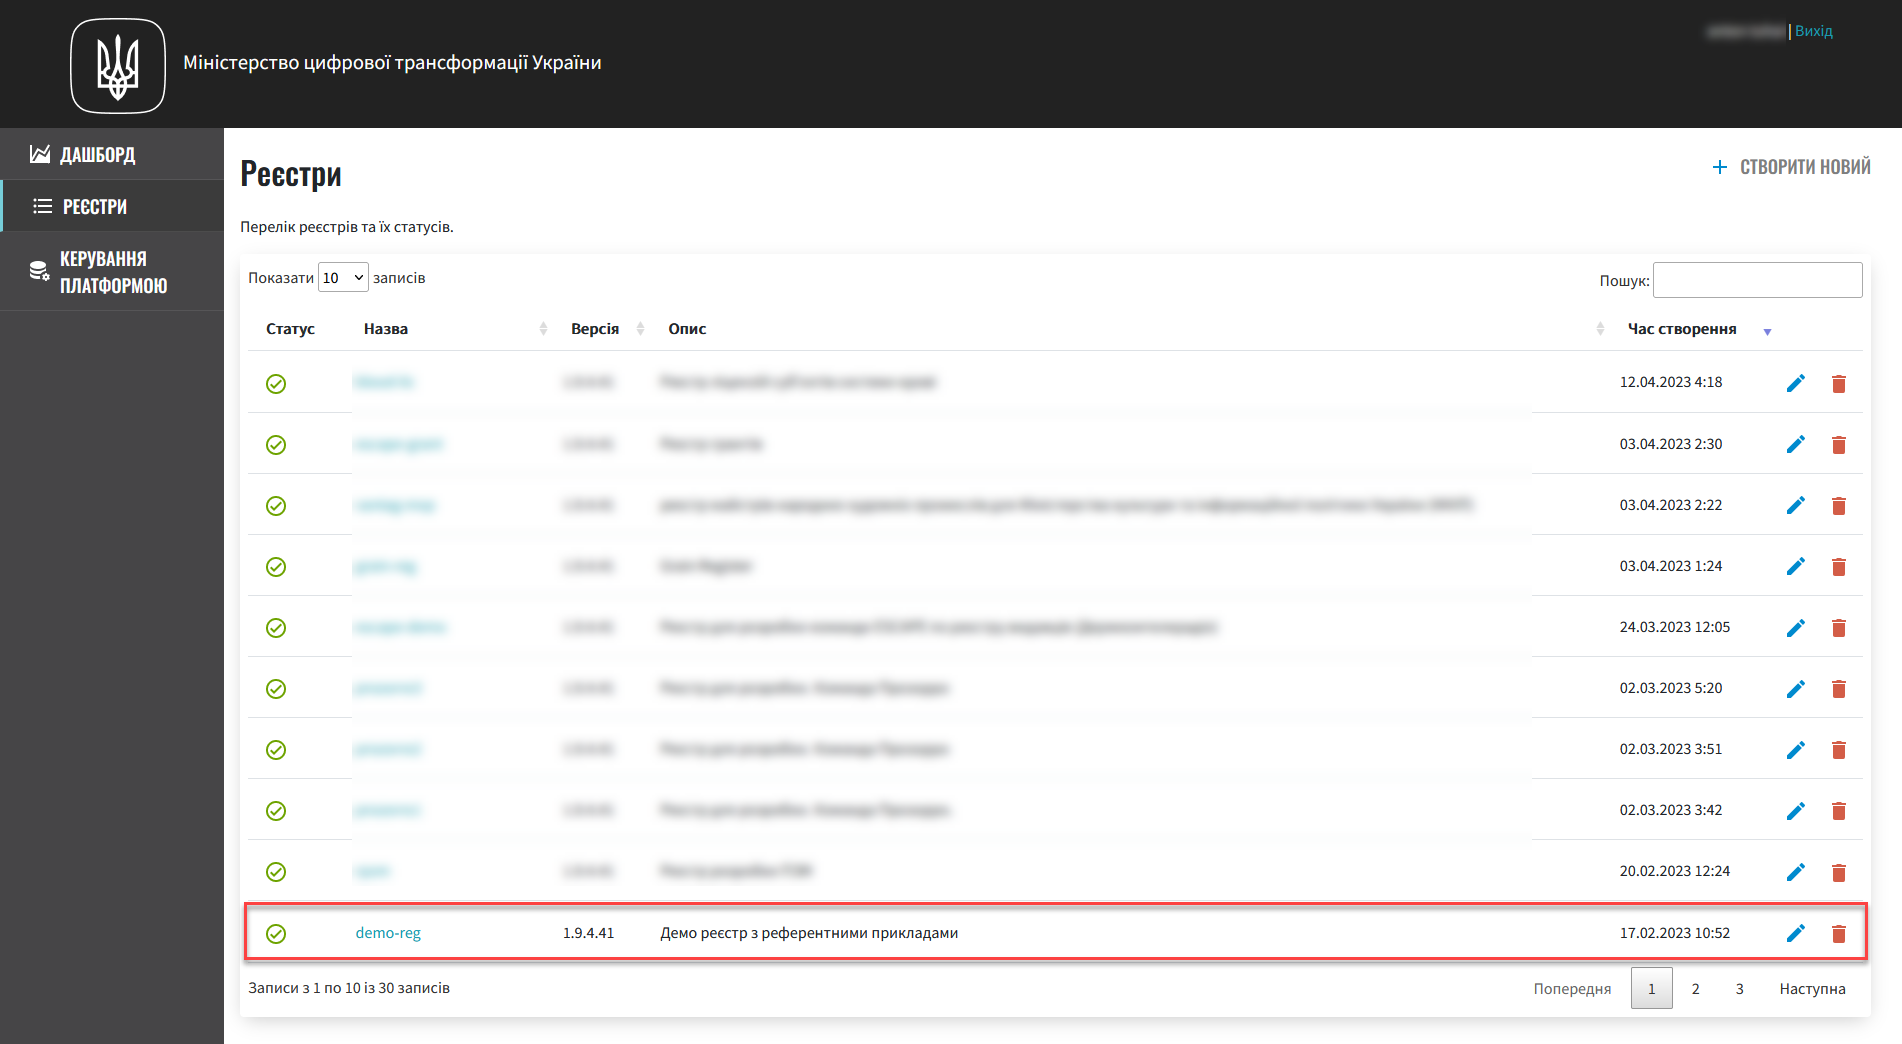
As a result, the registry appears in the Registries section of the Control Plane admin console interface.
If the registry is deployed successfully, a green check mark appears next to its name in the Status column.
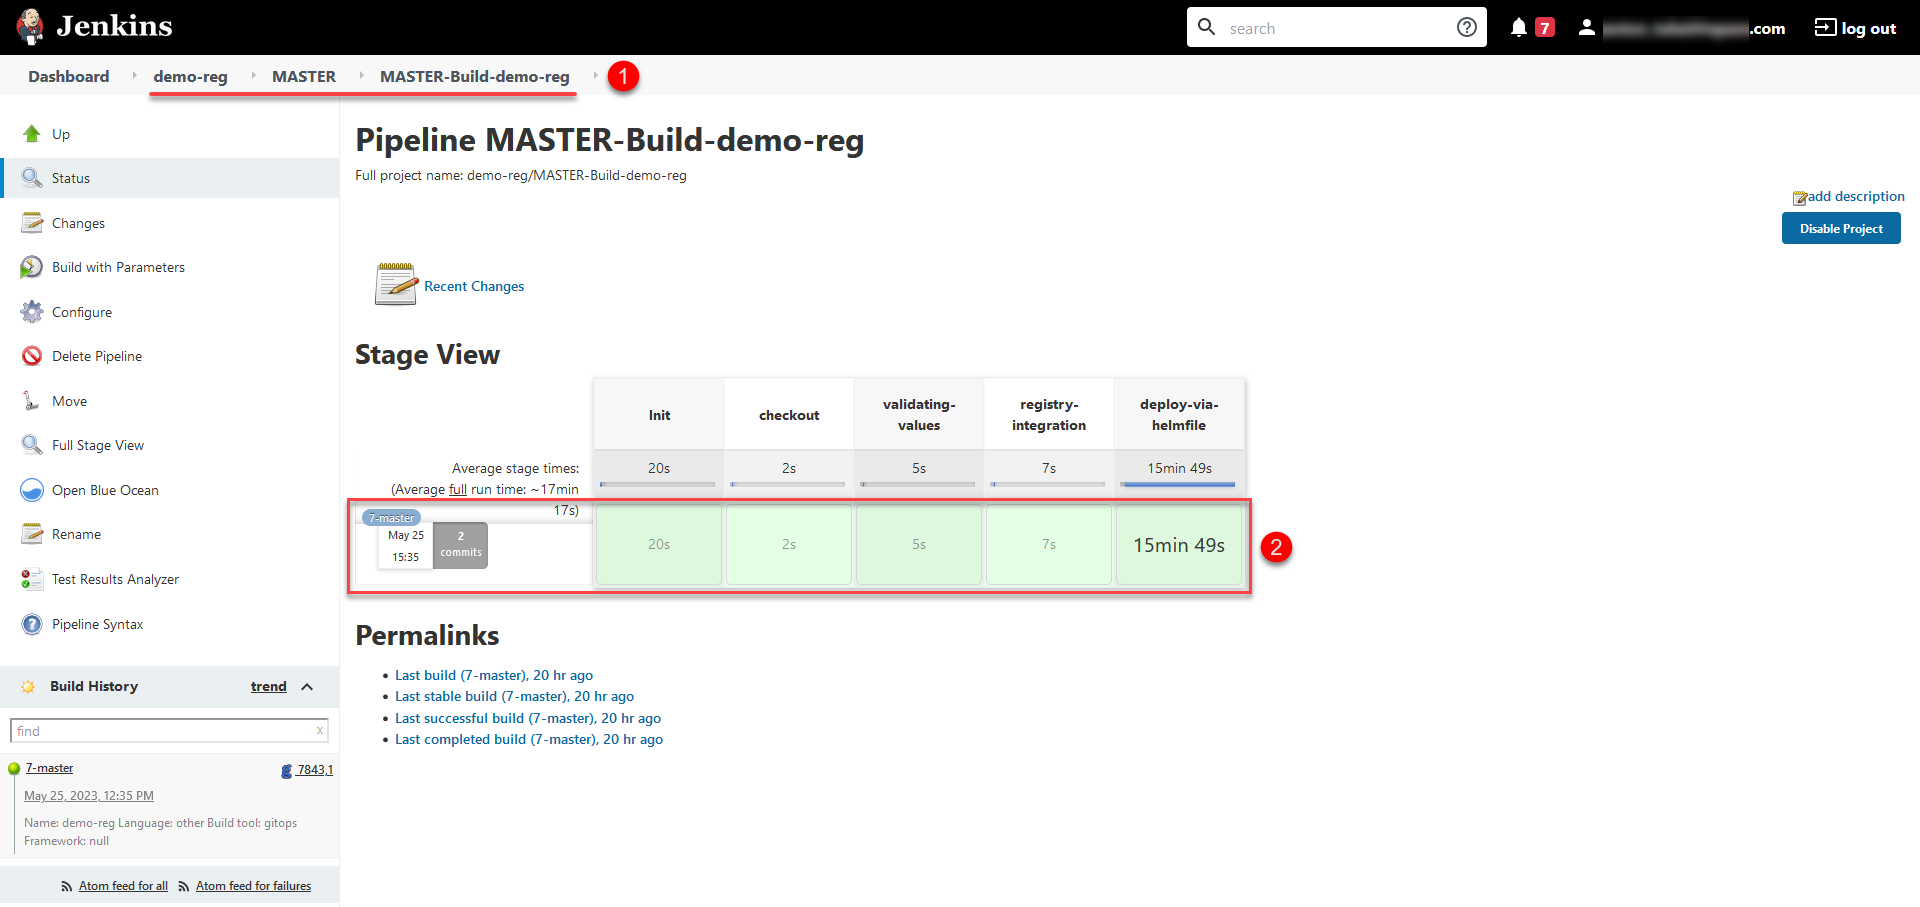
Deploying the registry takes some time. The Jenkins service starts the deployment automatically by running the pipeline called Master-Build-<registry-name>, where <registry-name> is the name of your registry. To monitor the deployment process, go to the Registries section and open the registry you just created, then scroll down to the Configuration section and click the Jenkins link icon in the CI column.