Configuring authentication for officers
| 🌐 This document is available in both English and Ukrainian. Use the language toggle in the top right corner to switch between versions. |
|
Changing the authentication type is available for the registry versions All earlier versions of the registry use the authentication with the Qualified Electronic Signature (QES) and the IIT widget, which is the default authentication type for the Officer portal. |
1. General description
Registry administrators can configure the desired authentication type for the Officer portal. The platform allows using their own IIT widget for authenticating with a Qualified Electronic Signature or configuring integration with an external digital authentication provider (in the Ukrainian implementation it is the id.gov.ua service).
|
Registry officers will be able to use only one type of authentication at a time when logging into the Officer portal: either a Qualified Electronic Signature or a digital identification service.
The id.gov.ua digital identification service is specific to the Ukrainian market and may not apply or function as described in other contexts or regions.
Please consult the local guidelines or documentation if you are implementing this outside of Ukraine.
|
2. Authenticating with the IIT widget
-
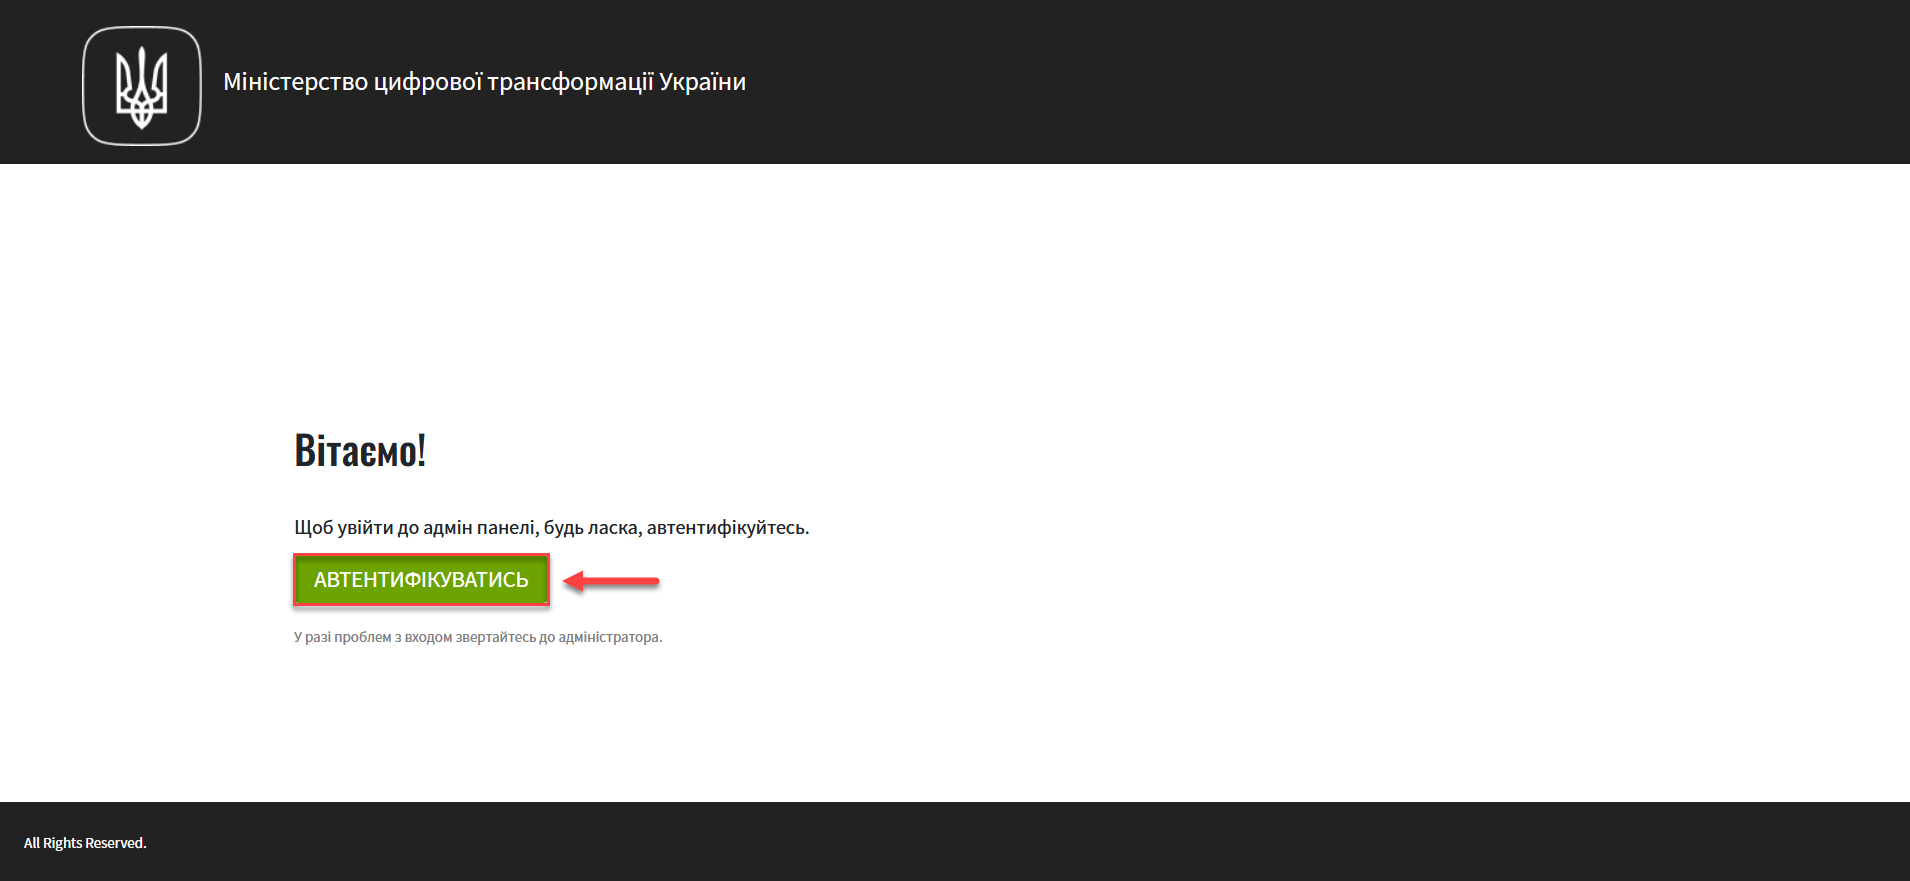
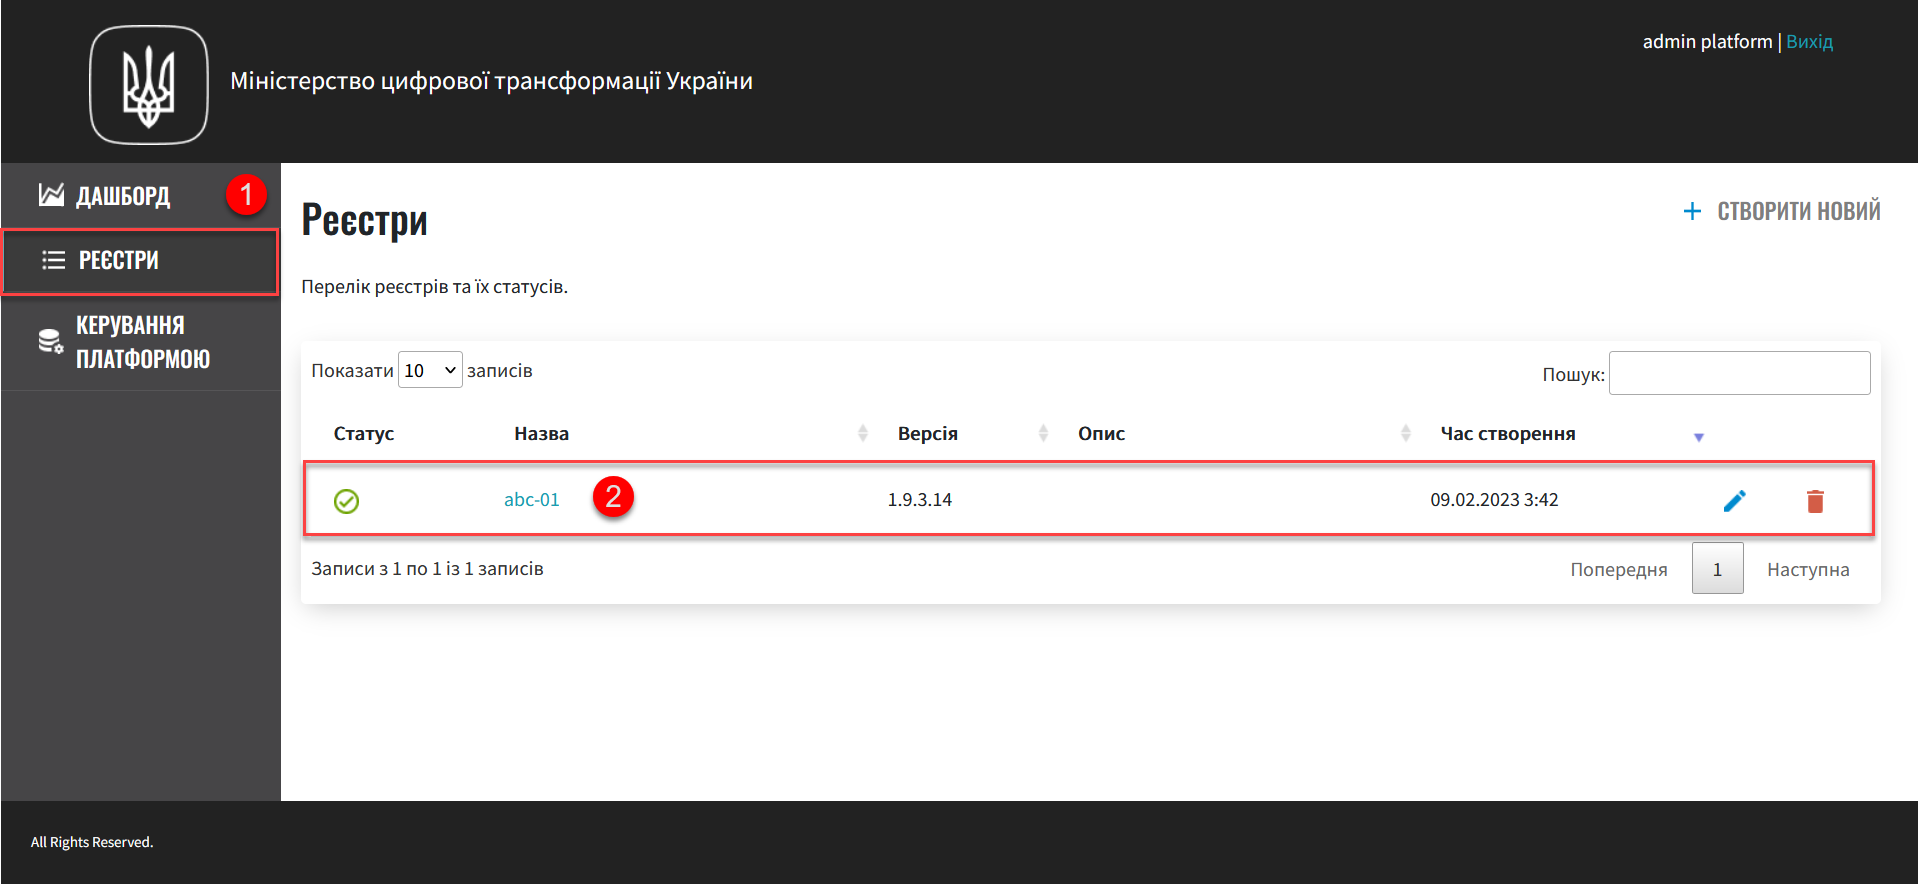
Log in to the Control Plane console as a registry administrator.
-
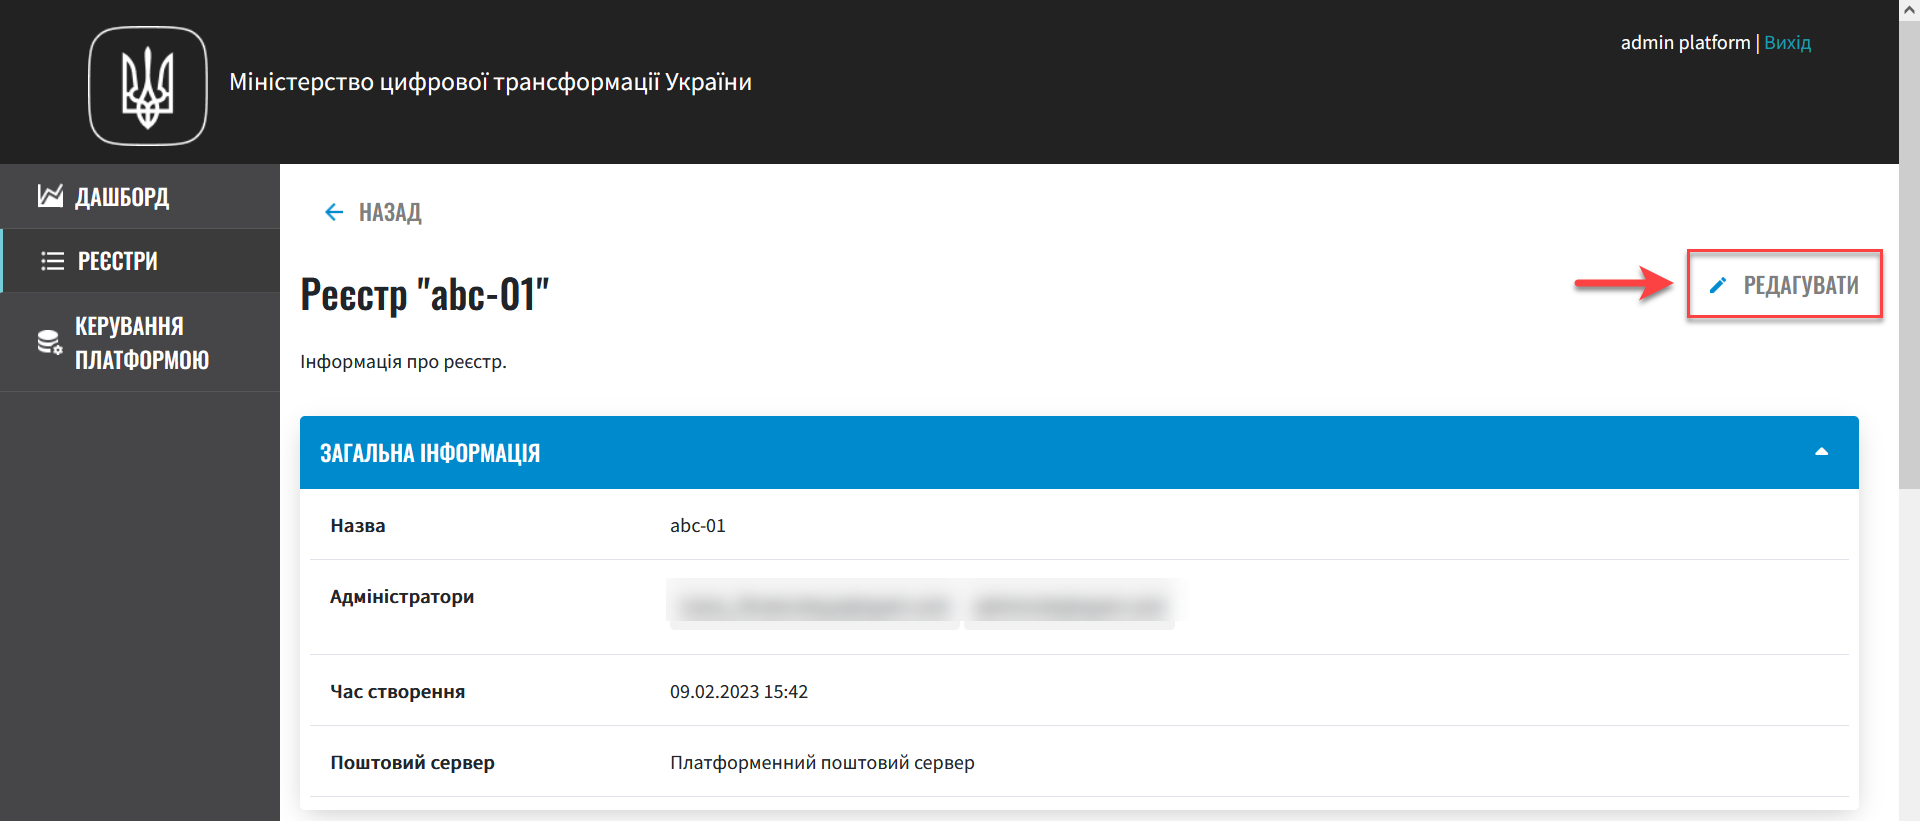
Go to the Registries section, open the necessary registry, and click on
EDIT.You can also configure authentication type for the officers during the registry creation.
-
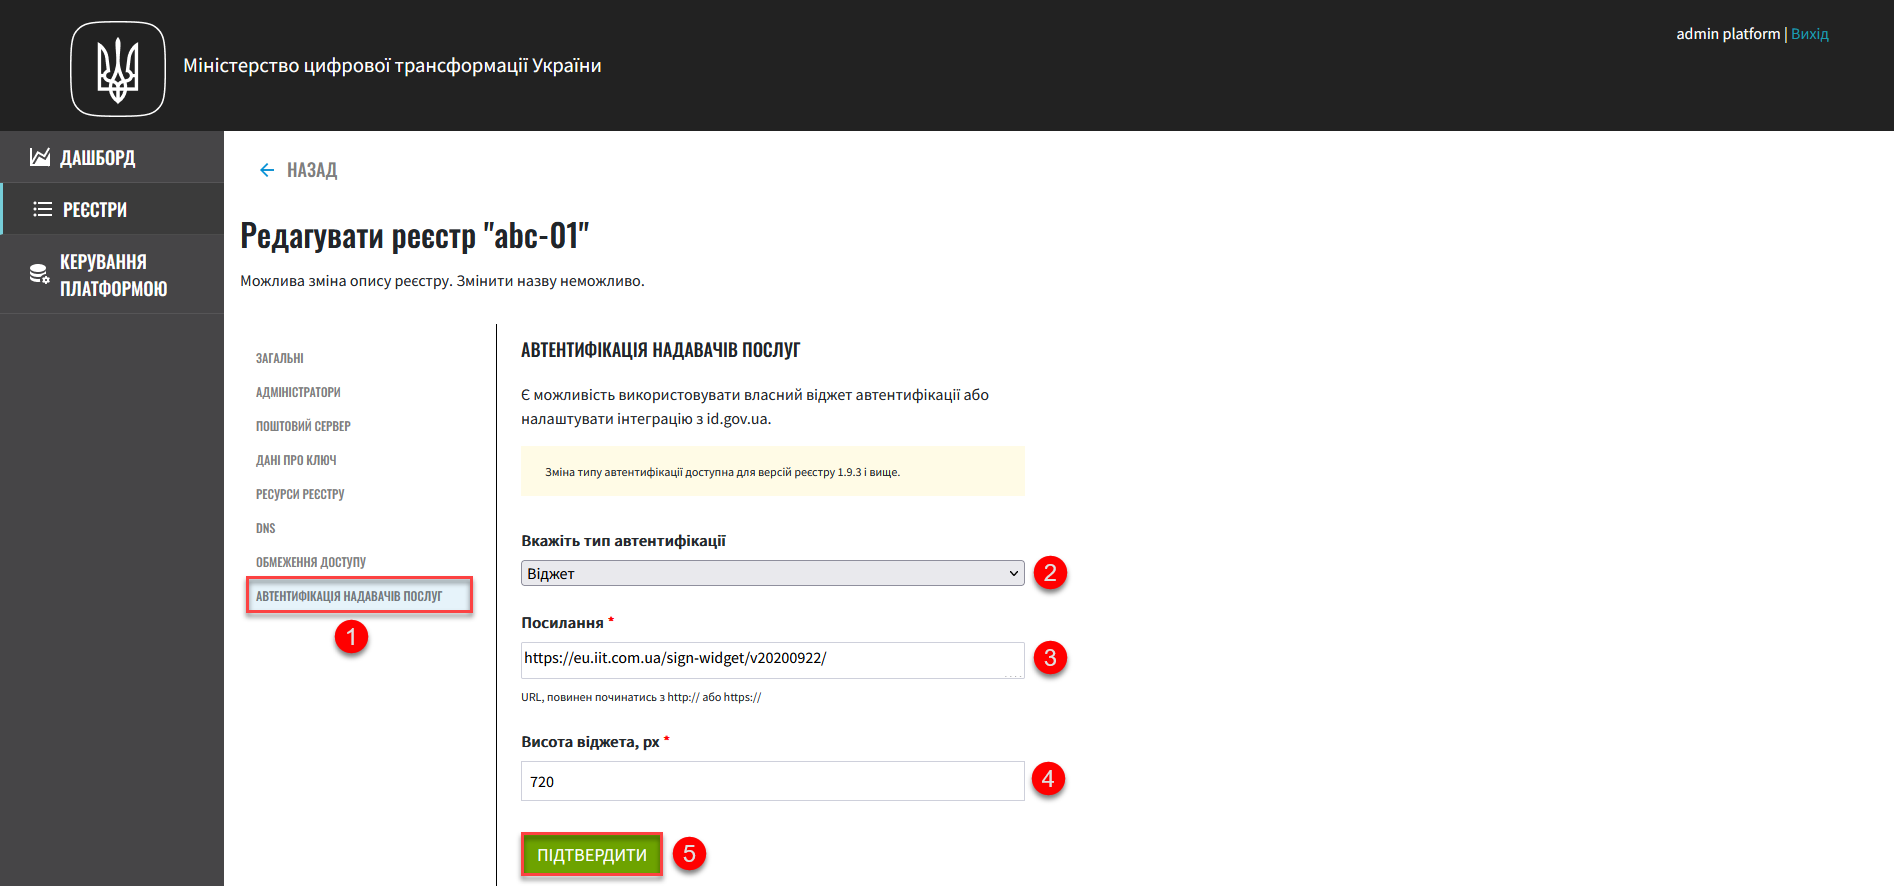
Select the Officer authentication section and perform the following configuration:
-
Specify the authentication type as
Widget. This type is intended for authenticating officers using the Qualified Electronic Signature on the login form of the Officer portal.Widgetis the default authentication type. -
Add a link to the resource with a widget. The standard IIT widget is at the following URL: https://eu.iit.com.ua/sign-widget/v20200922/.
You can use a widget from any provider with a different URL, but in that case, pay attention to the height parameter, which can be configured in the next field (see below).
-
Define the widget height in pixels (px). By default, the parameter is set to
720px for the IIT widget.Increase or decrease the height as needed. For example, 1000px. Pay special attention to this if you use the URL of another provider to ensure the Qualified Electronic Signature widget appears correctly in the Cabinet.
-
-
Click Confirm to save the configuration.
This will result in a merge request to the registry configuration.
-
Go back to the registry details and find the section Update requests.

-
Open the generated request by clicking on the view icon - 👁.
The proposed changes will be saved to the registry configuration in the deploy-templates/values.yaml file upon confirmation. -
In the new window, compare the 2 versions of the changes, make sure the data you entered is correct, and click Confirm. You can also reject the changes to the configuration immediately by clicking Reject.
The comparison window allows you to conveniently check the current (left) and new (right) versions of the changes. 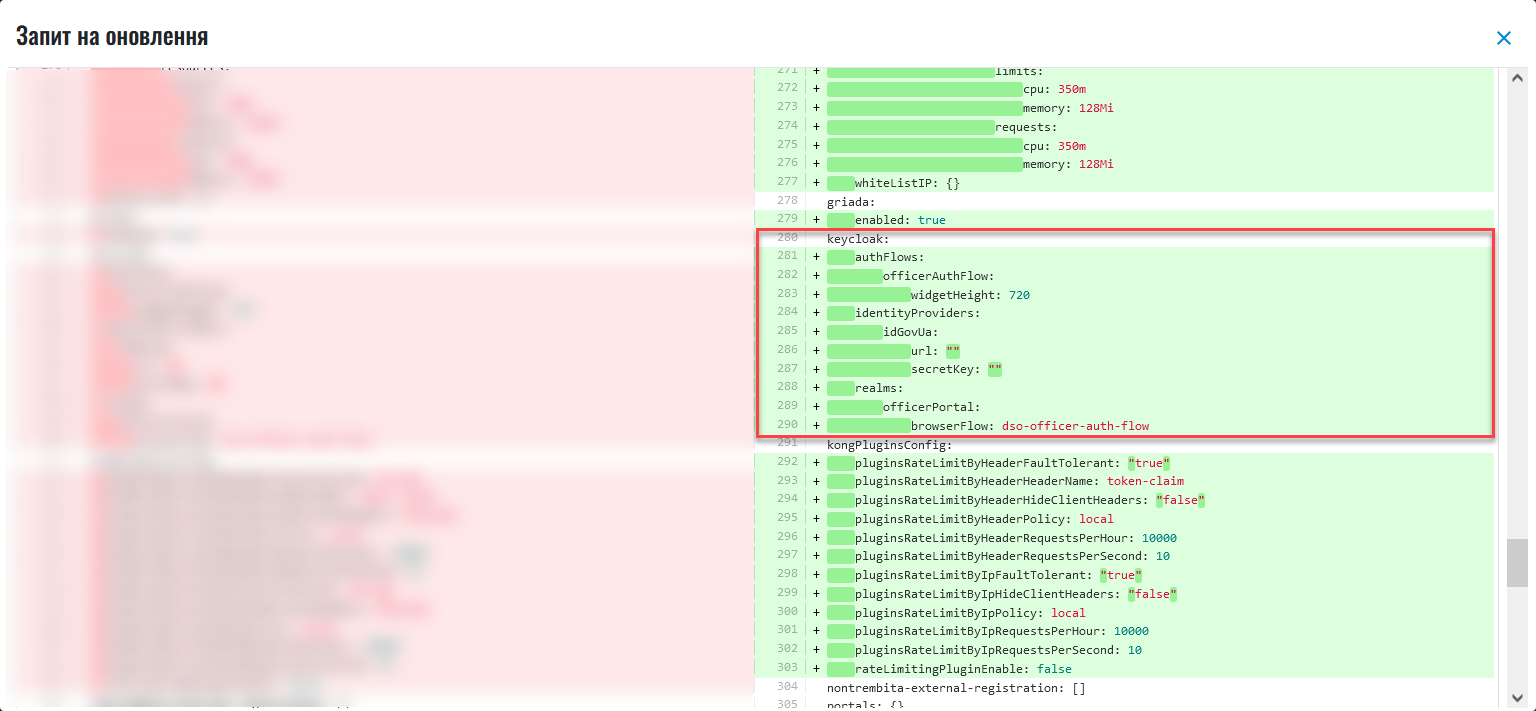
Registry officers will be able to use only one type of authentication at a time when logging into the Officer portal: either a Qualified Electronic Signature or
id.gov.ua.When switching the authentication type, the parameters for the other type remain unchanged. Thus, two configurations can coexist at the same time, but only one can be active. When changing the
browserFlow, the excessive resources in the Helm chart are deleted.In our example, the standard
browserFlowis used for authentication via Qualified Electronic Signature —dso-officer-auth-flow.As a result, the request obtains the
Confirmedstatus and triggers the Jenkins pipelineMASTER-Build-<registry-name>, where<registry-name>is name of the registry. It applies the parameters of the specified configuration. -
Wait while the code is being built. This may take up to 15 minutes.
You can check the current status and execution result by following the
CIlink in the interface.
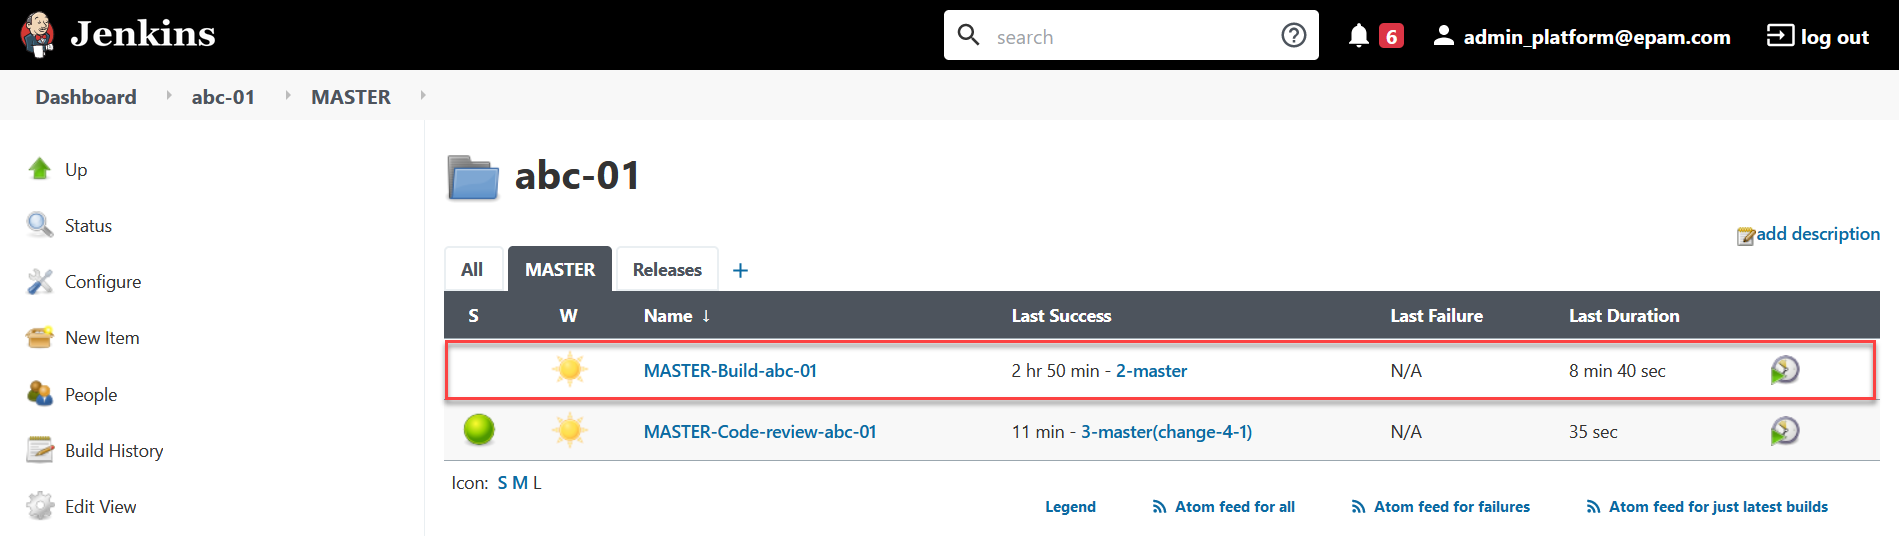
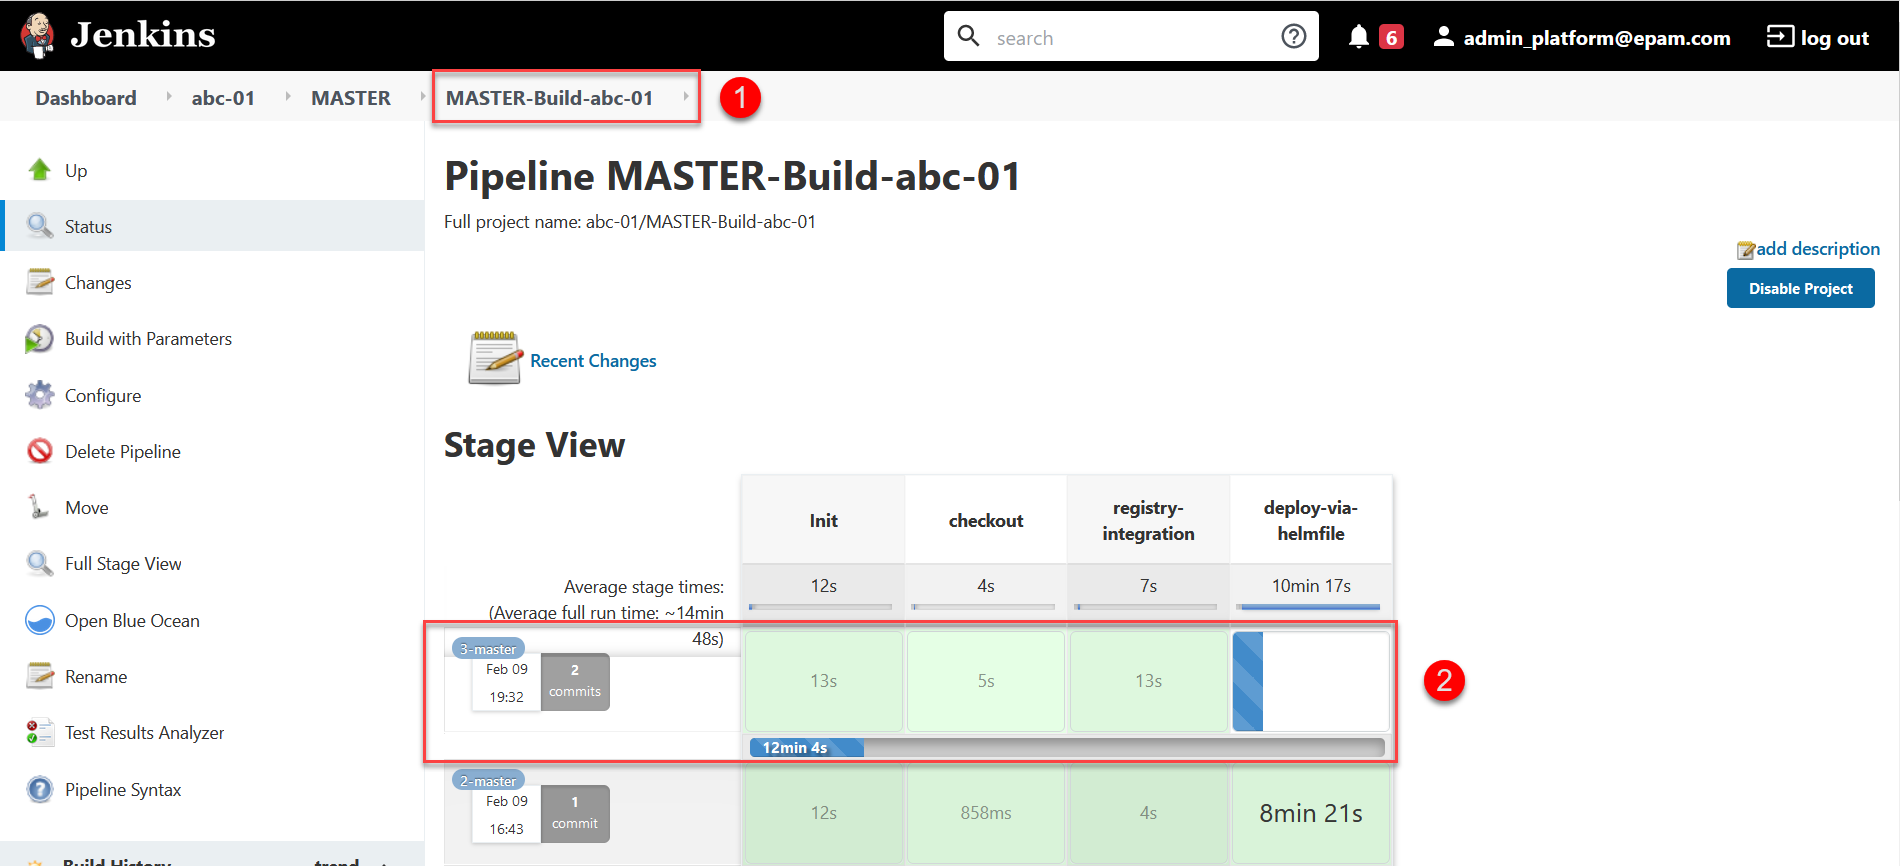
Upon successful completion of the build, the specified configuration will be applied to the registry.
3. Authenticating via the id.gov.ua system
| This functionality is specific to the Ukrainian implementation and may not apply or function as described in other contexts or regions. Please consult the local guidelines or documentation if you are implementing this outside Ukraine. |
3.1. Prerequisites
-
Register in the ICEI
id.gov.uasystem. To do this, go to https://id.gov.ua/connect and conclude an electronic agreement on access to the integrated system of electronic identification.The conclusion of the agreement and other related legal and technical procedures are performed on the
id.gov.uaside between the data owner (registry technical administrator) and ICEI. -
After registering as a client (of the registry), obtain the client identifier in the
id.gov.uasystem (client_id) and the password (secret) from ICEI. -
Use the obtained data to configure authentication with
id.gov.uain the Control Plane interface.
3.2. Configuring
-
Log in to the Control Plane console as the registry administrator.
-
Go to the Registries section, open the necessary registry, and click
EDIT.You can also configure authentication type for the officers during the registry creation.
-
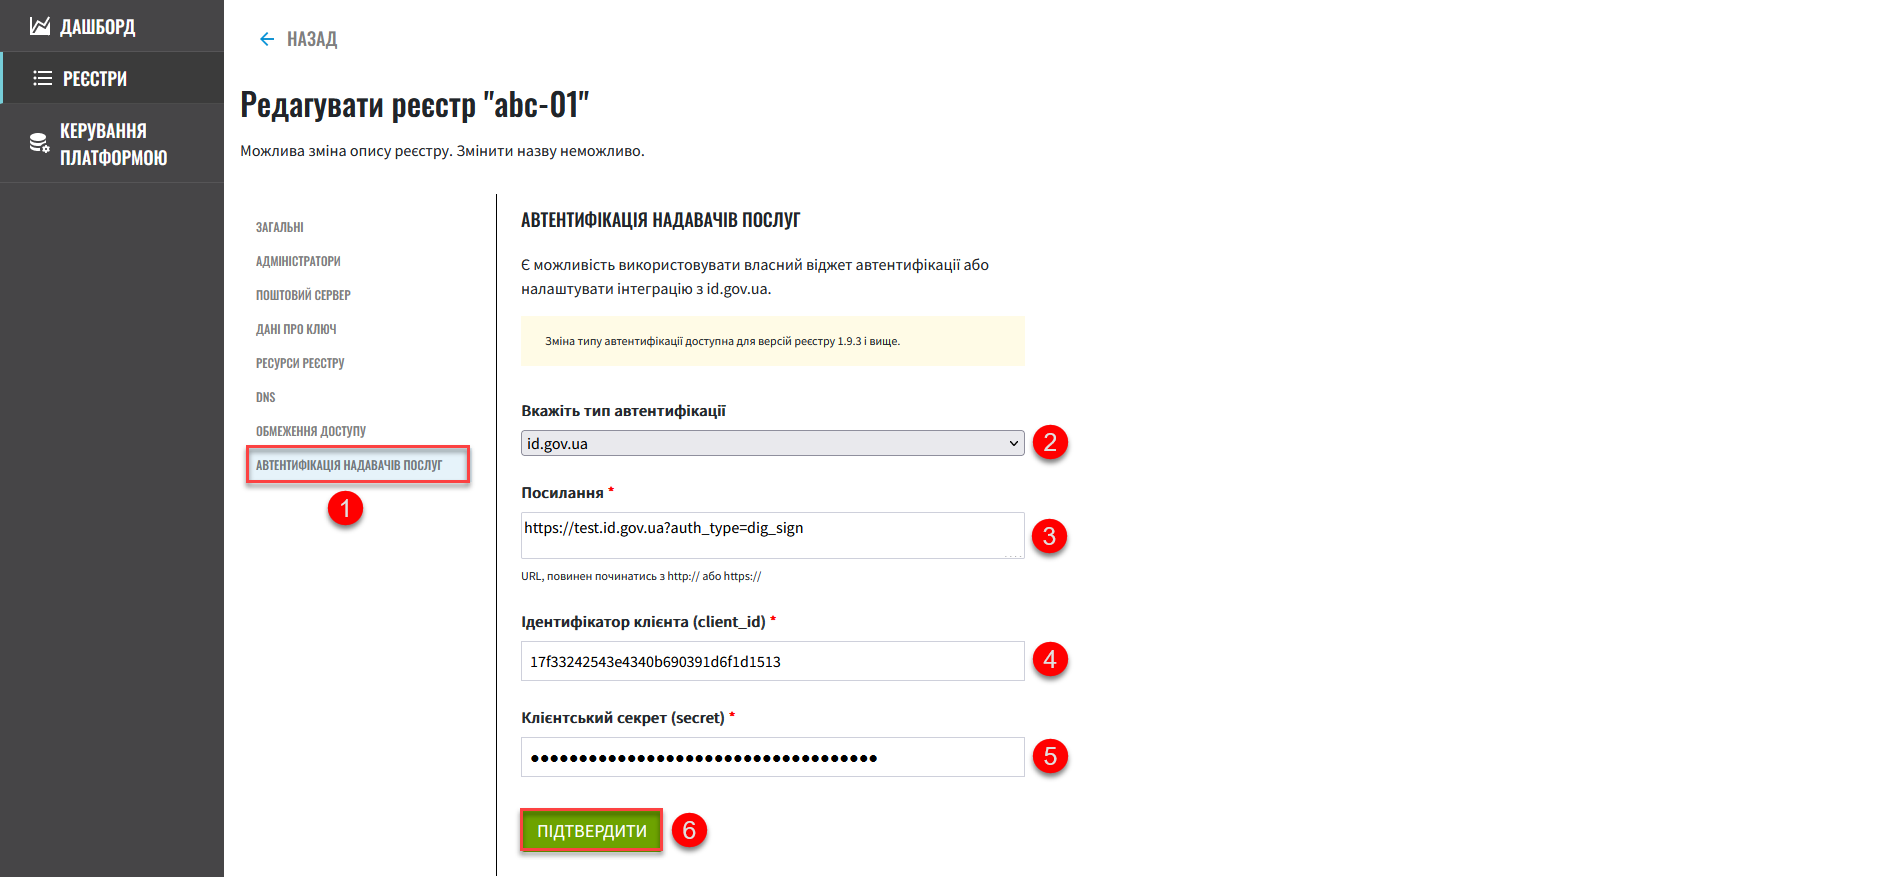
Select the Officer authentication section and perform the following settings:
-
Specify the authentication type as
id.gov.ua. This type is intended for authenticating officers using an external provider on the Officer portal login form. -
Add a link to the resource. For example, the URL may look like this: https://test.id.gov.ua?auth_type=dig_sign.
In the request’s query parameters (in the URL after
?), specify the authentication types available for the official throughid.gov.ua.Possible values for the
auth_typeparameter:-
dig_sign- authentication with a Qualified Electronic Signature (digital signature); -
bank_id- authentication viaBankID; -
diia_id- authentication viaDiia.Sign.
❗ Specify only
auth_type=dig_sign, as shown in the example. This is due to the fact that theBankIDandDiia.Signmethods do not pass theedrpouparameter, which is necessary for successful authentication of the official in the system. Other parameters required for successful official authentication -drfoandfullName(see Registry user authentication for more details). -
-
Specify the client identifier (
client_id) obtained in theid.gov.uasystem. For example,17f33242543e4340b690391d6f1d1513.The client identifier in the
id.gov.uasystem is similar to the UUID format but without the hyphens (-) between characters. -
Specify the client secret (
secret) obtained from theid.gov.uasystem.This can be any randomly generated password in the id.gov.uasystem.
-
-
Click Confirm to save the settings.
This will result in a merge request to the registry configuration.
-
Go back to the registry details and find the Update requests section.
-
Open the generated request by clicking the view icon—👁.
The proposed changes are saved to the registry configuration in the deploy-templates/values.yaml file upon confirmation. -
In the new window, compare the two versions of the changes, make sure the data you entered is correct, and click Confirm. You can also reject the changes to the configuration immediately by clicking Reject.
The comparison window allows you to conveniently check the current (left) and new (right) versions of the changes. 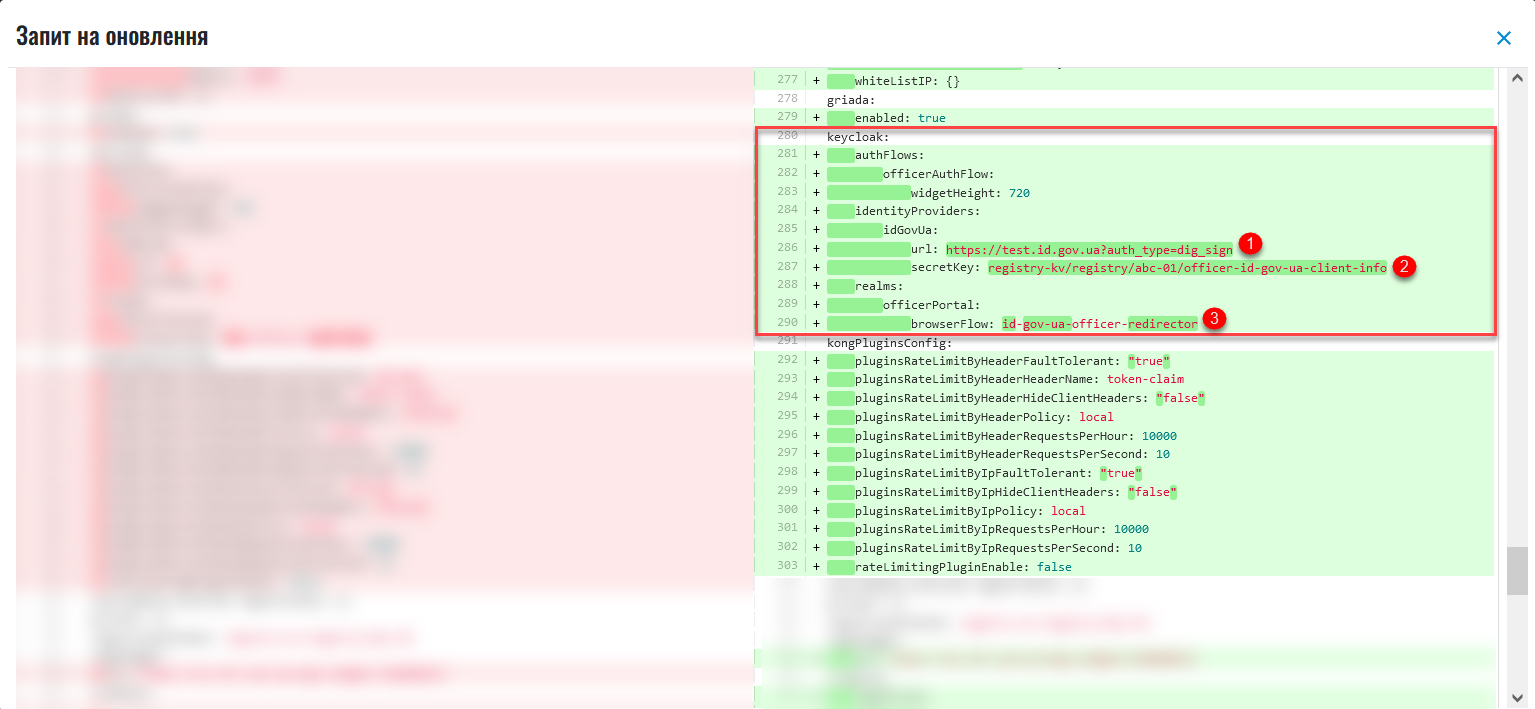
Registry officers will be able to use only one type of authentication at a time when logging into the Officer portal: either a Qualified Electronic Signature or
id.gov.ua.When switching the authentication type, the parameters for the other type remain unchanged. Thus, two configurations can coexist at the same time, but only one can be active. When changing the
browserFlow, the excessive resources in the Helm chart are deleted.In our example,
browserFlowis used for authentication with redirection to an external provider — theid-gov-ua-officer-redirector.As a result, the request obtains the
Confirmedstatus and triggers the Jenkins pipelineMASTER-Build-<registry-name>, where<registry-name>is name of the registry. It applies the parameters of the specified configuration. -
Wait while the code is being built. This may take up to 15 minutes.
You can check the current status and execution result by following the
CIlink in the interface.Upon successful completion of the build, the specified configuration will be applied to the registry.