Configuring registry access
1. Introduction
Access between registries is configured via Control Plane, the admin console interface for managing clusters and registries.
An administrator can grant access to the data of the target, or master registry for other registries deployed on the Platform, as well as for external systems. This is done by creating a separate user in the master registry, which the client registry then uses to access the master registry.
- The process of requesting access consists of the following stages:
-
-
Creating a registry access request in Control Plane.
-
Validating code and approving the request.
-
Monitoring the build in Jenkins.
-
|
In addition to providing access to the registry via the Control Plane admin console, the regulations administrator must also open access to the corresponding views and REST API of the registry at the data model level (for details, see Configuring access to the registry’s API views). |
2. Creating a registry access request
To create a registry access request, perform the following steps:
-
Sign in to the Control Plane admin console.
-
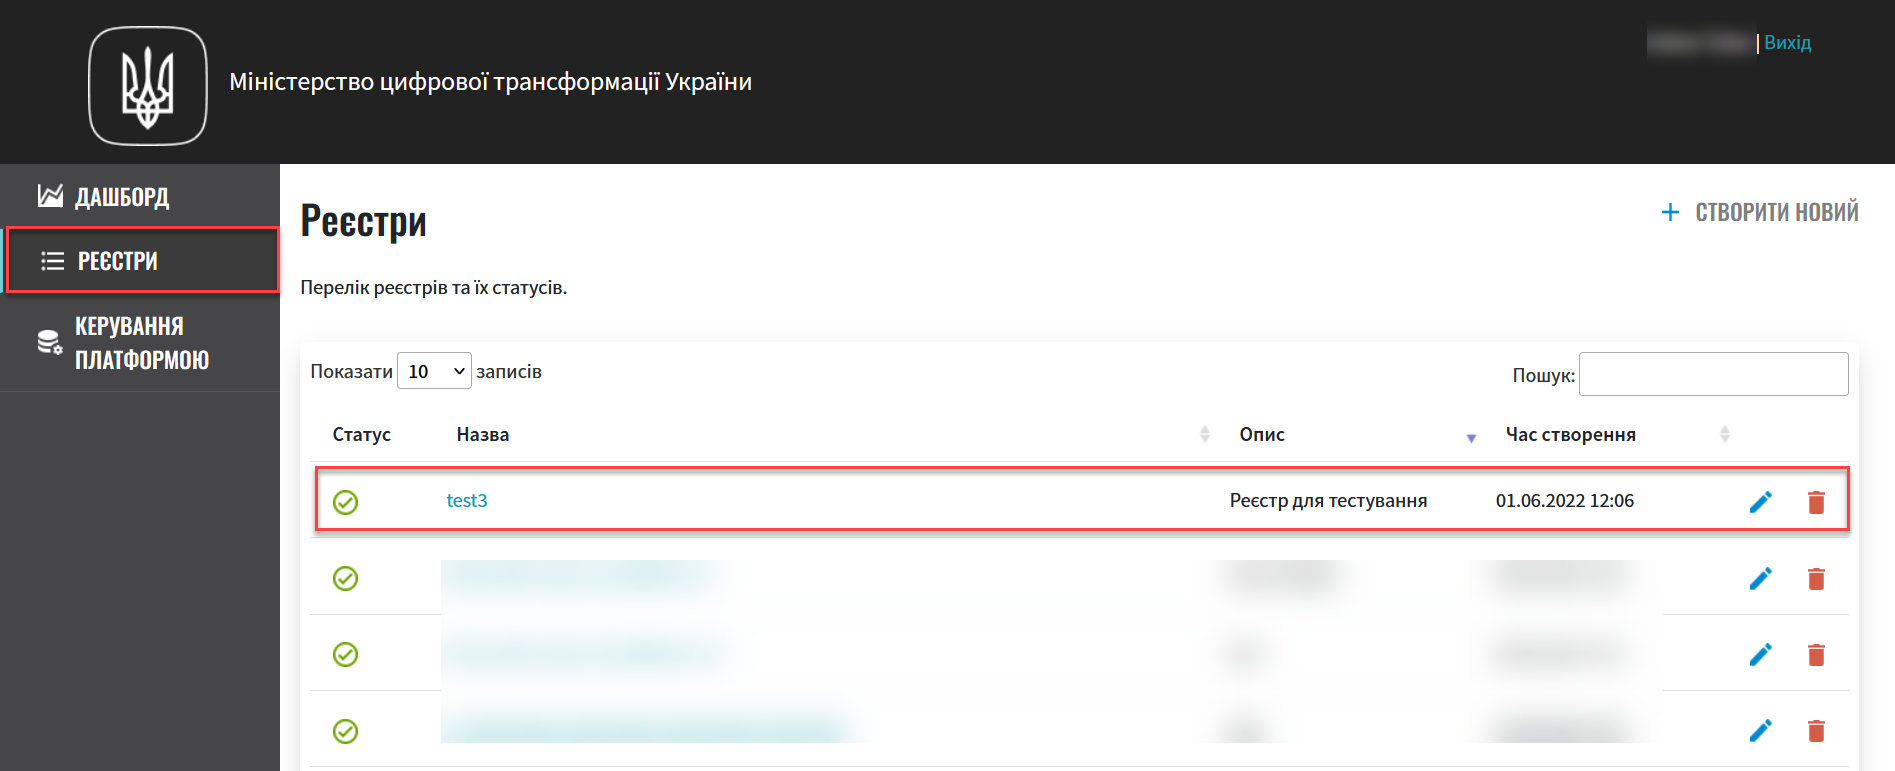
Open the Registries section.
-
Go to registry settings.
-
Open the Access to Platform registries and external systems section and click
+ Grant access.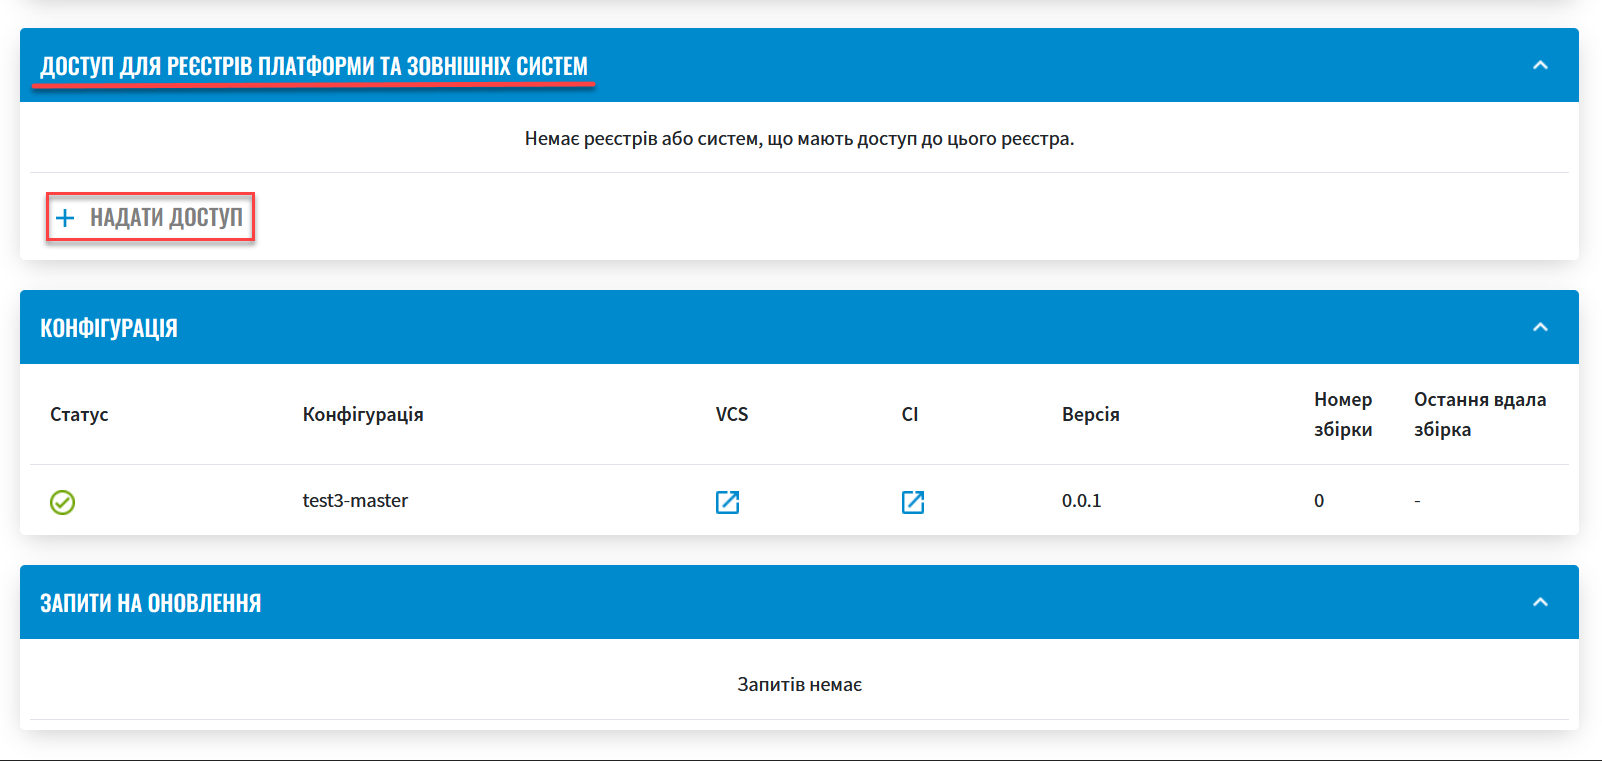
-
Select the type of system to grant access to:
You can grant access to the registry deployed on the Platform or some external system (such as a service or registry outside the Platform’s cluster). -
Select the Platform’s internal registry option and pick the registry to grant access to from the dropdown list.
If the registry is not listed, it must be created beforehand. For details, see Deploying a registry. 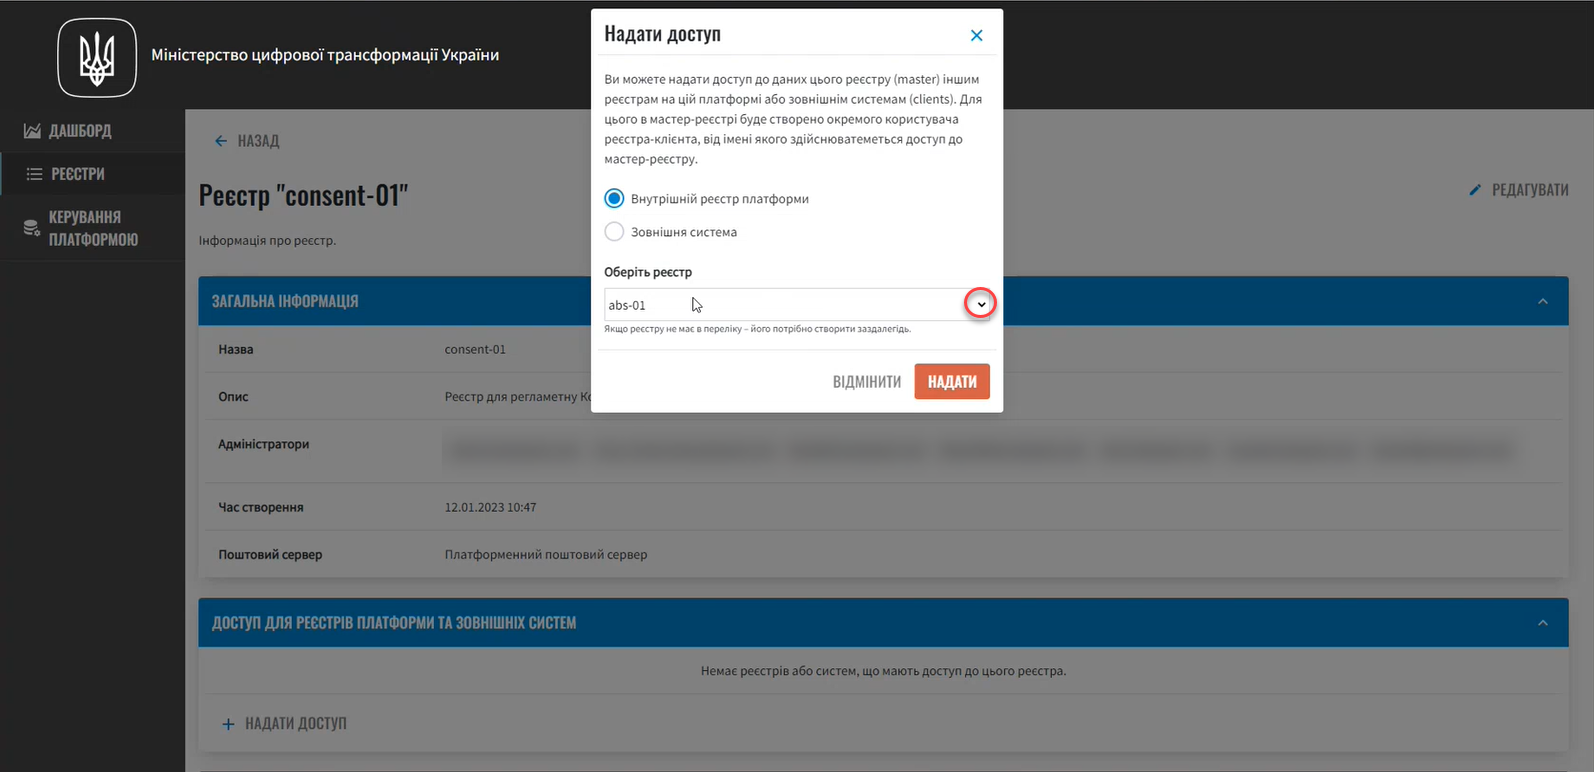
-
Alternatively, select the External system option and enter the name of the system into the System name field.
The name may be a maximum of 32 characters long and consist of lowercase Latin letters ( a-z), digits (0-9), and a hyphen (-). The name must start and end with either a Latin letter or number.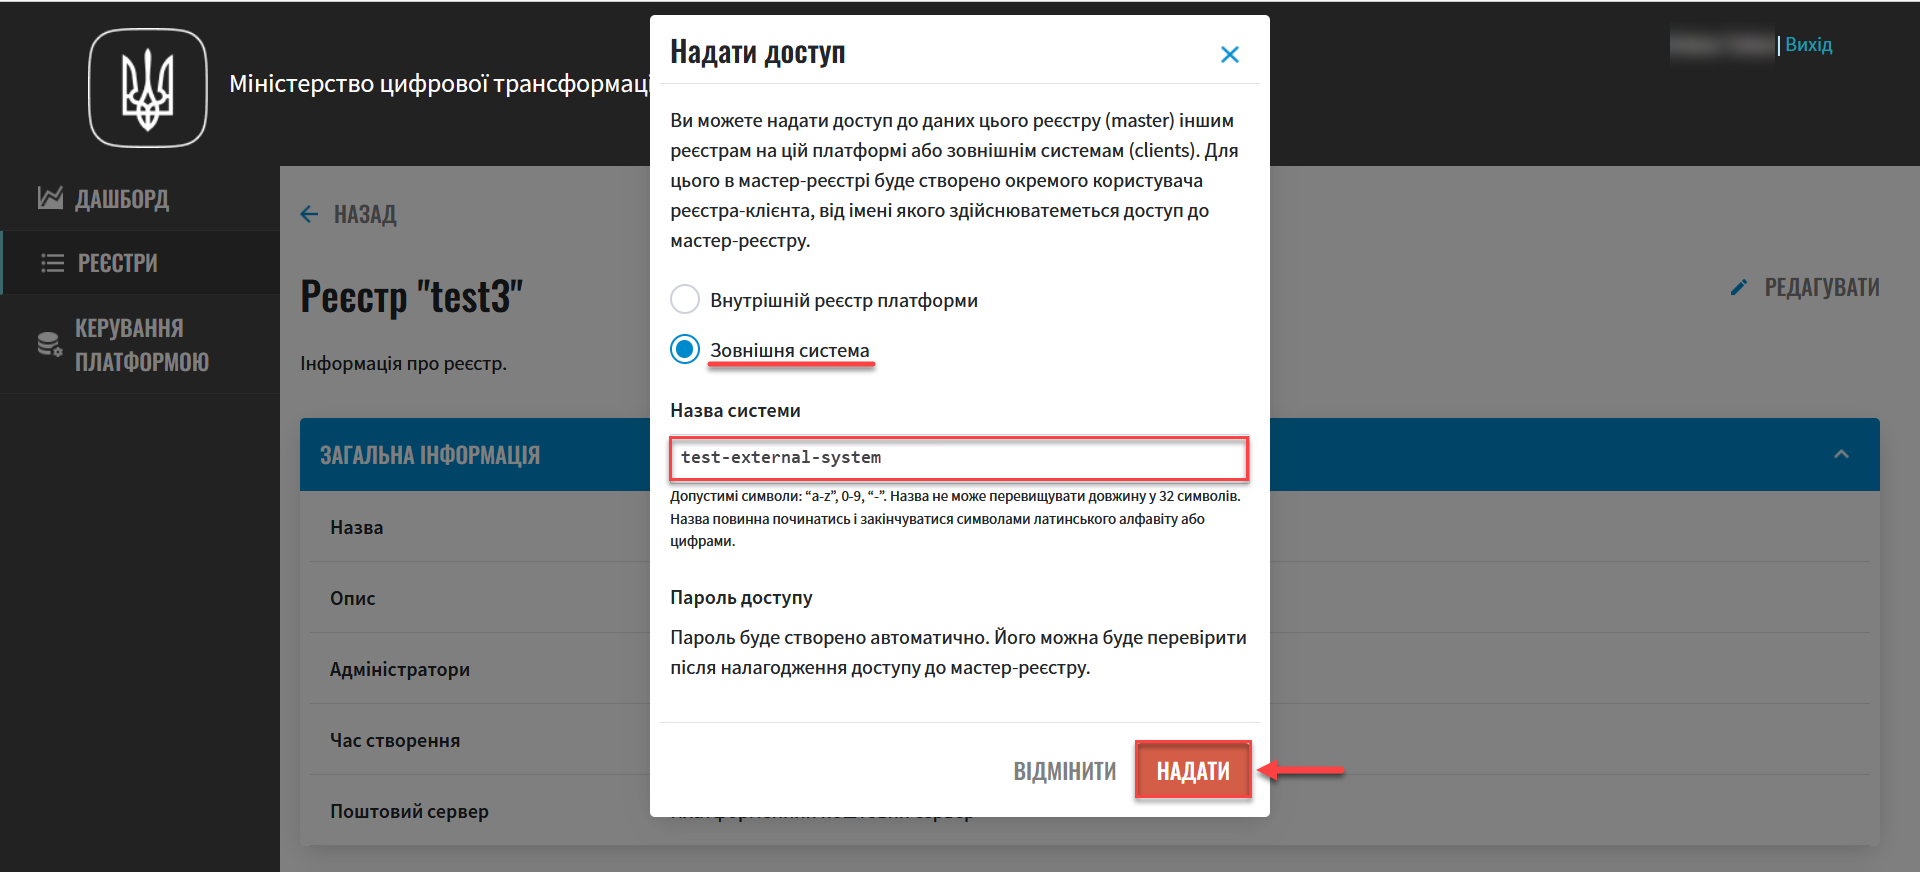
The password is generated automatically. You can check it after establishing access to the master registry (see Changing the registry access password).
-
-
Click
Grantto create the request.This creates the access request with a New status.
You cannot submit two or more access requests in a row. You can submit a new request only after an authorized person has reviewed and confirmed the previous request. In other words, requests are created and confirmed one by one. 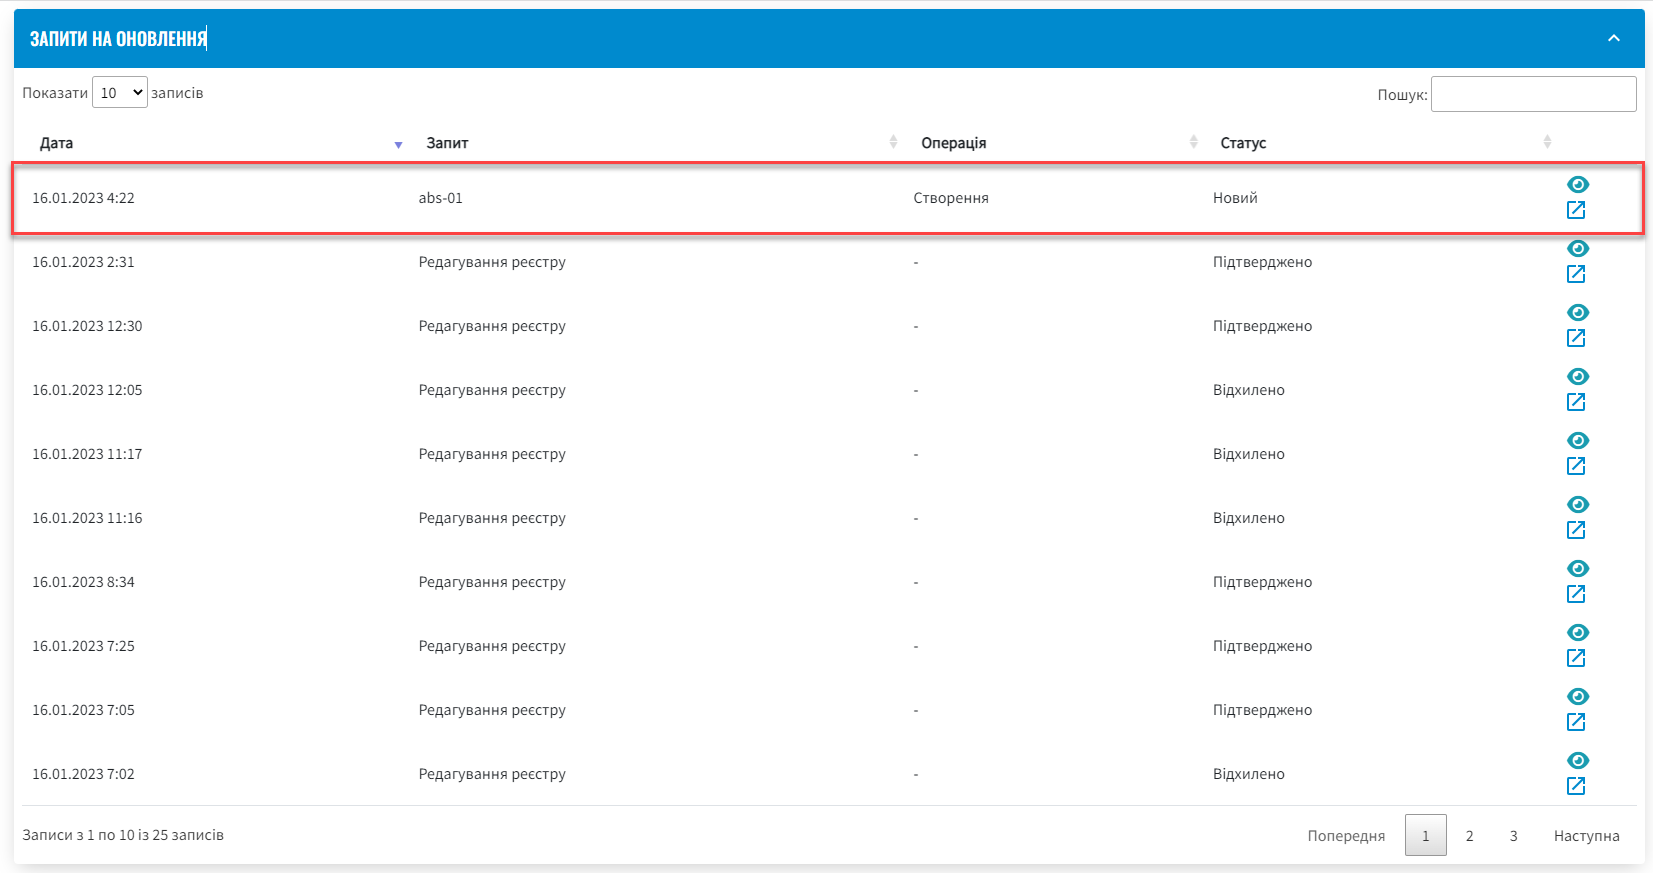
Next, changes are pushed to the Gerrit repository (
git push) for further code review and confirmation of changes (for details, see Approving a registry access request).
|
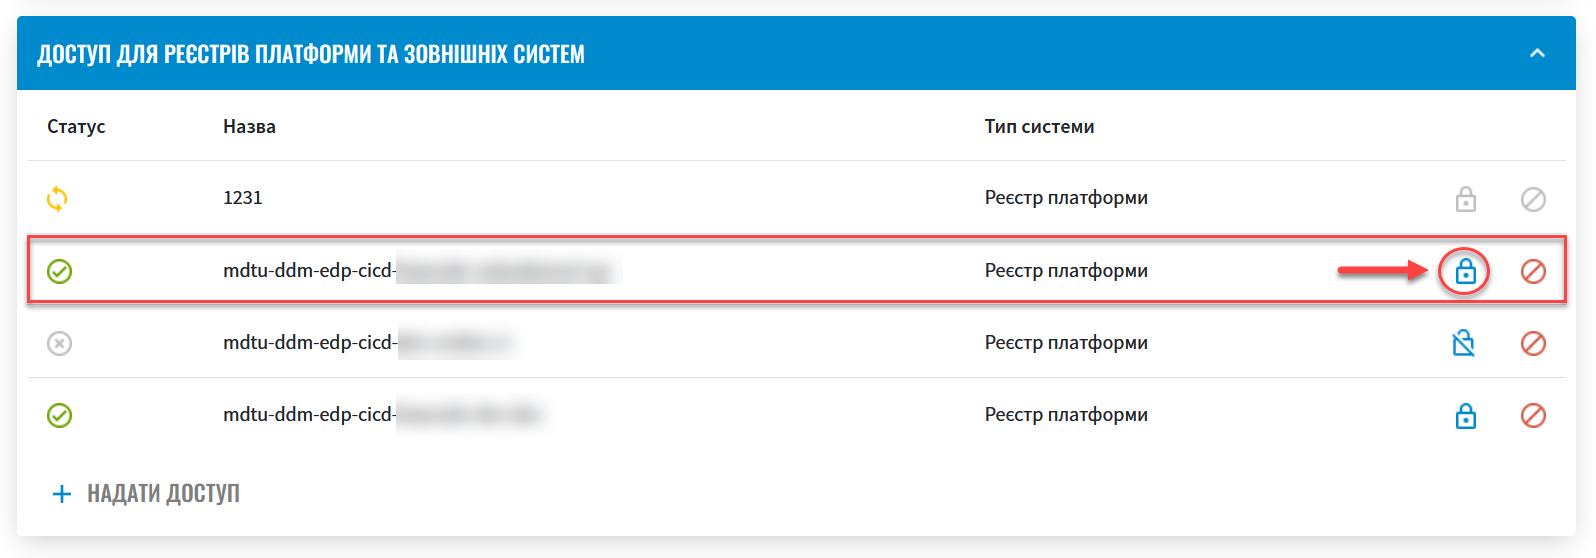
You can block, unblock, or completely cancel access to a registry. The process of requesting blocking, unblocking, or cancelling access is identical to requesting access. An example of blocking one Platform registry’s access to another registry
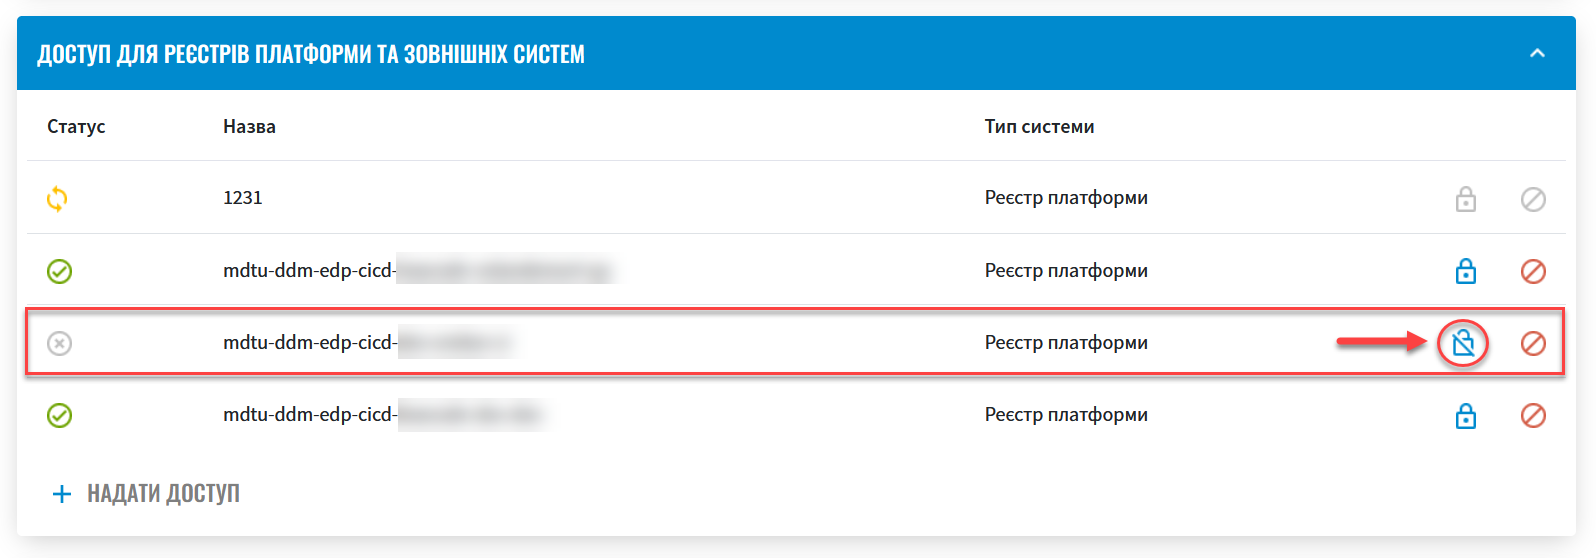
An example of unblocking one Platform registry’s access to another registry
An example of cancelling one Platform registry’s access to another registry
|
3. Approving a registry access request
After successfully creating a registry access request through the Control Plane admin console, you need to go through the code validation procedure. You can do this either in Control Plane or Gerrit.
Perform the following steps:
-
Sign in to Control Plane.
-
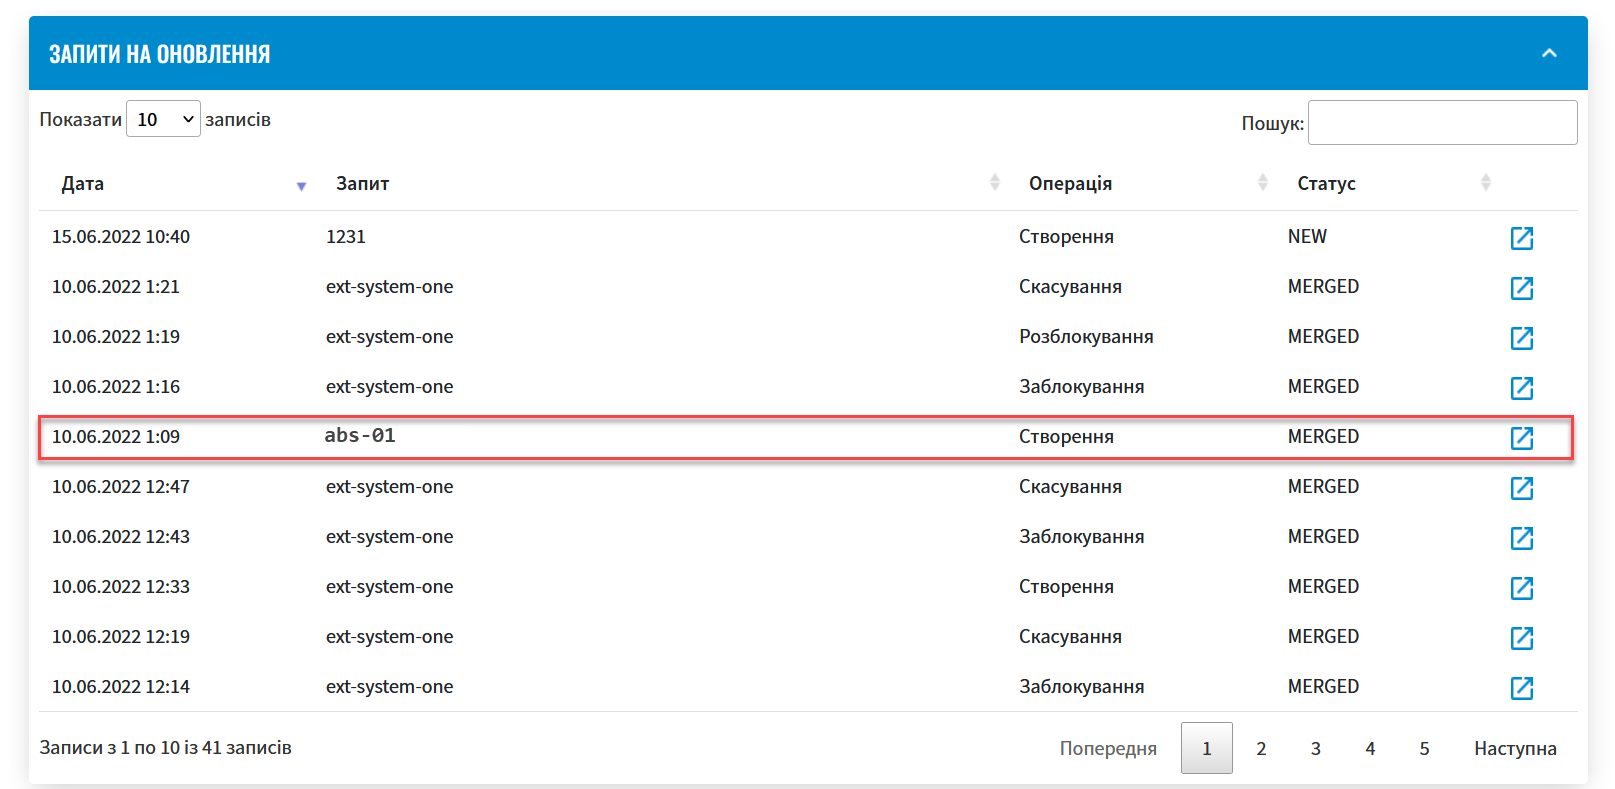
Open the Update requests section and locate the request you created earlier.
-
Click the view icon 👁 to open the request.
The proposed changes are applied to the deploy-templates/values.yaml configuration file upon confirmation. -
Compare the changes between the two versions that open in a new window and make sure the data you entered is correct. Click
Approve.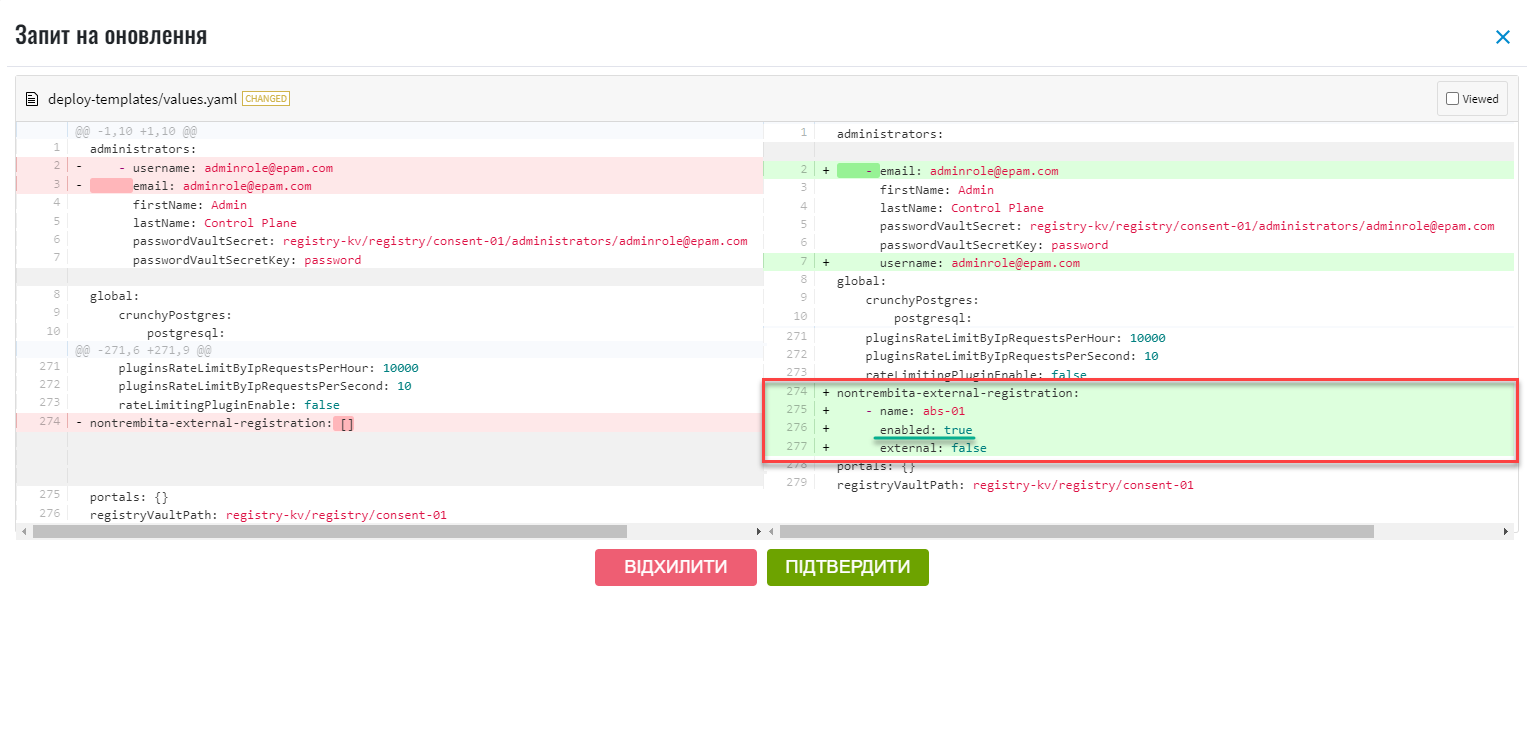
The comparison window provides a convenient way of reviewing the differences between the two versions: the current (left) and the new (right). -
After the approval, Jenkins automatically starts the build process using the latest changes (for details, see Monitoring the build process in Jenkins).
You can also approve the request through the Gerrit interface.
-
Sign in to Gerrit using an appropriate link.
-
Review the code and approve the changes (
git merge) to themasterbranch of the repository.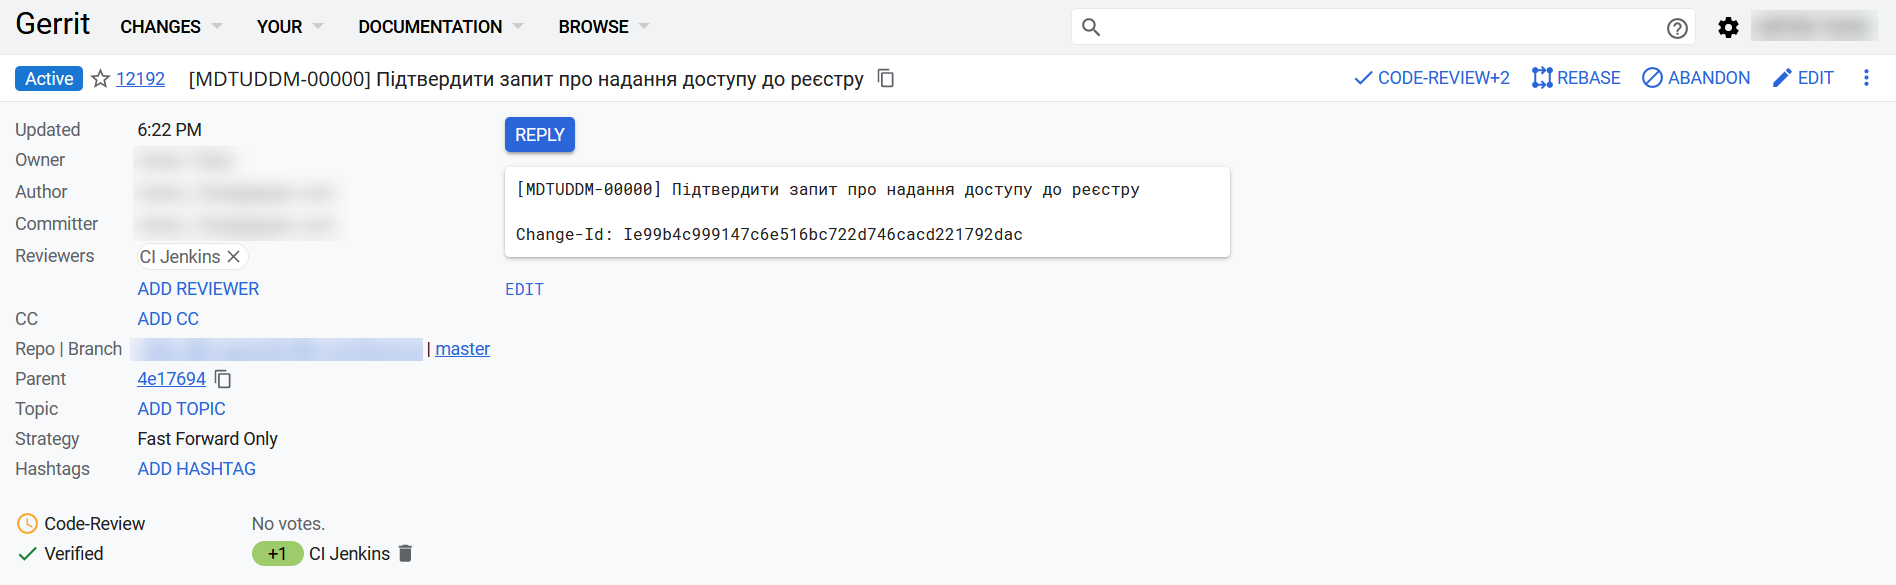
The status of the approved access request in the Update requests section changes to Merged.
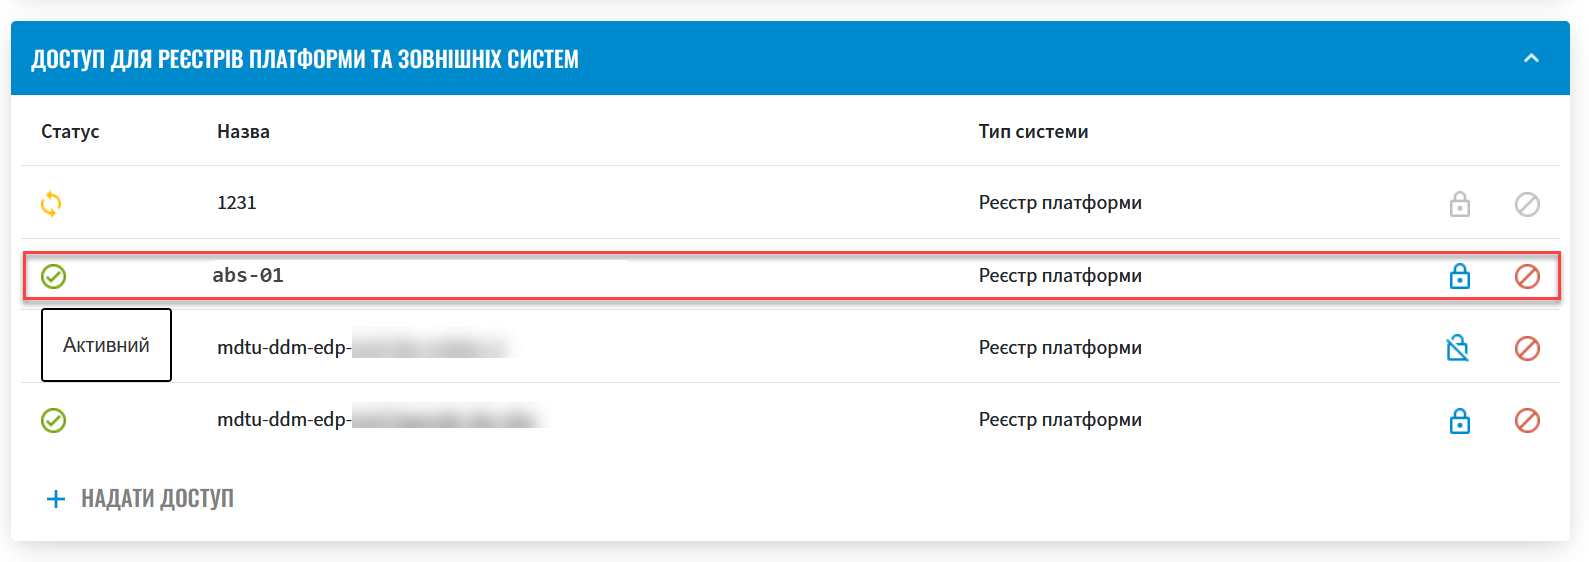
Registry’s access status in the Access to Platform registries and external systems section appears as Active.
After the changes are merged to the
masterbranch of the Gerrit repository, Jenkins automatically starts the build process using the latest changes.
-
4. Monitoring the build process in Jenkins
After the changes are merged to the master branch of the Gerrit repository successfully, you need to make sure that the Master-Build-<registry-name> pipeline has started and completed successfully in Jenkins.
<registry-name> is the name of the registry to which you are configuring access.
|
-
Open the cluster management console in Control Plane.
-
Open the Configuration section.
-
Click the link to Jenkins in the CI column.

-
Wait until all the steps of the
Master-Build-<registry-name>build are completed. This may take up to 15 minutes.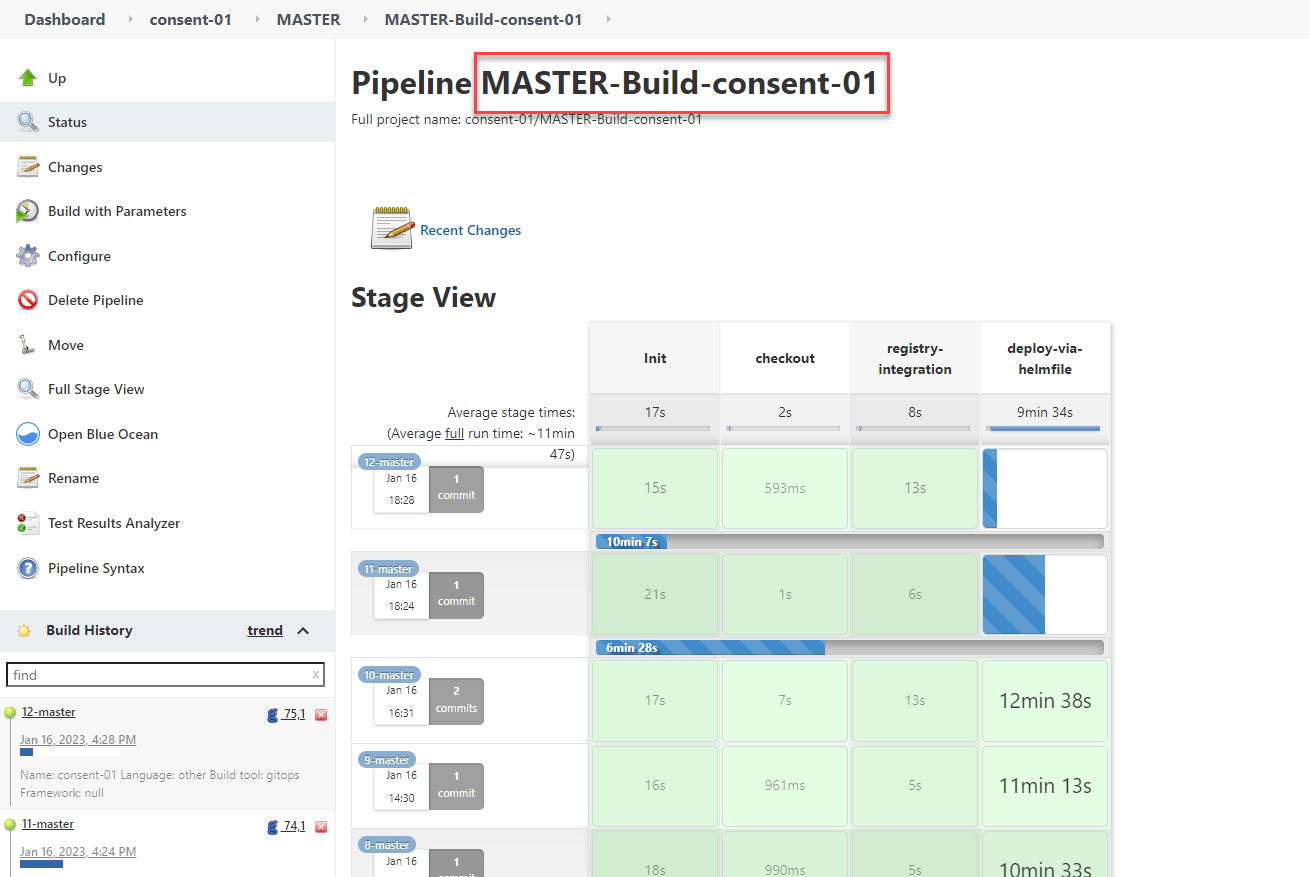
|
The changes take effect after a successful build. |
5. Changing the registry access password
After the access request is created, the system generates the registry access password automatically.
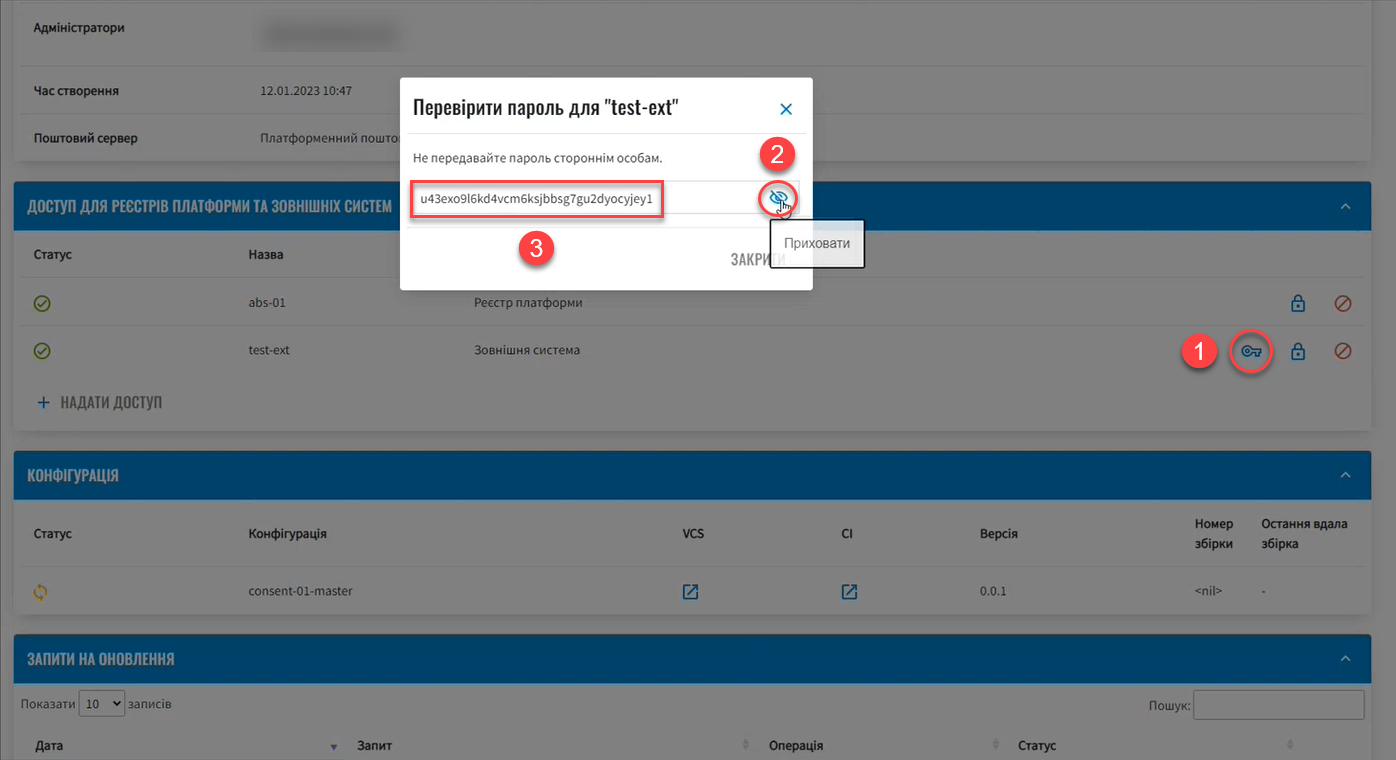
The password is saved to the Vault secrets storage. To view or copy the password, click the password icon that appears in the Control Plane interface.
The encrypted password is also saved to Keycloak for further authentication of registries and external systems, as well as to verify the generated secret in Vault.
- To change the password:
-
-
Cancel access to the registry or external system. To do this, go to the Access to Platform registries and external systems section and click the
Cancel accessicon.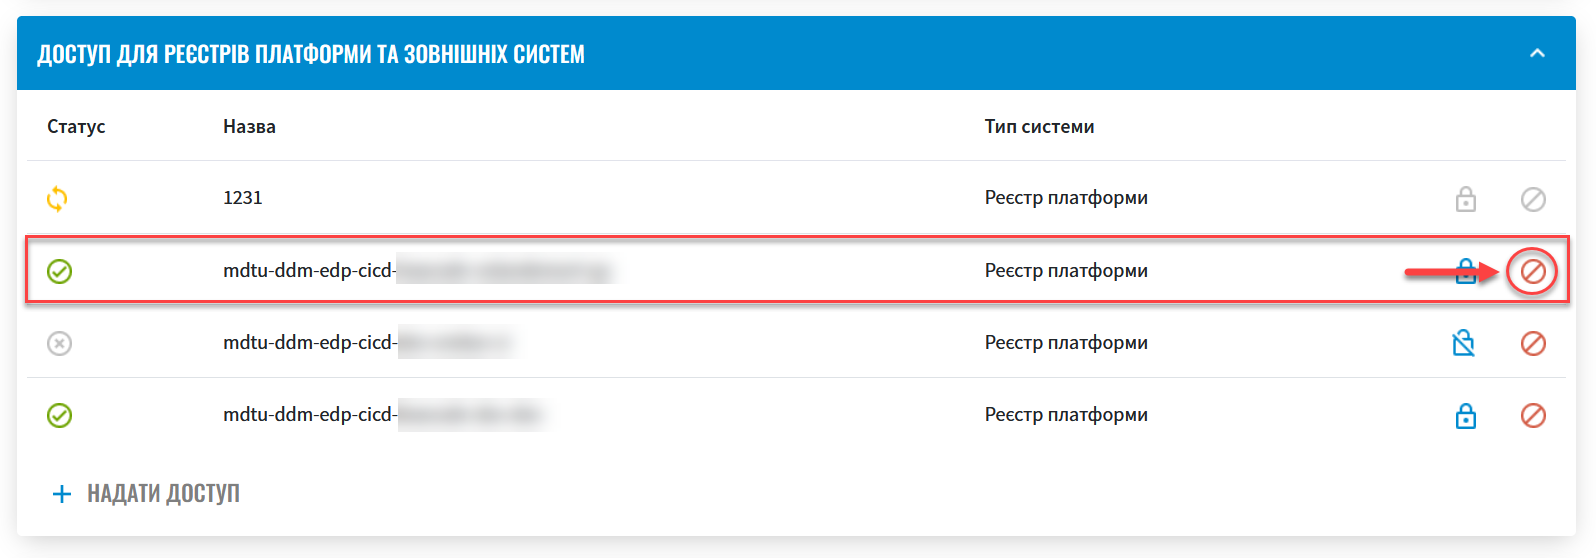
-
Grant access again by creating a new access request.
Once you do that, the old password will be deprecated, and the new one will be generated automatically.
-