Setting up the central components backup schedule and retention time
| 🌐 This document is available in both English and Ukrainian. Use the language toggle in the top right corner to switch between versions. |
1. General description
The platform allows for managing the schedule of creating backups for central components and the time for storing such backups in the backup repository.
The backups of components are created using the velero tool and stored in a secure backup repository called minio, located outside the Platform cluster.
|
The backup schedule is configured in the unix-cron format on the Control Plane administrative panel interface. The retention time for backups must be greater than or equal to one, be a whole number, and not contain special characters. |
- The list of central components for which backup scheduling and retention time can be configured includes:
-
-
Artifact repository - central component
nexus. -
Control panel for the Platform and registries—central component
control-plane. -
User Management - central component
user-management. -
Monitoring - central component
monitoring.
-
The values are stored in the values.yaml configuration file in the cluster-mgmt repository.
The corresponding parameters are applied through the MASTER-Build-cluster-mgmt Jenkins pipeline.
2. Setting up a schedule
| Schedule backups during periods of lowest system load. We recommend running them at night to avoid failures and prevent any impact on users. |
-
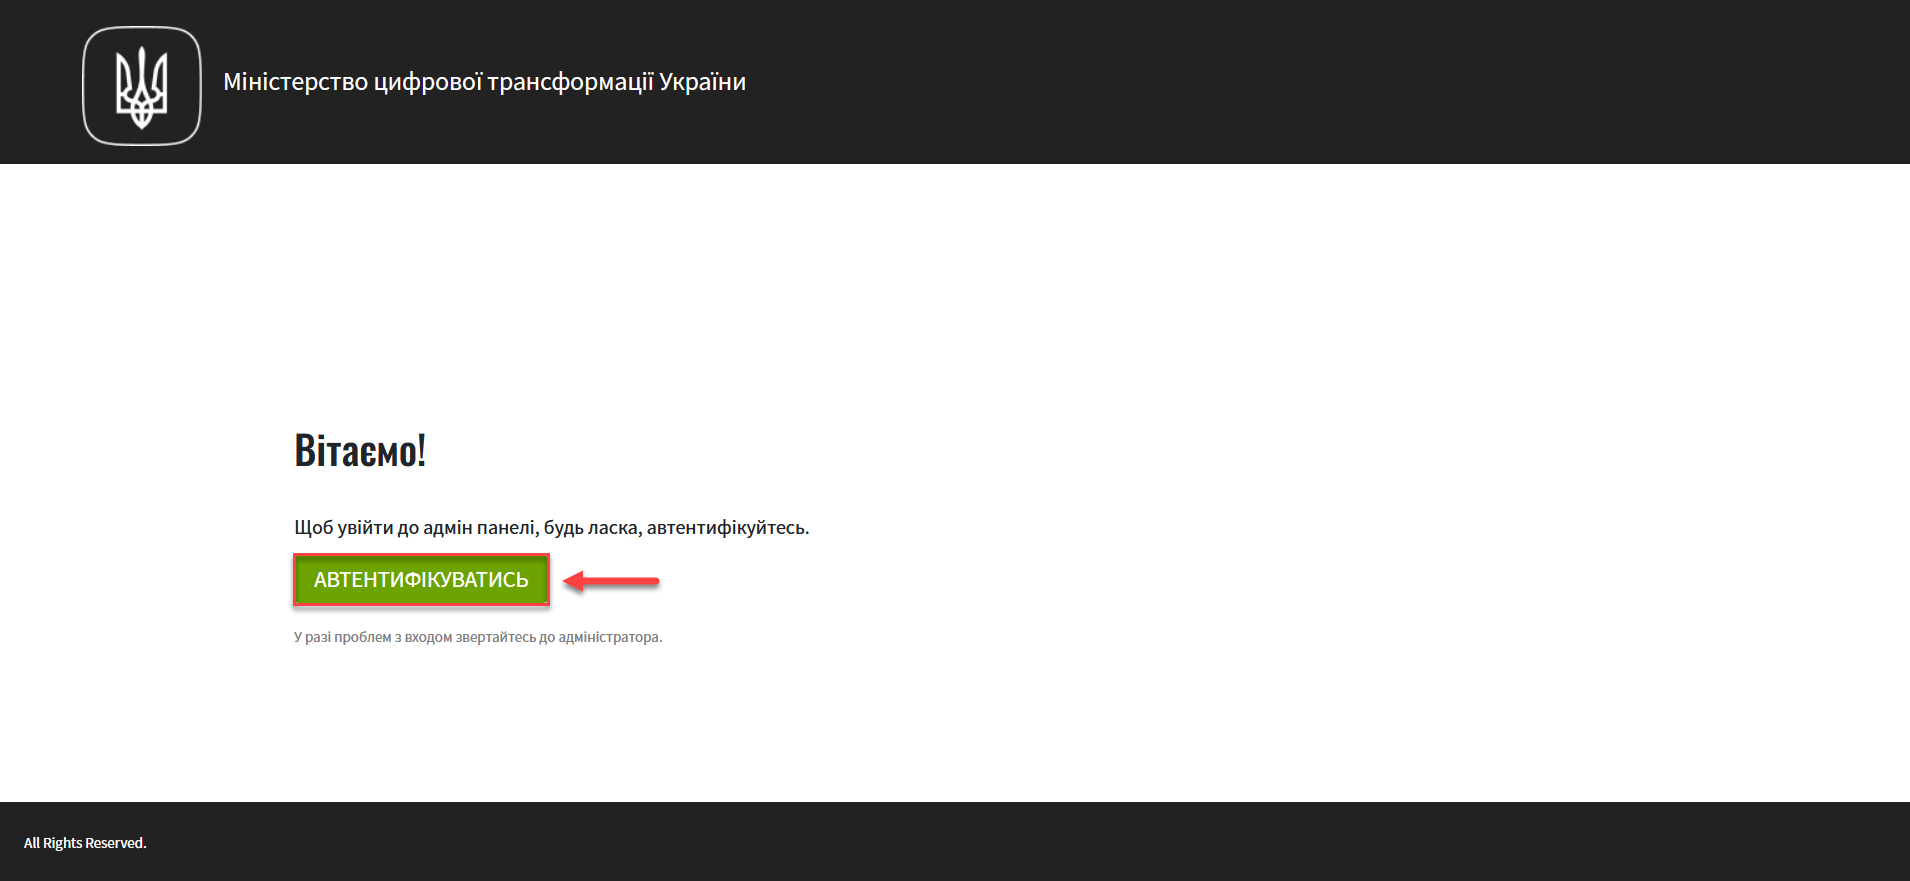
Log in to the Control Plane console as the Platform administrator.
-
Go to the Platform management section and click on
Edit.
-
Navigate to the Backup schedule section and configure the settings for the required central components.
Currently, they are:
-
Artifact repository - central component
nexus. -
Control panel for the Platform and registries — central component
control-plane. -
User Management - central component
user-management. -
Monitoring - central component
monitoring.

The backup schedule is configured in the unix-cron format and is determined by the server’s time in UTC.
If you are configuring the schedule for Ukraine, take into account the +2 hours offset (
UTC+2) in winter time and +3 hours offset (UTC+3) in summer time.Use the https://crontab.guru/ resource, a simple and convenient cron expression editor, to better understand the logic of schedule settings.
-
-
Configure the schedule for the Nexus component and set the backup retention time in days:
-
In the
Schedulefield, enter, for example, the following value:5 11 * * MON-FRI. Use a space as a separator.This means that a backup for the
nexuscomponent will be created every day from Monday to Friday at 11:05 UTC time (13:05 Kyiv time). -
In the
Retention time (days)field, enter, for example, the following value:5. This means that the backup will be stored in the repository for 5 days.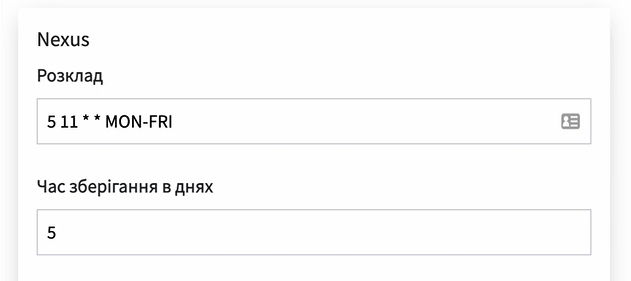
-
-
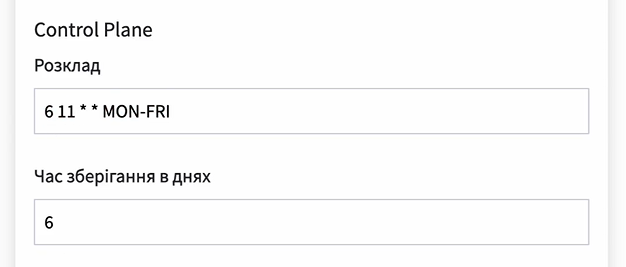
Configure the schedule for the Control Plane component and set the backup retention time in days:
-
In the
Schedulefield, enter, for example, the following value:6 11 * * MON-FRI. Use a space as a separator.This means that a backup for the control-plane component will be created every day from Monday to Friday at 11:06 UTC time (13:06 Kyiv time).
-
In the
Retention time (days)field, enter, for example, the following value:6. This means that the backup will be stored in the repository for 6 days.
-
-
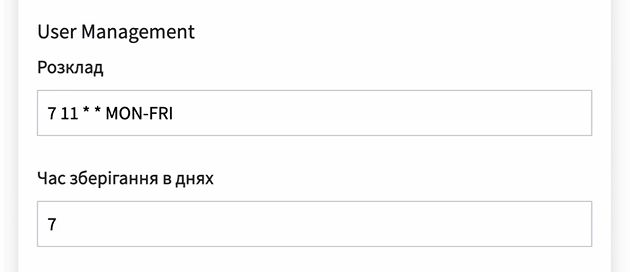
Configure the schedule for the User Management component and set the backup retention time in days:
-
In the
Schedulefield, enter, for example, the following value:7 11 * * MON-FRI. Use a space as a separator.This means that a backup for the user-management component will be created every day from Monday to Friday at 11:07 UTC time (13:07 Kyiv time).
-
In the
Retention time (days)field, enter, for example, the following value:7. This means that the backup will be stored in the repository for 7 days.
-
-
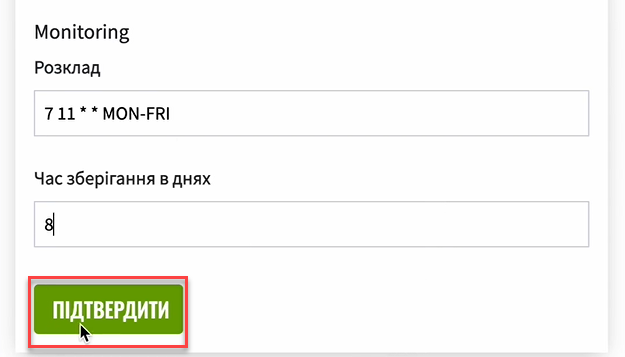
Set up the schedule for the Monitoring component and specify the backup retention period in days:
-
In the
Schedulefield, enter, for example, the following value:7 11 * * MON-FRI. Use a space as a separator.This means that a backup for the monitoring component will be created every day from Monday to Friday at 11:07 UTC time (13:07 Kyiv time).
-
In the
Retention time (days)field, enter, for example, the value 8. This means that the backup will be stored in the repository for 8 days
-
-
Click
Confirmto save the changes.As a result, a request for update with the status
Newwill be generated. -
Go back to the Platform management section, scroll down the page, and find the
Update requestssection.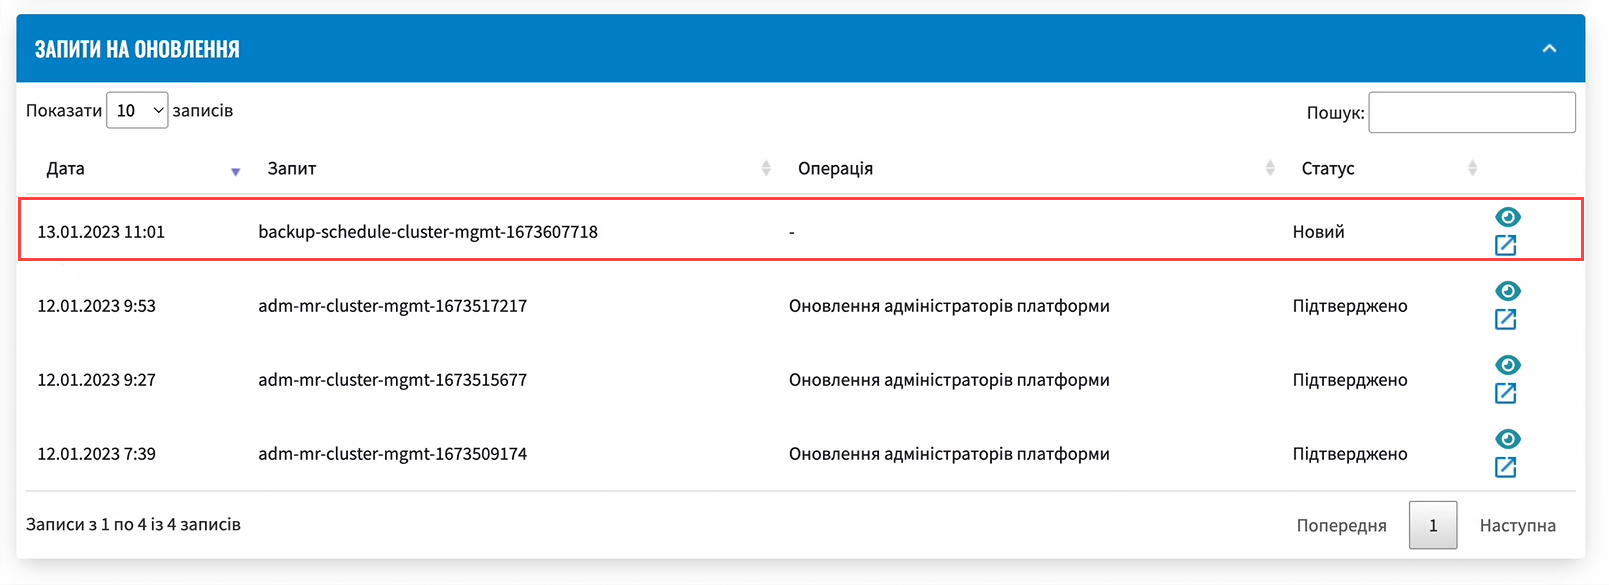
-
Open the generated request by clicking the view icon — 👁.
The proposed changes will be saved to the values.yaml configuration file in the cluster-mgmt repository upon confirmation. -
In the new window, compare the two versions of the changes, make sure the data you entered is correct, and click
Confirm. You can also reject the changes to the configuration immediately by clickingReject.The comparison window allows you to conveniently check the two versions of the changes: the current one (on the left) and the new one (on the right). 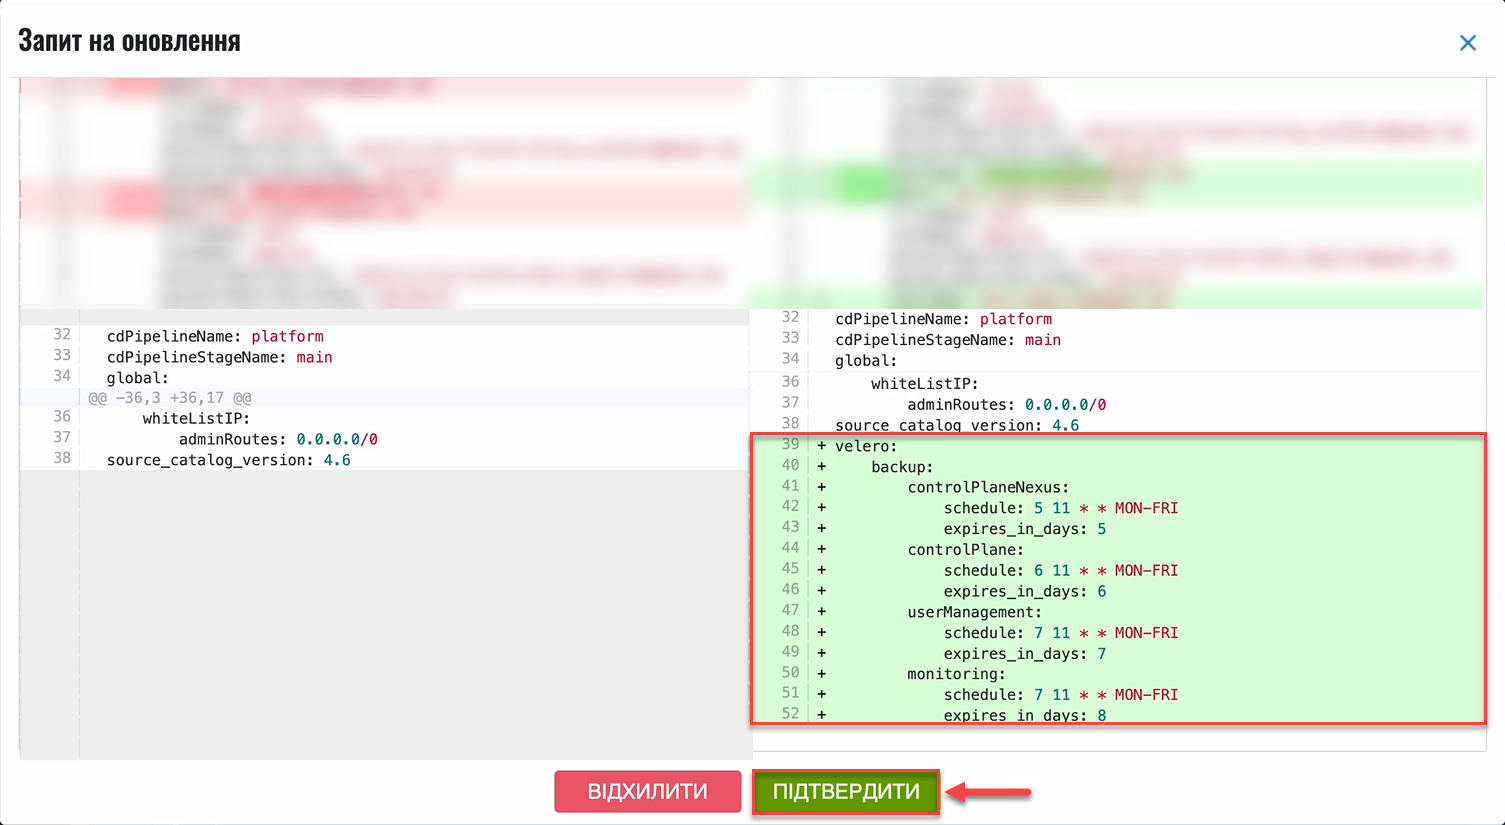
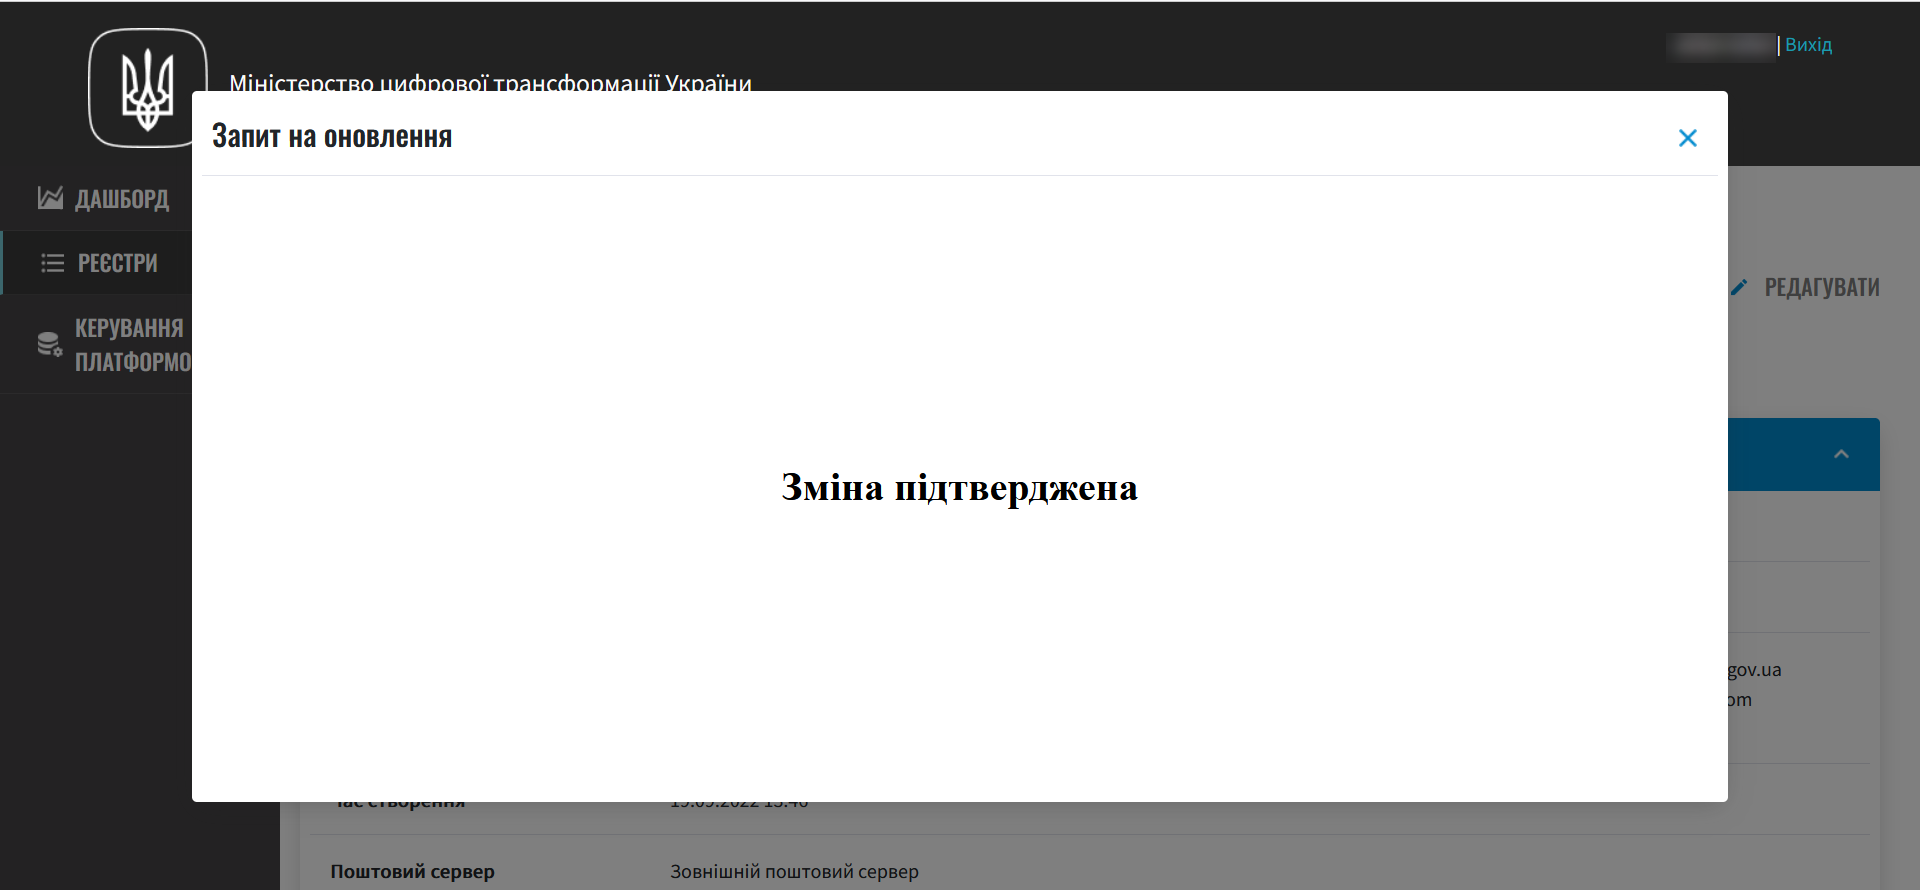
As a result, the request will change the state to
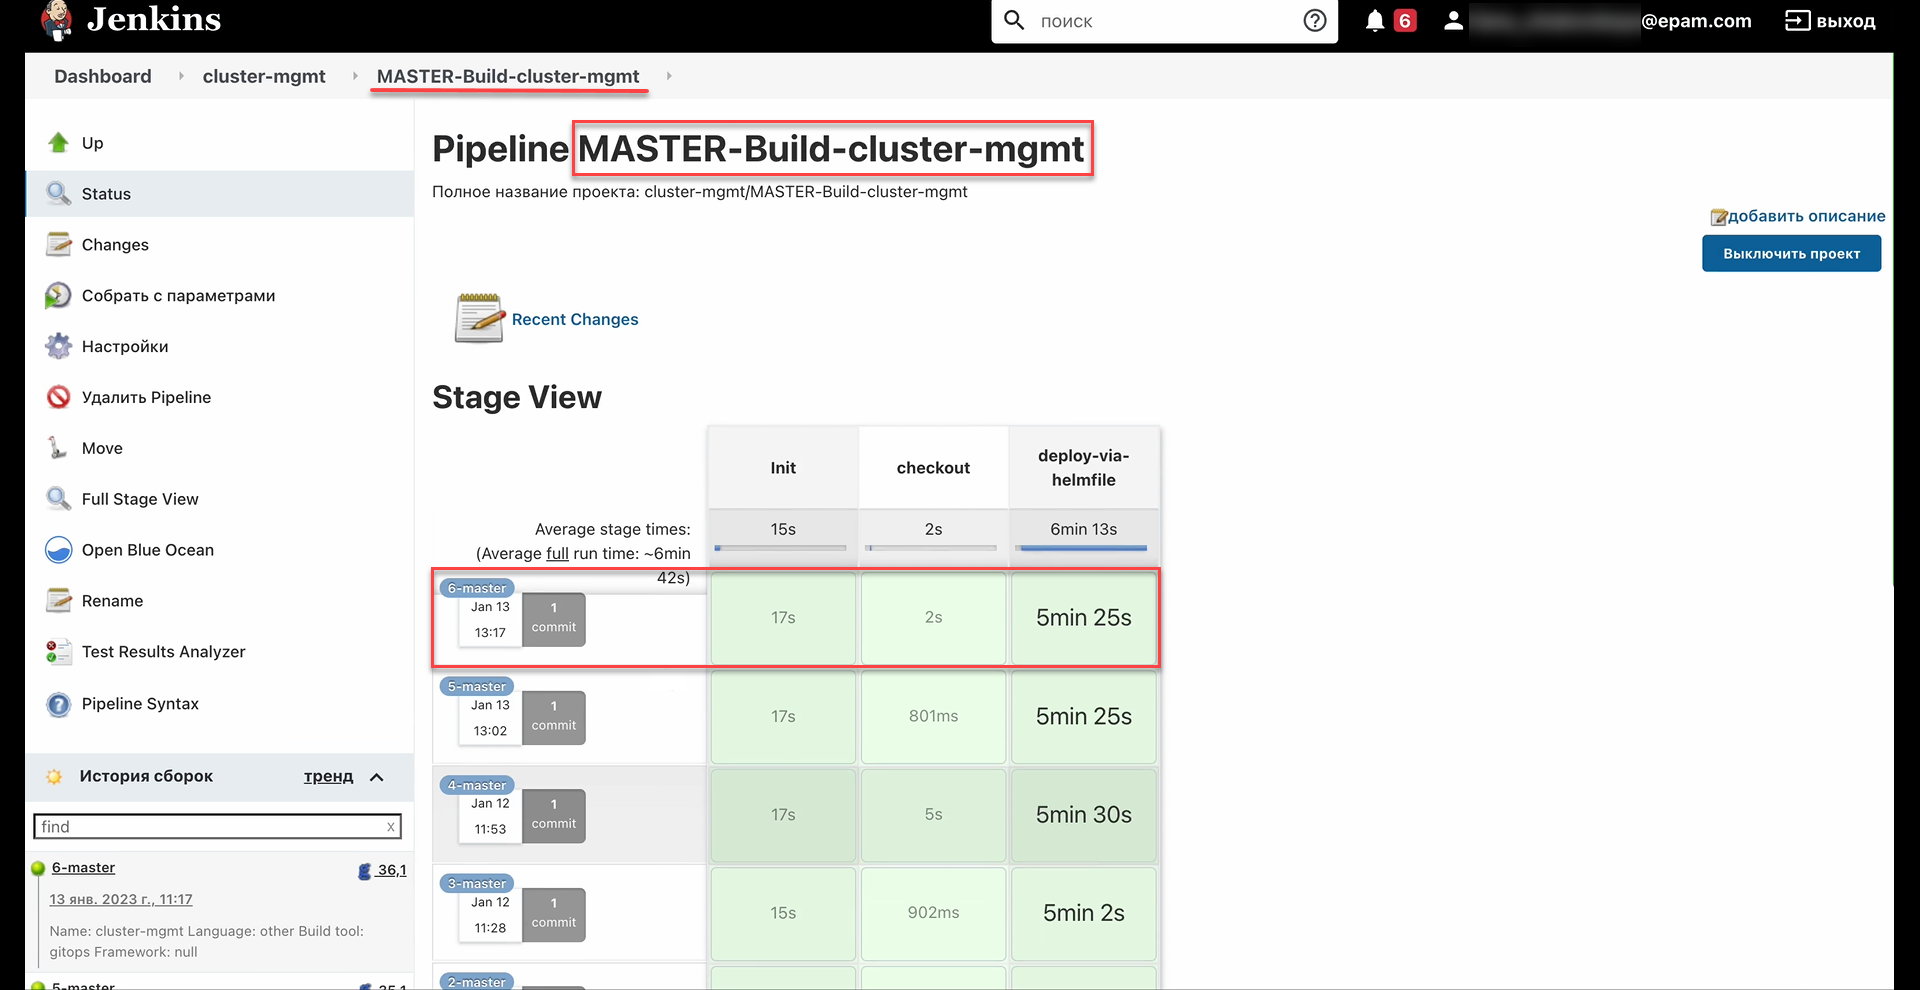
confirmed. At the specified time, theMASTER-Build-cluster-mgmtJenkins pipeline will be triggered. It applies the parameters of the specified configuration and creates backups in the backup repository. -
Wait until the code build is completed. This may take a few minutes.
You can check the current status and execution result by clicking the
CIlink on the interface.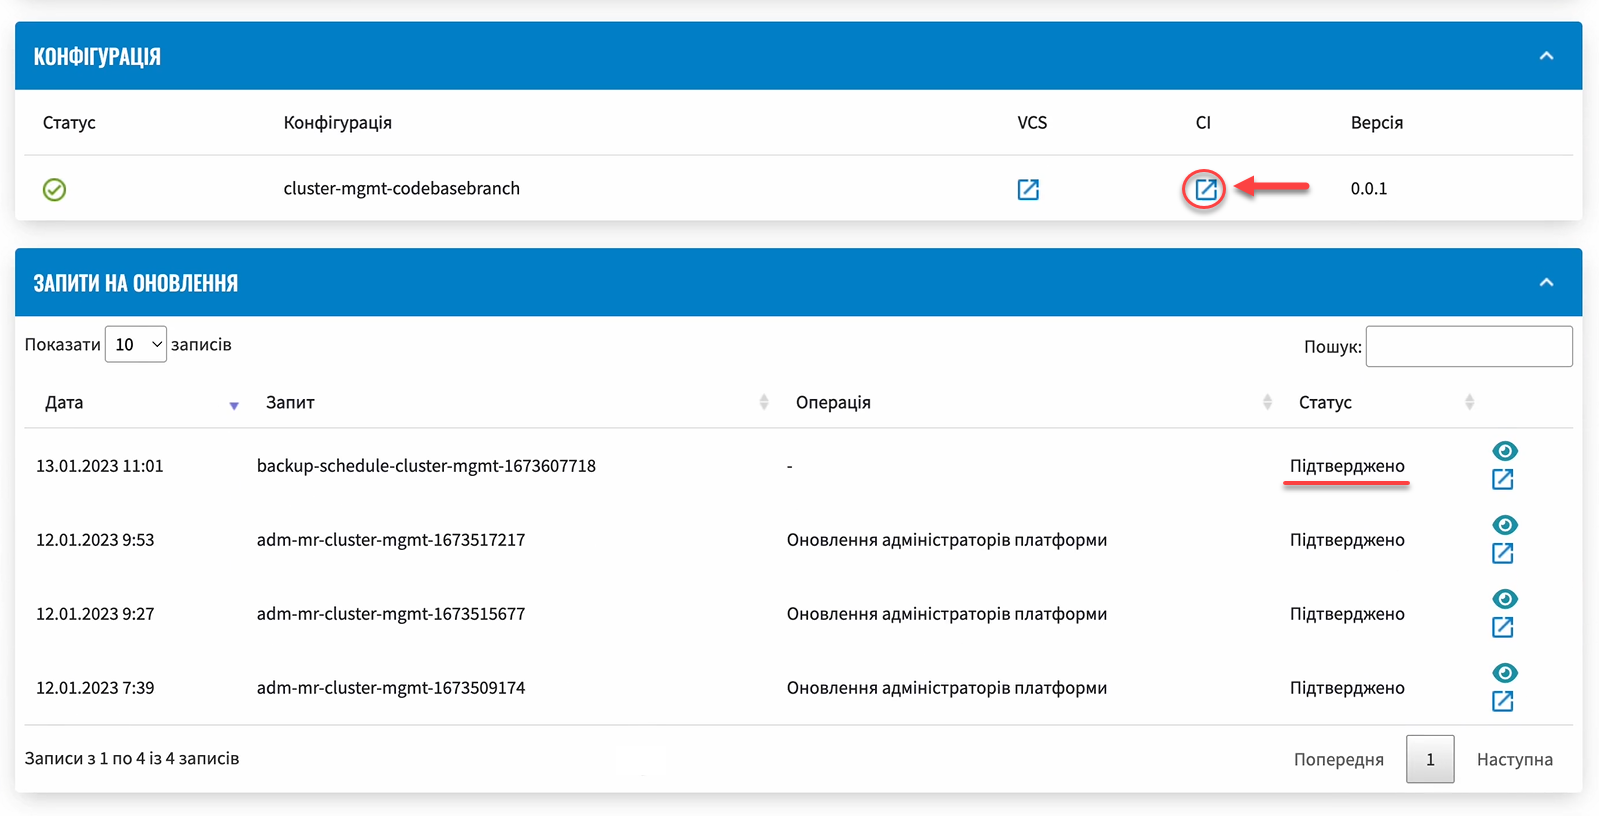
3. Checking the created backups
At the specified date and time, backups should be created according to the schedule specified in the configuration (see — Setting up a schedule_).
- You can check this as follows:
-
-
Log in to the Openshift console as the Platform administrator.
-
Obtain an API token for cluster access via
oc login:-
Click
Copy login command.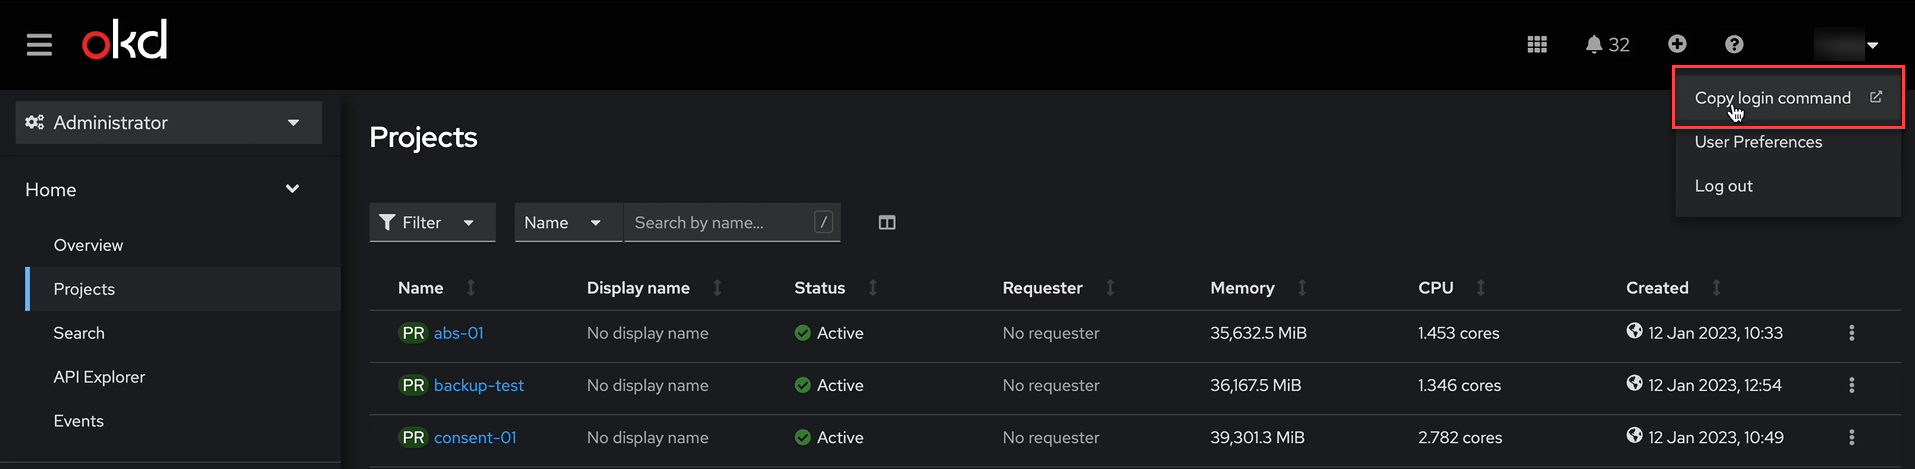
-
Log in through Keycloak.
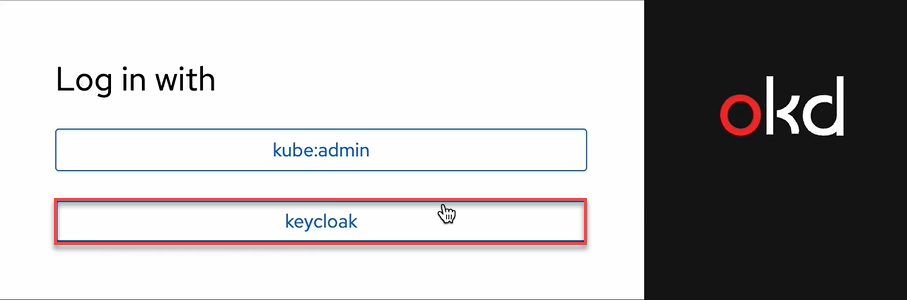
-
Click
Display Token.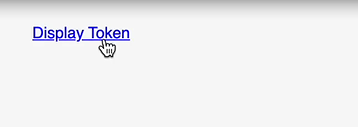
-
Copy the
oc loginAPI token.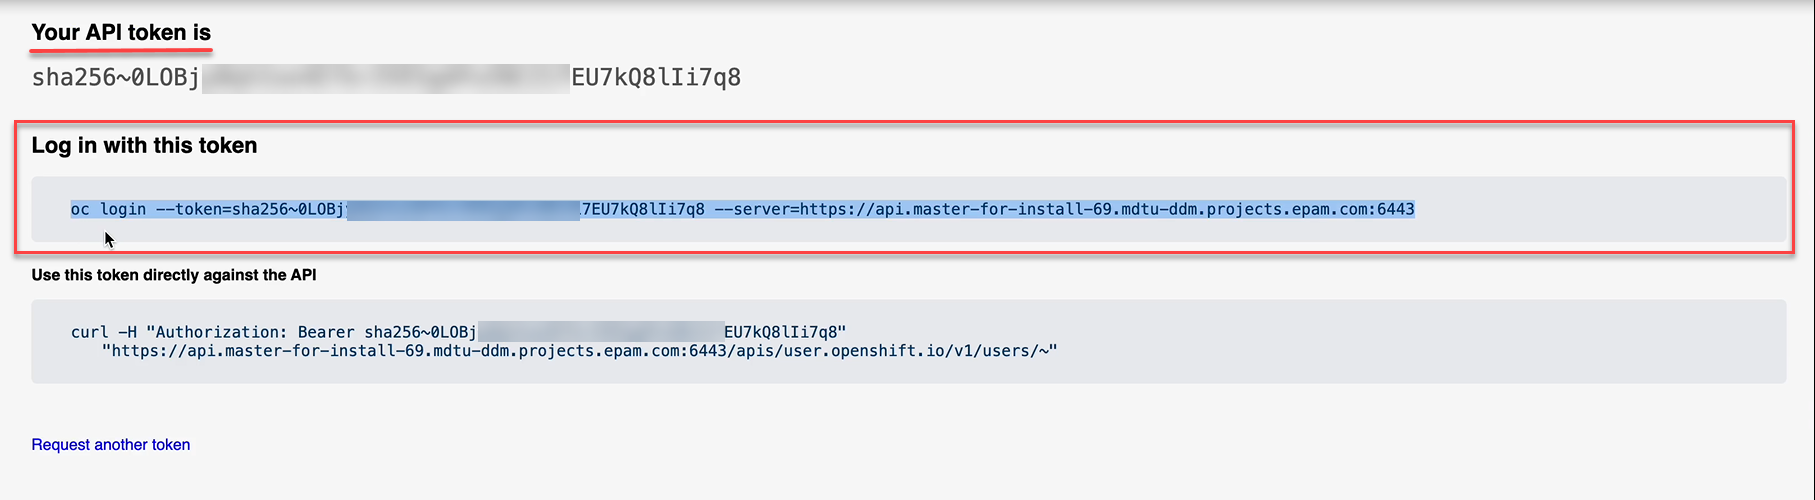
-
-
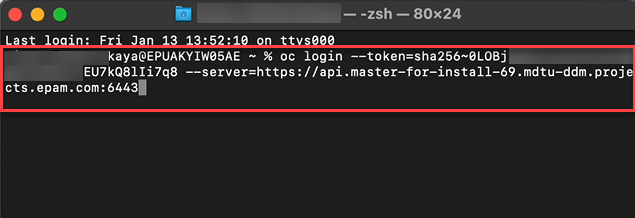
Open a terminal/console, paste the obtained token, and execute the login.
-
Retrieve the list of backups using the command:
velero get backupsAs a result, you will get a list of backups for central components, including their names, statuses, creation dates and times, as well as the retention period for these backups in the repository.
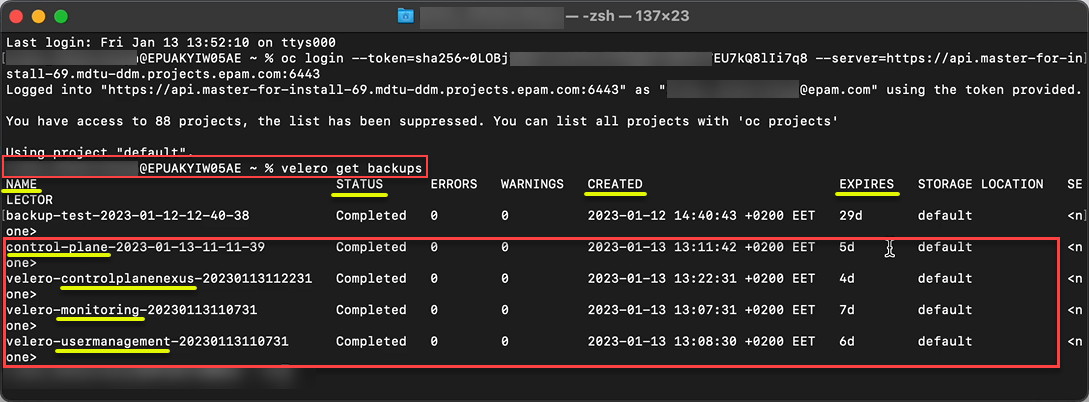
Note that the backup creation time is shown in the target time zone (UTC+2, Kyiv time), not the server time (UTC).
-
| After the retention period expires, the backup system deletes outdated backups. |