Integration with external services using the REST connector
| 🌐 This document is available in both English and Ukrainian. Use the language toggle in the top right corner to switch between versions. |
You can use the REST connector to connect to secured services or systems outside the Platform cluster.
This guide describes the steps required to set up the connector.
1. Creating a Service Entry
Before a request for an external resource can go beyond the Platform cluster, you need to create a Service Entry at the registry level to serve as an entry point for the outbound traffic.
|
A Service Entry is created automatically after the registry administrator configures the integration in the Control Plane admin console. Once the changes are applied to the registry configuration and the MASTER-Build- For details on Control Plane settings, see Configuring integrations with external systems in Control Plane. |
|
For registry versions 1.9.2 or earlier, a Service Entry is created automatically after the publication pipeline is launched and changes to the registry regulations are deployed. |
You can check whether the Service Entry was created using the ServiceEntries list in the OpenShift console.
-
Sign in to the OpenShift web console.
-
Go to Home > API Explorer.
-
In the Filter by kind search field, search for
ServiceEntryand select the corresponding service.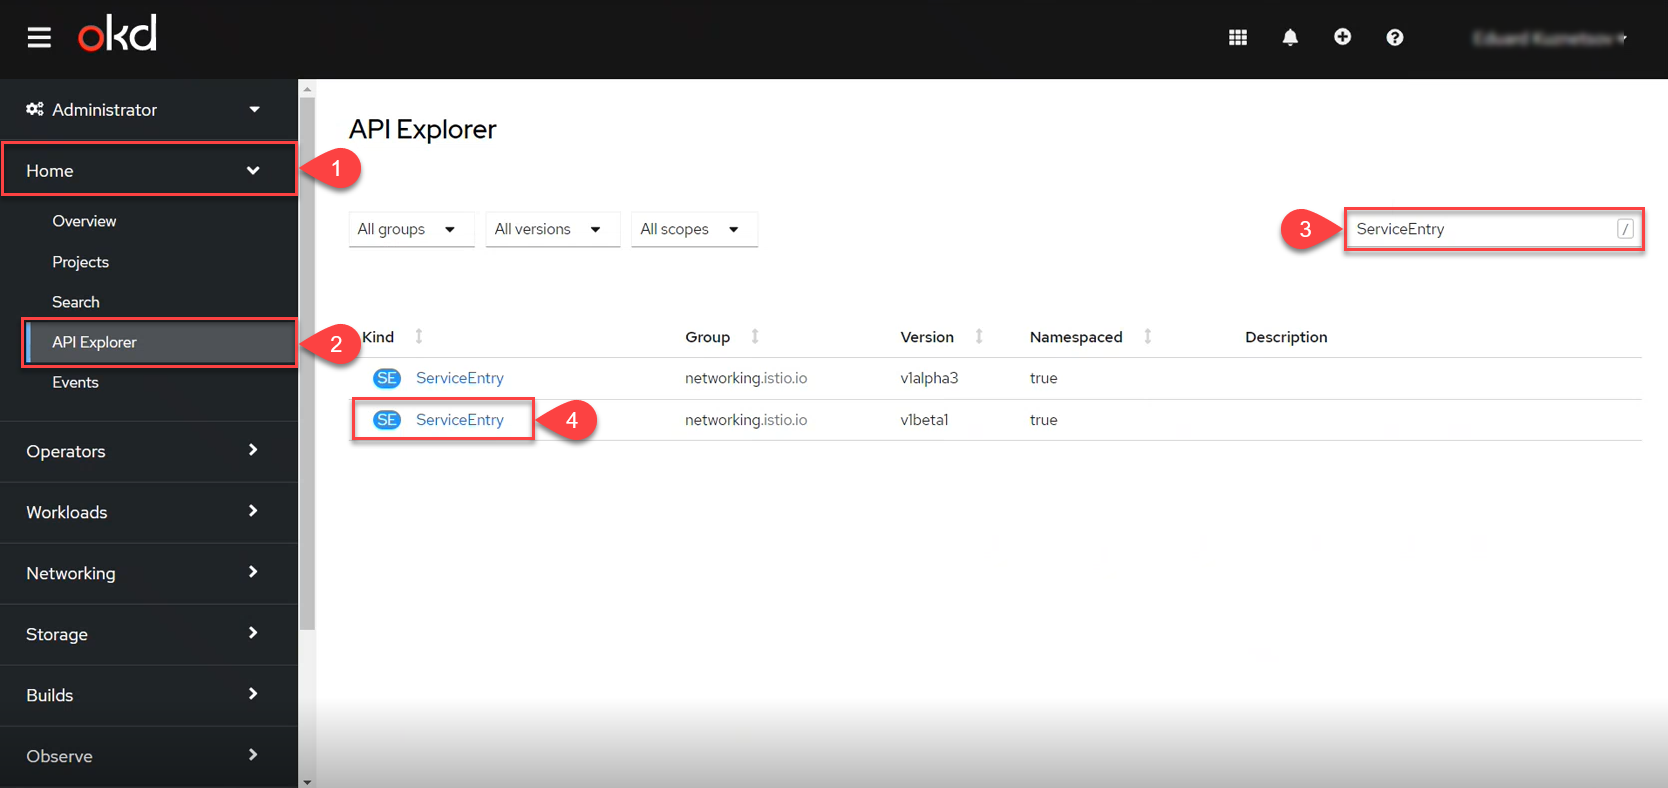
-
From the Project dropdown list, select the registry that will use the external service.
-
Open the Instances tab and find the required
ServiceEntry.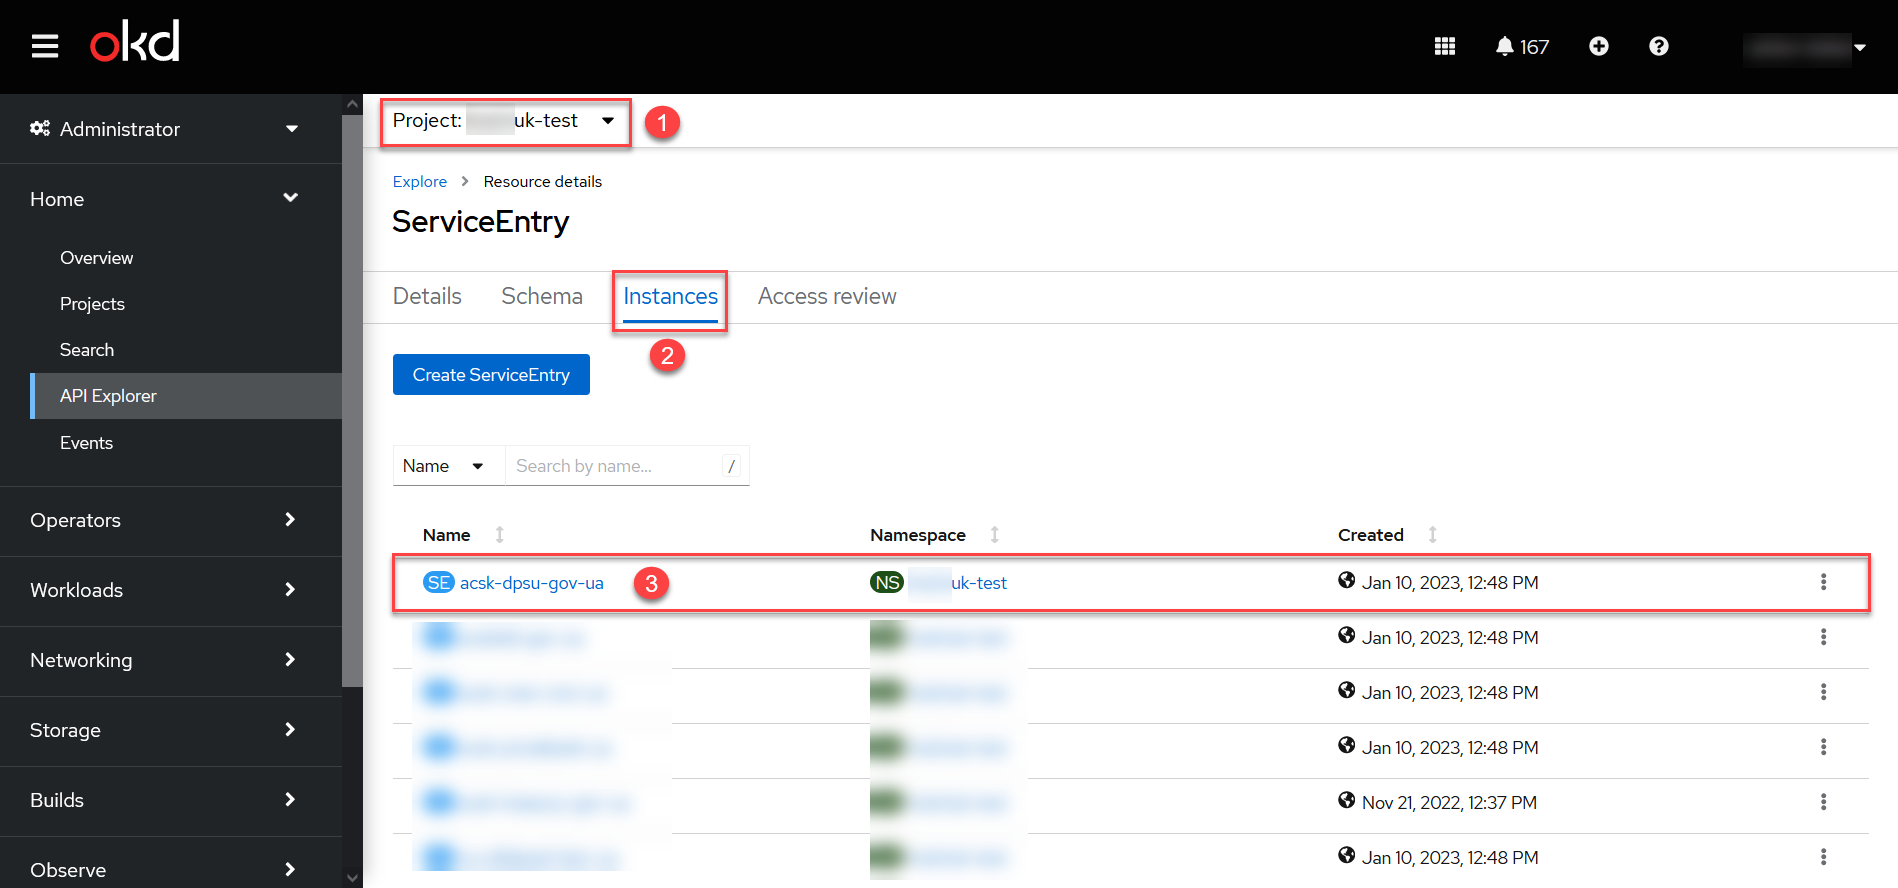
2. Creating a secret for service authorization
|
For registry versions 1.9.3 or later, there is no need to create secrets manually in Openshift. The secrets (such as a token or password) are created automatically after the external system interaction settings are applied via the Control Plane admin console. Once the changes are applied to the registry configuration and the MASTER-Build- For details on configuring interactions with external systems, see Configuring integrations with external systems in Control Plane. |
To create the secret manually, perform these steps:
-
Sign in to the OpenShift web console.
-
Go to Workloads > Secrets and select your project from the Project dropdown list.
-
Select
Create> Key/value secret.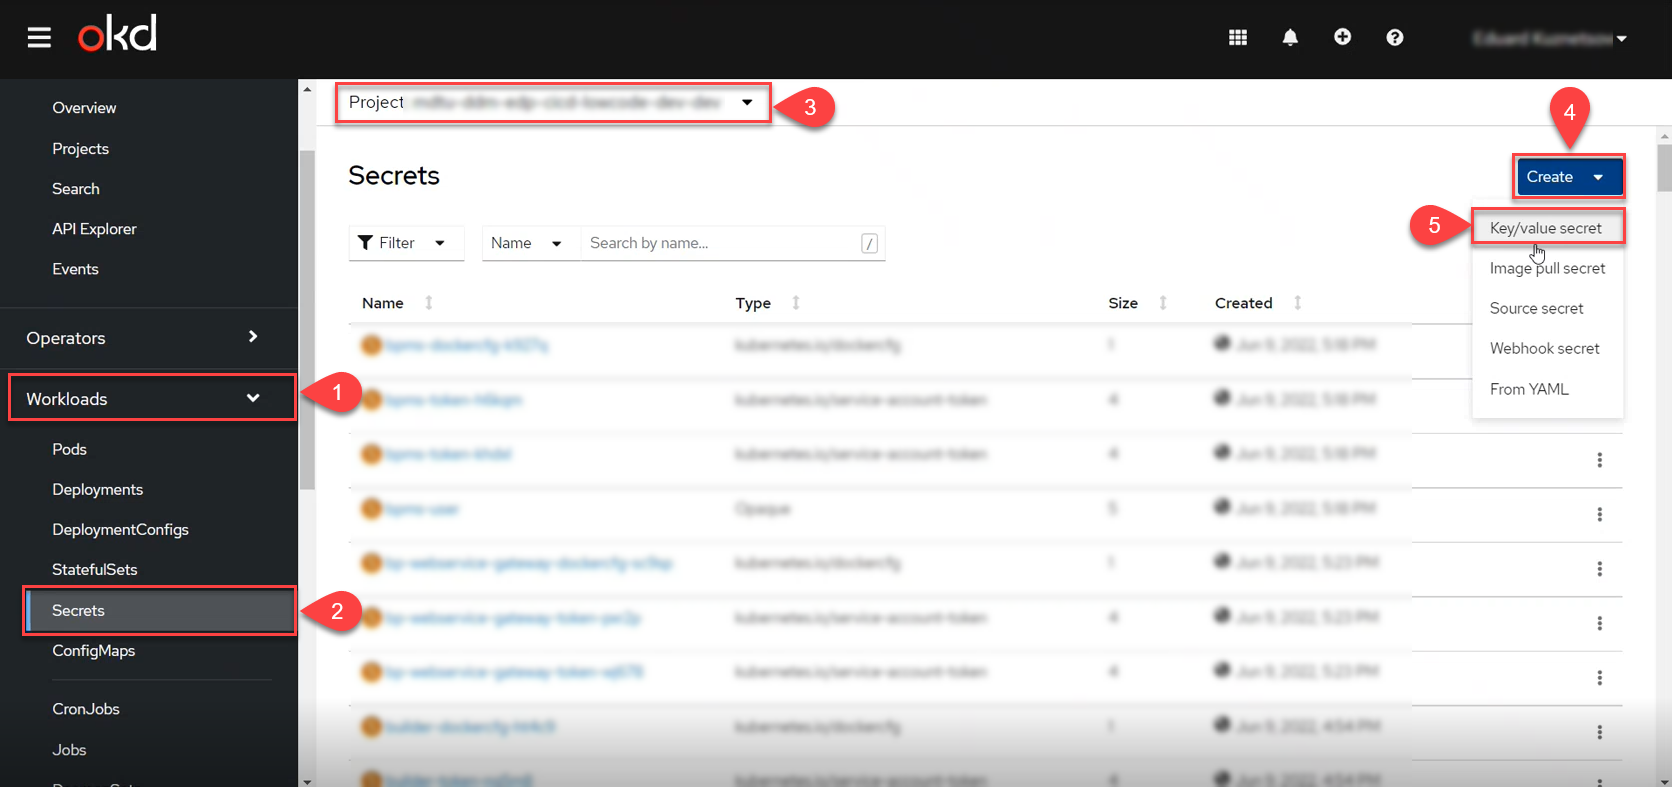
-
Enter the name of the secret into the Secret name field. For example:
httpbin-basic-authentication.You will need the name of the secret for the secret-nameparameter when configuring the regulations. For details, jump to Configuring the regulations.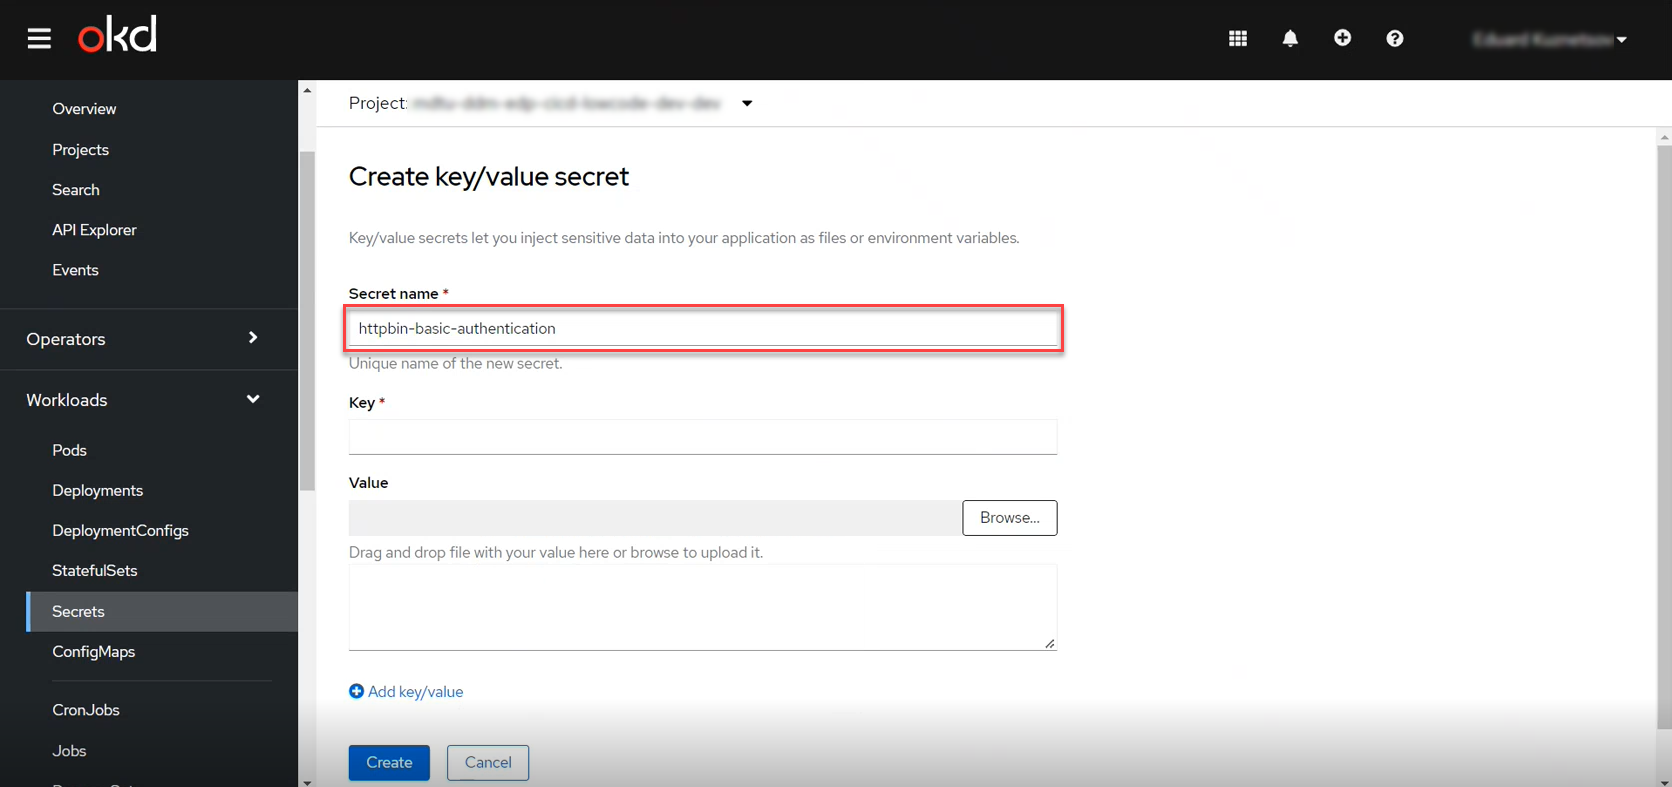
-
Specify the type of service authentication to use:
-
For
BASICauthentication, add two Key parameters:-
username -
password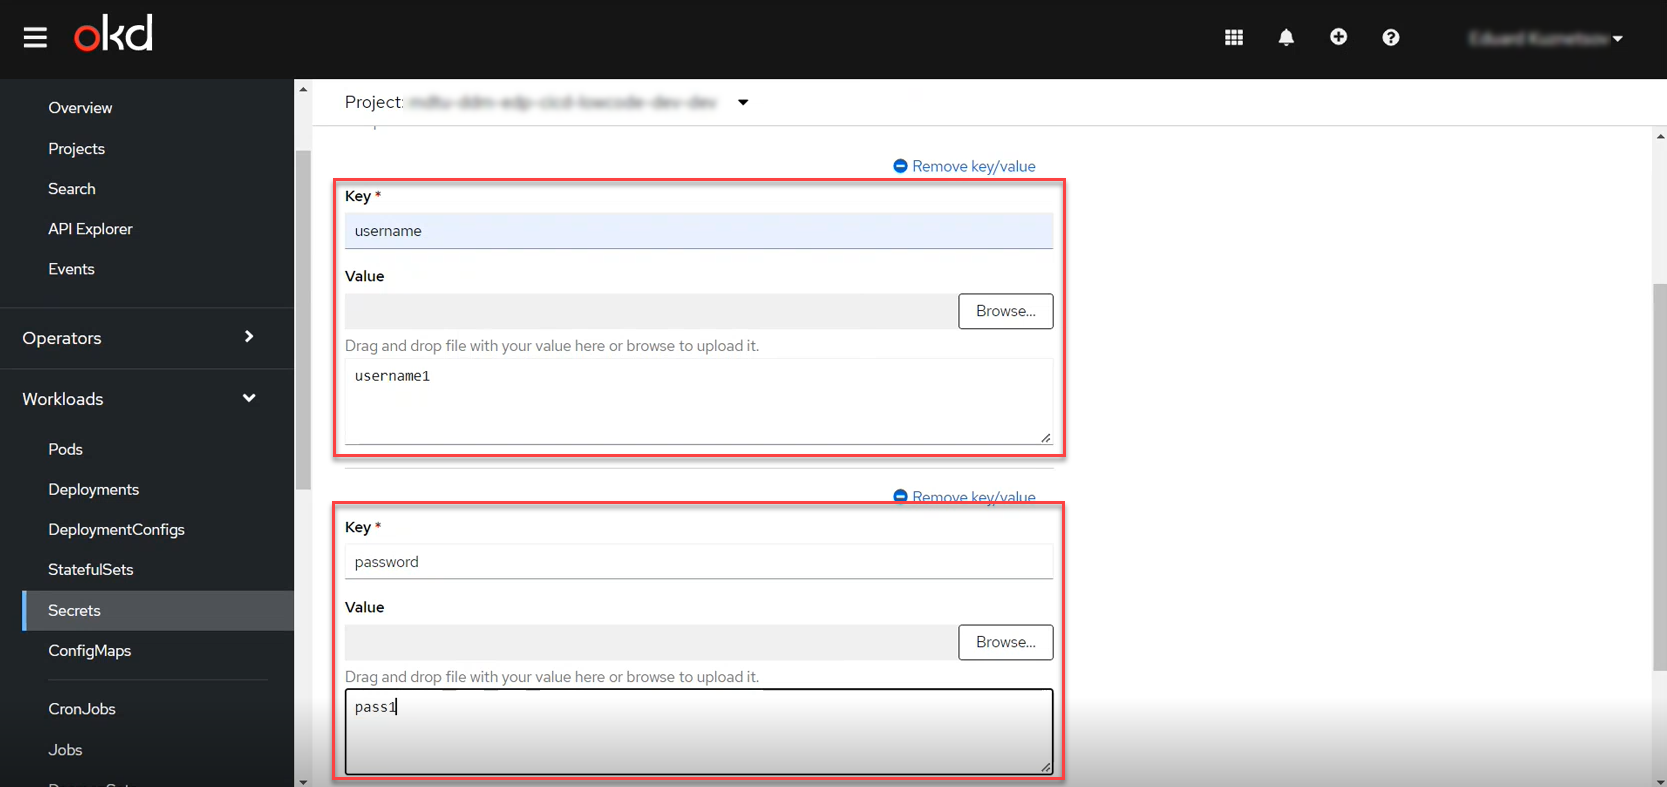
-
-
For
PARTNER_TOKENauthentication, add one Key parameter:-
token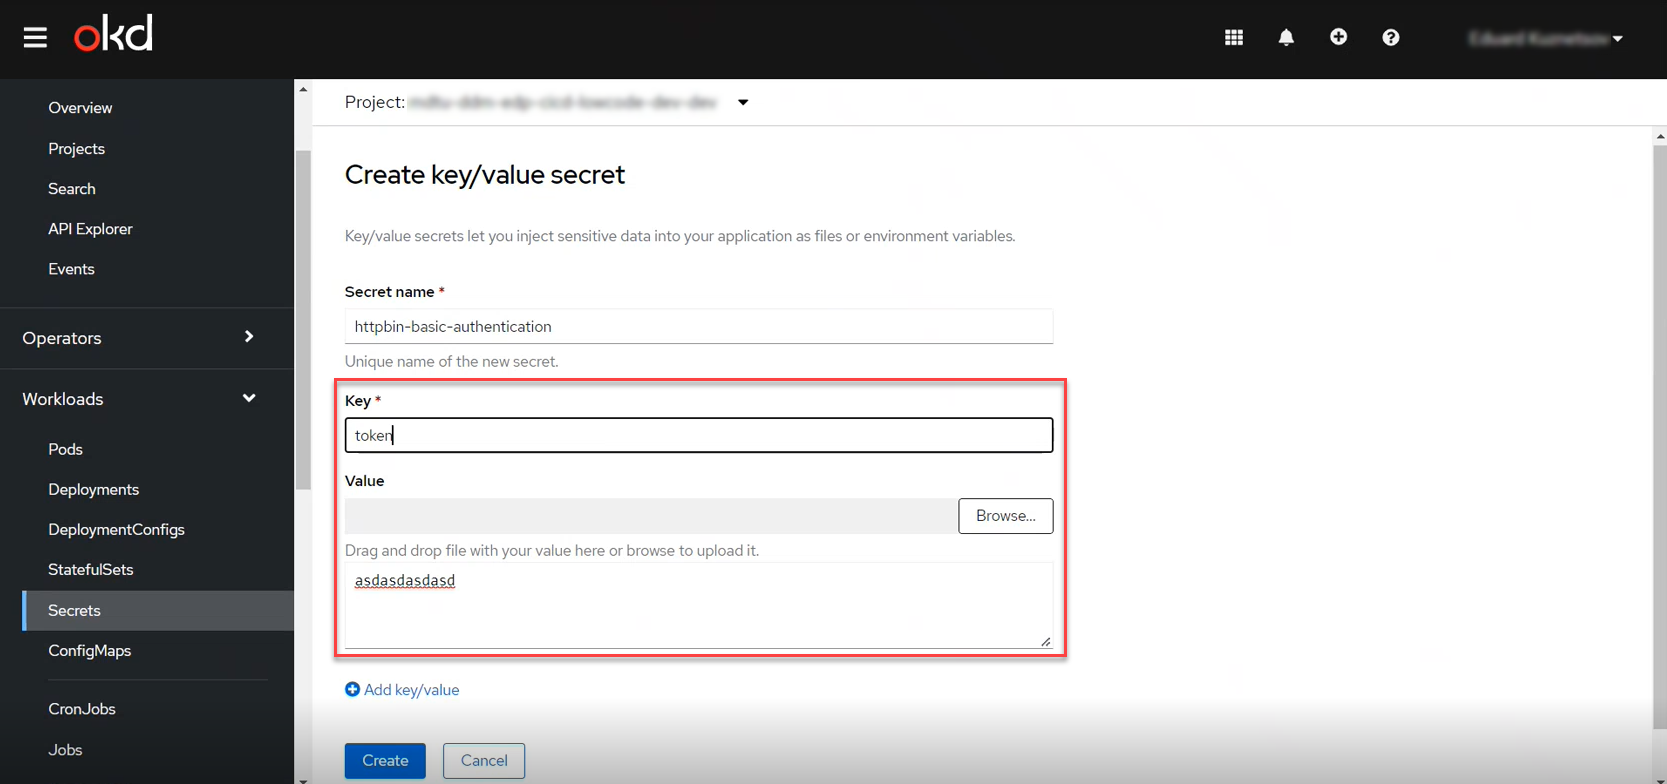
-
-
-
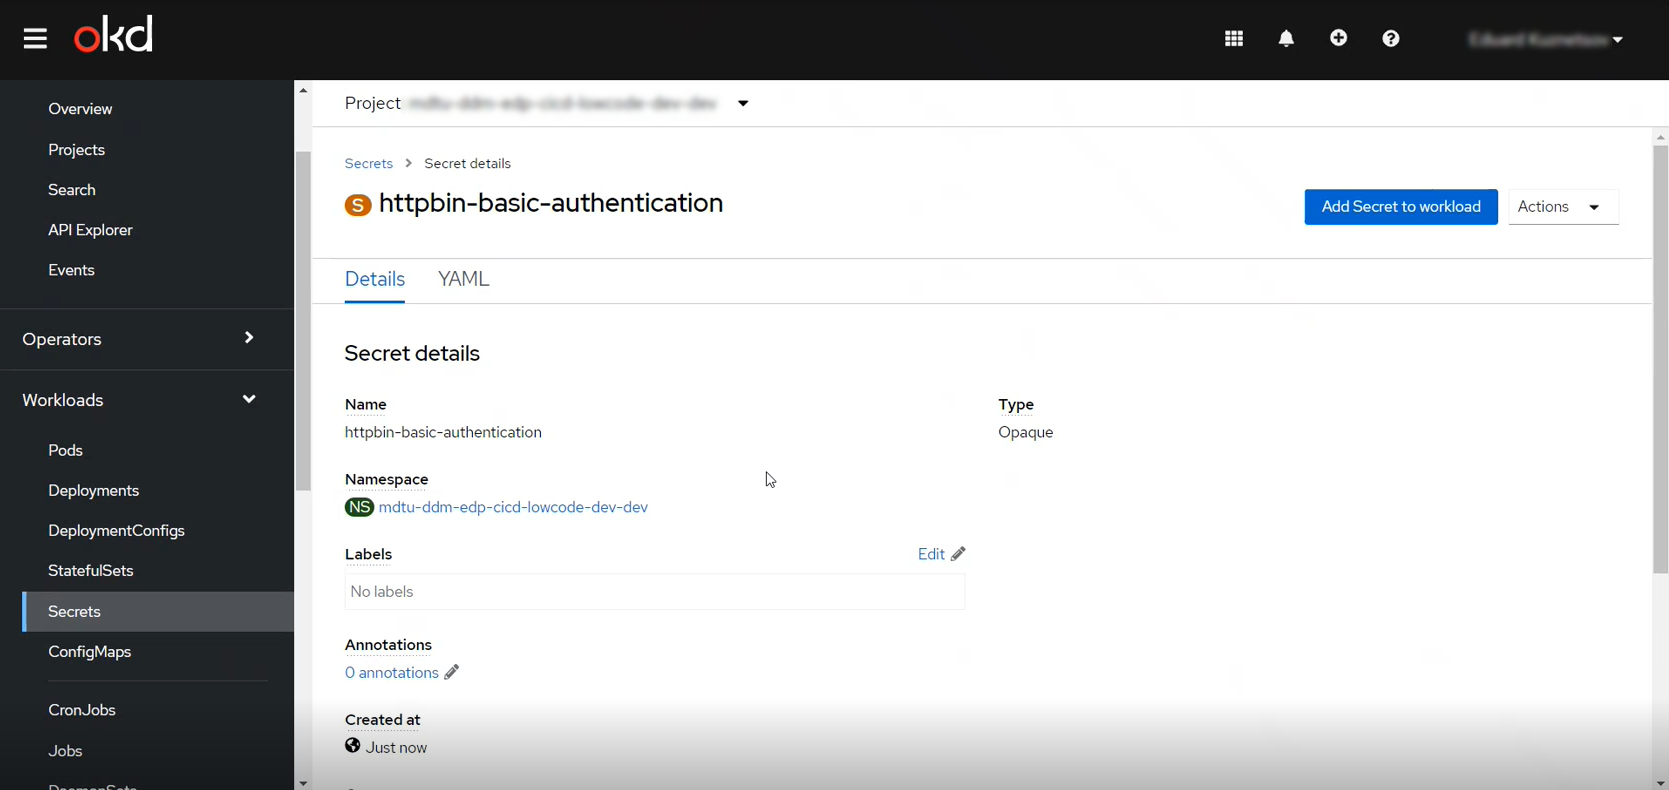
Once the settings are applied successfully, the secret is created. You can use this secret for authorization in the external service.
3. Configuring the regulations
|
For registry versions 1.9.3 or later, the main integration settings are performed at the registry instance level in the Control Plane admin console. For details, see Configuring integrations with external systems in Control Plane.
Example 1. external-systems config in the bp-trembita/configuration.yml file for registries version 1.9.3 or later
|
For registries version 1.9.2 or earlier, perform the configuration at the registry regulations level.
To do this, you need to configure the external-systems block in the bp-trembita/configuration.yml file of a corresponding registry.
BASIC authenticationexternal-systems:
httpbin:
url: http://httpbin.org/
methods:
get:
path: /get
method: GET
auth:
type: BASIC
secret-name: httpbin-basic-authentication
|
PARTNER_TOKEN authenticationexternal-systems:
diia:
url: http://api2.diia.gov.ua
methods:
get-damaged-property:
path: /api/v1/public-service/damaged-property/filtered
method: GET
auth:
type: PARTNER_TOKEN
secret-name: secret2
partner-token-auth-url: https://api2t.diia.gov.ua/api/v1/auth/partner
token-json-path: $.token4. Modeling business processes using the "Connect to external system" delegate
To configure the delegate template in Camunda Modeler, perform these steps:
-
Open the business process modeling interface.
-
Create a Service Task.
-
In the settings panel on the right, click the
Open Catalogbutton and select the Connect to external system v2 delegate template from the list. ClickApplyto confirm your action.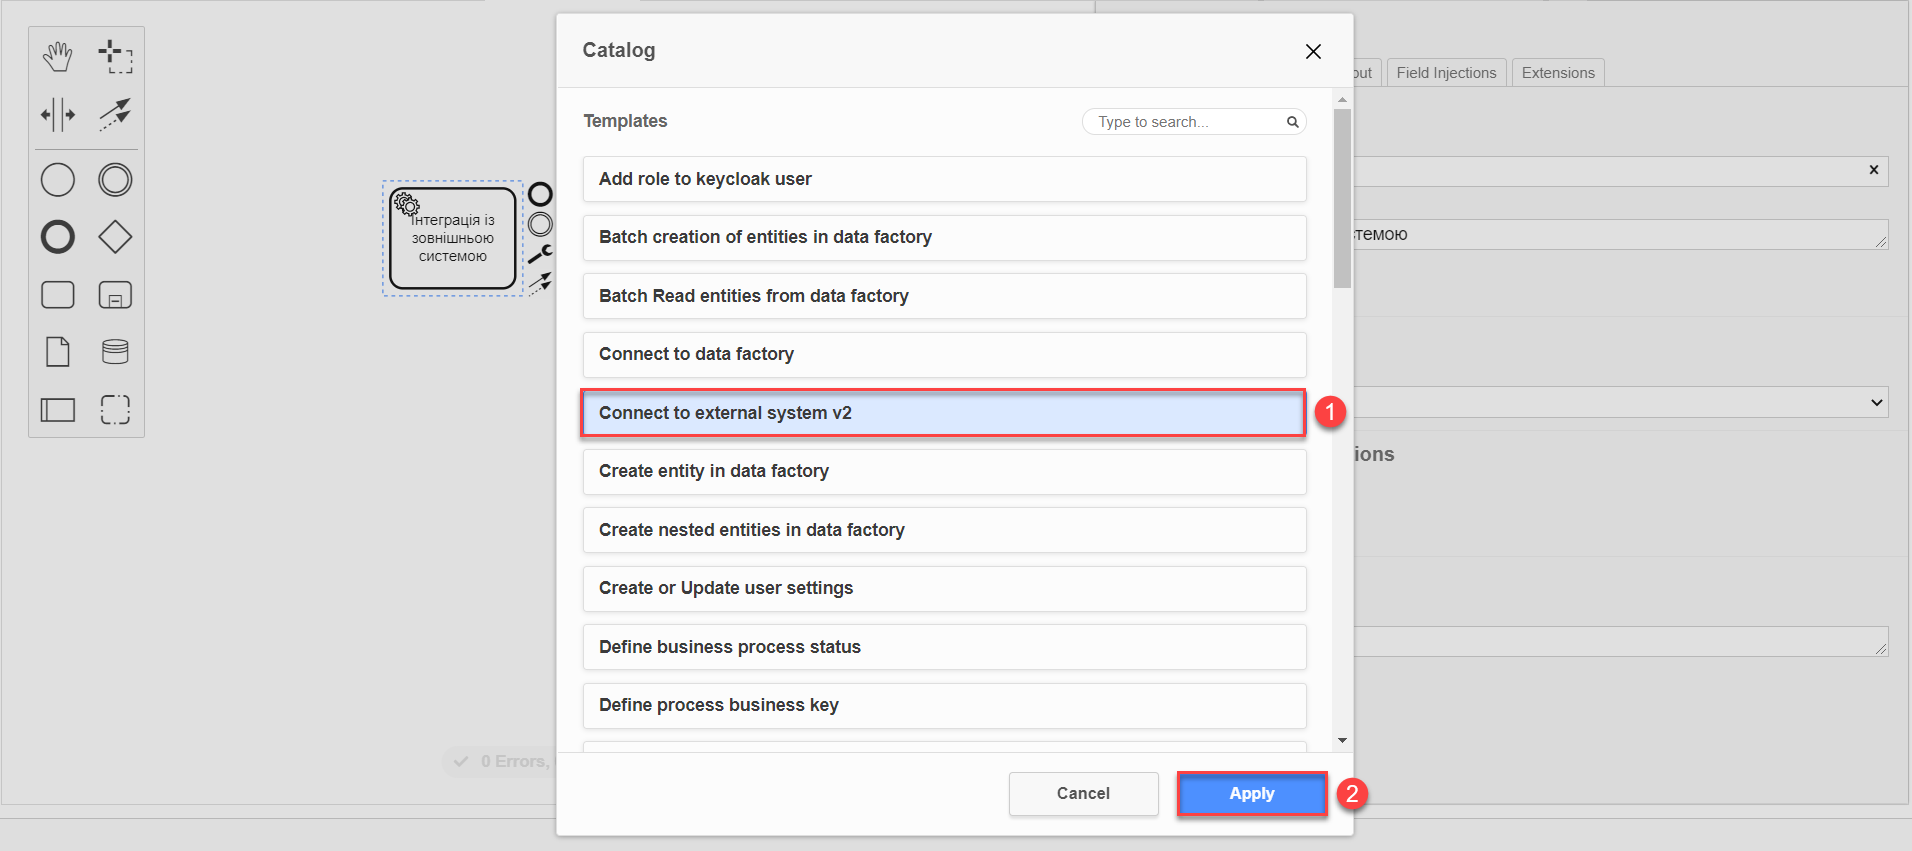
-
Configure the following options:
-
Name: Specify the task name. For example,
Create a GET request. -
Input Parameters:
-
Expand the External system name section and specify the name of the target external system:
-
Set the Local Variable Assignment toggle to On. This will allow creating a local variable for the method.
-
From the Variable Assignment Type dropdown list, select String or Expression.
-
In the Variable Assignment Value field, enter the name of the external system. For example,
httpbin.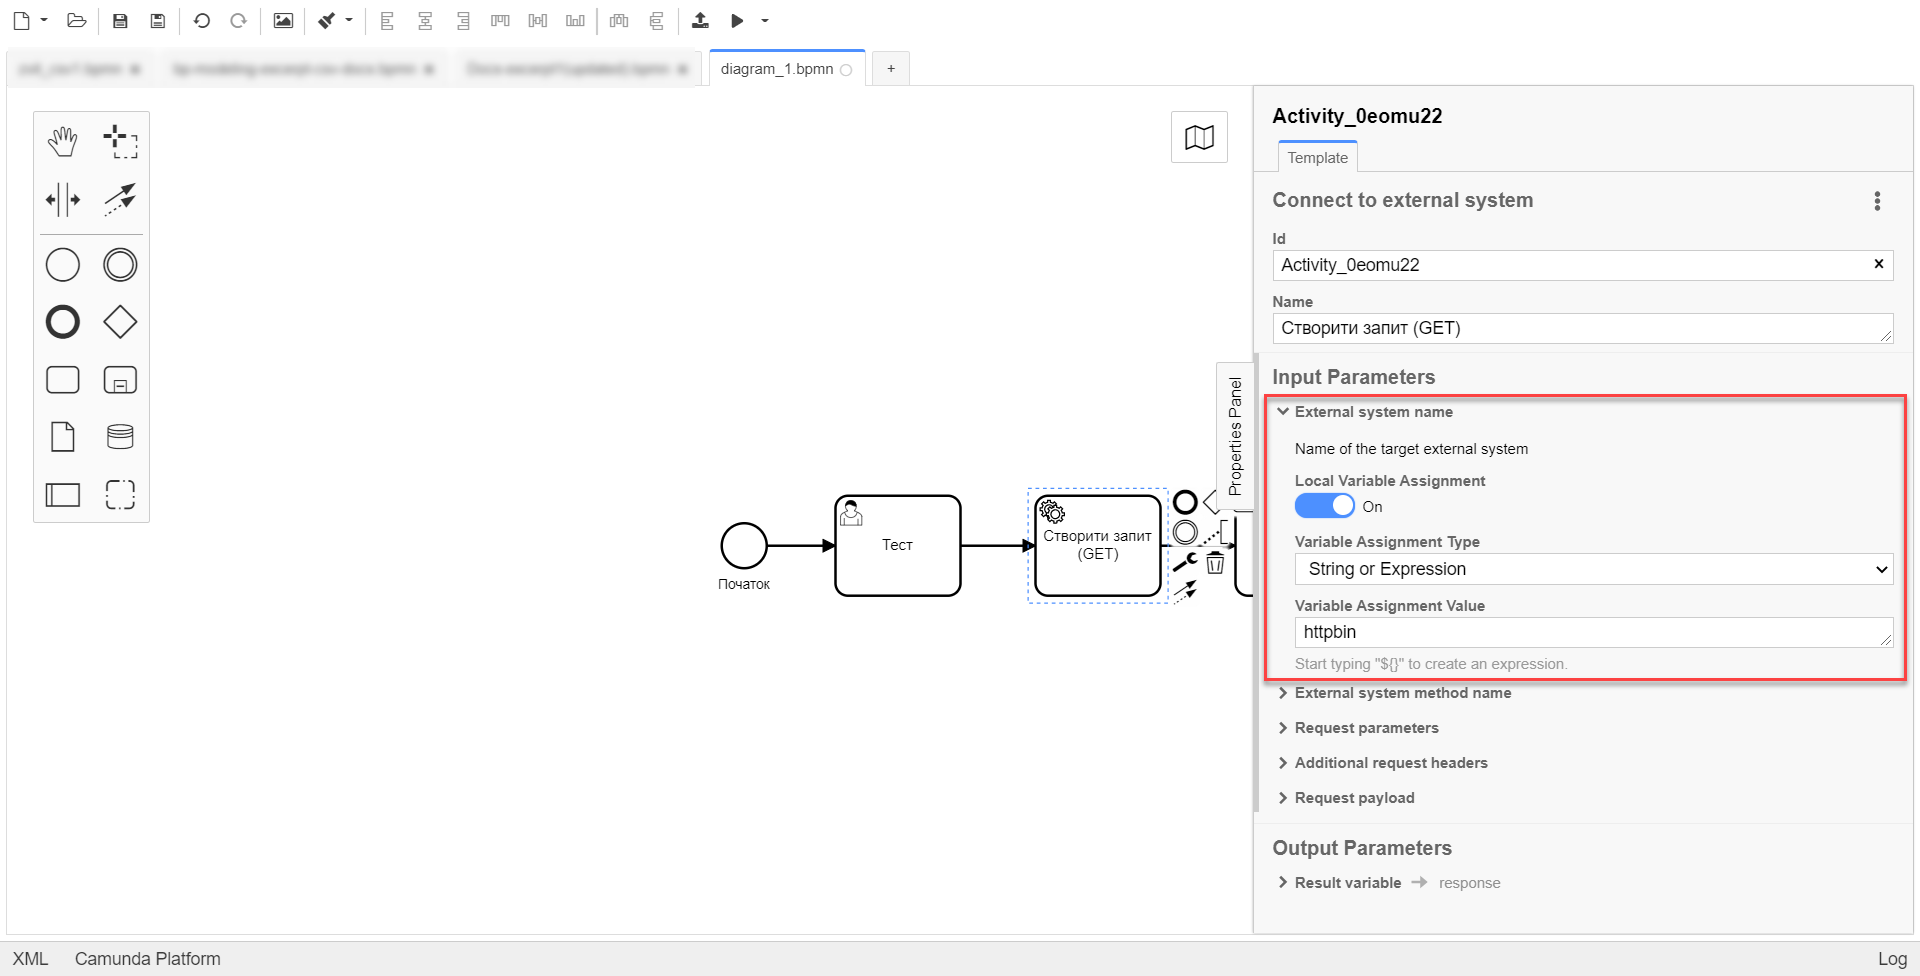
-
-
Expand the External system method name section and specify the HTTP method for interacting with the external system:
-
Set the Local Variable Assignment toggle to On. This will allow creating a local variable for the method.
-
From the Variable Assignment Type dropdown list, select String or Expression.
-
In the Variable Assignment Value field, enter the name of the method. For example,
get.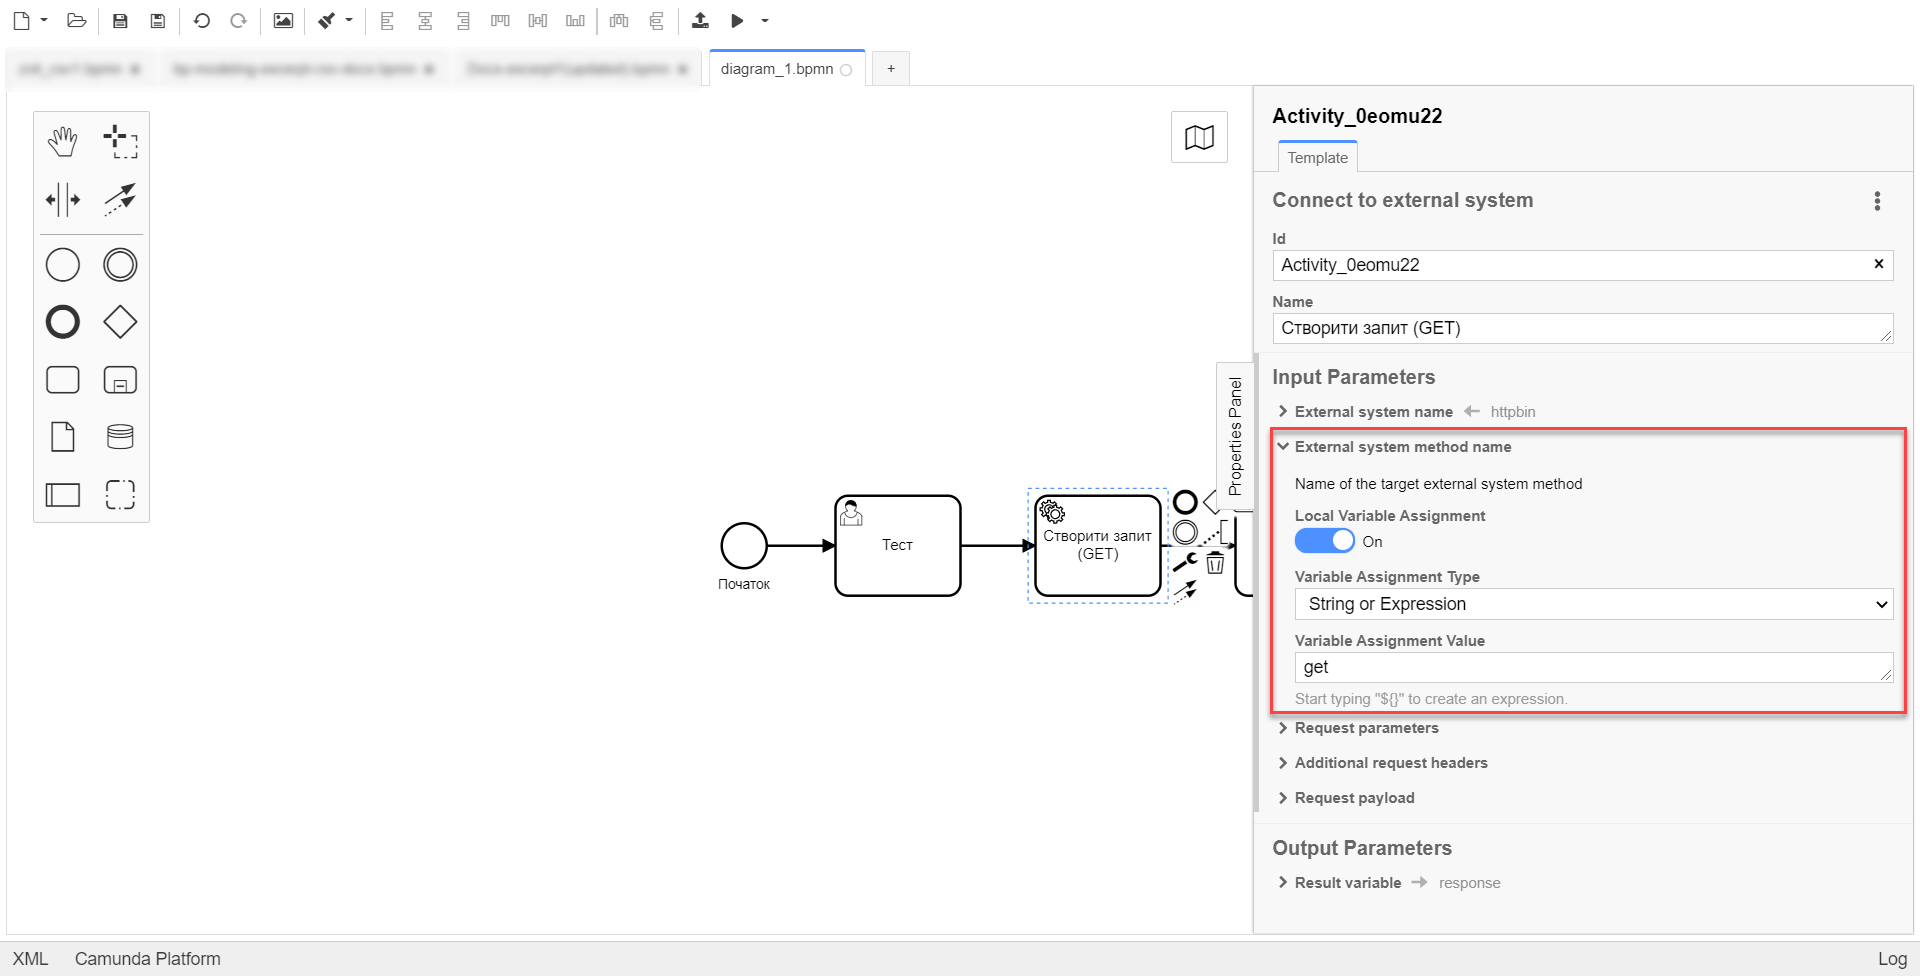
-
-
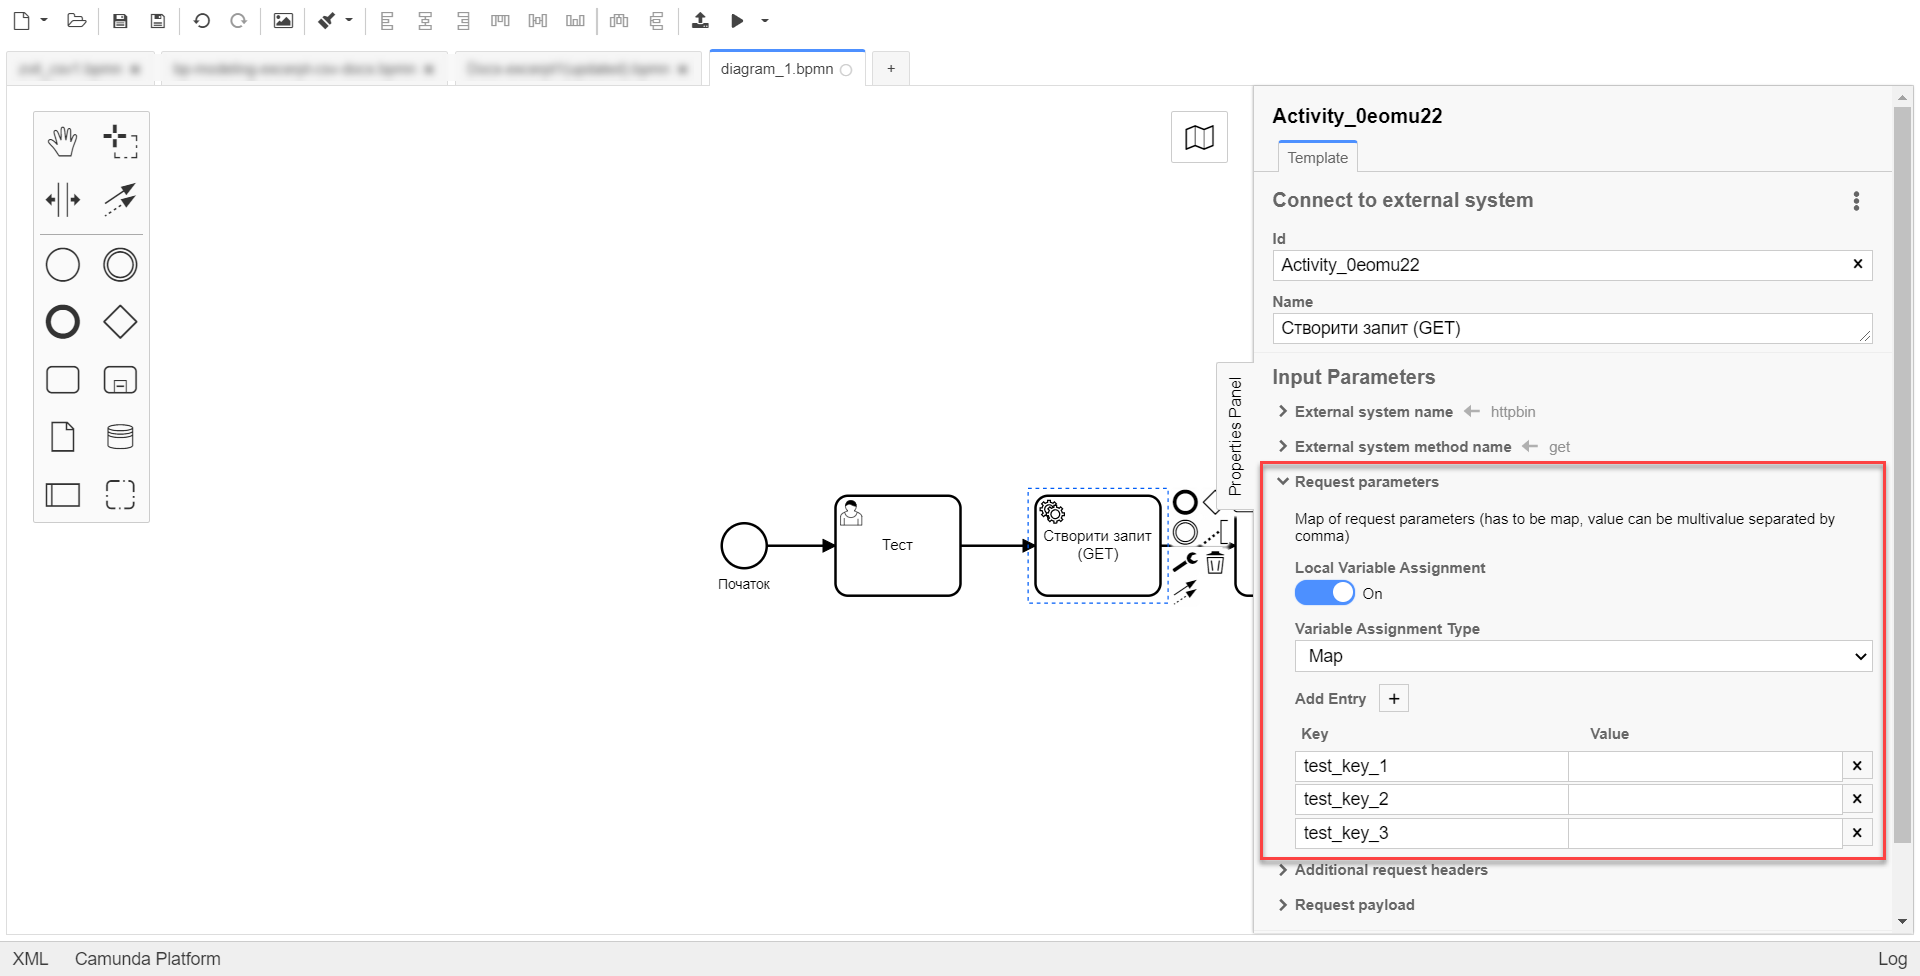
When using the GET method, expand the Request parameters section and specify the required request parameters:
-
Set the Local Variable Assignment toggle to On. This will allow creating a local variable for the method.
-
From the Variable Assignment Type dropdown list, select Map.
-
Key: Specify the request parameter key.
-
Value: Specify the request parameter value.
-
-
-
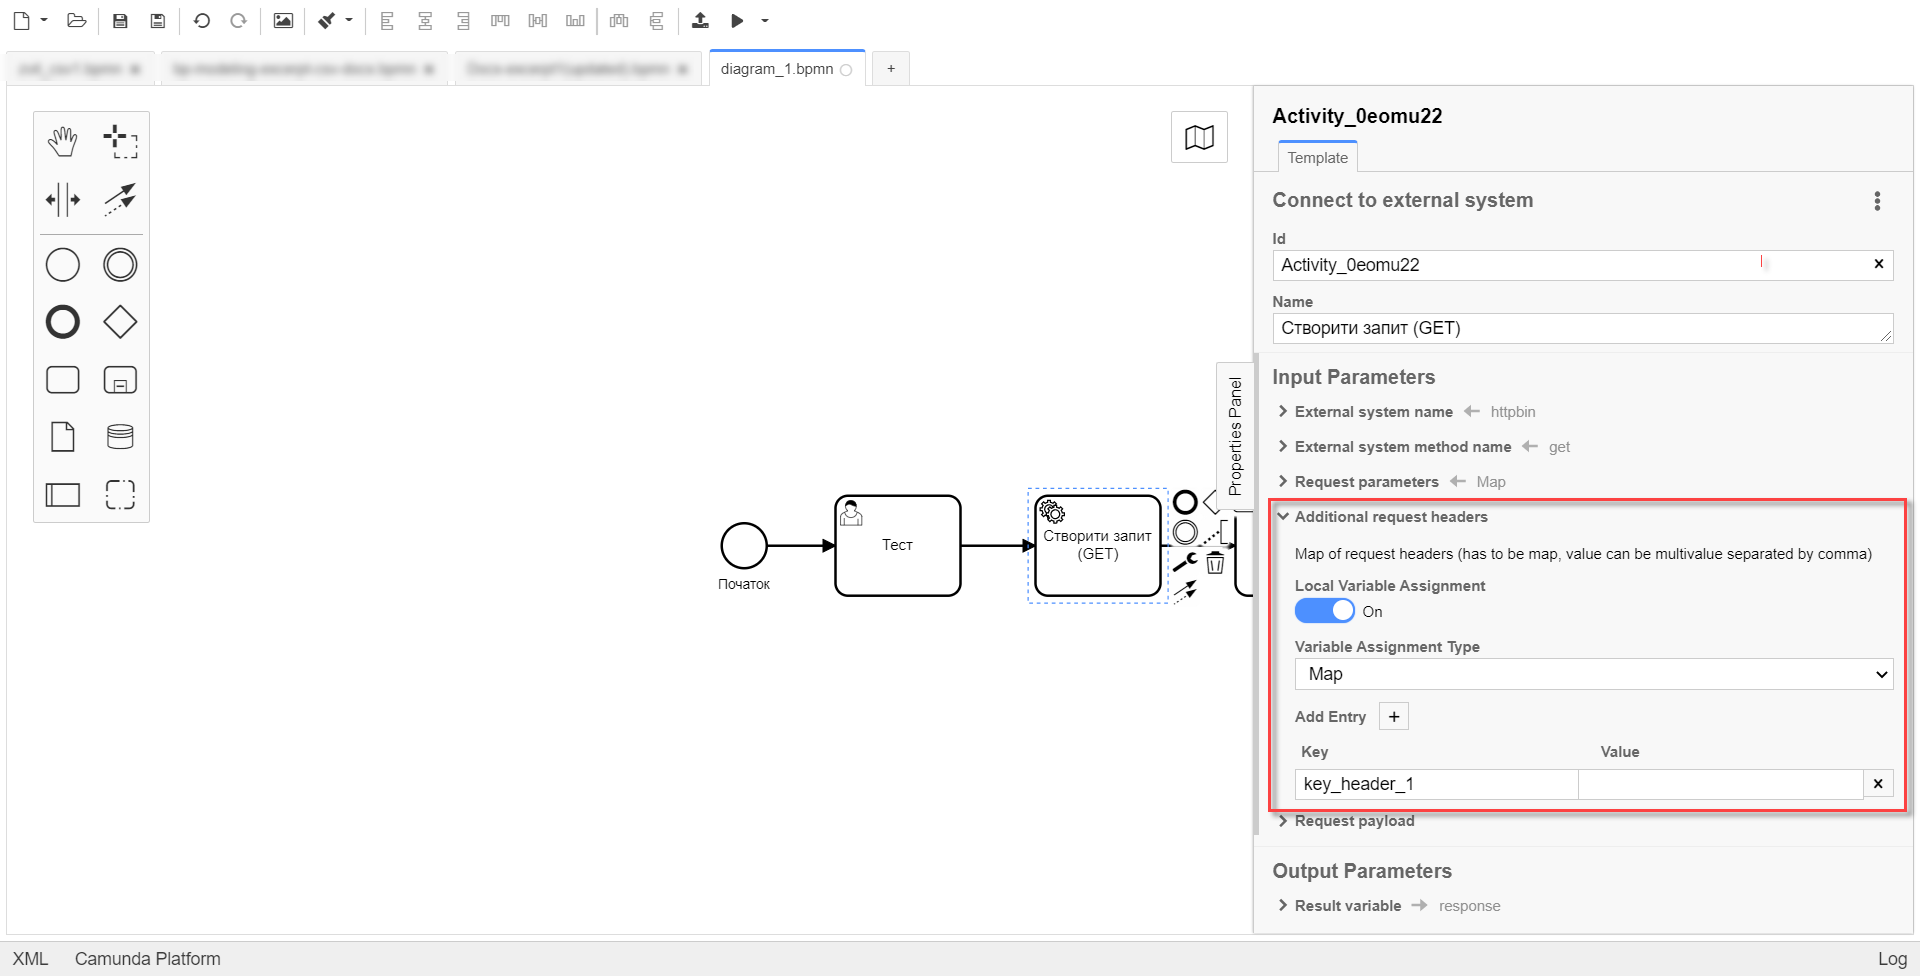
Expand the Additional request headers section and specify additional request headers:
-
Set the Local Variable Assignment toggle to On. This will allow creating a local variable for the method.
-
From the Variable Assignment Type dropdown list, select Map.
-
Key: Specify the request header key.
-
Value: Specify the request header value.
-
-
-
The Request payload section is used for the POST and PUT request methods.
-
-
Output Parameters:
-
Expand the Result variable section and specify the process variable to put response to. The default value is
response. -
Set the Process Variable Assignment toggle to On.
-
In the Assign to Process Variable field, enter the name of the result variable or leave the default
responsevalue.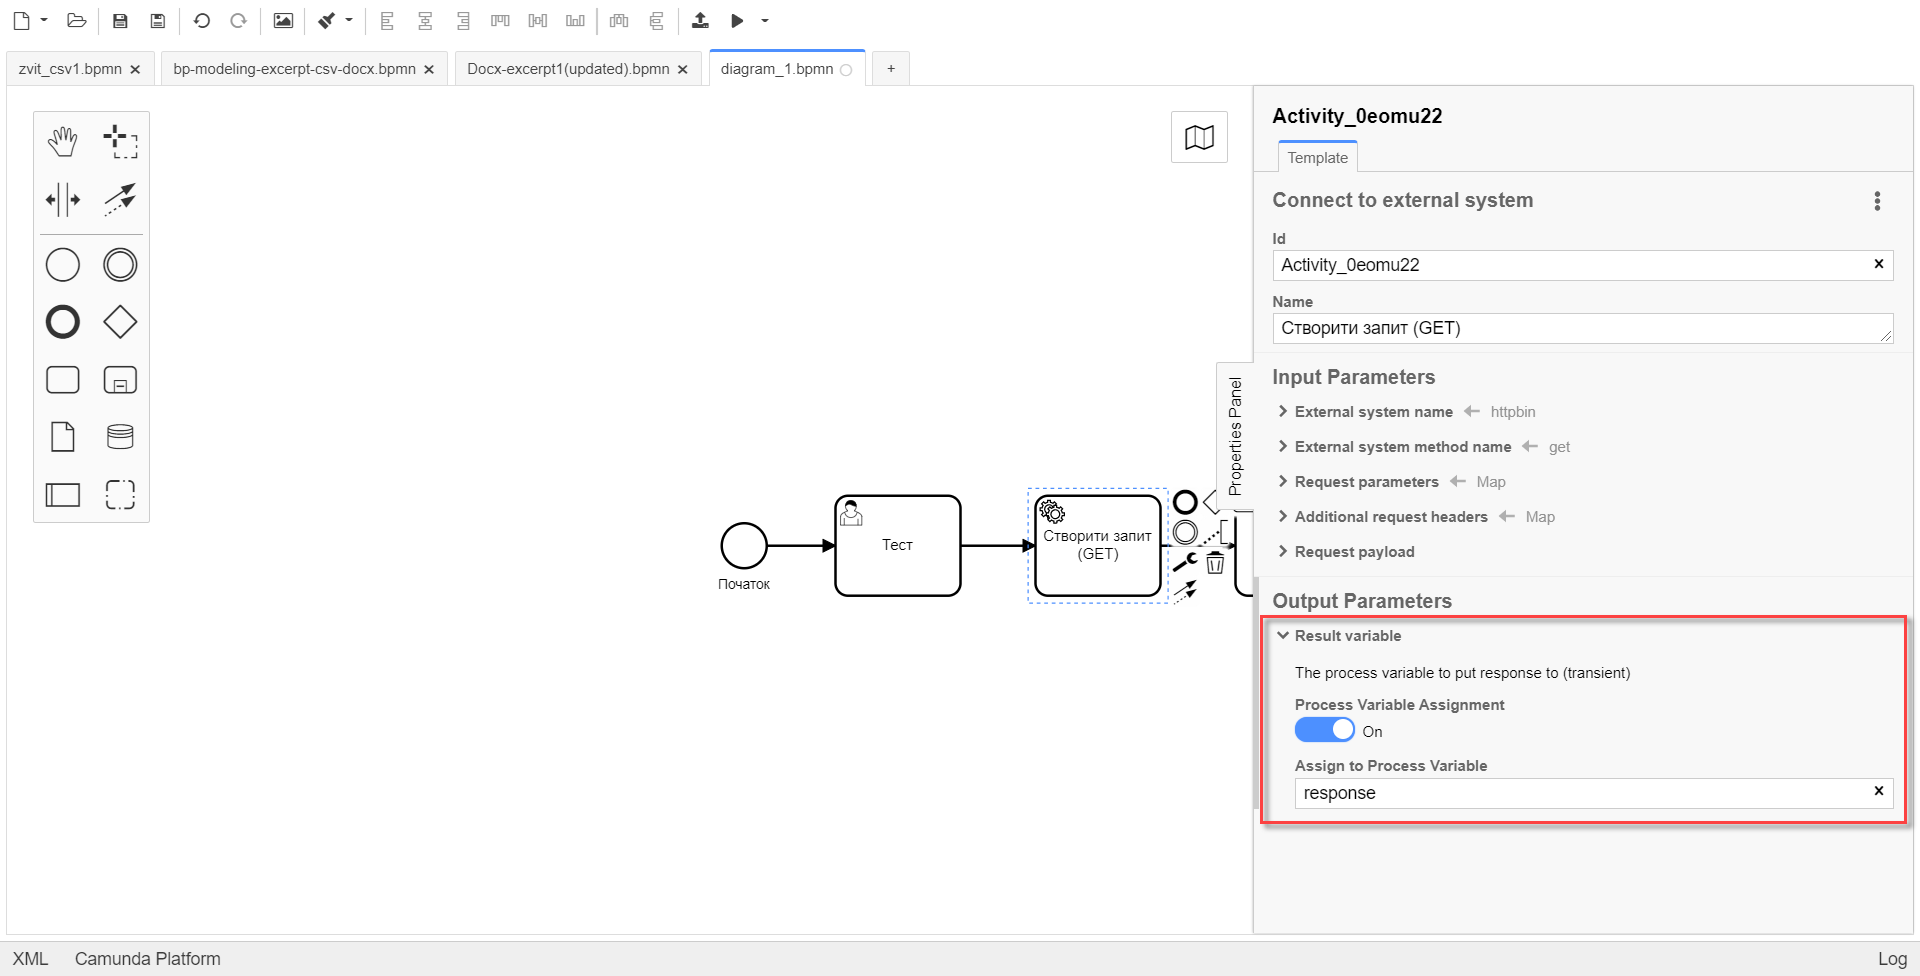
-
-