Creating registry administrators
Registry administrators are official administrators who perform the functions of registry support, as well as the deployment and maintenance of regulations for the respective registries.
|
For more information about the Platform role classes and their functional responsibilities, refer to the following link: |
1. Creating a registry administrator
|
After Creating Platform administrators and deploying the registry, you can add administrators for that registry. The first service registry administrator must be created by the Platform administrator with the appropriate access rights. Subsequently, the service registry administrator can add other registry administrators independently. |
-
Log in to the Control Plane registry management administrative panel using the provided login and password.
-
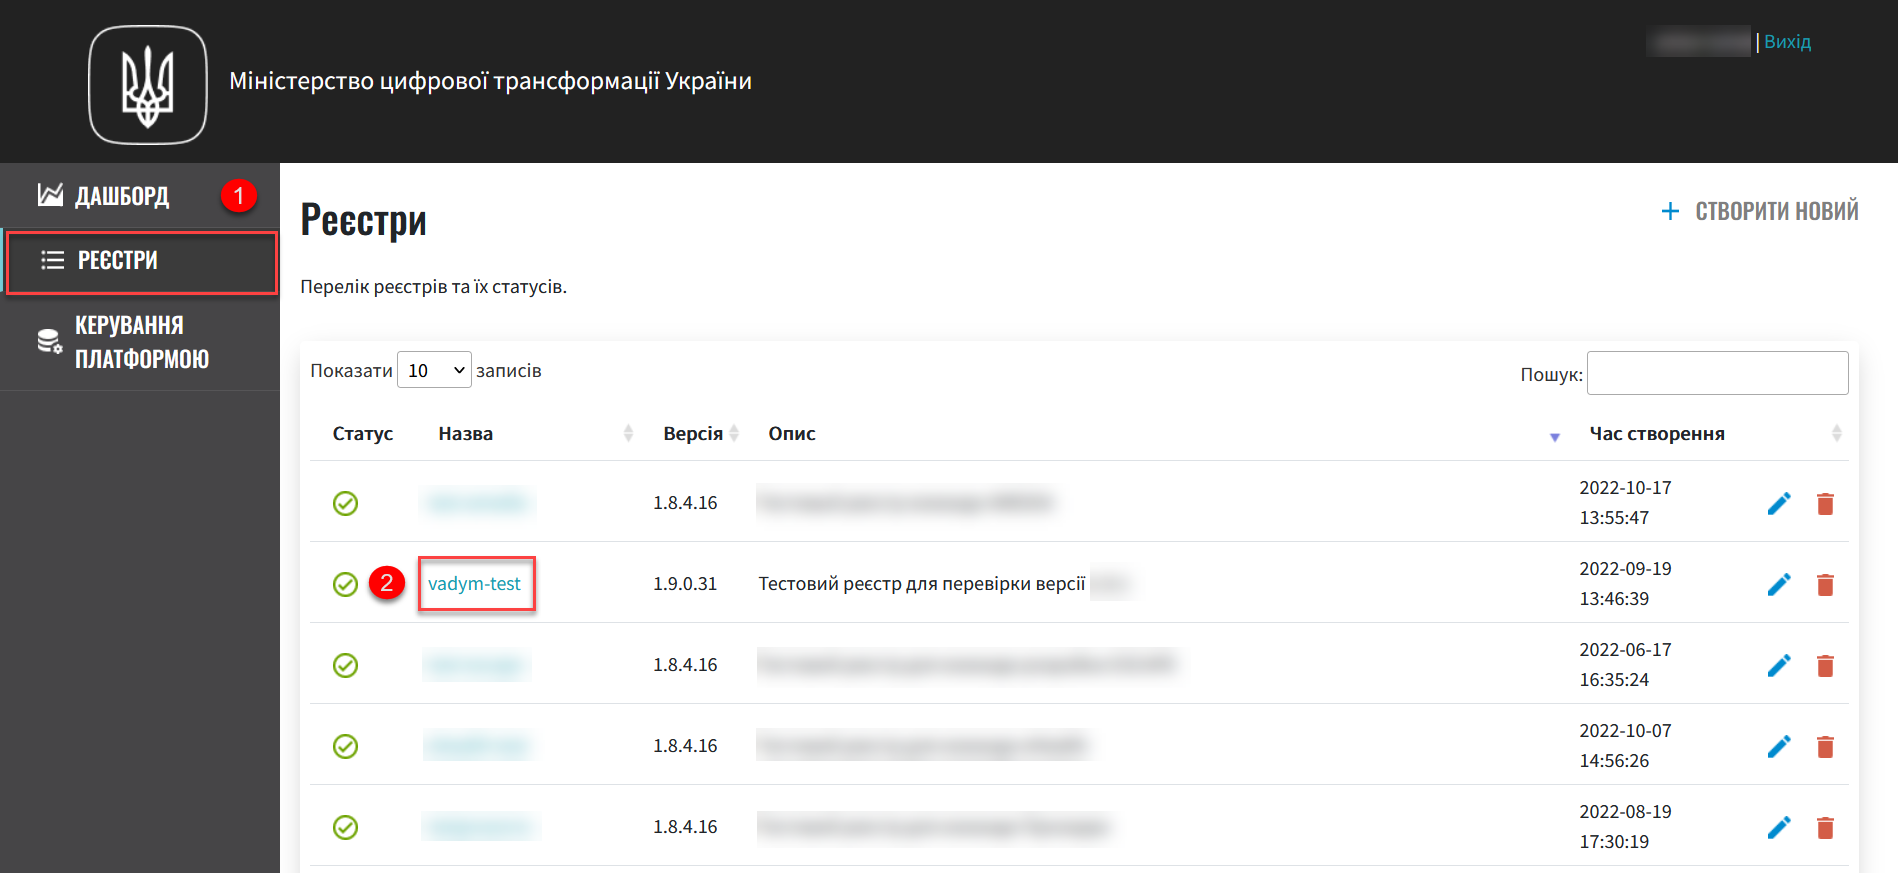
Go to the Registries section and select the registry for which you need to add administrators.
-
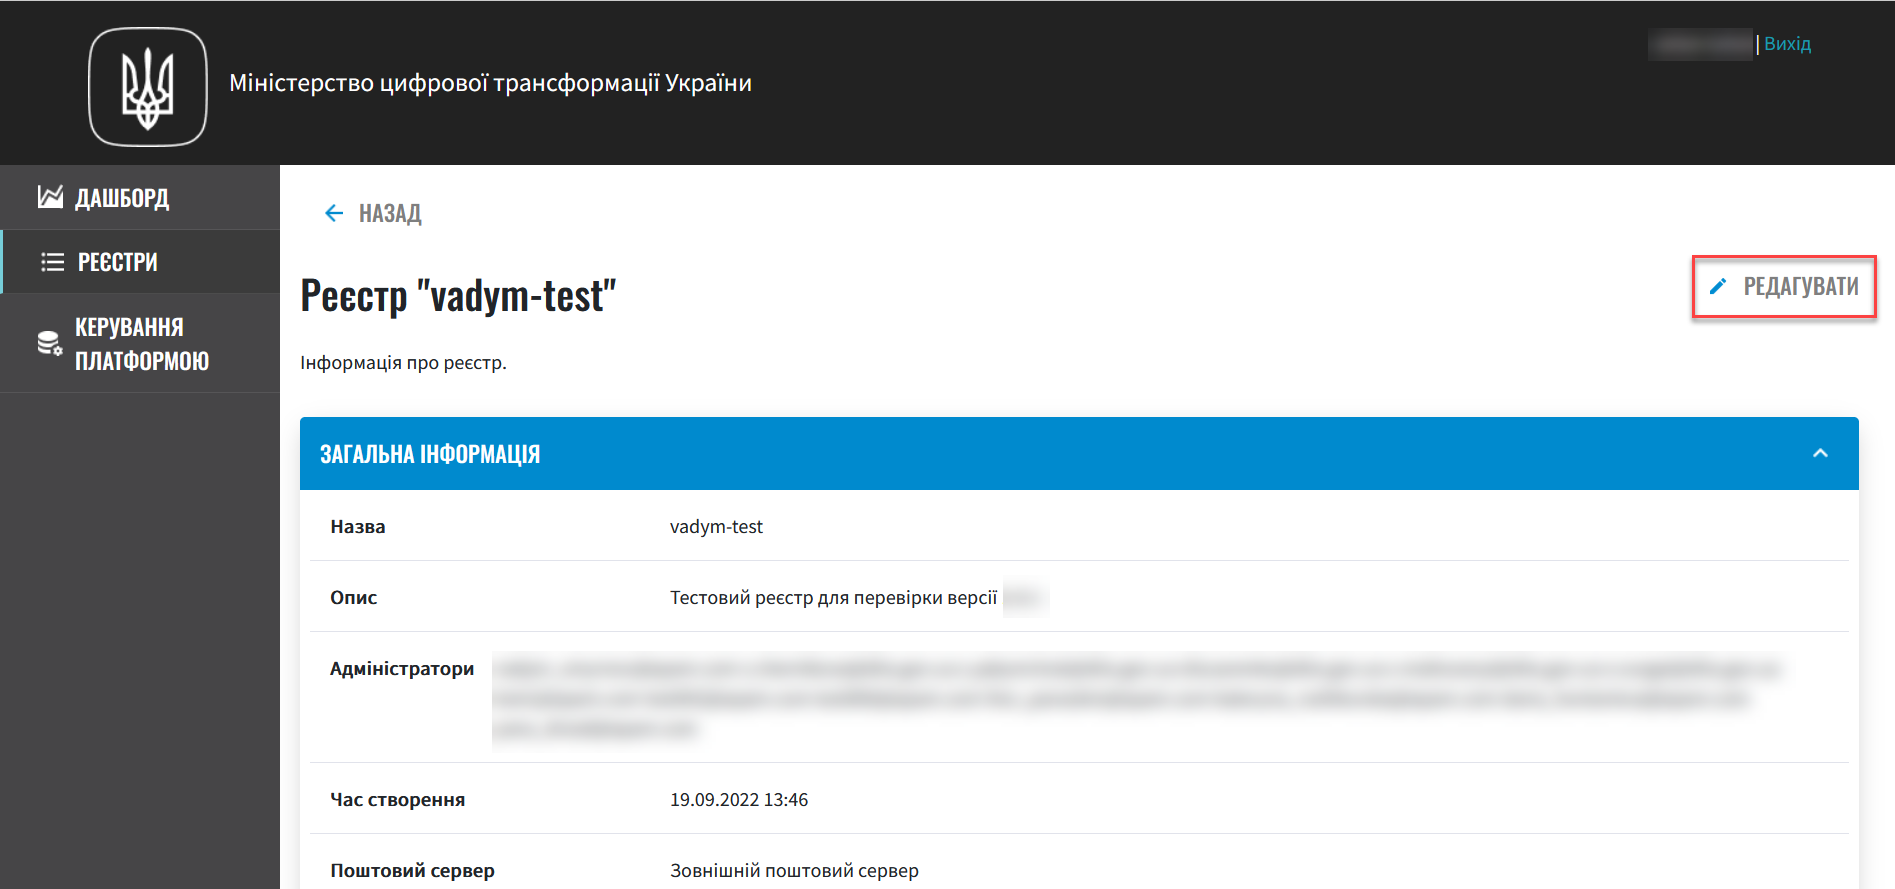
Click the Edit button in the upper right corner of the page.
-
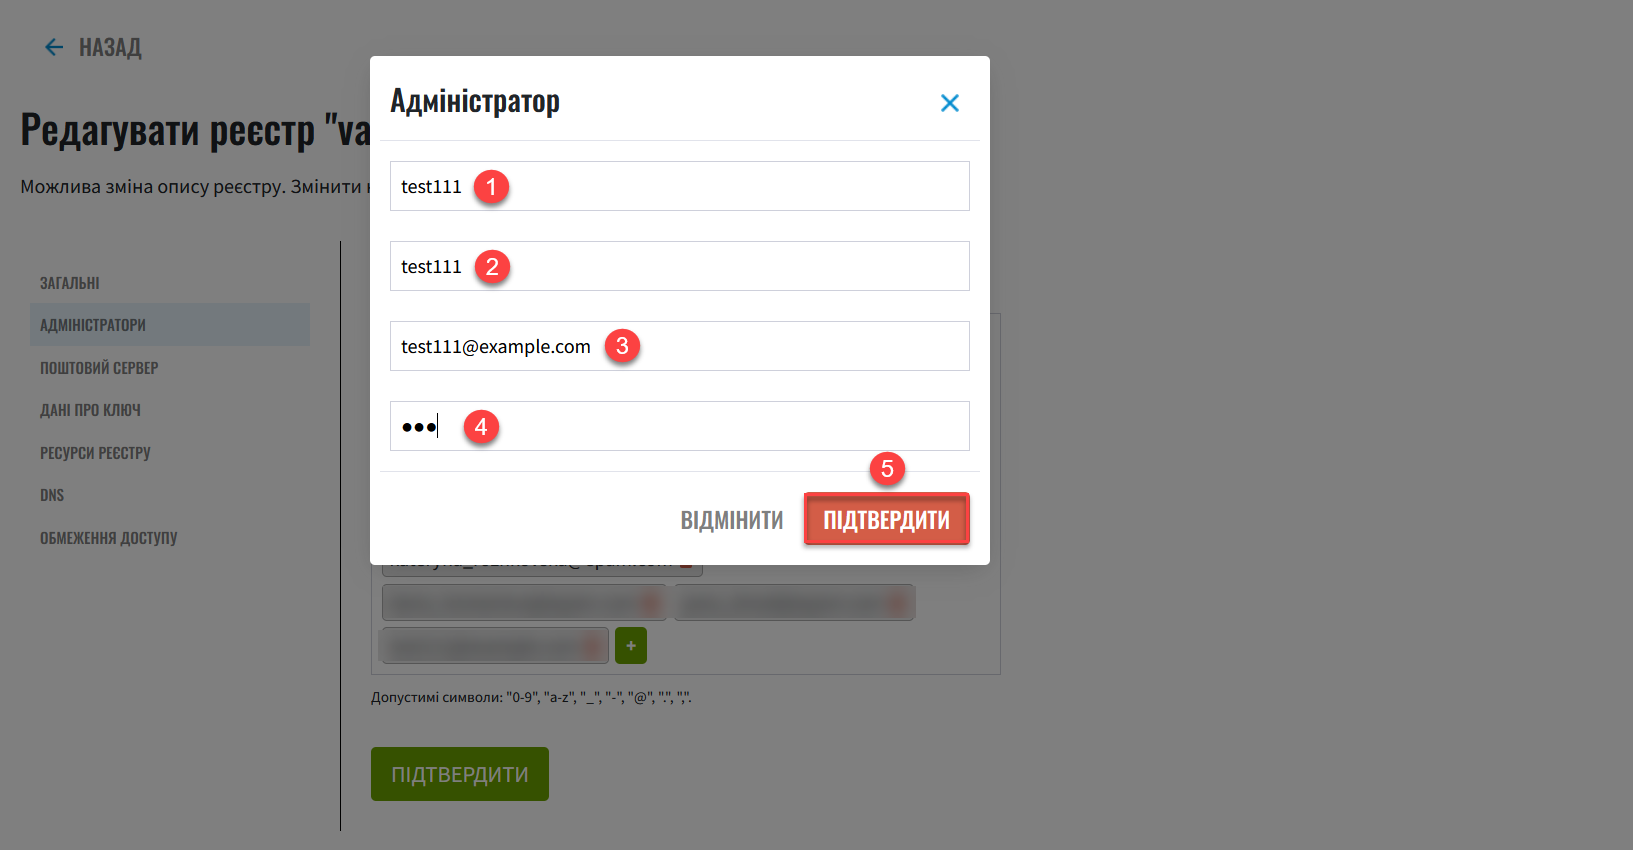
Go to the Administrators section and add a new registry administrator.
Click the
+(plus) icon. In the new opened window, fill in the following fields:-
First name
-
Last name
-
Email address
-
Temporary password
You can provide access to multiple registry administrators. To do this, repeat the action for each administrator separately (
+> provide data > clickConfirm).Provide the email address in lowercase.
Allowed characters:
"0-9","a-z","_","-","@",".",",".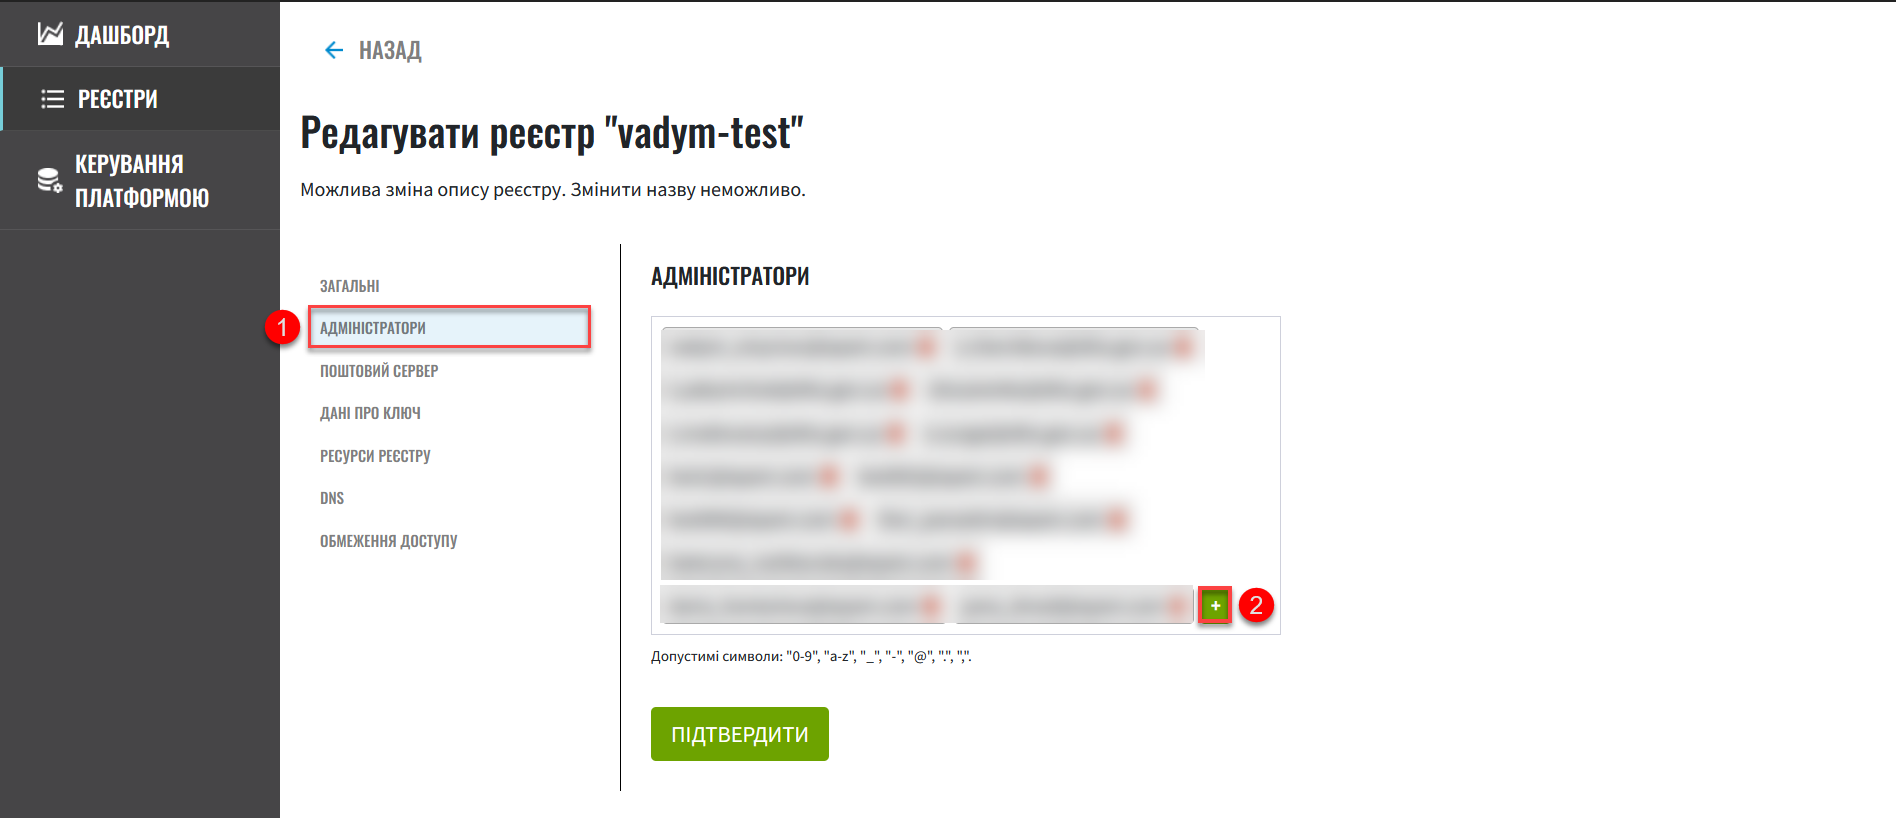
-
-
Click
Confirmto save the changes.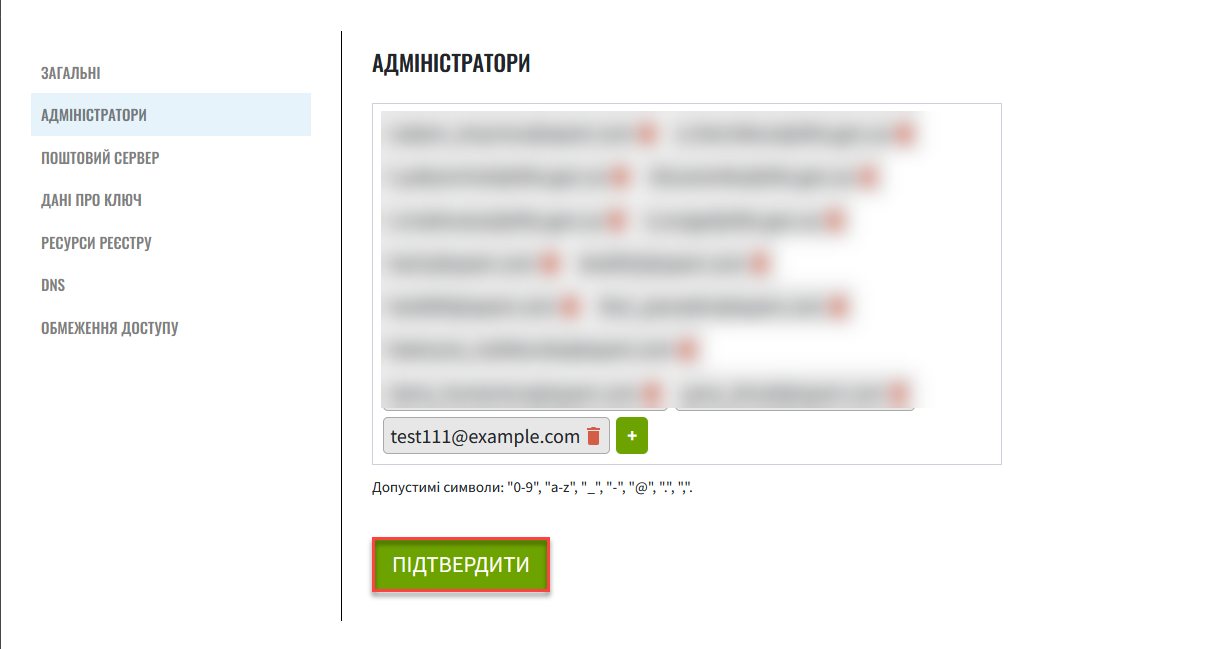
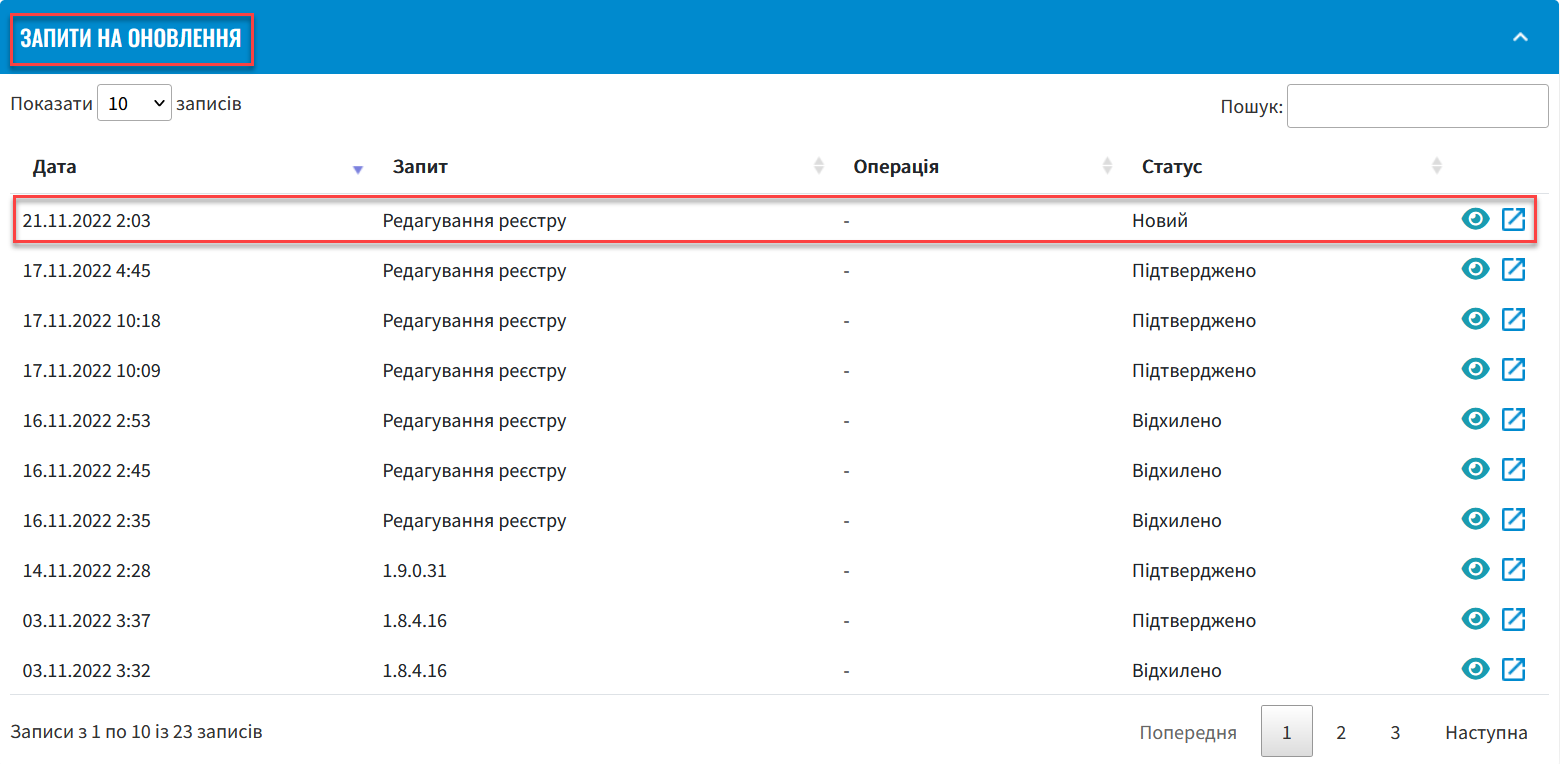
As a result, a registry update request with the status
Newwill be generated. -
Go back to the Registries section, scroll down the page, and find the Update requests section.
-
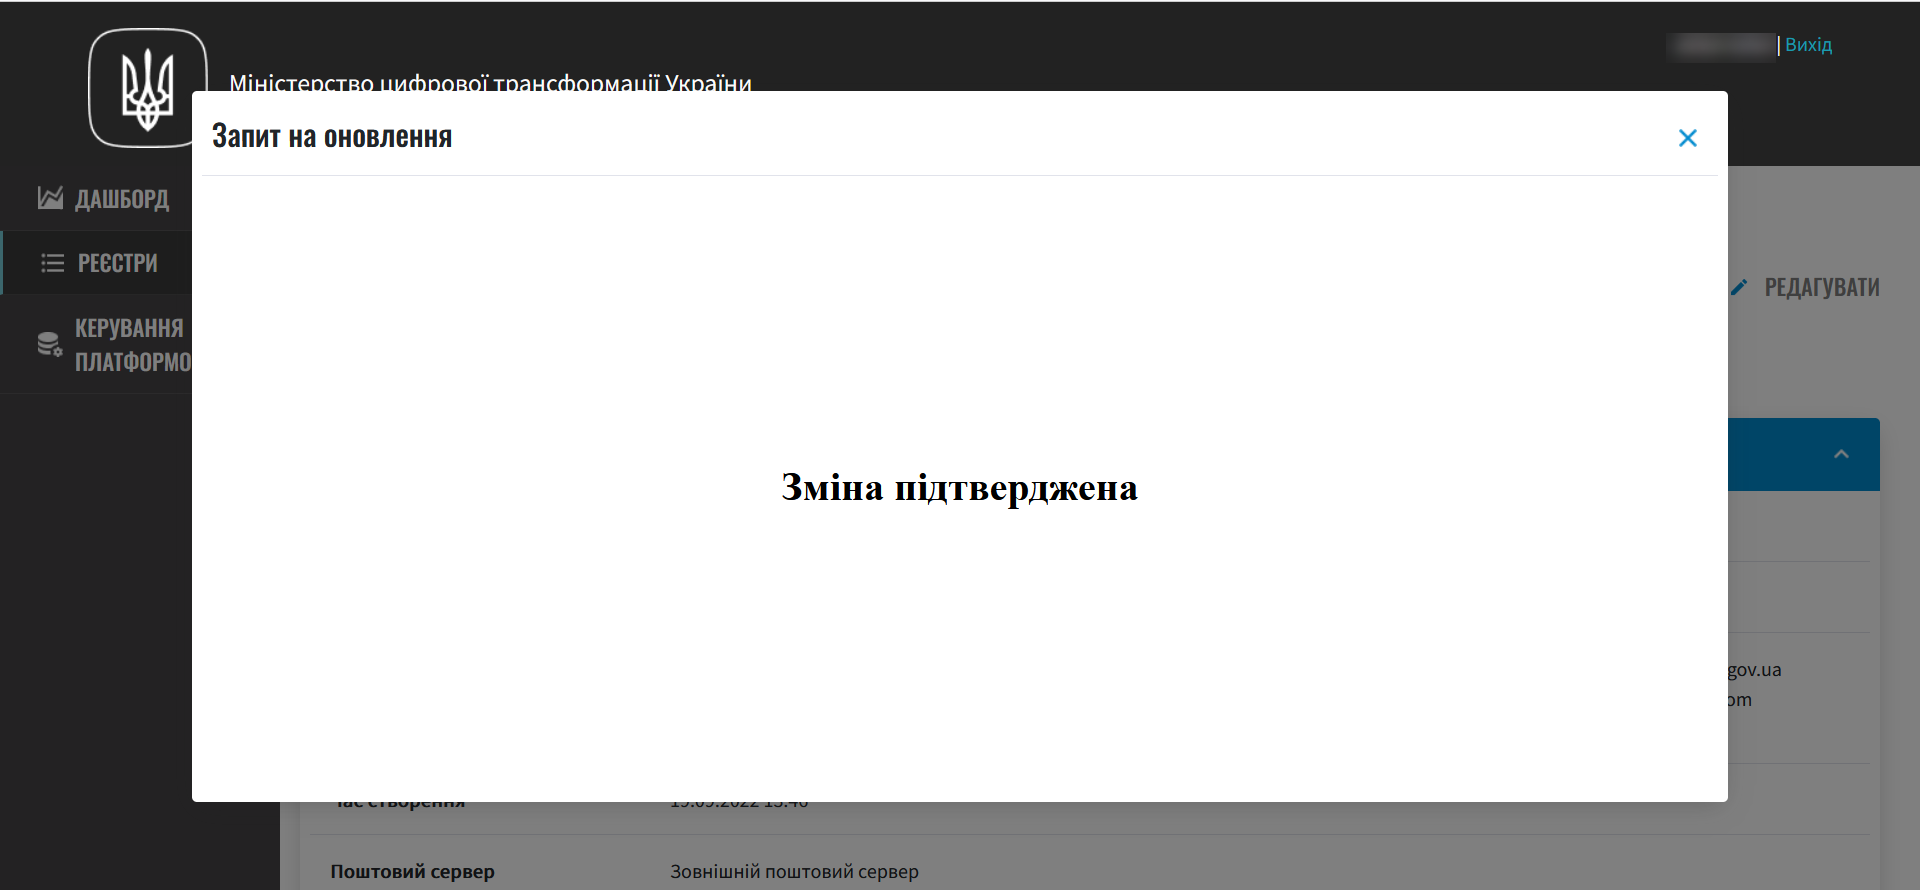
Open the generated request by clicking the view icon — 👁
The proposed changes will be applied to the deploy-templates/values.yaml configuration file upon confirmation. -
In the new window, compare the two versions of the changes, make sure the data you entered is correct, and click
Confirm.The comparison window allows you to conveniently check the two versions of changes: the current one (left) and the new one (right). 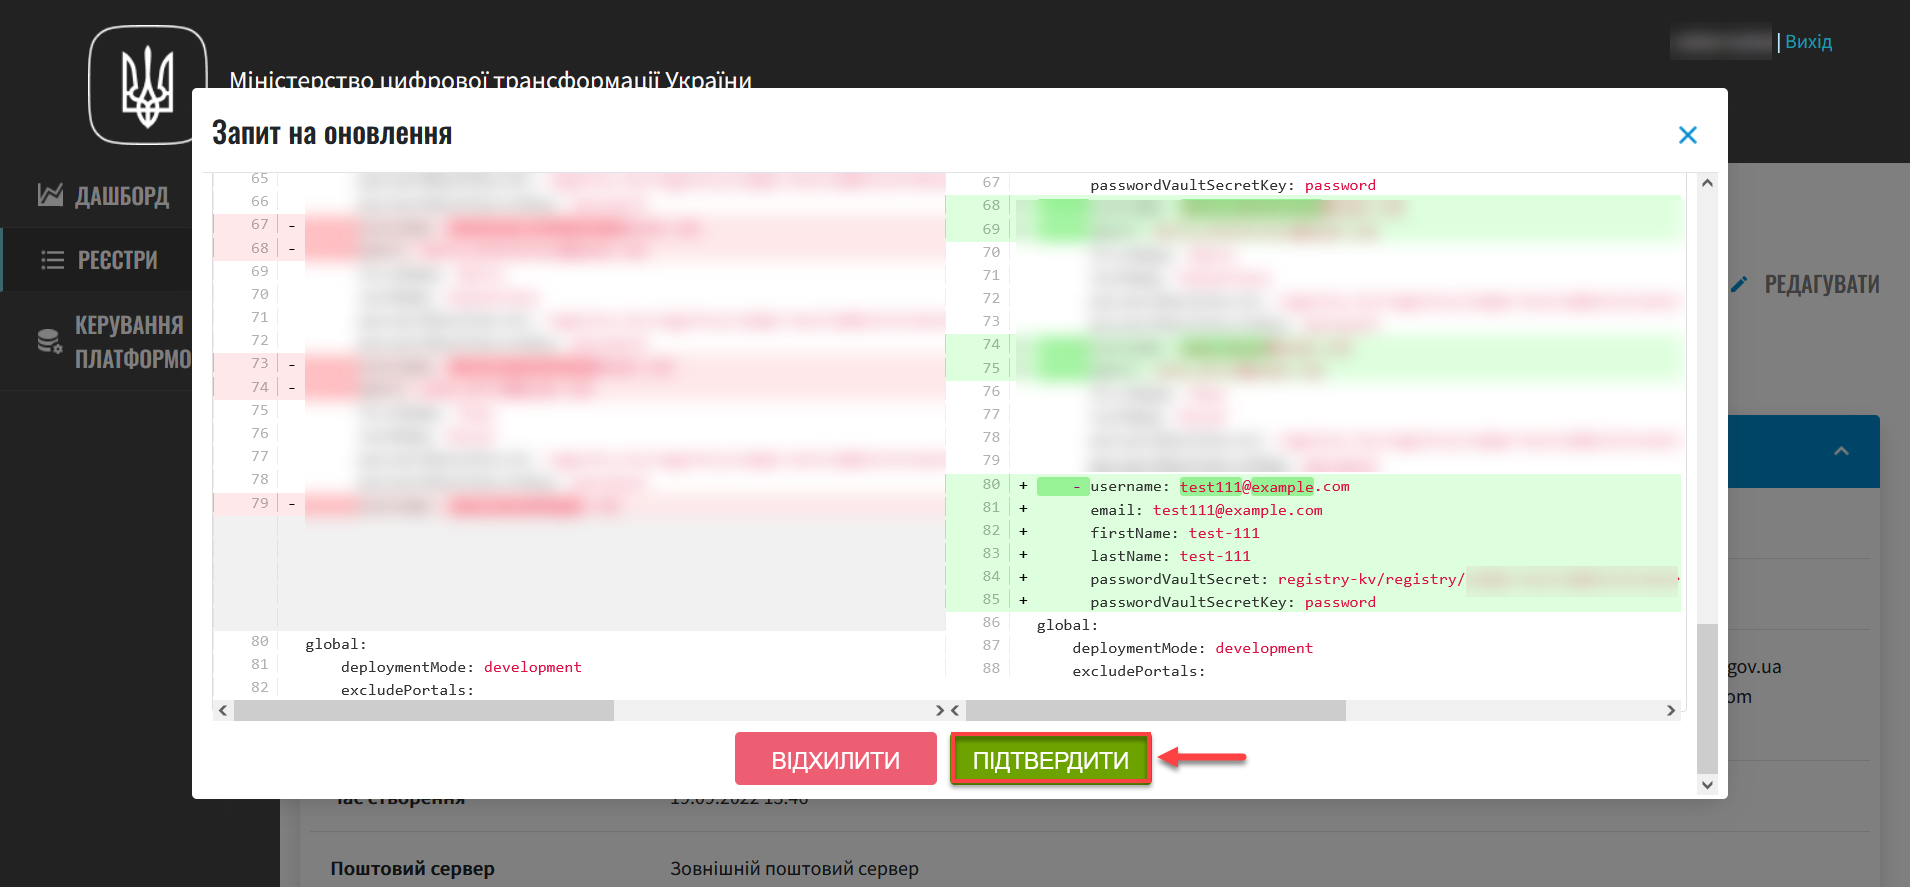
As a result, the request will be assigned the
Verifiedstatus, and the changes will take effect.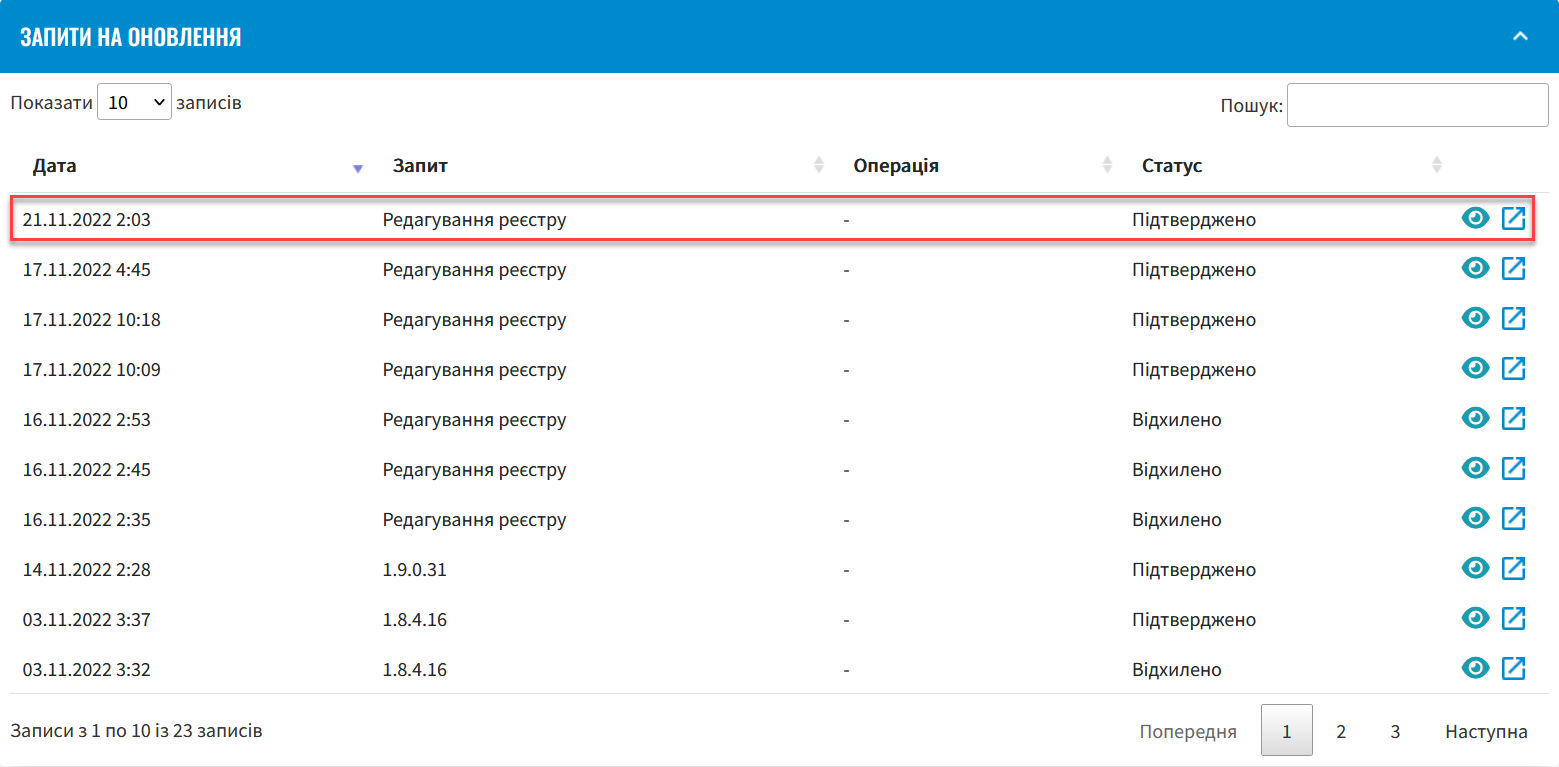
Wait for the automatic code build to complete. This may take a few minutes. For more details, see Confirming the changes in the Gerrit interface (alternative method). You can also reject the changes to the registry configuration immediately by clicking
Reject.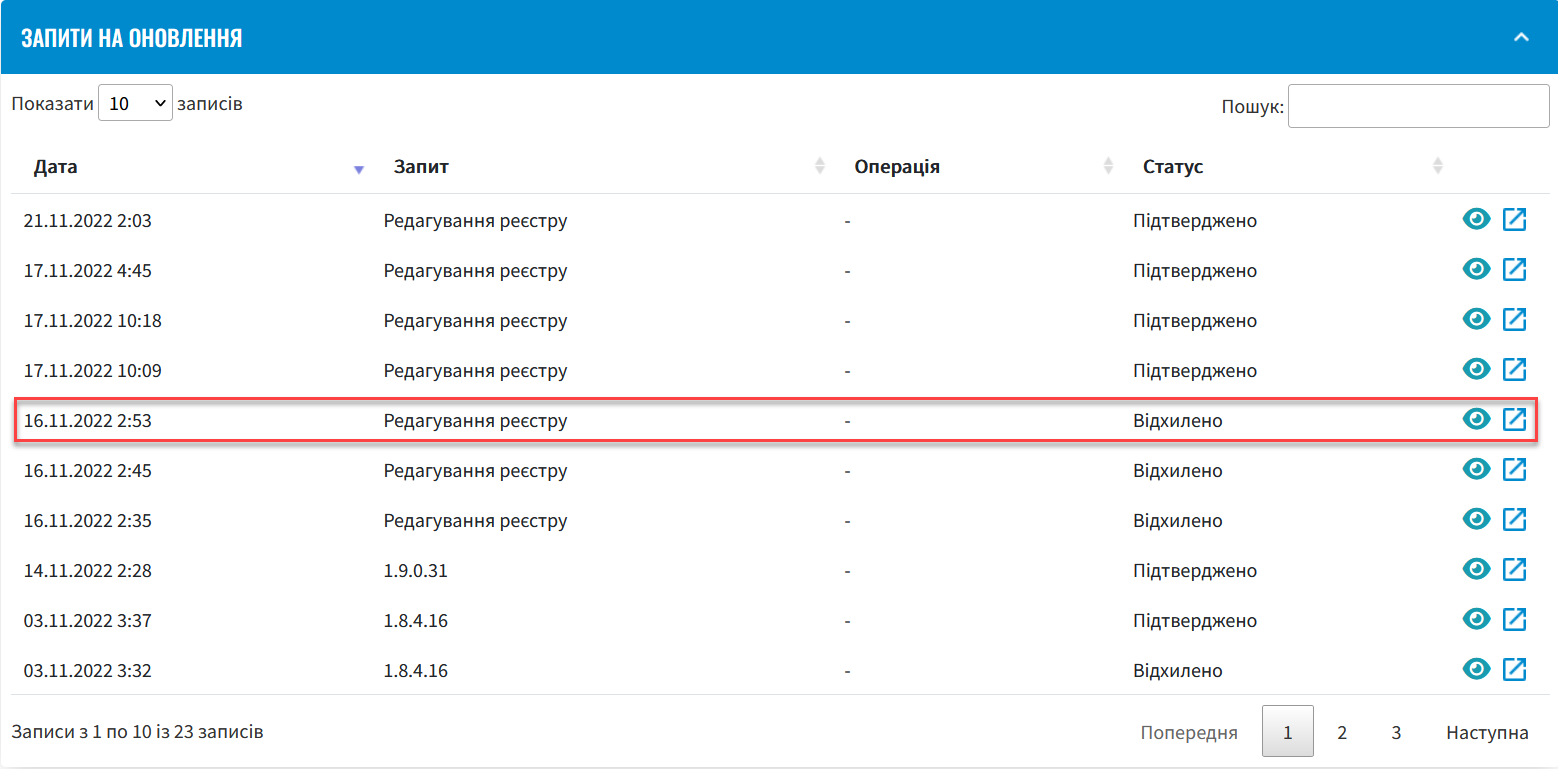
The system automatically creates a registry administrator in the
openshiftrealm of the Keycloak service and assigns them thecp-registry-admin-<registry-name>role and the group/cp-registry-admin-<registry-name>, where<registry-name>is the name of the registry.
Confirming the changes in the Gerrit interface (alternative method)
An alternative method for confirming changes to the registry configuration is to perform the confirmation in the Gerrit interface. After making a change in the Control Plane (adding a new administrator, etc.), follow these steps:
-
У розділі
Запити на оновленняз’явиться новий запит. Натисніть іконкуПереглянути в Gerrit. -
A new request will appear in the Update requests section. Click the
View in Gerriticon.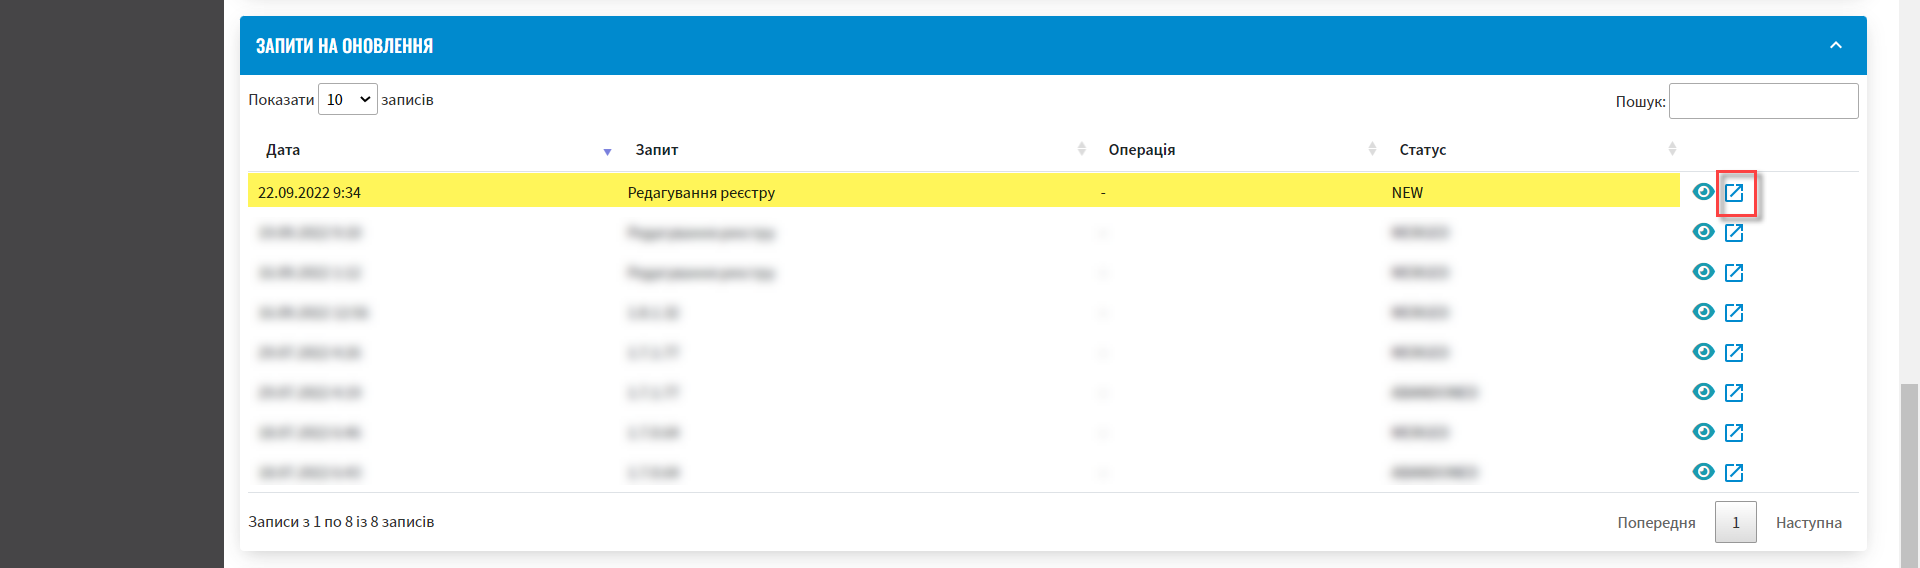
-
Perform the quality gate checks. To do this, enter the created change and click
REPLY.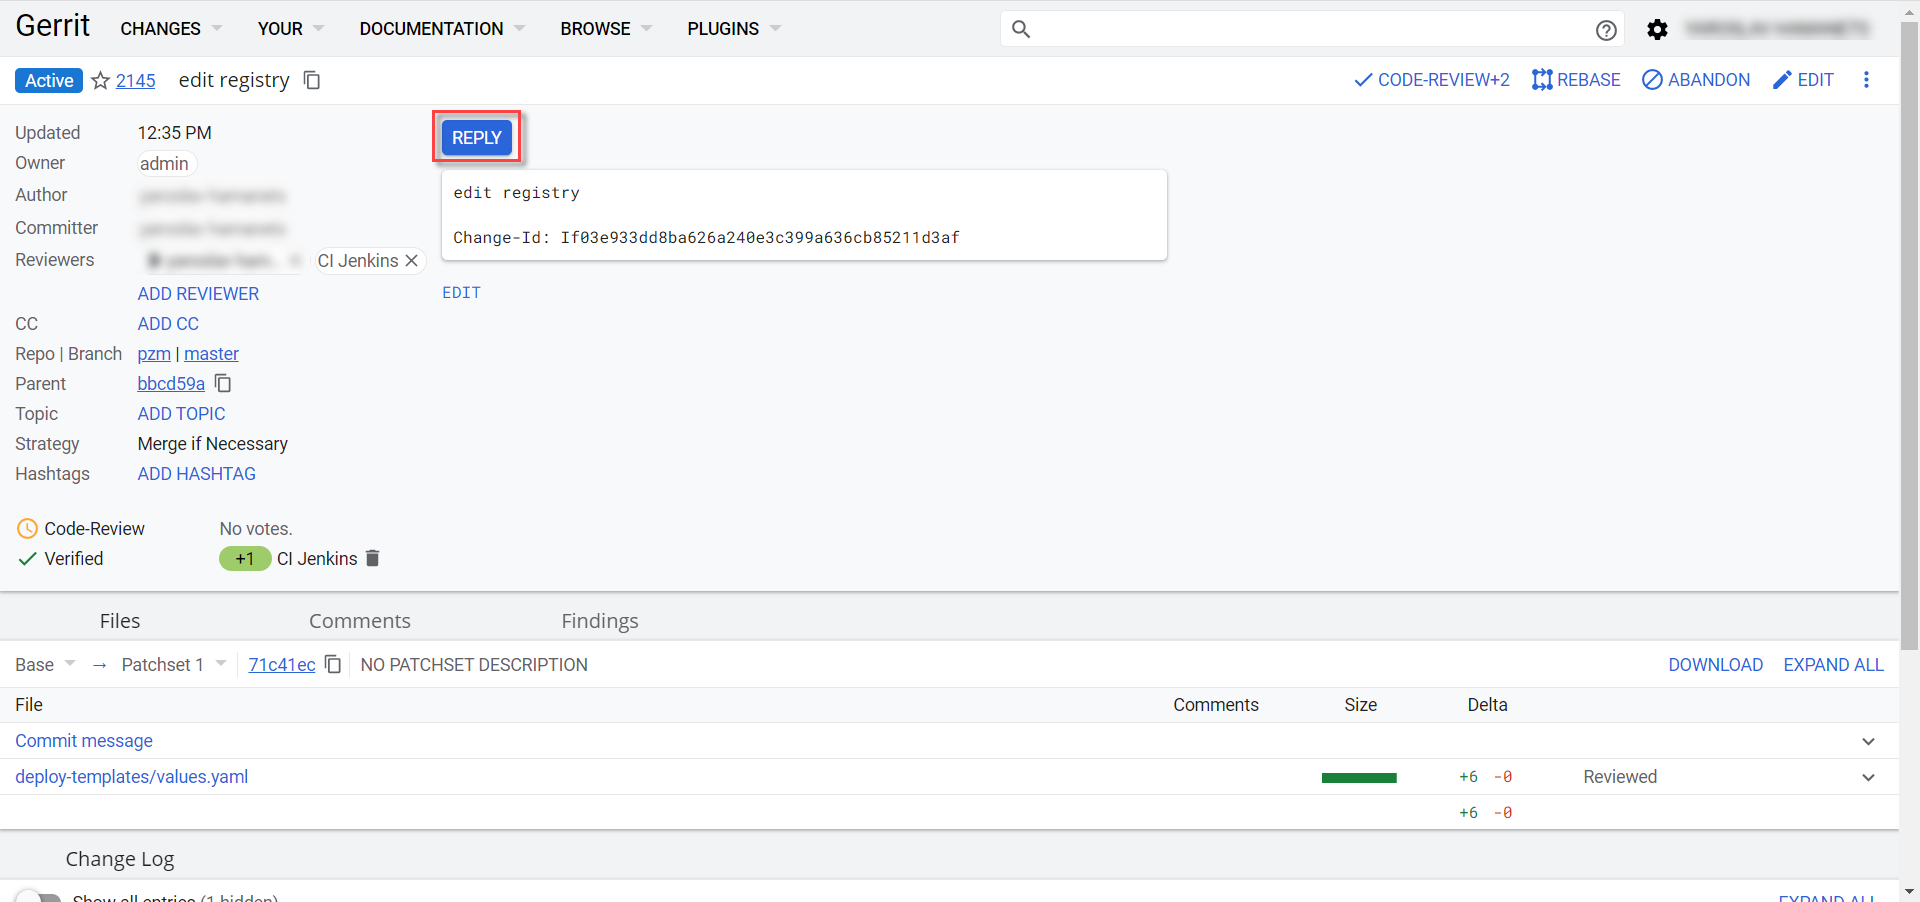
-
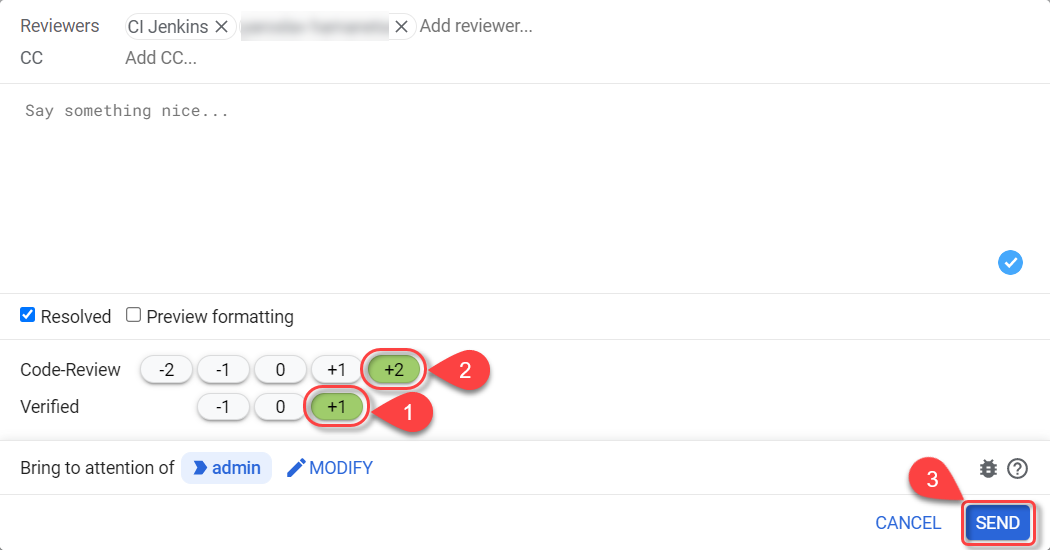
Click the following buttons to confirm:
-
+2— for Code-Review; -
+1— for Verified. -
SEND— to save.
-
-
Click
SUBMITto merge the changes into the repository (git mergechanges).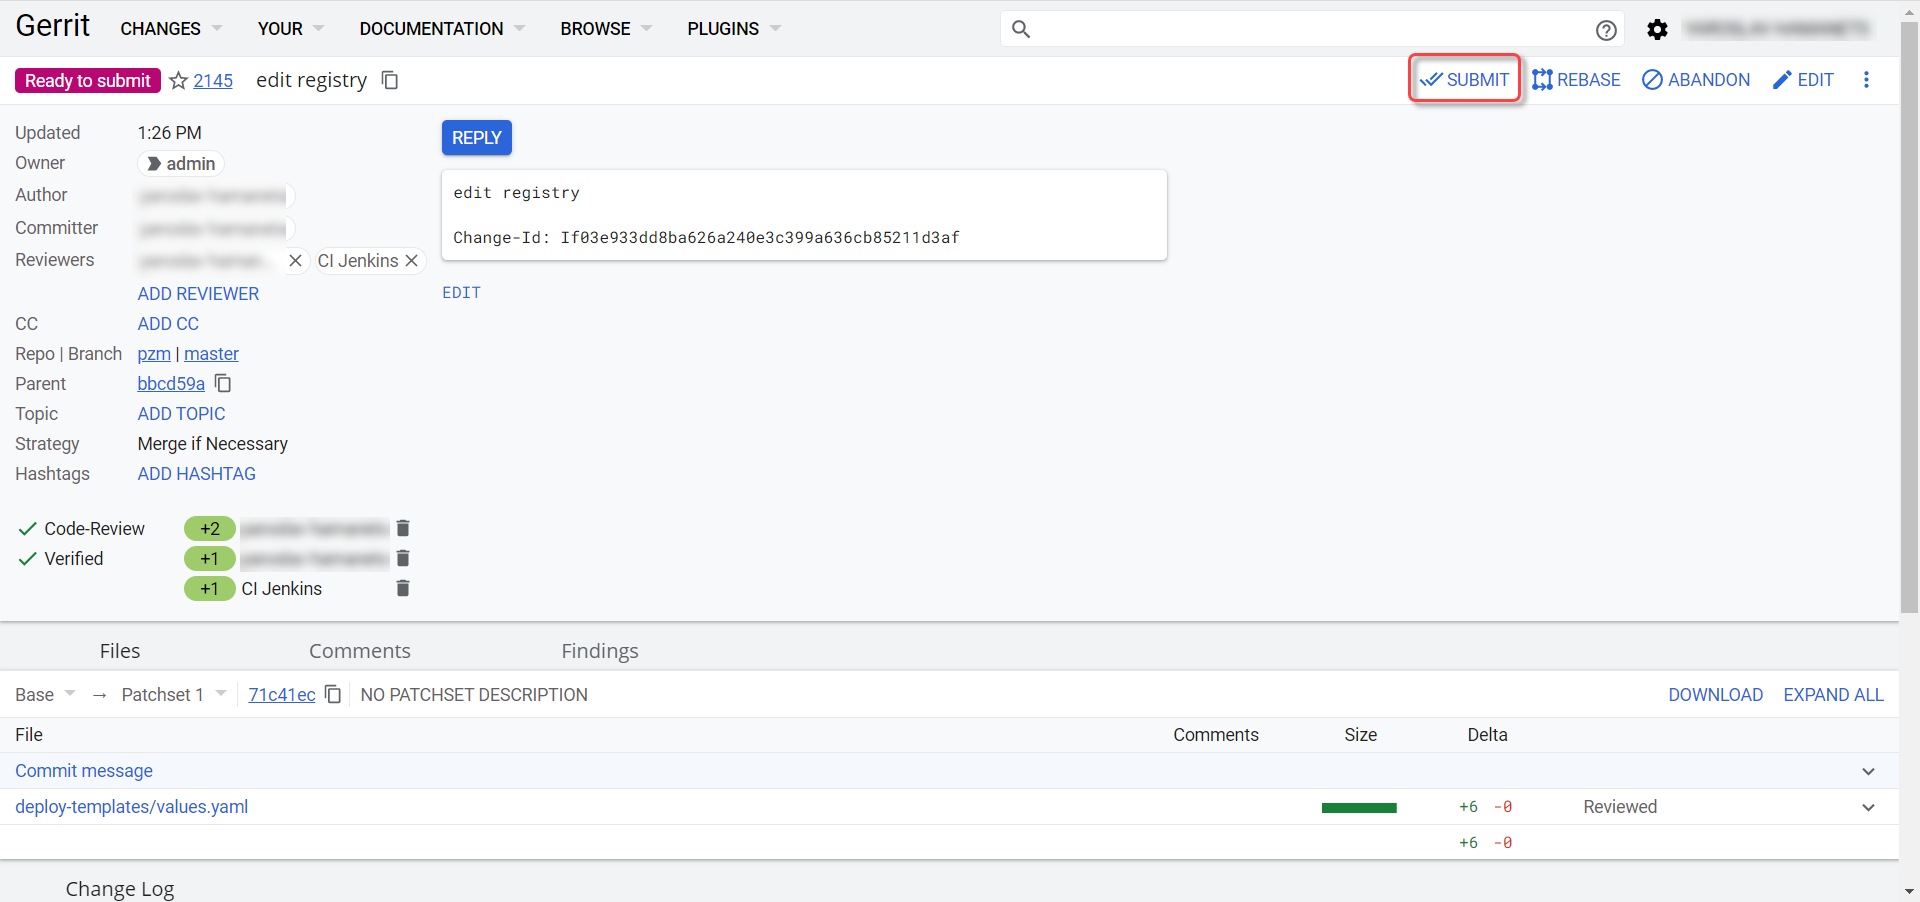
-
In the pop-up window, click
CONTINUEto confirm.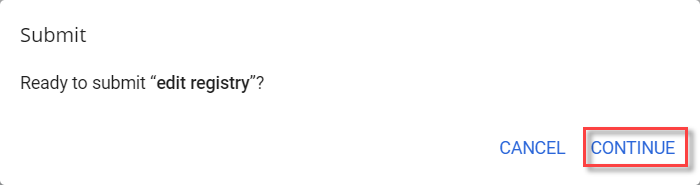
-
At the bottom of the Gerrit page, locate the CI Jenkins build information and follow the link.
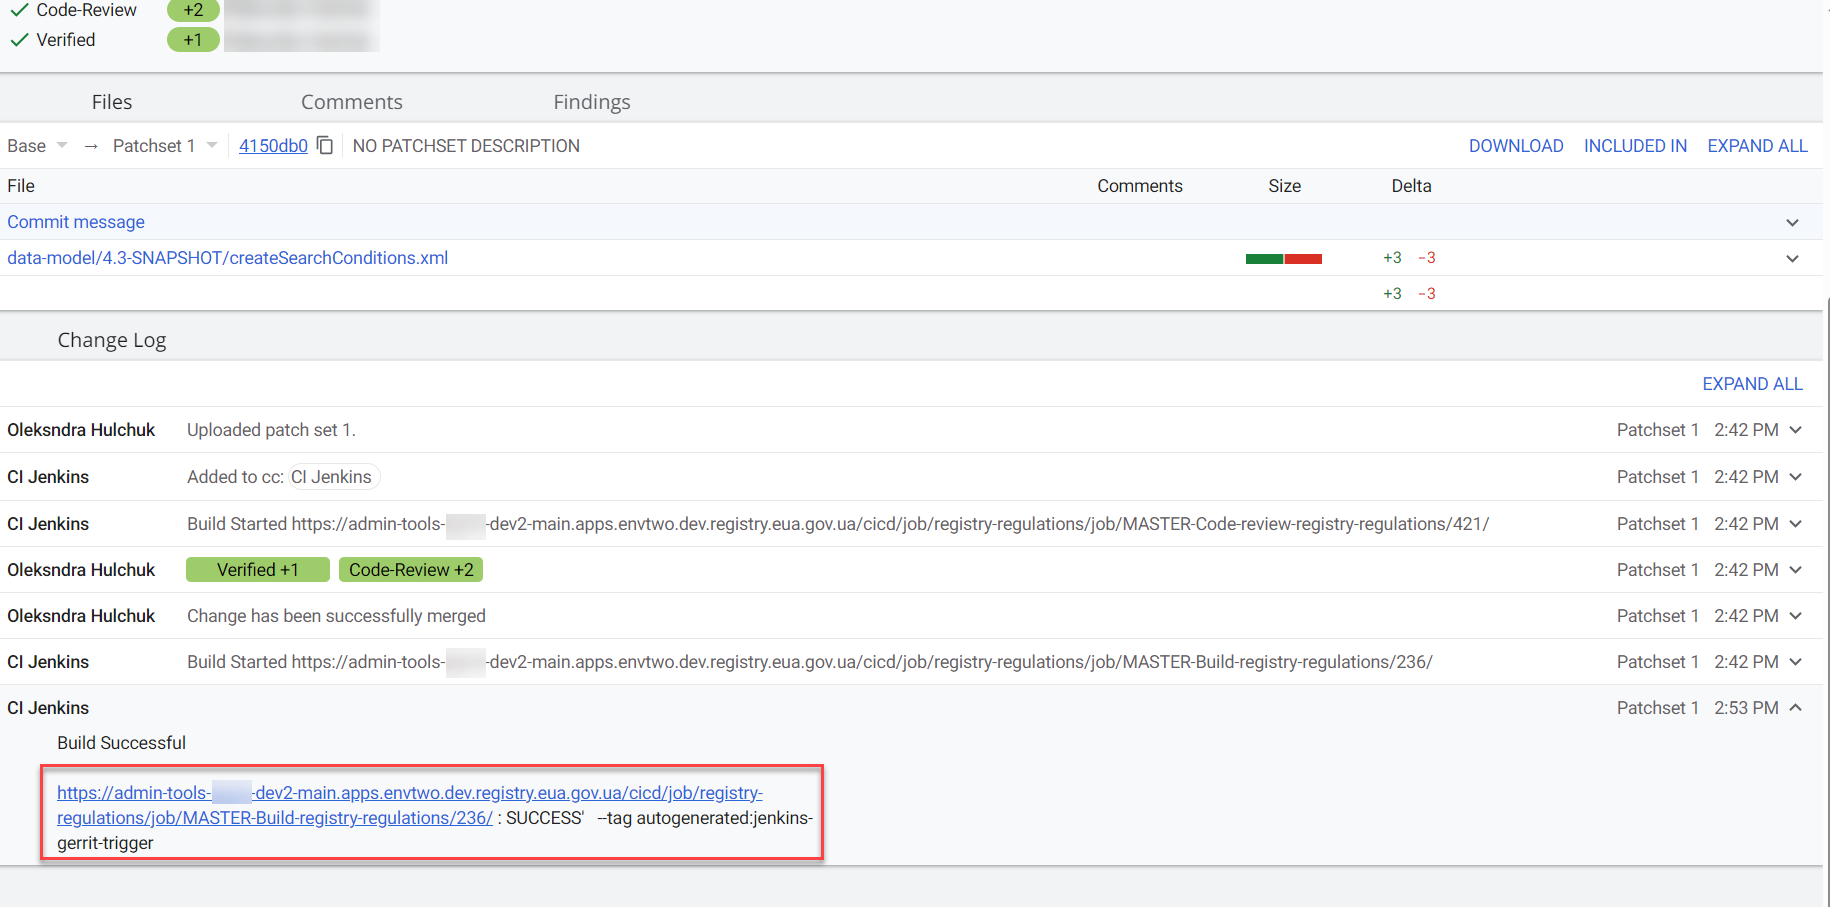
-
In the new window, click Back to Project on the left side (return to the project).

-
Ensure the build was successful.
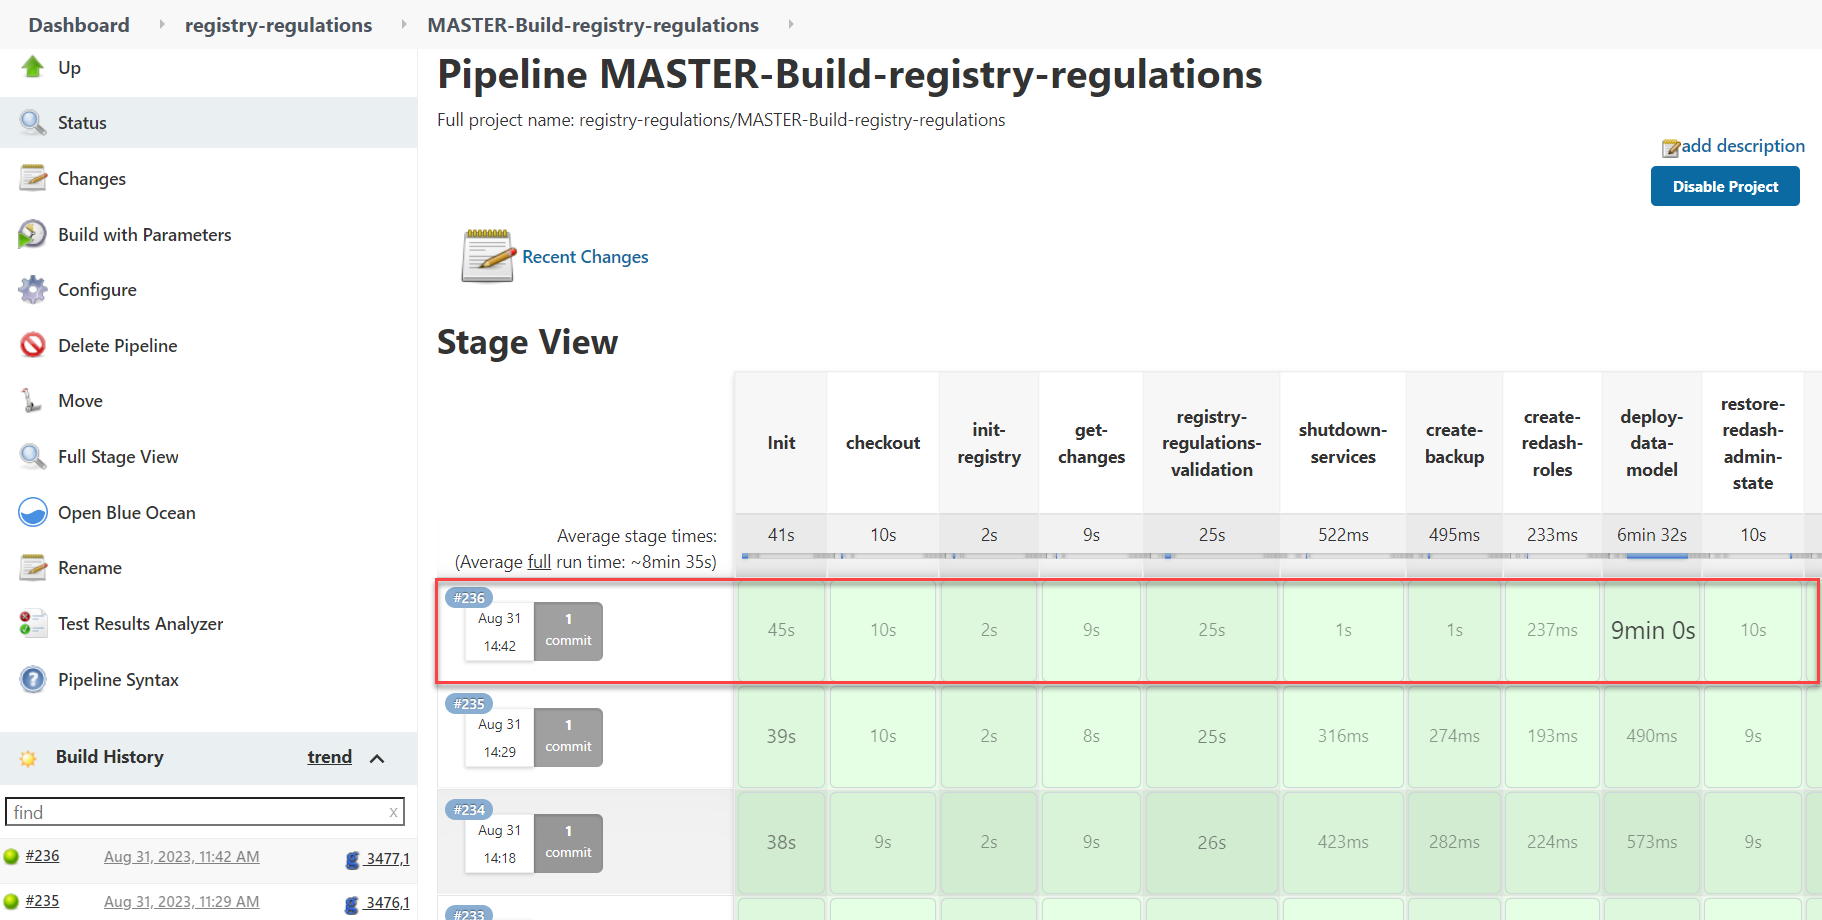
-
After a successful execution of the Jenkins job, the system creates a new registry administrator.
The system automatically creates a registry administrator in the openshift Keycloak service realm and assigns them the
cp-registry-admin-<registry-name>role and the/cp-registry-admin-<registry-name>group, where<registry-name>is the name of the registry.
2. Creating a registry regulations administrator
Registry regulations administrators are service administrators responsible for deploying and maintaining regulations for the corresponding registries. Within the regulations, an administrator works with specific entities such as data models, business processes, UI data entry forms, analytical reports, extracts, and more.
It is necessary to manually create a registry regulations administrator and assign them roles. To do this, follow these steps:
-
Log in to the Openshift console using the provided login and password.
The login and password for access can be obtained from the technical support team. -
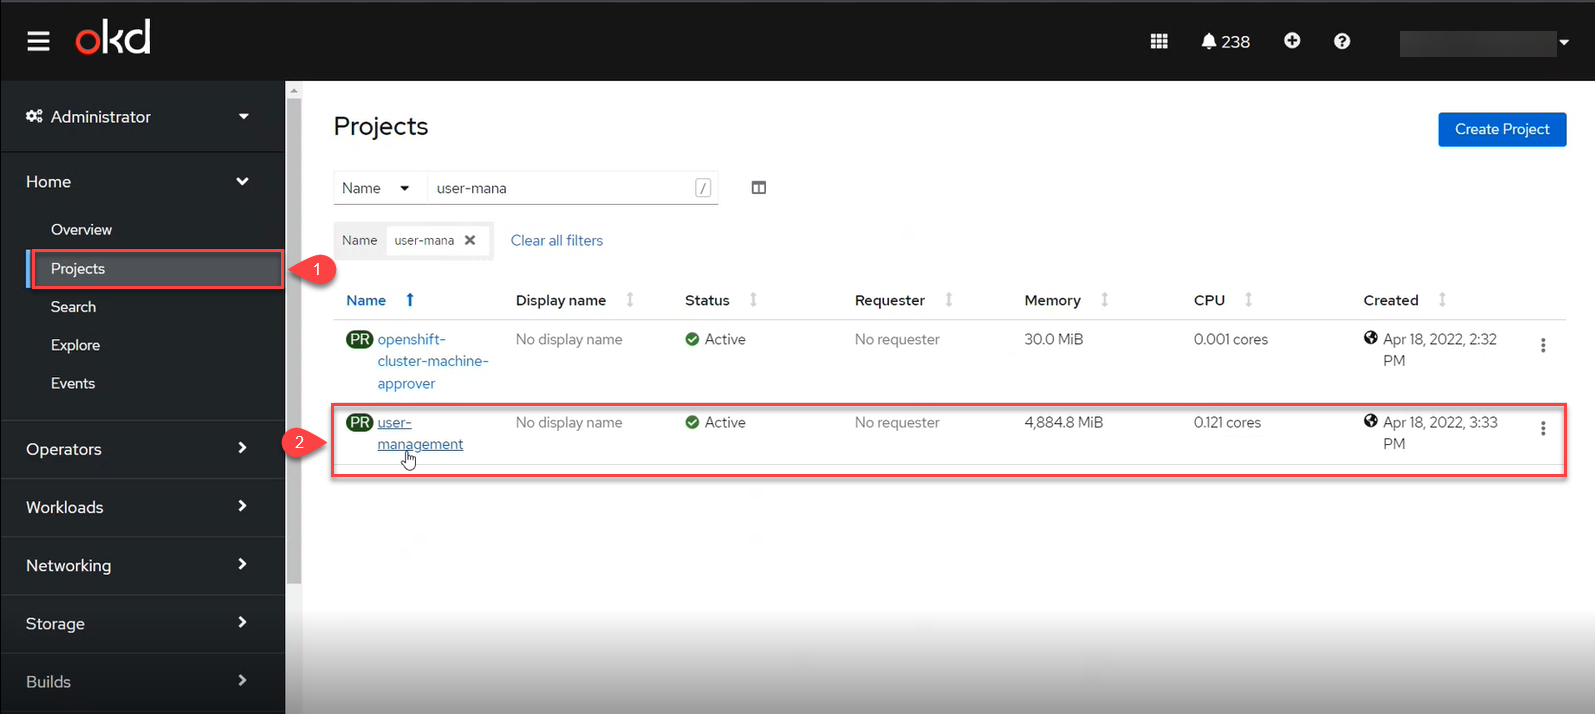
Go to Projects > user-management.
-
Find the Networking section and follow the link to the
keycloakservice.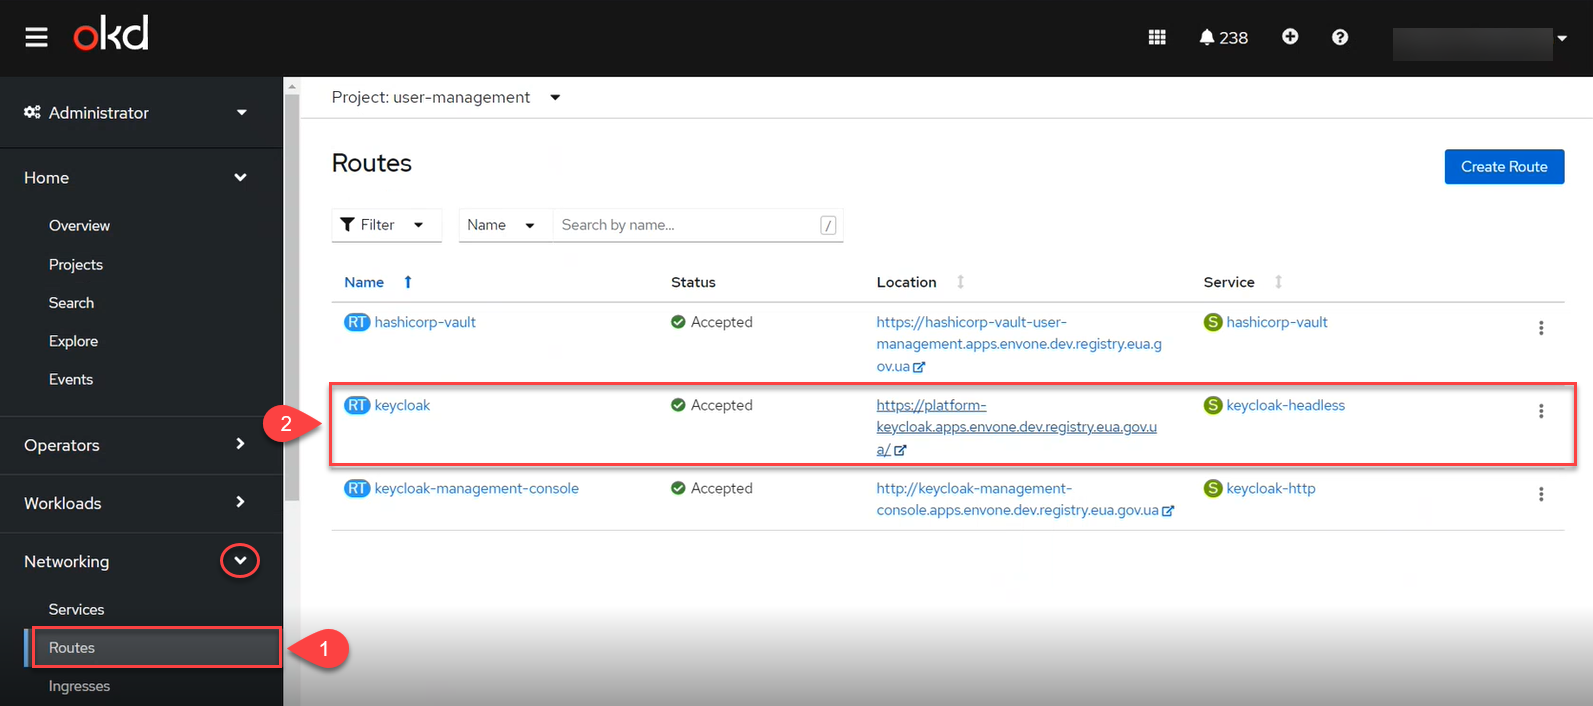
-
Access the Keycloak Administration Console using the Keycloak secrets (username and password).
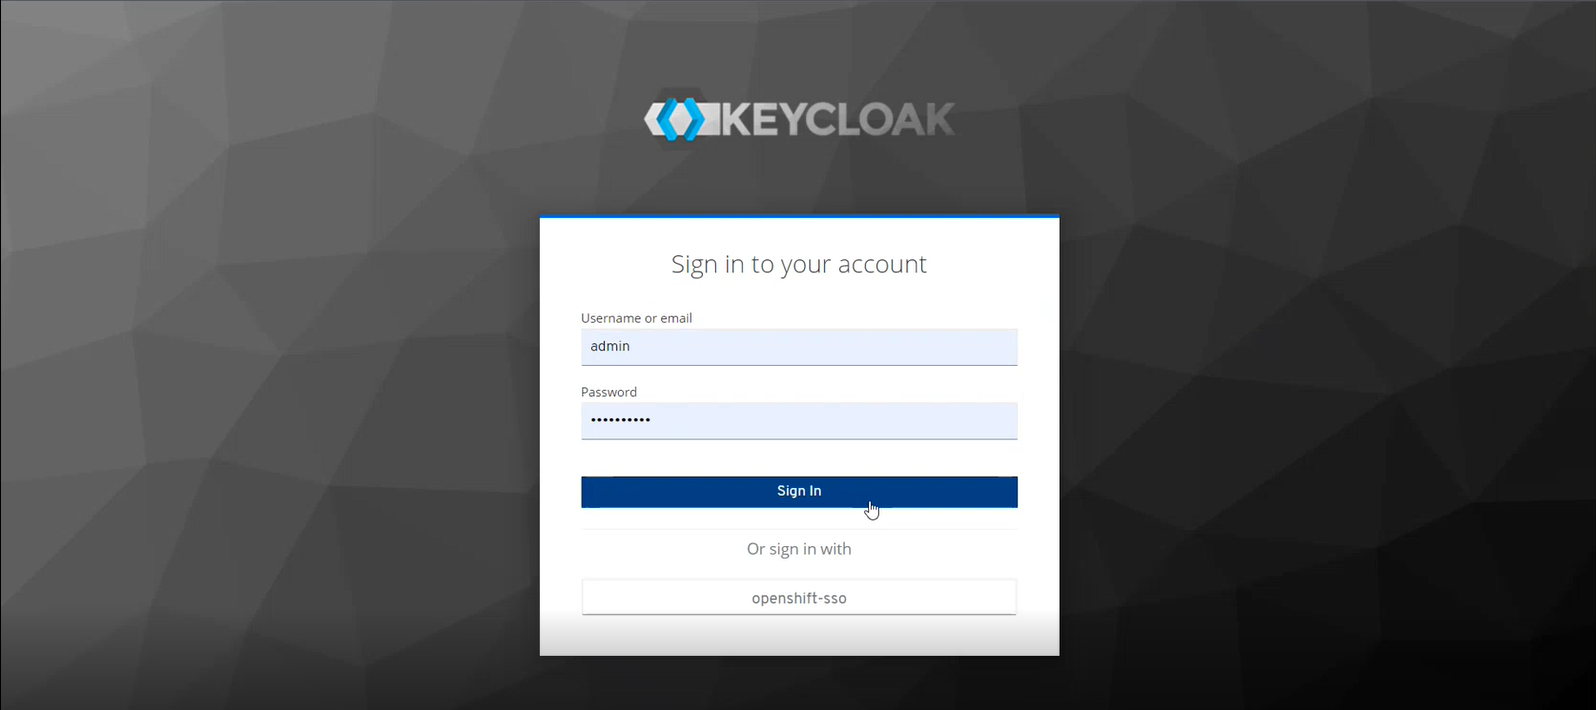
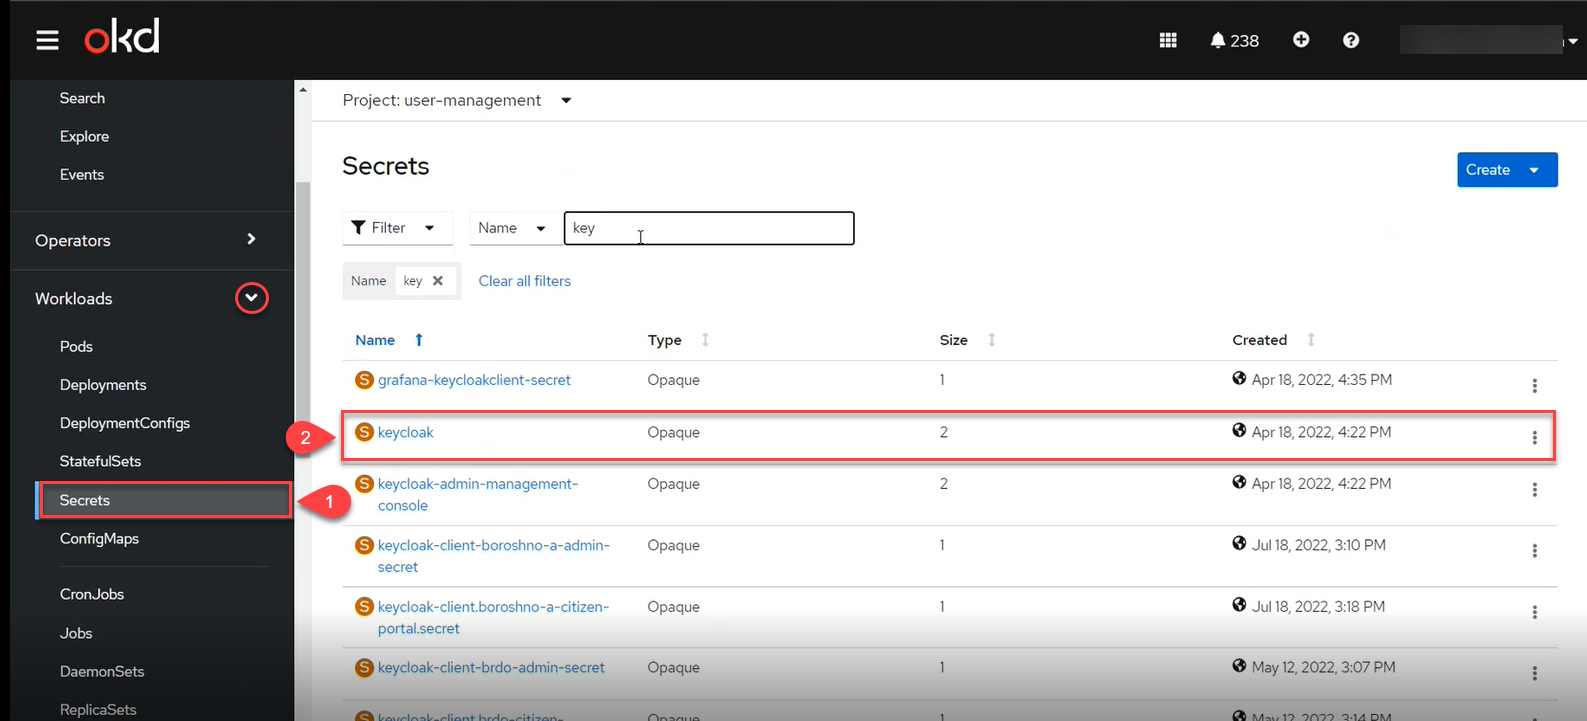
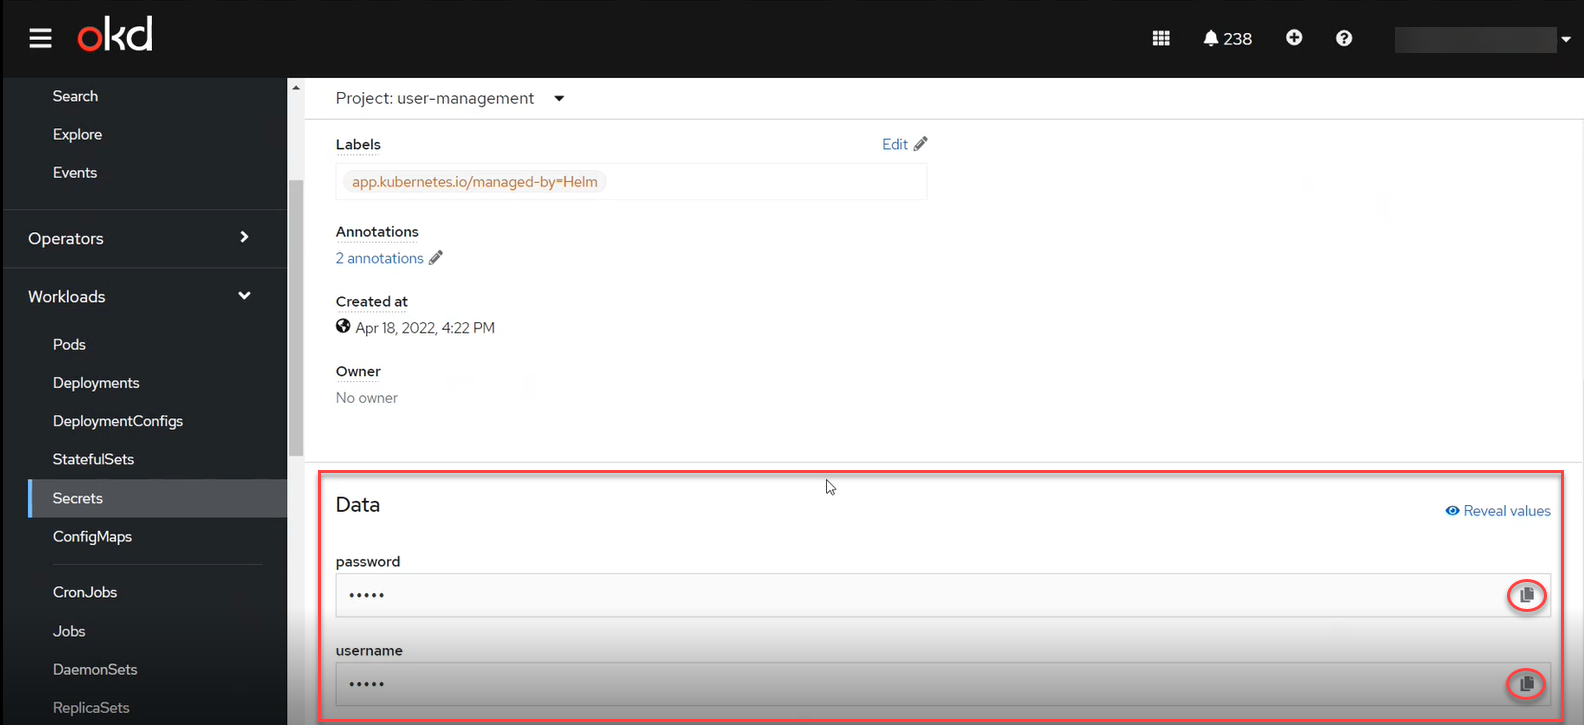
The username and password can be obtained from the secrets for the
Keycloakservice.To do this, go to Workloads > Secrets > keycloak and copy the secrets.
-
Log in to the
-adminrealm. This is where registry administrators are created and their roles (access rights) are defined.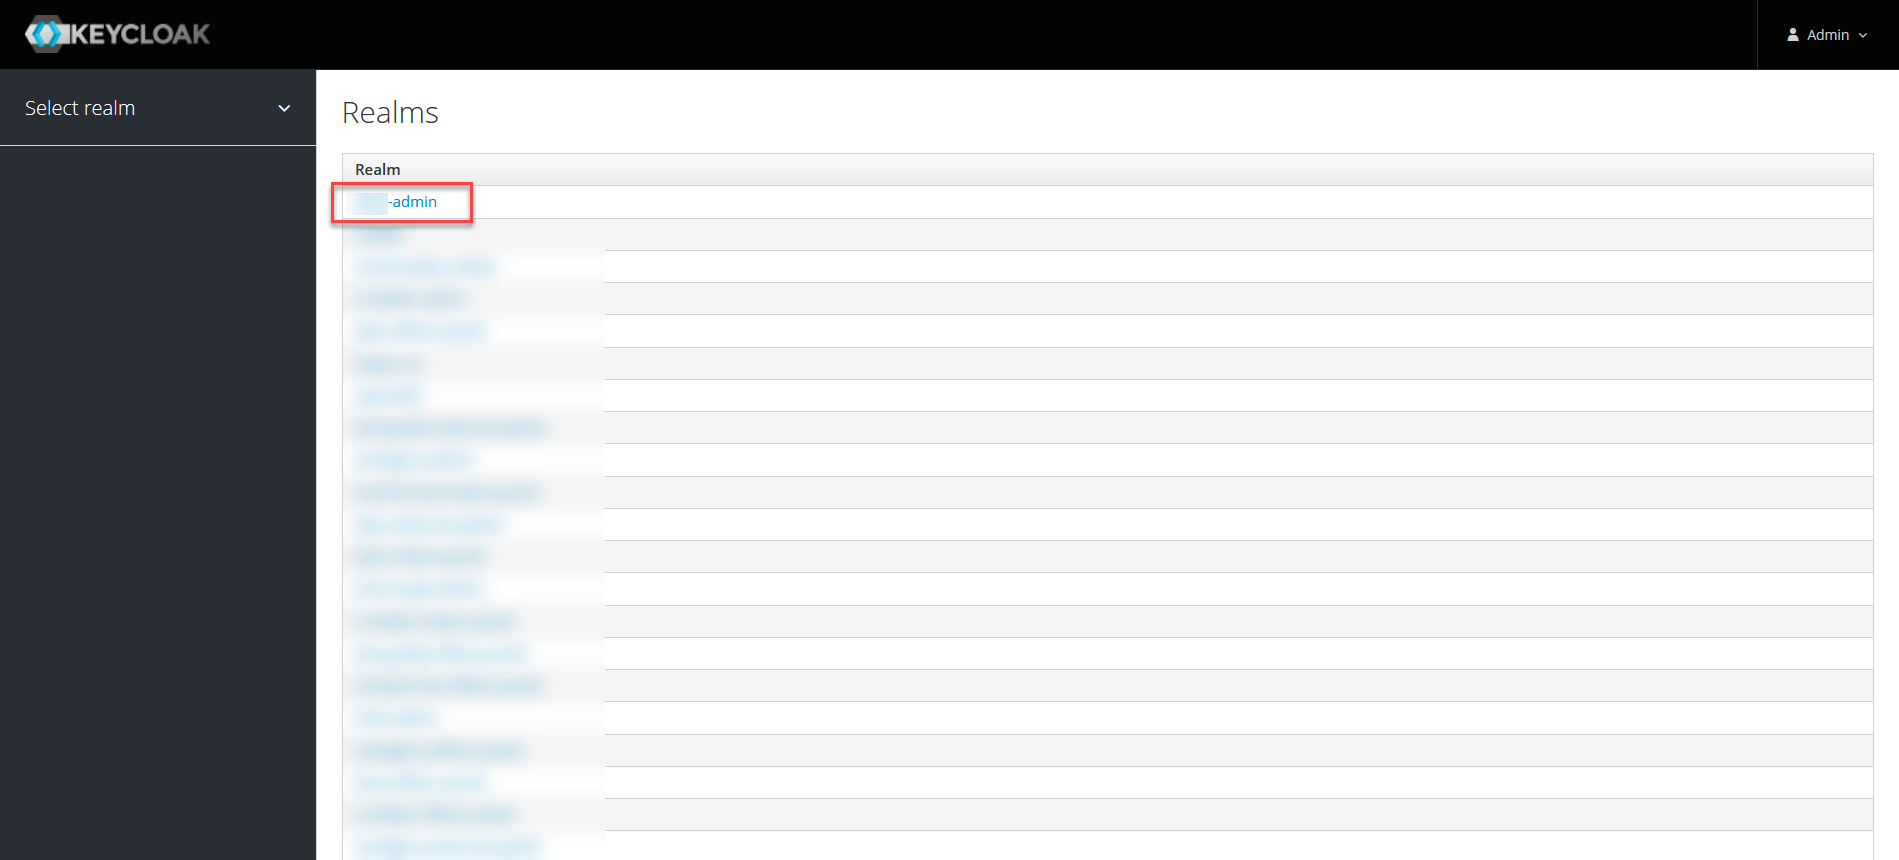
-
In the
-adminrealm, create a user and assign them the following roles: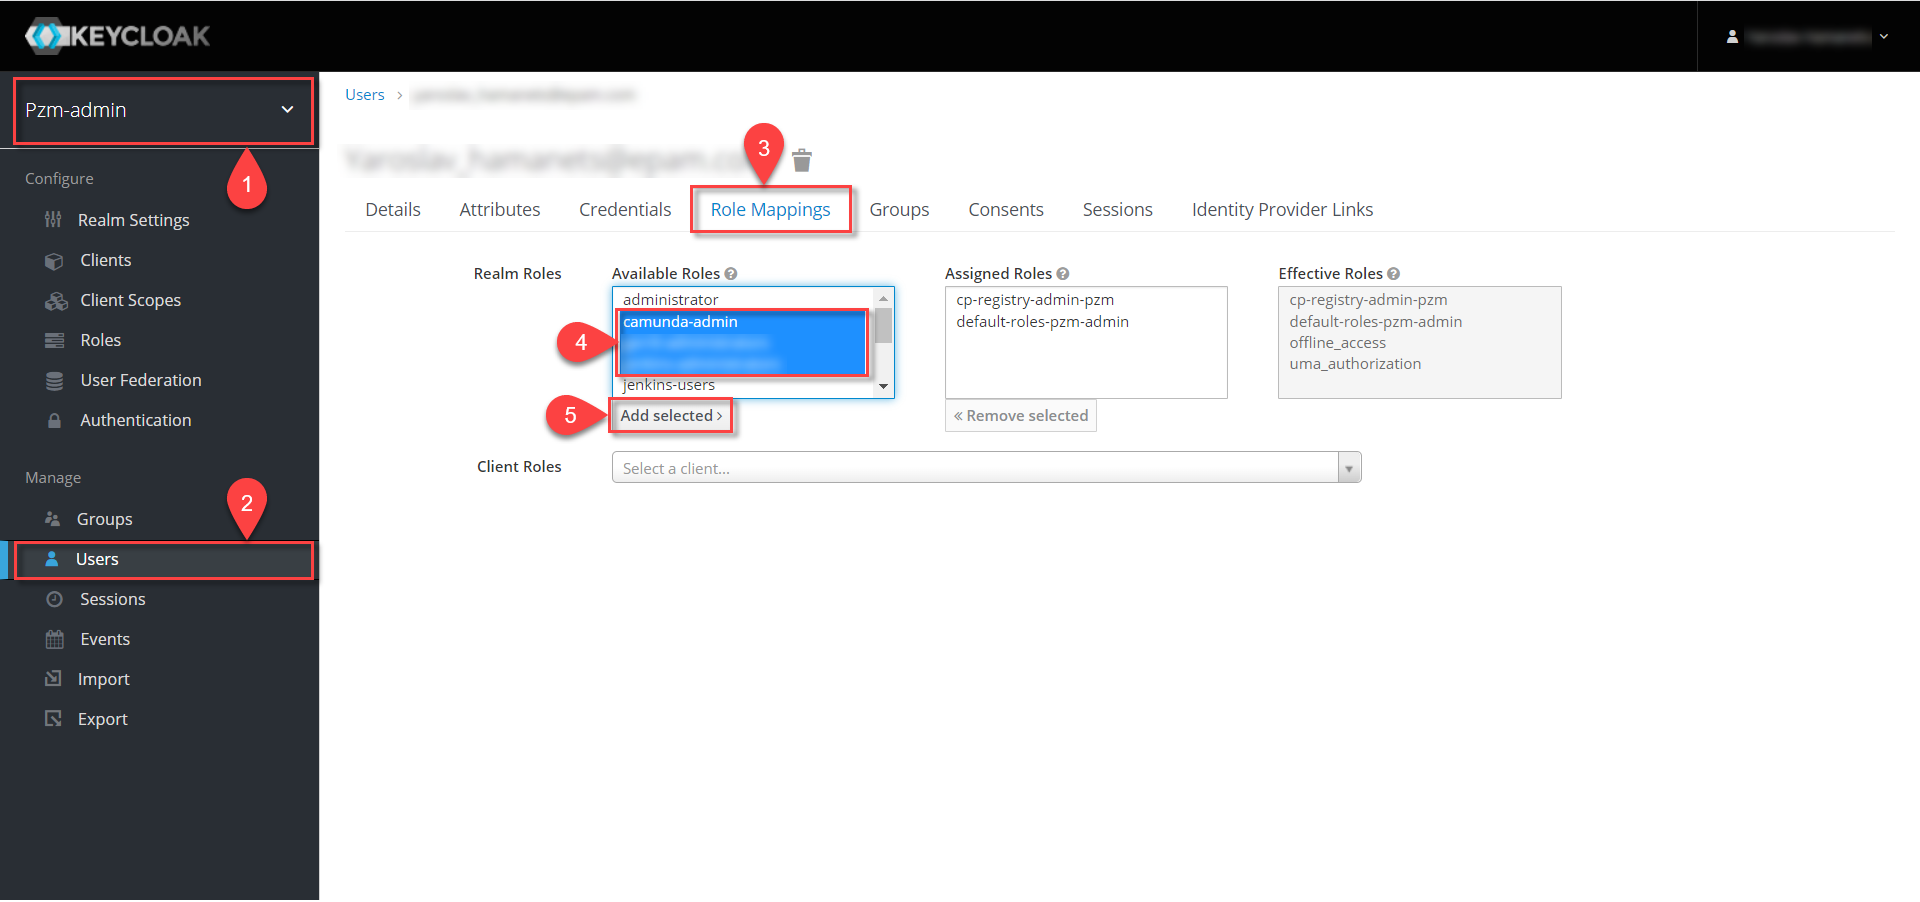
-
gerrit-administrators— Gerrit administrators, this role is necessary for deploying regulations and approving changes (passing Quality Gates); -
jenkins-administrators— Jenkins administrators, this role is necessary for running clean-up jobs, reviewing generated and added Jenkins pipelines, viewing logs, etc.; -
camunda-admin— Camunda Cockpit administrators, this role is necessary for viewing available business processes, rules, tasks, etc.
-
-
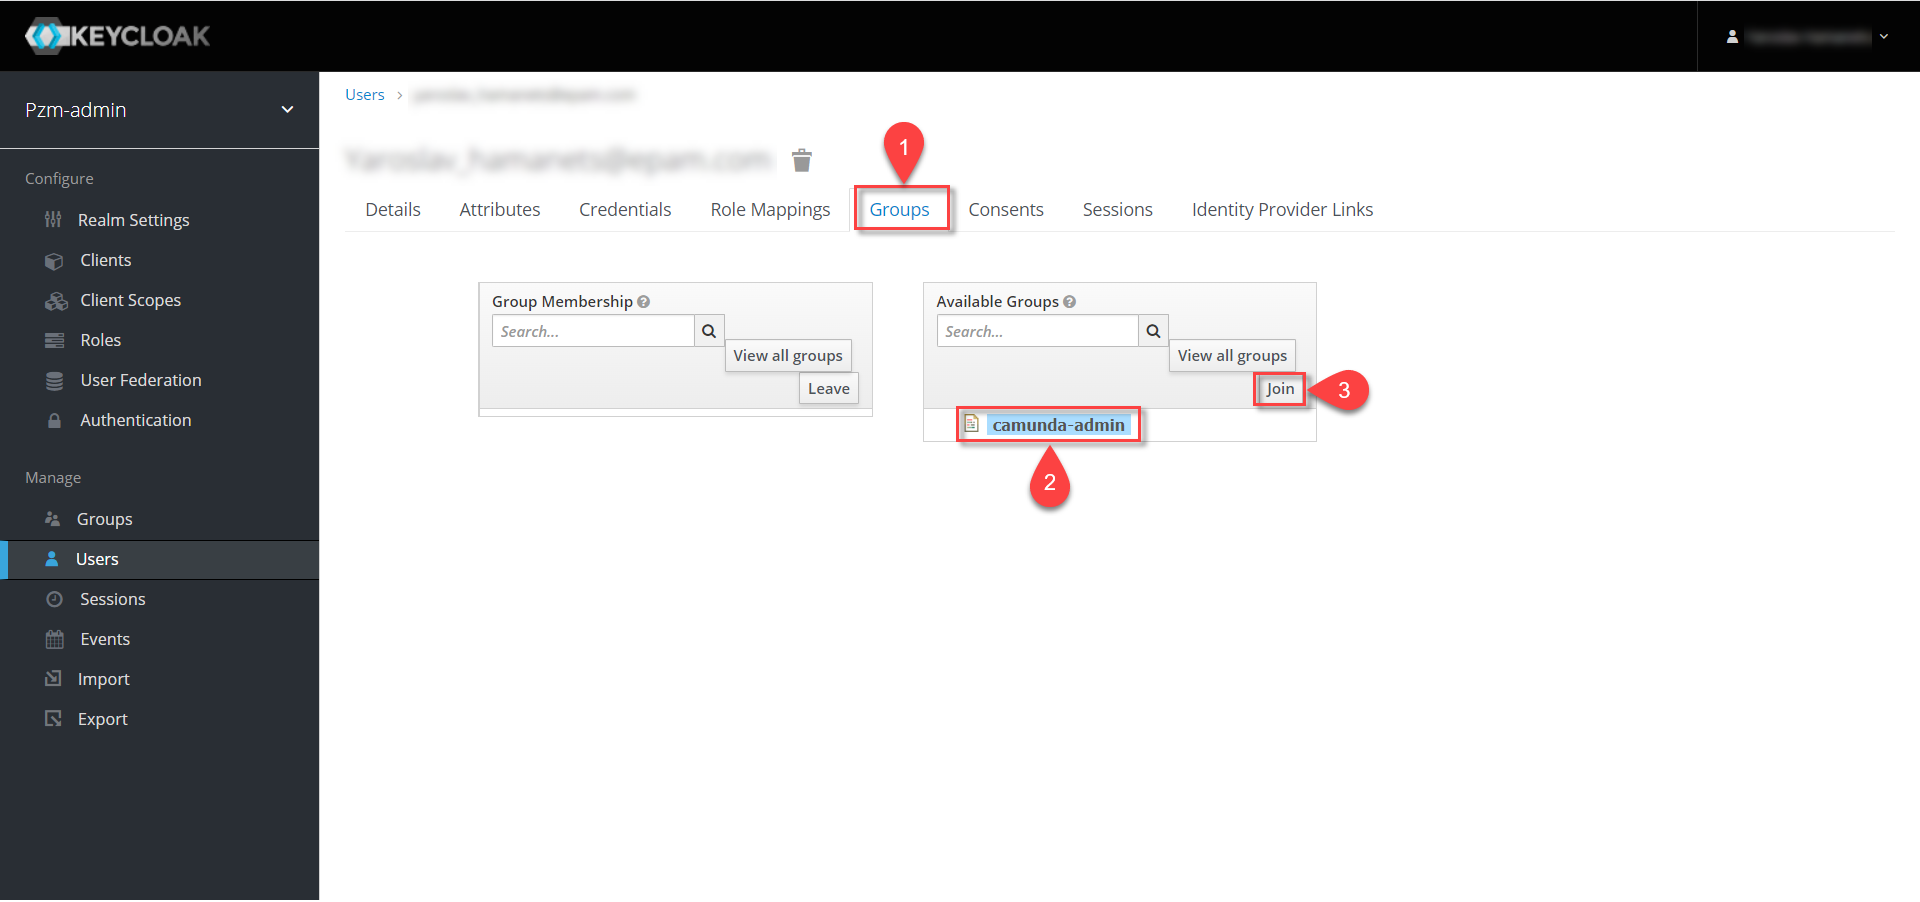
In addition to the role, assign a group to the user:
-
Go to the Groups > Available Groups tab.
-
Select the
camunda-admingroup. -
Click
join.As a result, the group should appear in the Group Membership list.
-
3. Related articles
After deploying the Platform in the target environment and before deploying any registry, it is necessary to first create the Platform administrator(s).
You can find out how to do this by following the link: