Supporting alternative branches in business processes
1. Overview
Alternative branches in business processes allow an officer to revert to the previous form of a process and modify the entered data, or cancel information entered in the form and return to the service menu. This is possible if the business process comprises two or more consequent tasks assigned to an officer, or when the process is modelled with a start form.
- There are 2 scenarios for using this functionality
-
-
An officer can revert to the previous task in the Portal, in accordance with the navigation in the modelled branch of a business process (Step back).
-
An officer can cancel the data entered in the form in the Portal, terminate the process through the alternative branch and return to the service menu (Cancel).
-
|
Both scenarios are implemented by means of the navigation in the Button component in the form for signing data using QES. The buttons modelled using the Button component are located on the data signature form, under the QES widget, and are visually separated from the widget. |
| Every transition via an alternative branch = an individual Button key with navigation on the forms. |
2. Modelling and configuring the buttons for alternative branches on the business process forms
Using the navigation function and the _action_code attribute in the Button component, it is possible to set up returning to the previous forms in a business process, and cancelling the information entered in a form and returning to the service menu.
Clicking a button with modelled Navigation results in either returning to one of the previous forms or termination of the task and returning to the service menu. In this case, the _action_code field in the form data takes the value of the Action code parameter.
The buttons modelled using the Button component are located in the data signature form, under the QES widget, and are visually separated from the widget.
2.1. Configuring the Button component to return to the 1st form
-
Log in to Regulations administrator portal and press
Log on service.
-
Go to the UI form modelling service for business processes.

-
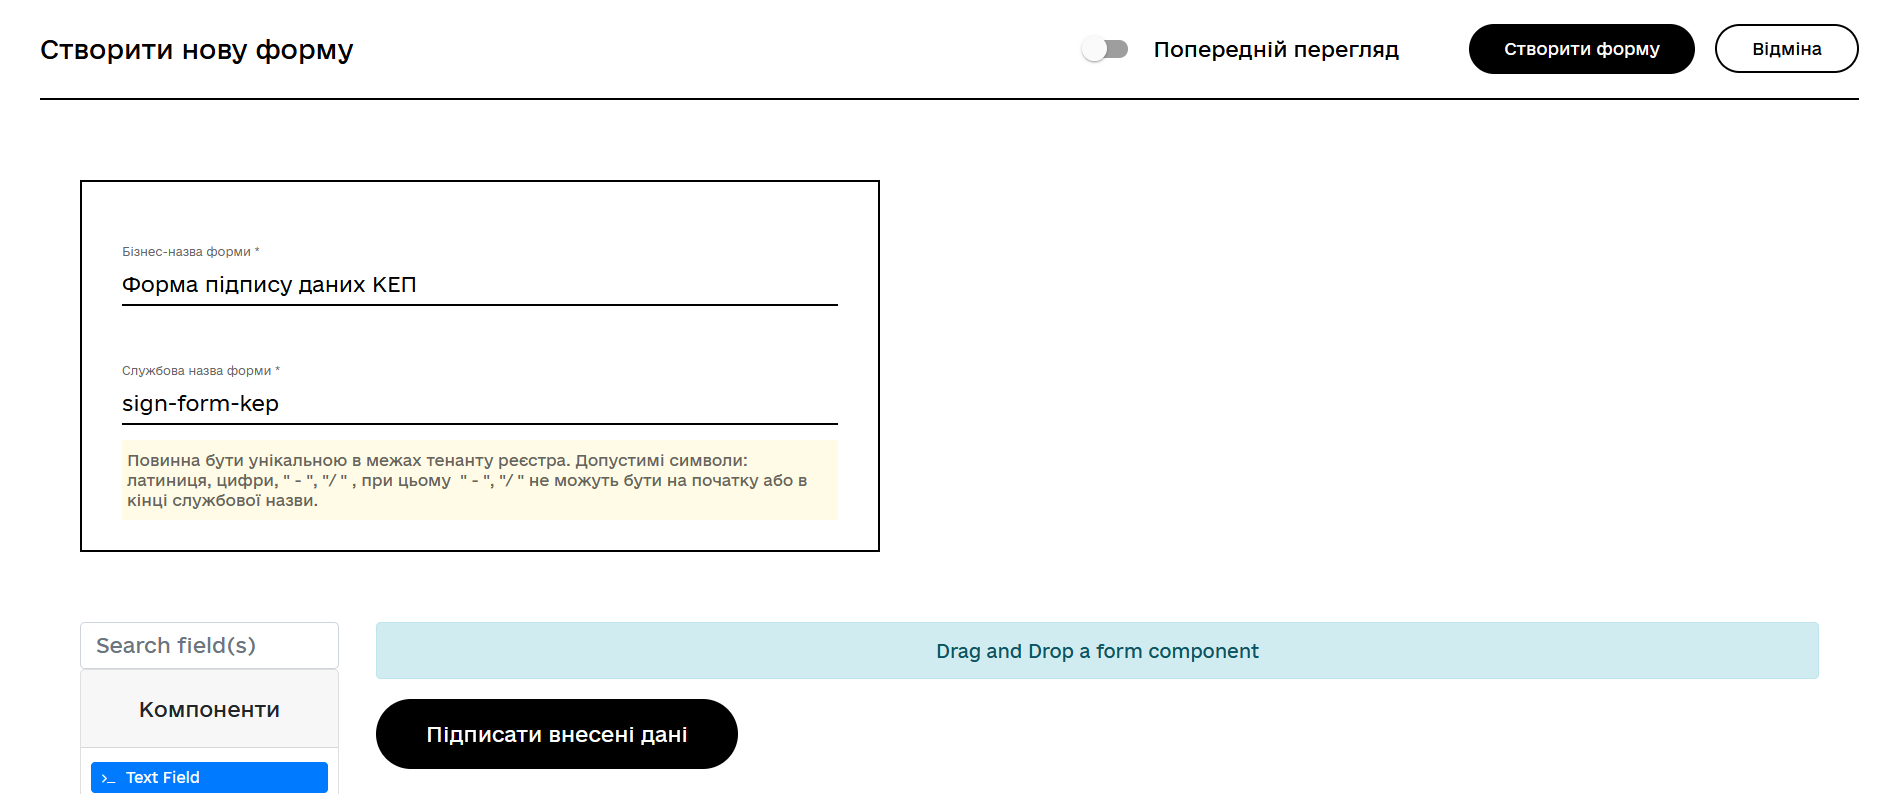
Create a new form for data signature using QES, or open one of the previously modelled forms.
For details about modelling UI forms for business processes, see:
-
Find the Components section in the forms for data signature modelling menu.
-
Select the
Buttoncomponent, drag it and drop into the modelling central panel.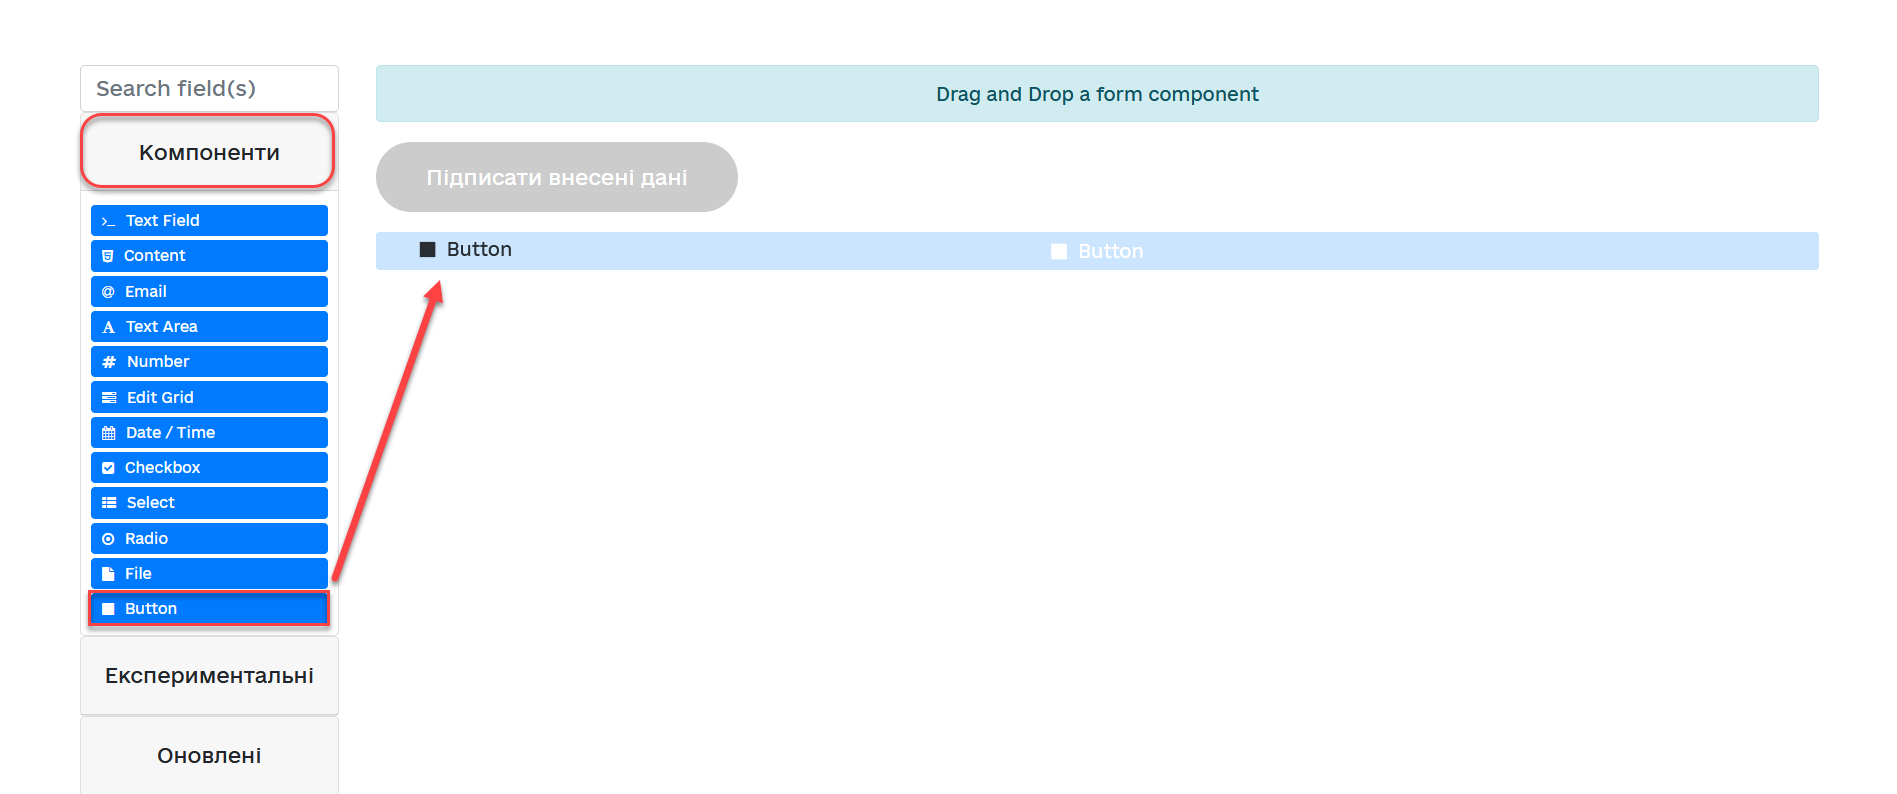
The page with the Button component settings opens.
-
Go to the Display tab:
-
Enter the component (button) name into the
Labelfield. For example,Return to form 1. -
In the
Actionfield, select theNavigationtype from the dropdown menu. This means that the button will be used for navigation. -
In the
Action codefield, enter the navigation destination. For example, enter thereturn_to_firstvalue for returning to the first form. -
In the
Themefield, select the theme for the component from the dropdown menu. For example, selectSecondary.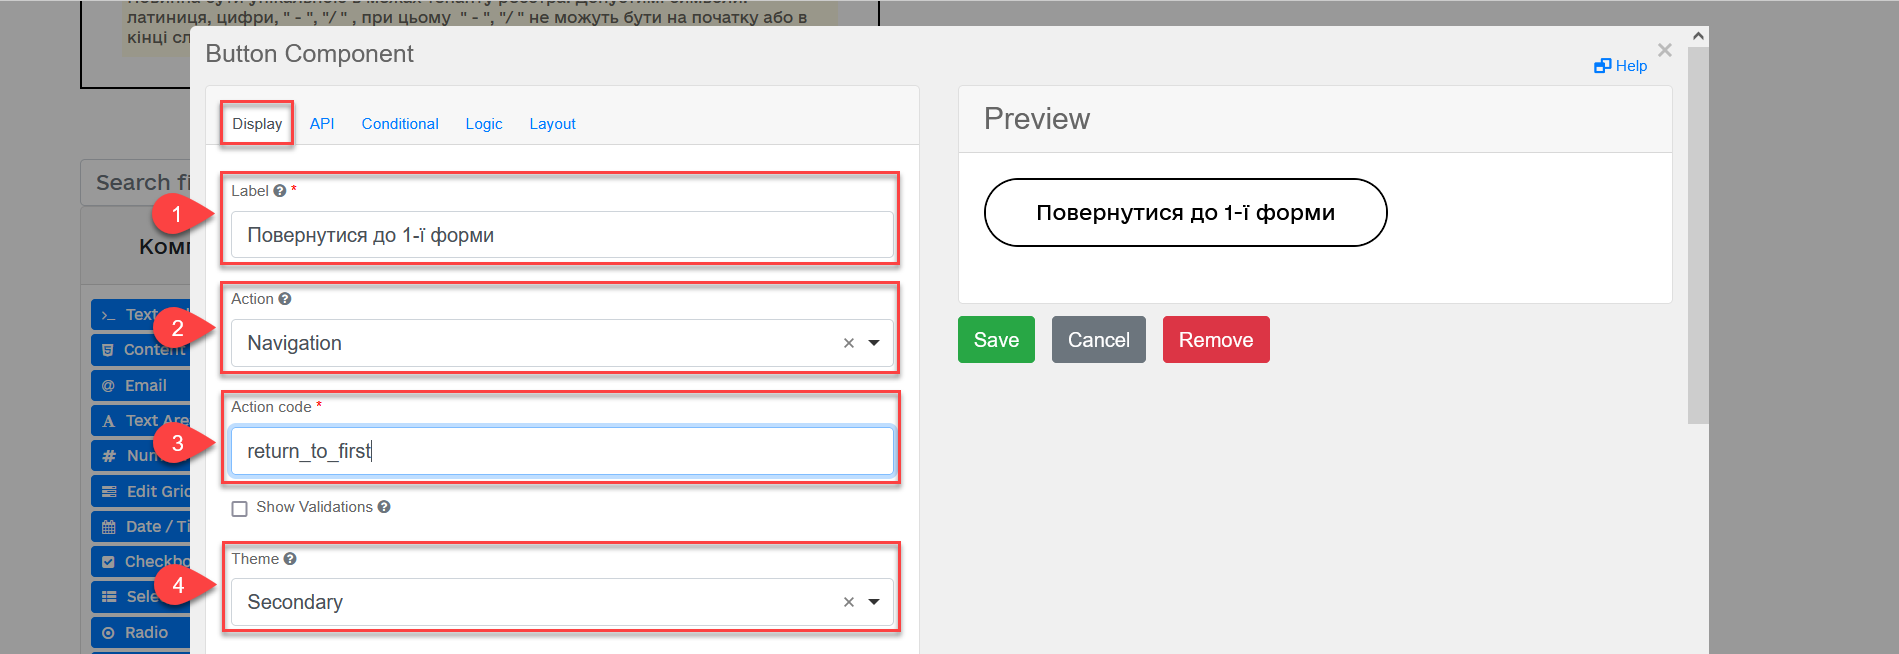
-
-
Go to the API tab. In the
Property namefield, enter the API endpoint name. For example,returnToFirst. -
Click
Saveto save the changes made to the form component.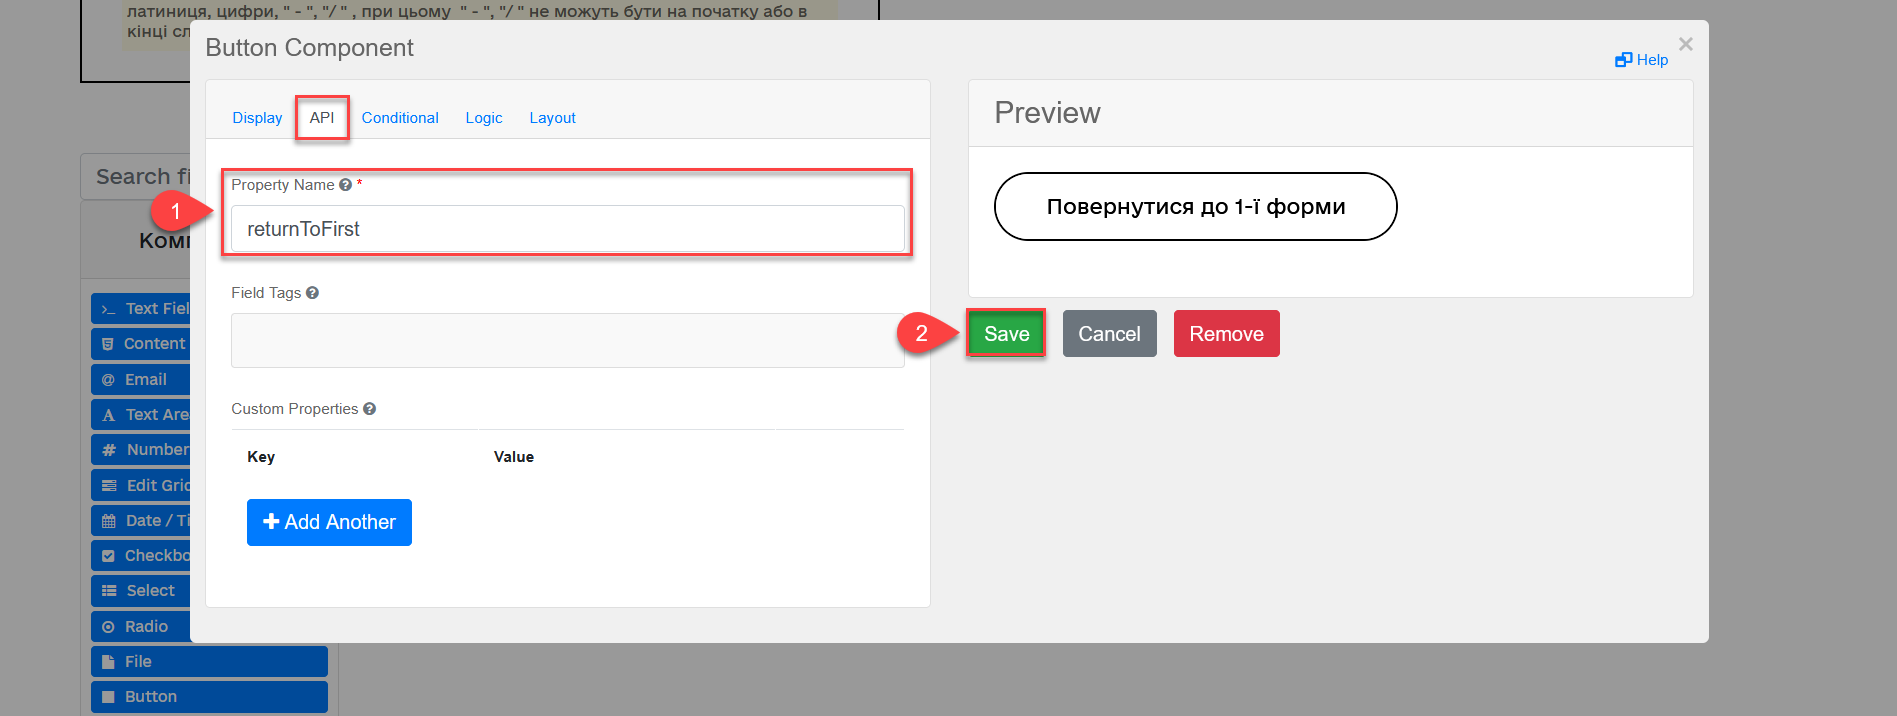
2.2. Configuring the Button component to return to the 2nd form
Configuring the Button component to return to any form using the navigation function is identical, except the Action code value, and Property name for the API endpoint (see details in Configuring the Button component to return to the 1st form).
|
-
Open the Button component settings.
-
Go to the Display tab.
-
Enter the component (button) name in the
Labelfield. For example,Return to form 2. -
In the
Actionfield, select theNavigationtype from the dropdown list. This means that the button will be used for navigation. -
In the
Action codefield, enter the navigation destination. For example, enter thereturn_to_secondvalue for returning to the second form. -
In the
Themefield, select the theme for the component from the dropdown menu. For example, selectSecondary.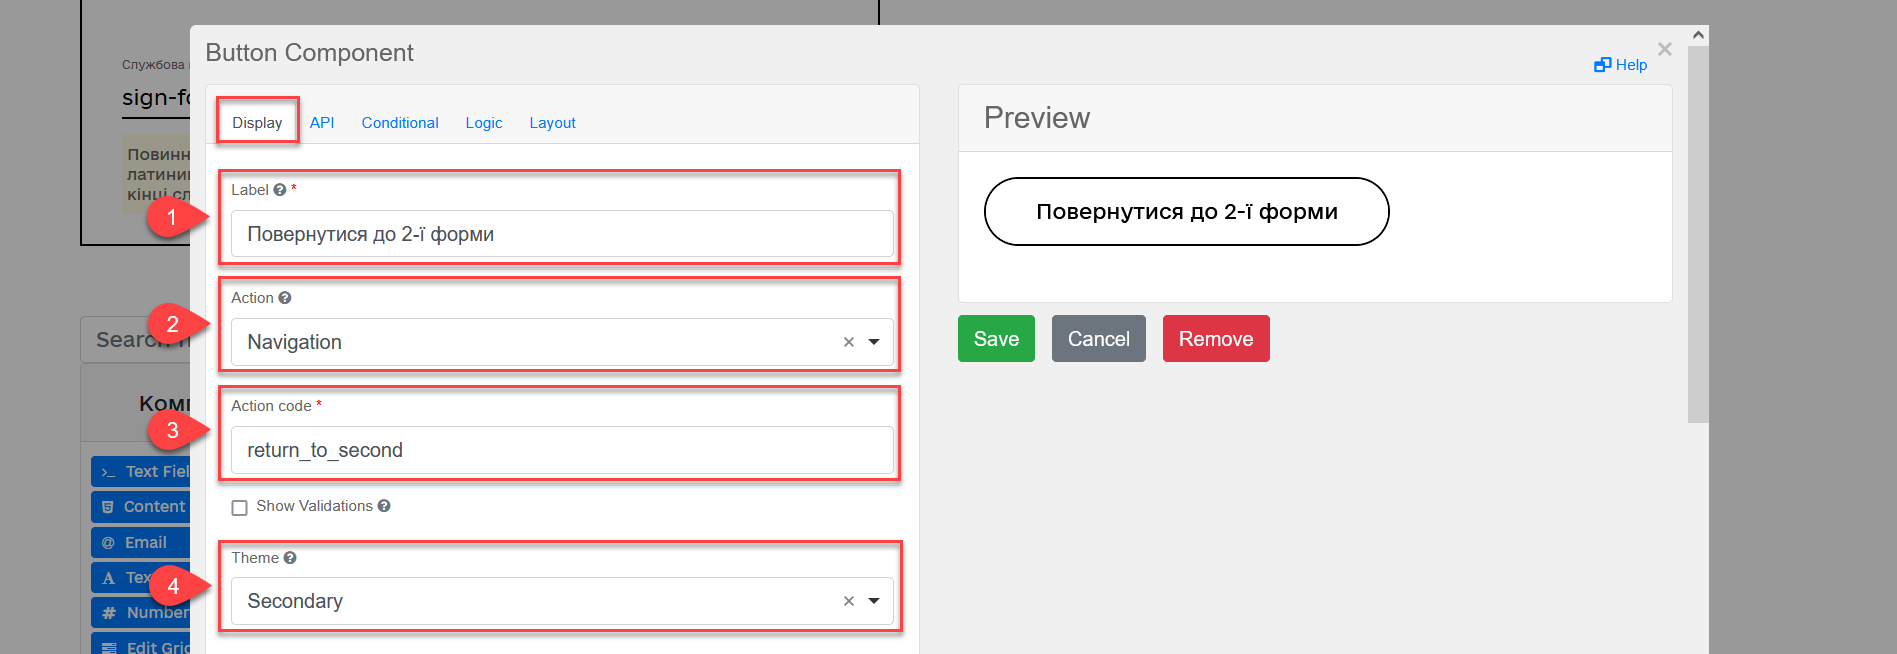
-
-
Go to the API tab. In the
Property namefield, enter the API endpoint name. For example,returnToSecond. -
Click
Saveto save the changes made to the form component.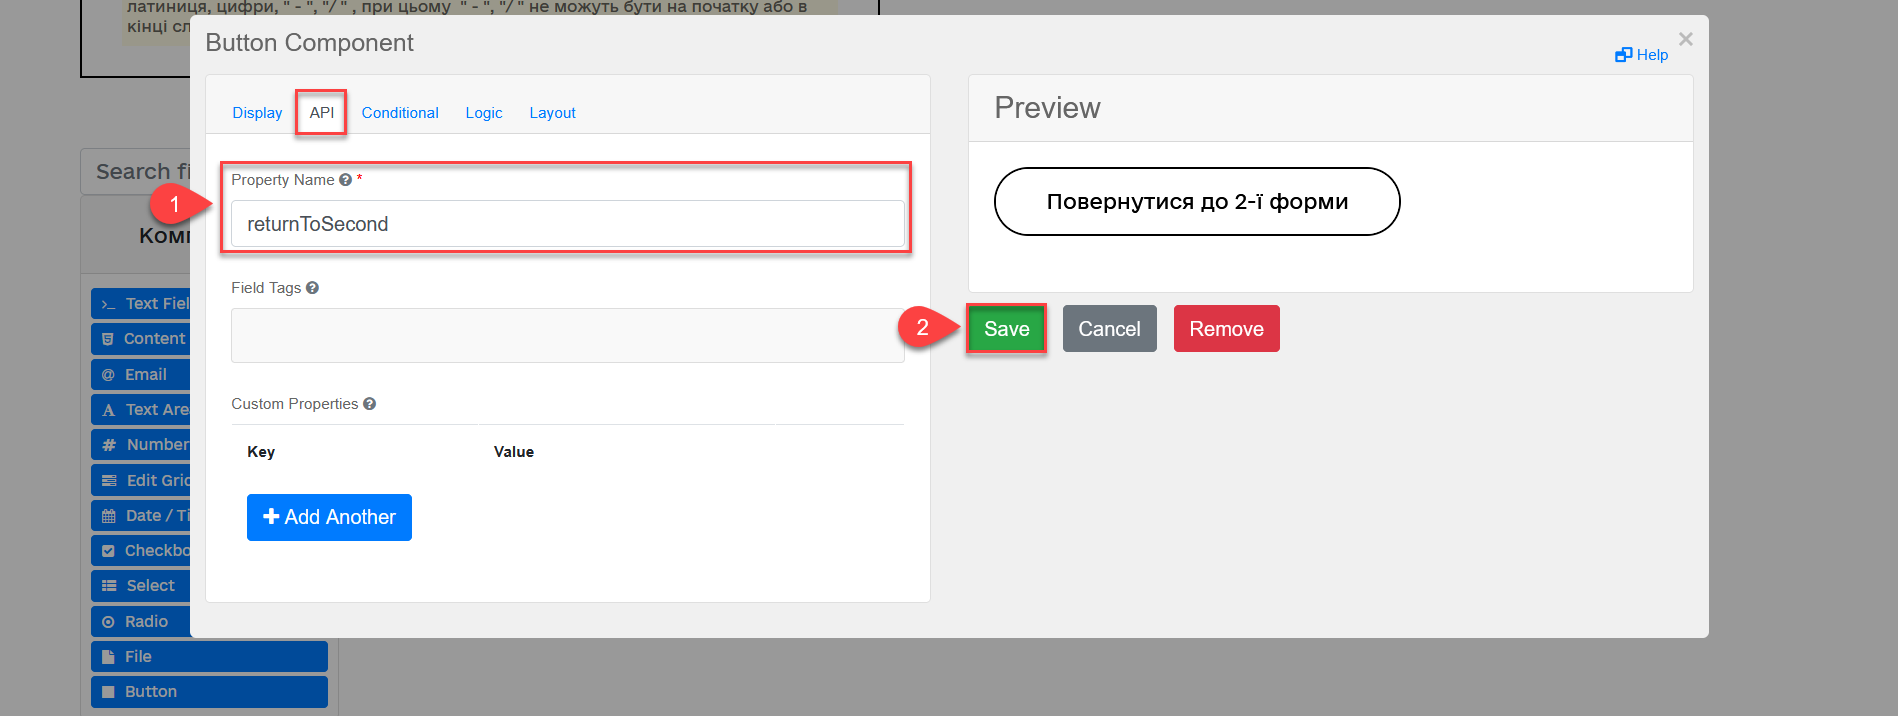
2.3. Configuring the Button component to cancel the data entered in the form and terminate the process
Configuring the Button component to cancel the data entered in the form, terminate the business process and return to the service menu is identical to returning to the previous forms using the navigation function, except the Action code value, and Property name for the API endpoint (see details in Configuring the Button component to return to the 1st form).
|
-
Open the Button component settings.
-
Go to the Display tab.
-
Enter the component (button) name in the
Labelfield. For example,Cancel. -
In the
Actionfield, select theNavigationtype from the dropdown list. This means that the button will be used for navigation. -
In the
Action codefield, enter the navigation action. For example, enter thecancelvalue for cancelling the data entered in a form and returning a user to the main menu. -
In the
Themefield, select the theme for the component from the dropdown menu. For example, selectSecondary.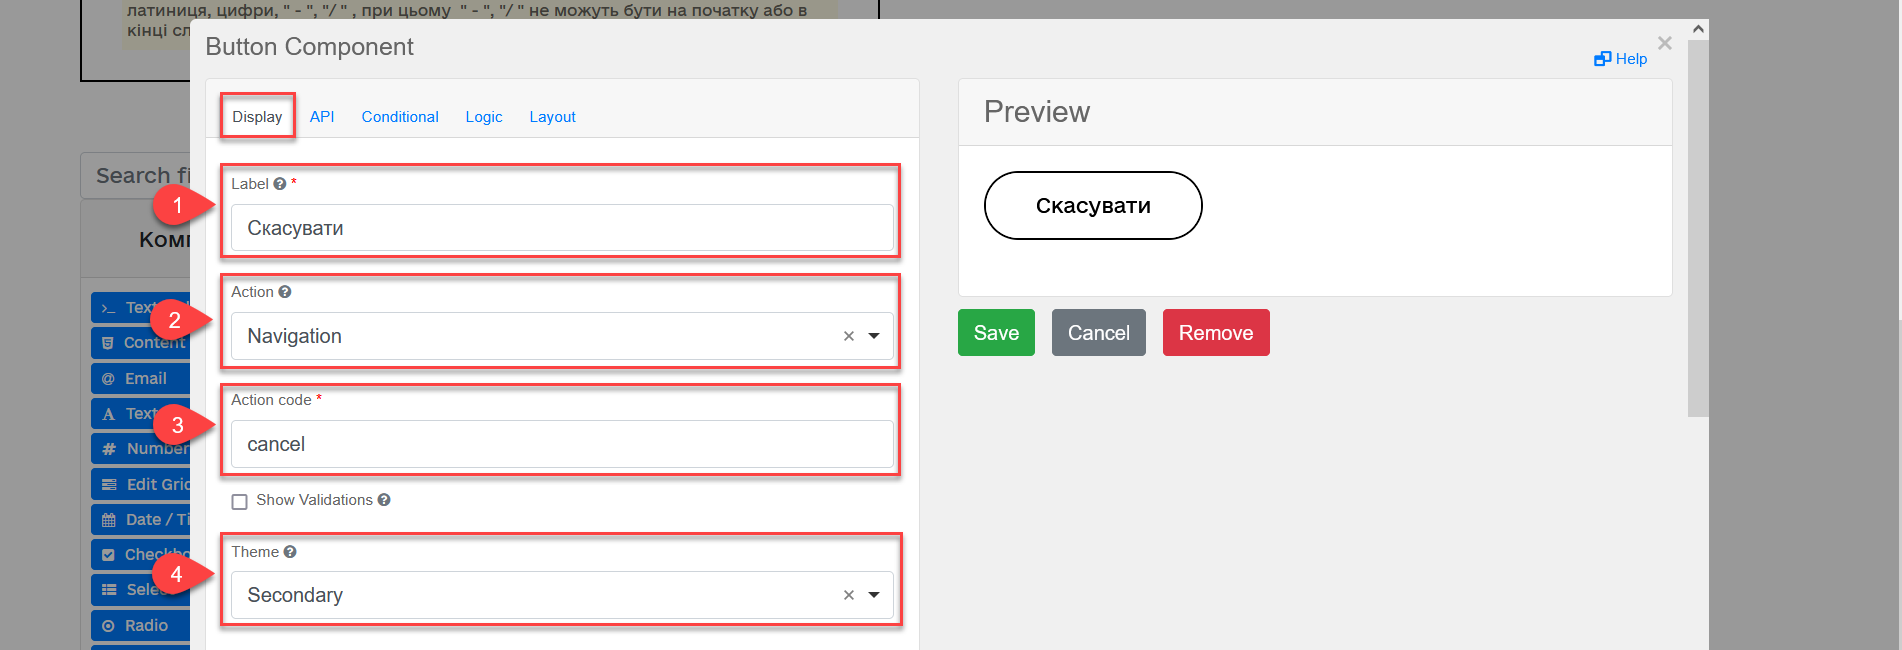
-
-
Go to the API tab. In the
Property namefield, enter the API endpoint name. For example,cancel. -
Click
Saveto save the changes made to the form component.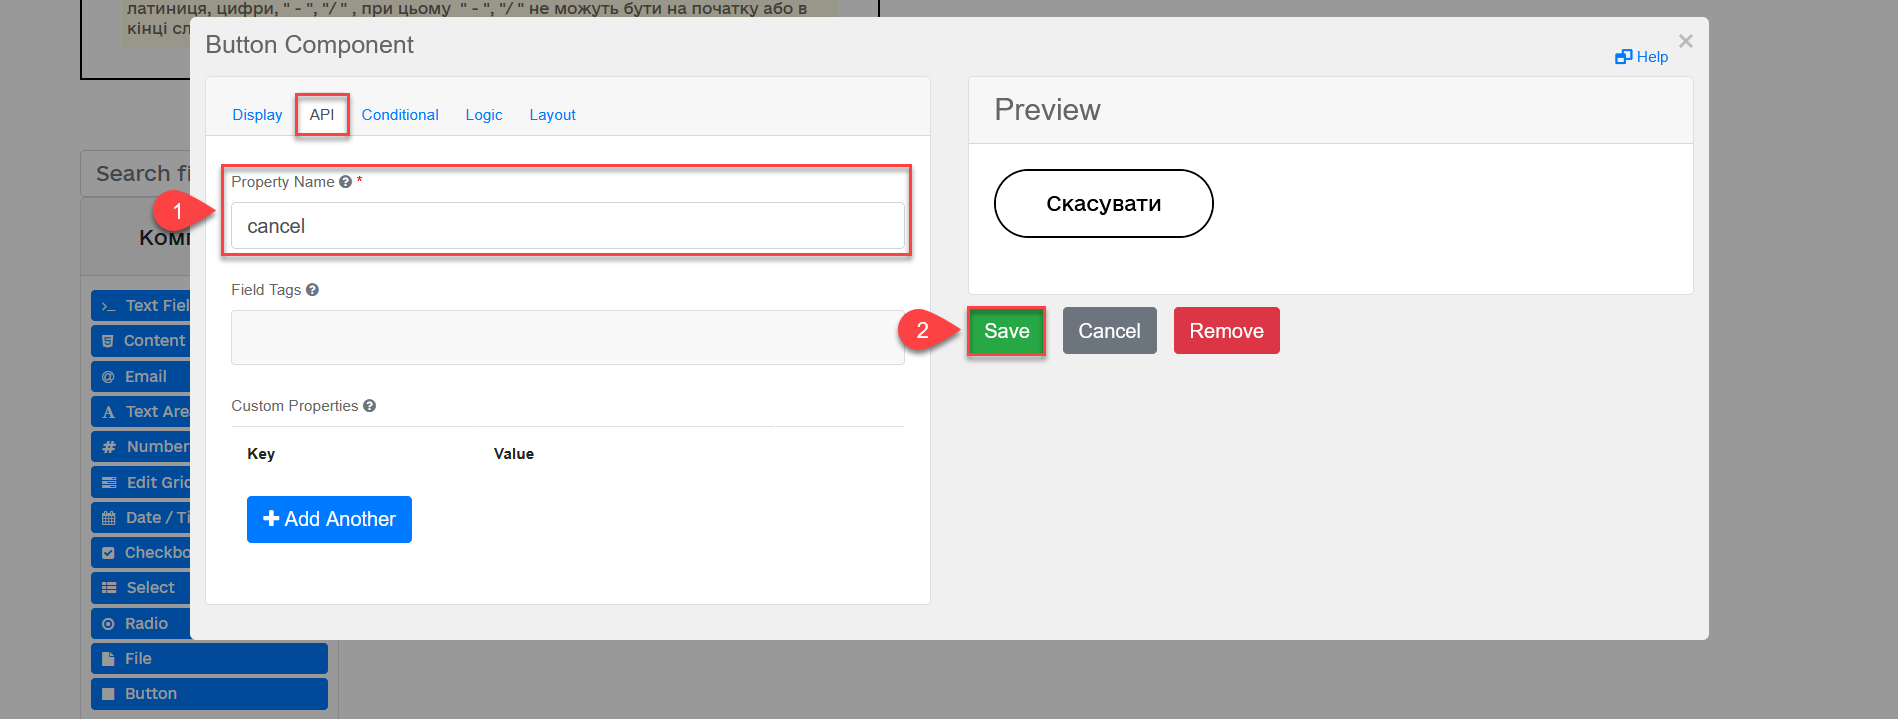
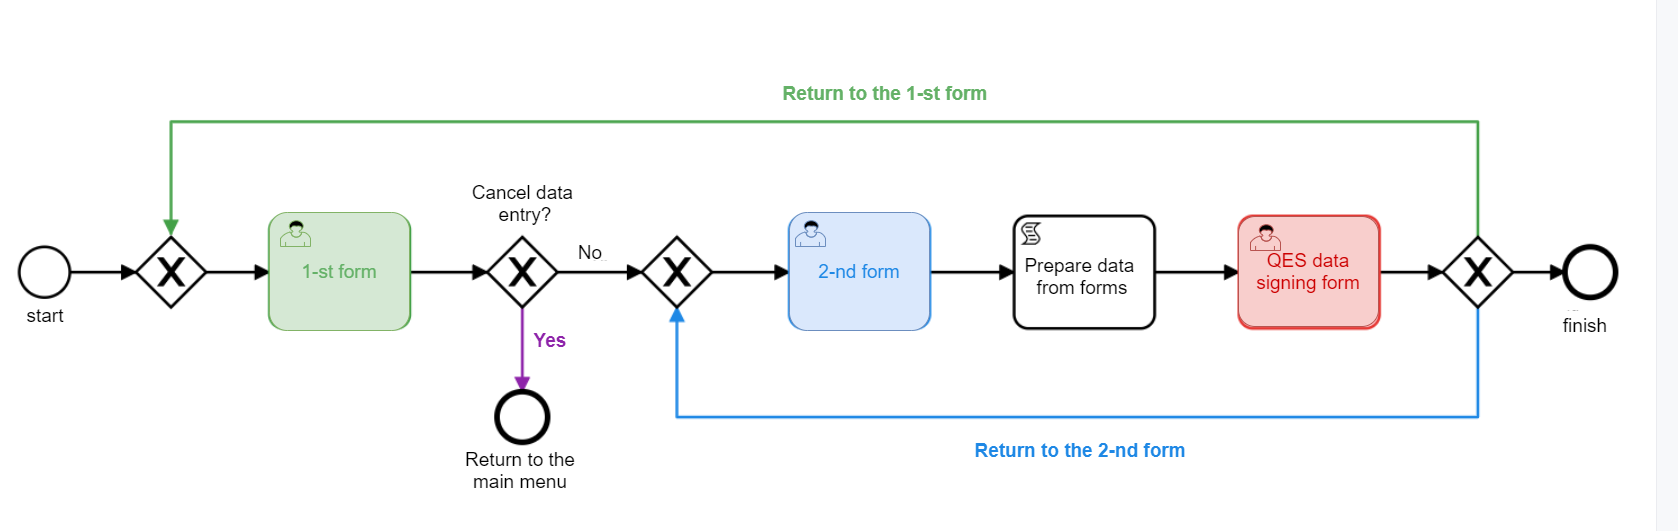
3. Modelling and configuring alternative branches in a business process
A modelled synthetic business process allowing to set up corresponding alternative branches:
|
3.1. Modelling returning to form 1
-
Select a branch navigating to the form you want to return to. In our case that is the green branch.
-
Enter the branch name in the
Namefield. For example,Return to form 1. -
In the
Condition Typefield, select theExpressiontype. -
In the
Expressionfield, model navigation to form 1 using thesubmission()JUEL expression.You can find the detailed description of the available JUEL functions in:
Example 1. Modelling returning to form 1 using the submission() JUEL function${submission('SignForm').formData.hasProp('_action_code') && submission('SignForm').formData.prop('_action_code').value().equals('return_to_first')}- Explanation
-
-
In the first part, before
&&, the expression checks whether'_action_code'exists in the form:{submission('SignForm').formData.hasProp('_action_code') -
In the second part, after
&&, the expression checks what does the'_action_code'value equal to. In our case, action code equals to'return_to_first':submission('SignForm').formData.prop('_action_code').value().equals('return_to_first') -
'return_to_first'is the value of theAction codefield when configuring a form in the form modelling service (configuration of a button navigating to the 1st form).
-
See Configuring the Button component to return to the 1st form for details about setting the form configuration. 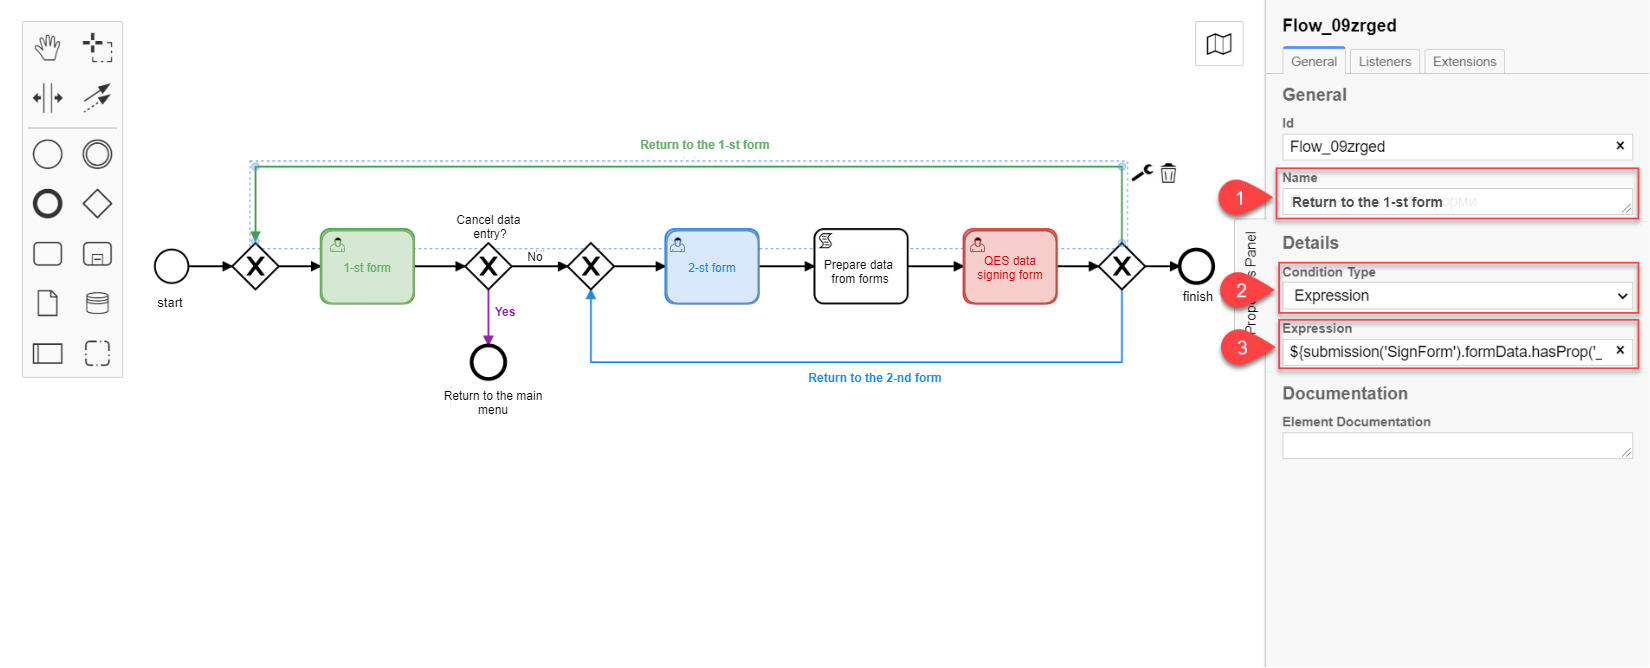
3.2. Modelling returning to form 2
Modelling returning to any forms through alternative branches is almost identical. Only the action_code parameter value changes that is identified when modelling a form for a business process. You have to pass this value to the submission() function.
-
Select a branch navigating to the form you want to return to. In our case that is the blue branch.
-
Enter the branch name in the
Namefield. For example,Return to form 2. -
In the
Condition Typefield, select theExpressiontype. -
In the
Expressionfield, model navigation to form 2 using thesubmission()JUEL expression.You can find the detailed description of the available JUEL functions in:
Example 2. Modelling returning to form 2 using the submission() JUEL function${submission('SignForm').formData.hasProp('_action_code') && submission('SignForm').formData.prop('_action_code').value().equals('return_to_second')}- Explanation
-
-
In the first part, before
&&, the expression checks whether'_action_code'exists in the form for data signing:{submission('SignForm').formData.hasProp('_action_code') -
In the second part, after
&&, the expression checks what does the'_action_code'value equal to. In our case, action code equals to'return_to_second':submission('SignForm').formData.prop('_action_code').value().equals('return_to_first') -
'return_to_second'is the value of theAction codefield when configuring a form in the form modelling service (configuration of a button navigating to the 2nd form).
-
See Configuring the Button component to return to the 2nd form for details about setting the form configuration. 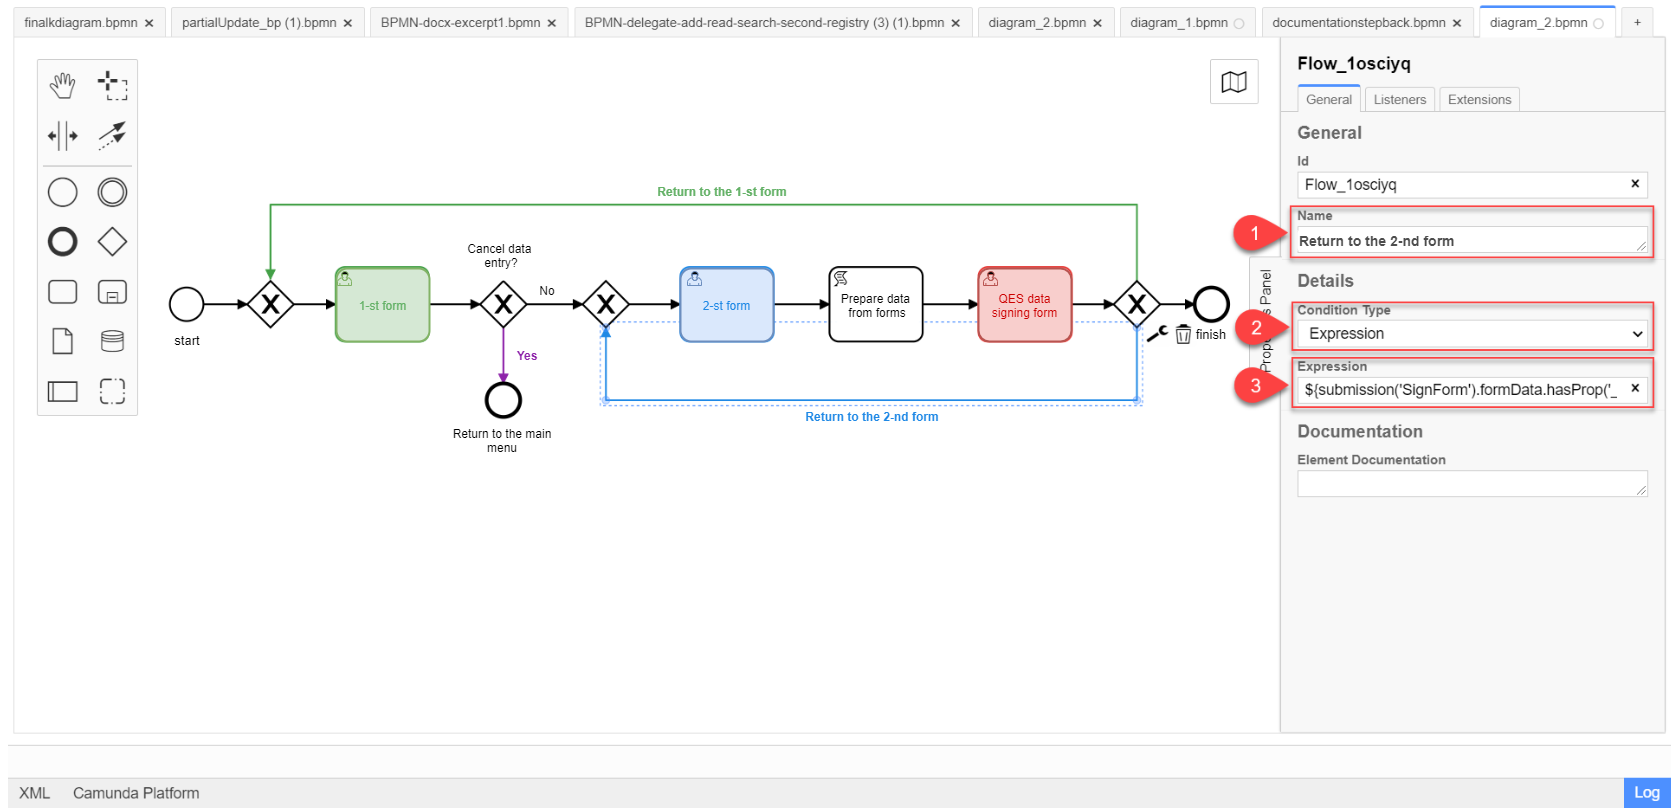
3.3. Modeling cancellation of data entered in the form and returning to the main menu
Modeling cancellation of data entered in the form and returning to the main menu through alternative branches is almost identical to the previous forms for data correction. Only the _action_code parameter value changes that is identified when modelling a form for a business process. You have to pass this value to the submission() function.
-
Select the XOR gateway having a branch to cancellation.
-
Enter the
Cancel data enteringname into theNamefield.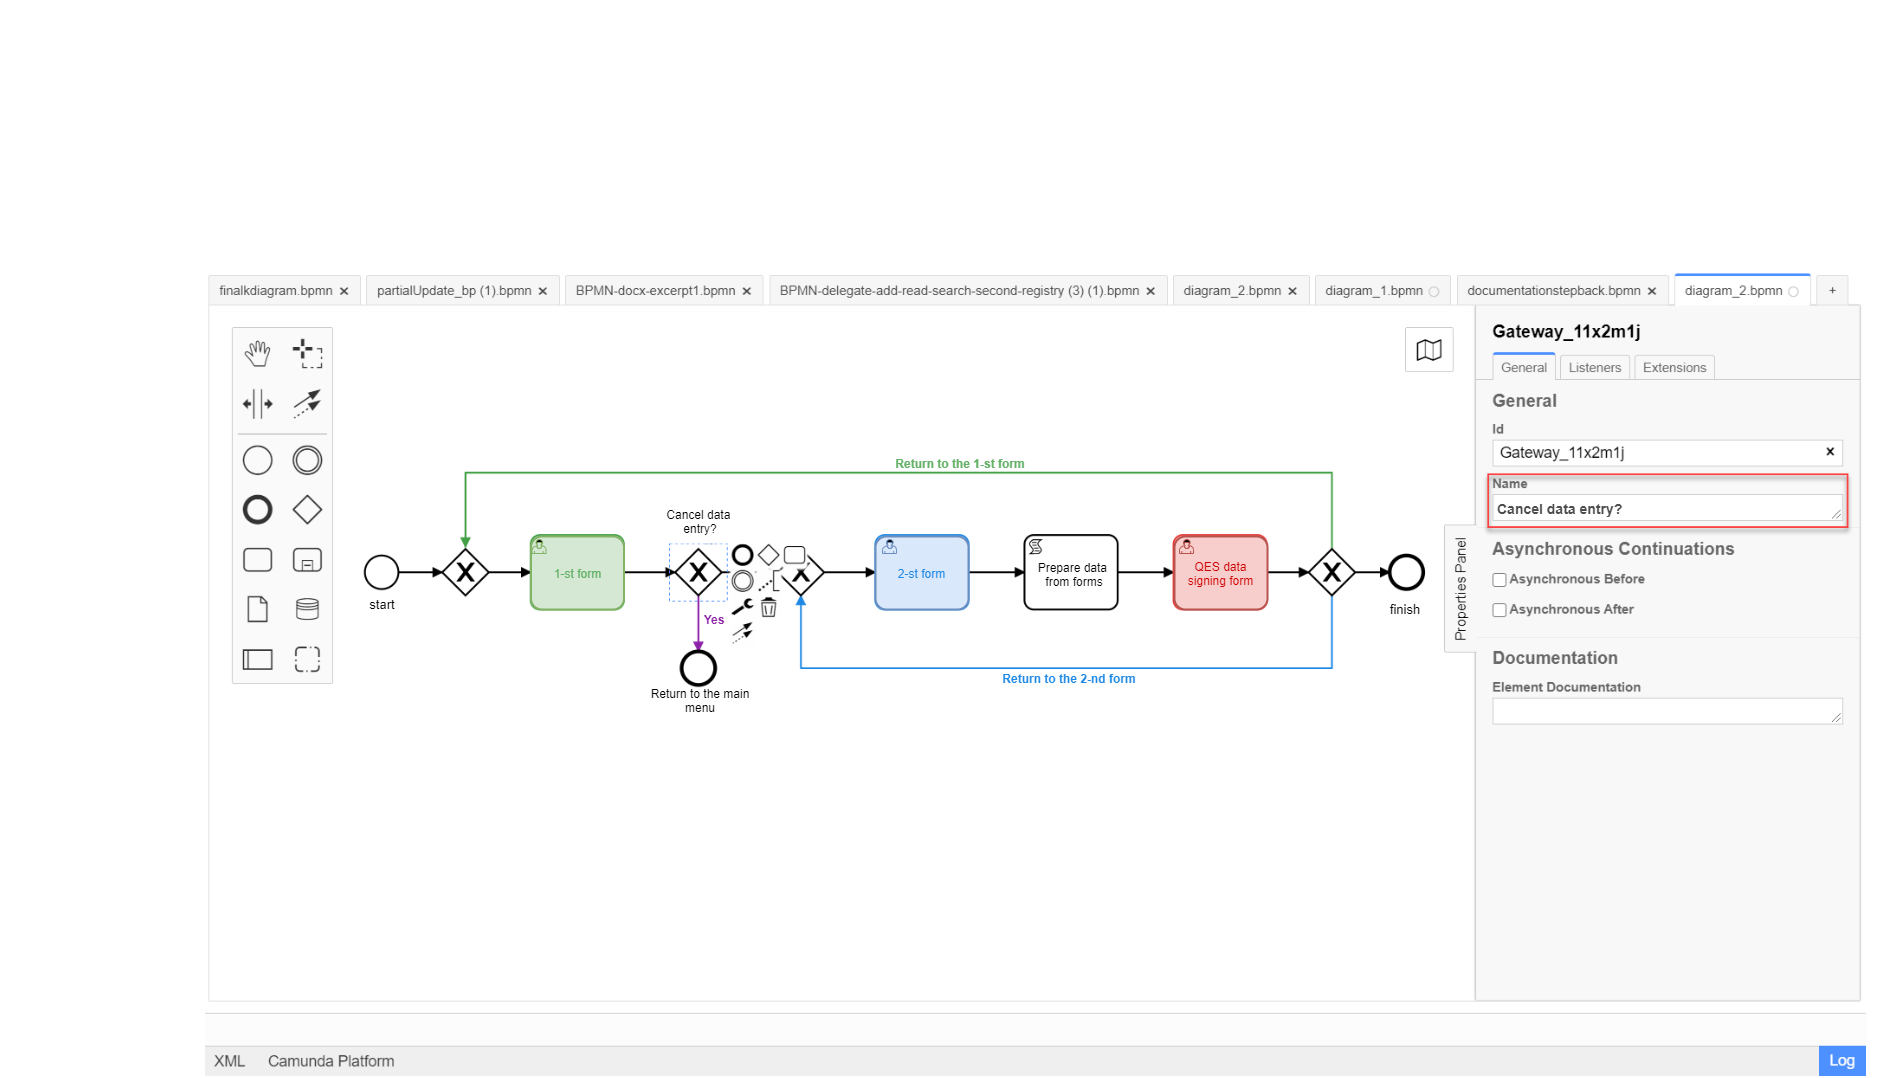
-
Select a branch navigating to cancellation of entered data and termination of the business process. In our case that is the violet branch.
-
In the
Namefield, enter the branch name. For example,Yes.-
In the
Condition Typefield, select theExpressiontype. -
In the
Expressionfield, model the cancellation of entered data and returning to the service menu using thesubmission()JUEL expression.You can find the detailed description of the available JUEL functions in:
Example 3. Modelling cancellation of entered data and returning to the service menu using thesubmission()JUEL expression${submission('Firsttask').formData.hasProp('_action_code') && submission('SignForm').formData.prop('_action_code').value().equals('cancel')}- Explanation
-
-
In the first part, before
&&, the expression checks whether form 1 has'_action_code':{submission('Firsttask').formData.hasProp('_action_code') -
In the second part, after
&&, the expression checks what does the'_action_code'value equal to. In our case,action codeequals to'cancel':submission('Firsttask').formData.prop('_action_code').value().equals('cancel')'cancel'is the value of theAction codefield when configuring a form in the form modelling service (configuration of cancelling the entered data and returning to the service menu).
-
See Configuring the Button component to cancel the data entered in the form and terminate the process for details about setting the form configuration. 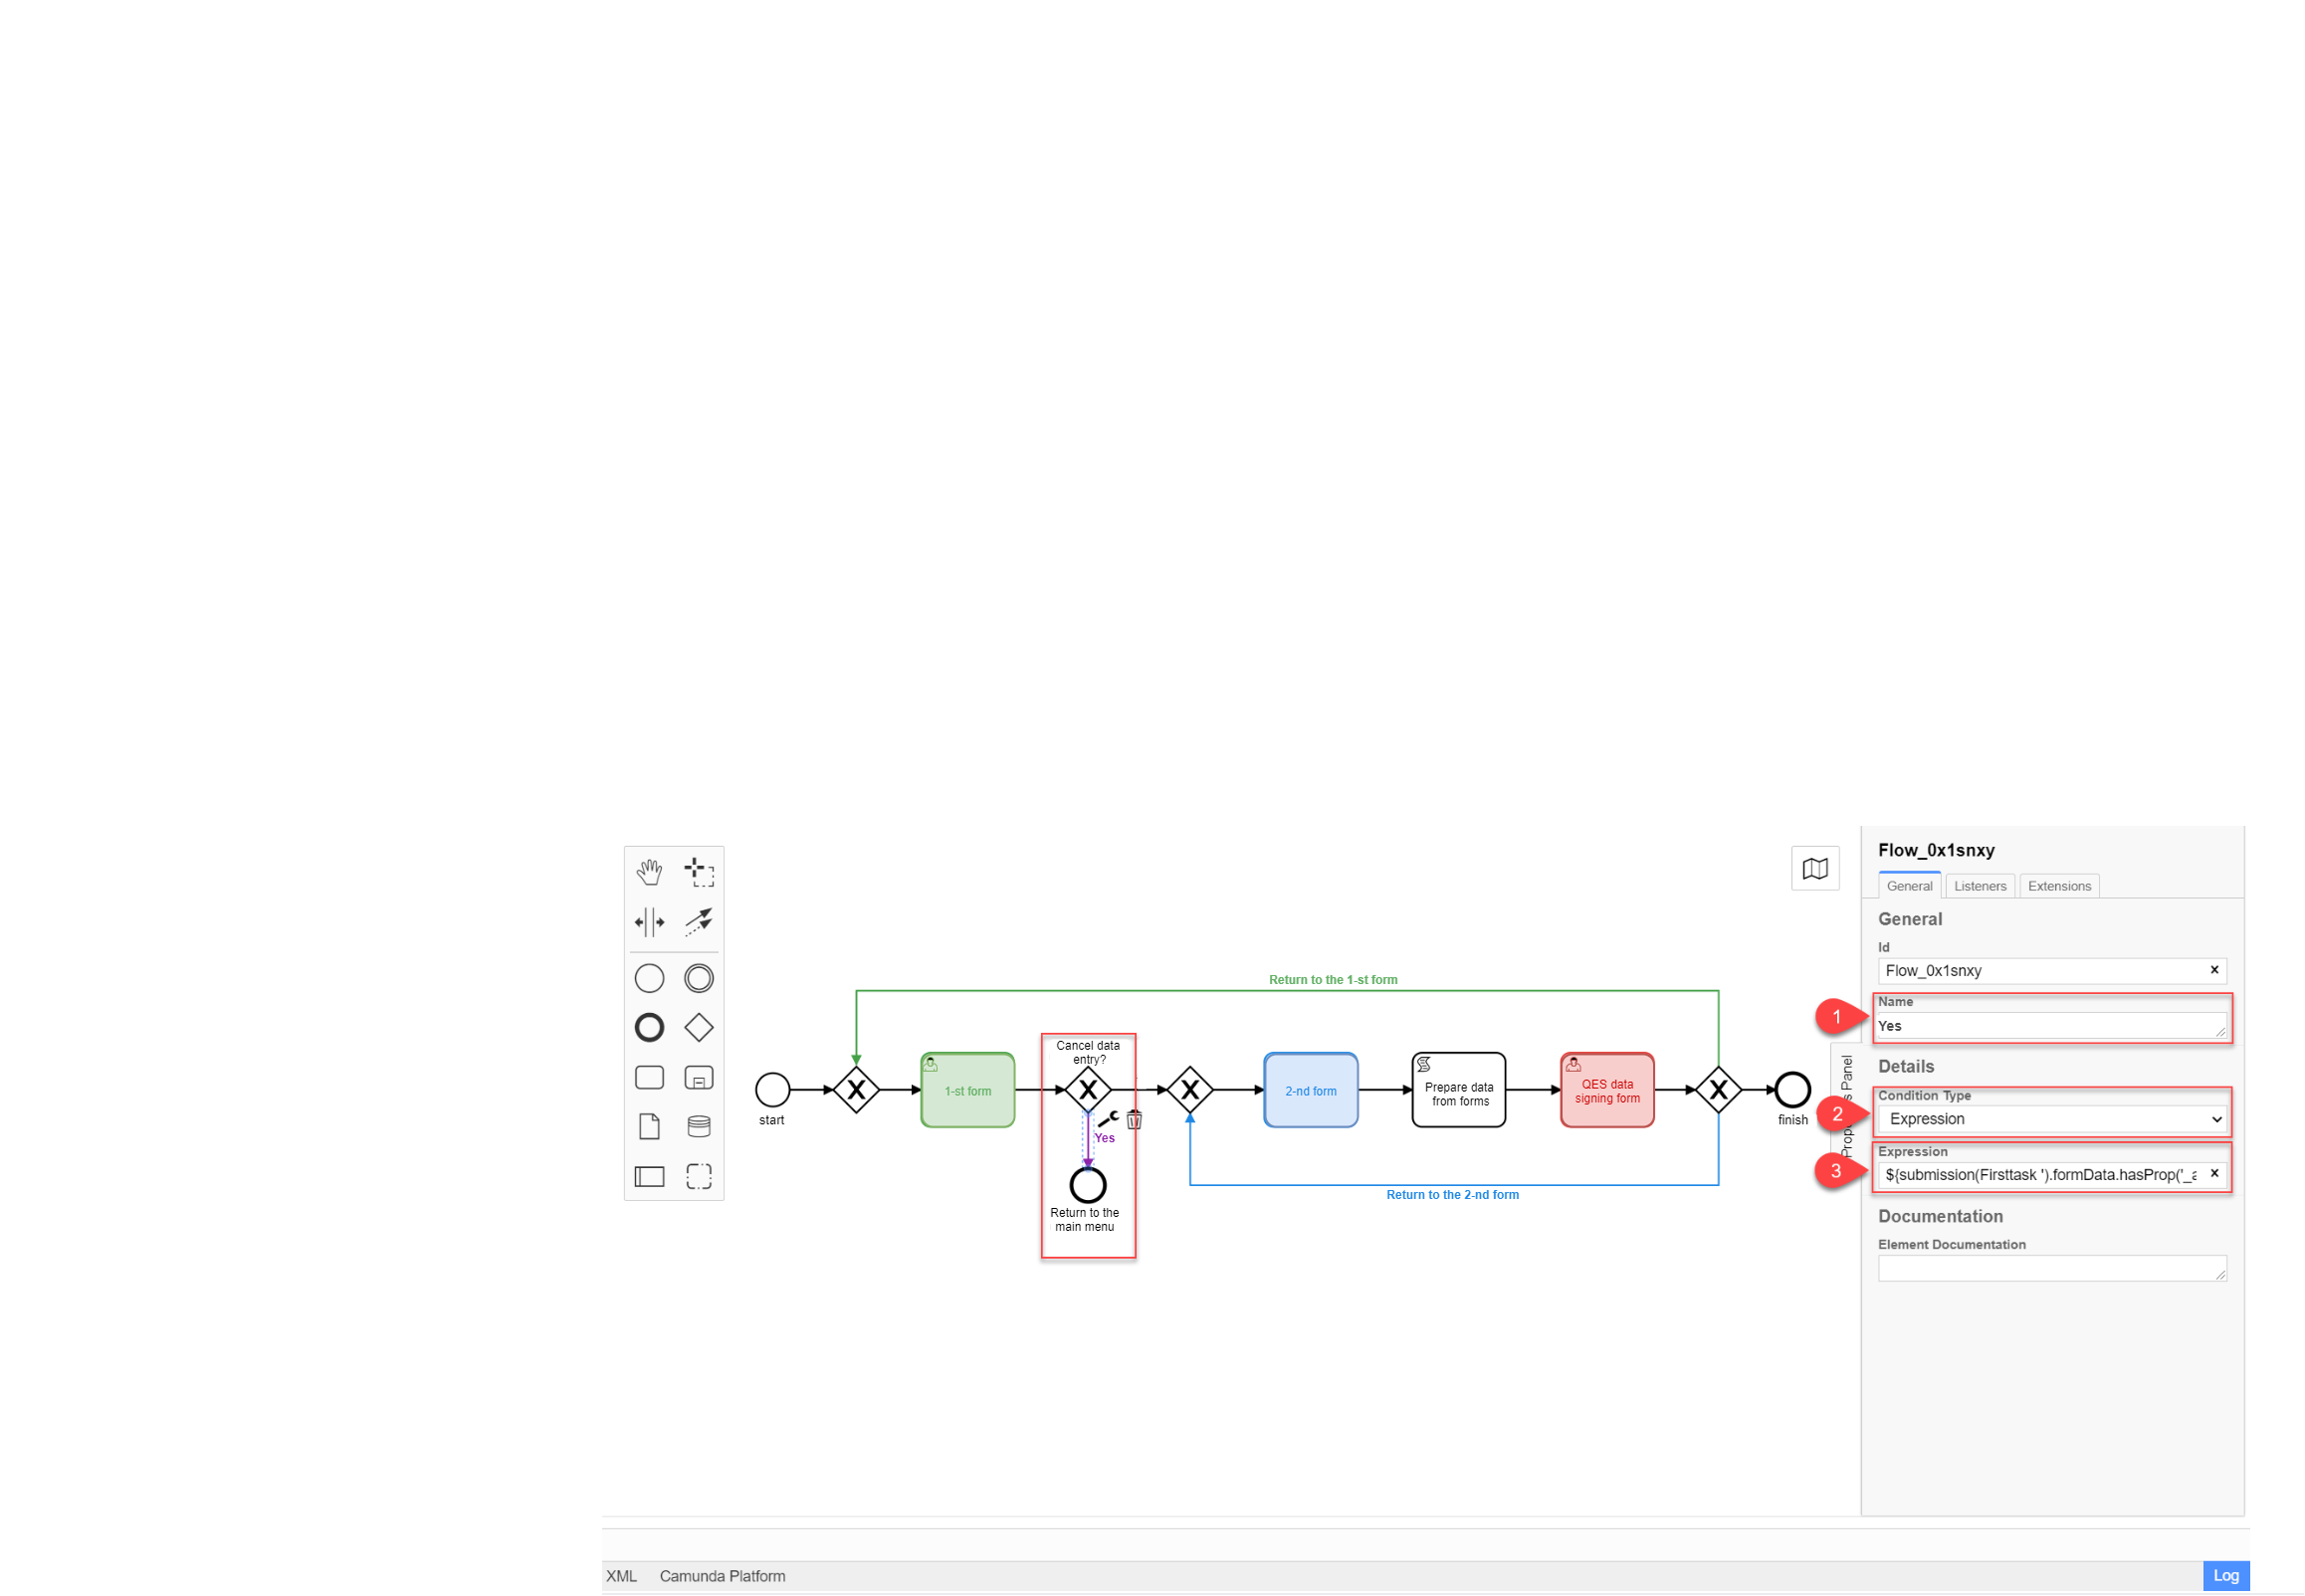
-