Configuring integrations with external systems in Control Plane
|
Configuring integrations through the Control Plane admin console is available for registries version 1.9.3 or later. For registries version 1.9.2 or earlier, you can configure integrations at the registry regulations level using the bp-trembita/configuration.yml file. For details, see REST connector: configuring the regulations. |
1. Overview
To use the Platform’s REST connector for integration with external systems and registries and fetch data from them, you must first configure the connector at the registry instance level.
To configure external interactions, you need to create a corresponding configuration in the Control Plane console. This enables deploying a Service Entry, which serves as an entry point for the outbound traffic, and creating a secret for accessing the external resources.
|
| Integration with third-party systems requires additional configuration at the regulations level. Namely, you need to list the operations and their types used by the registry through the standard Connect to external system integration extension (REST connector). For details, see REST connector: configuring the regulations. |
2. Configuring external integrations in Control Plane
- Configure an external integration in Control Plane:
-
-
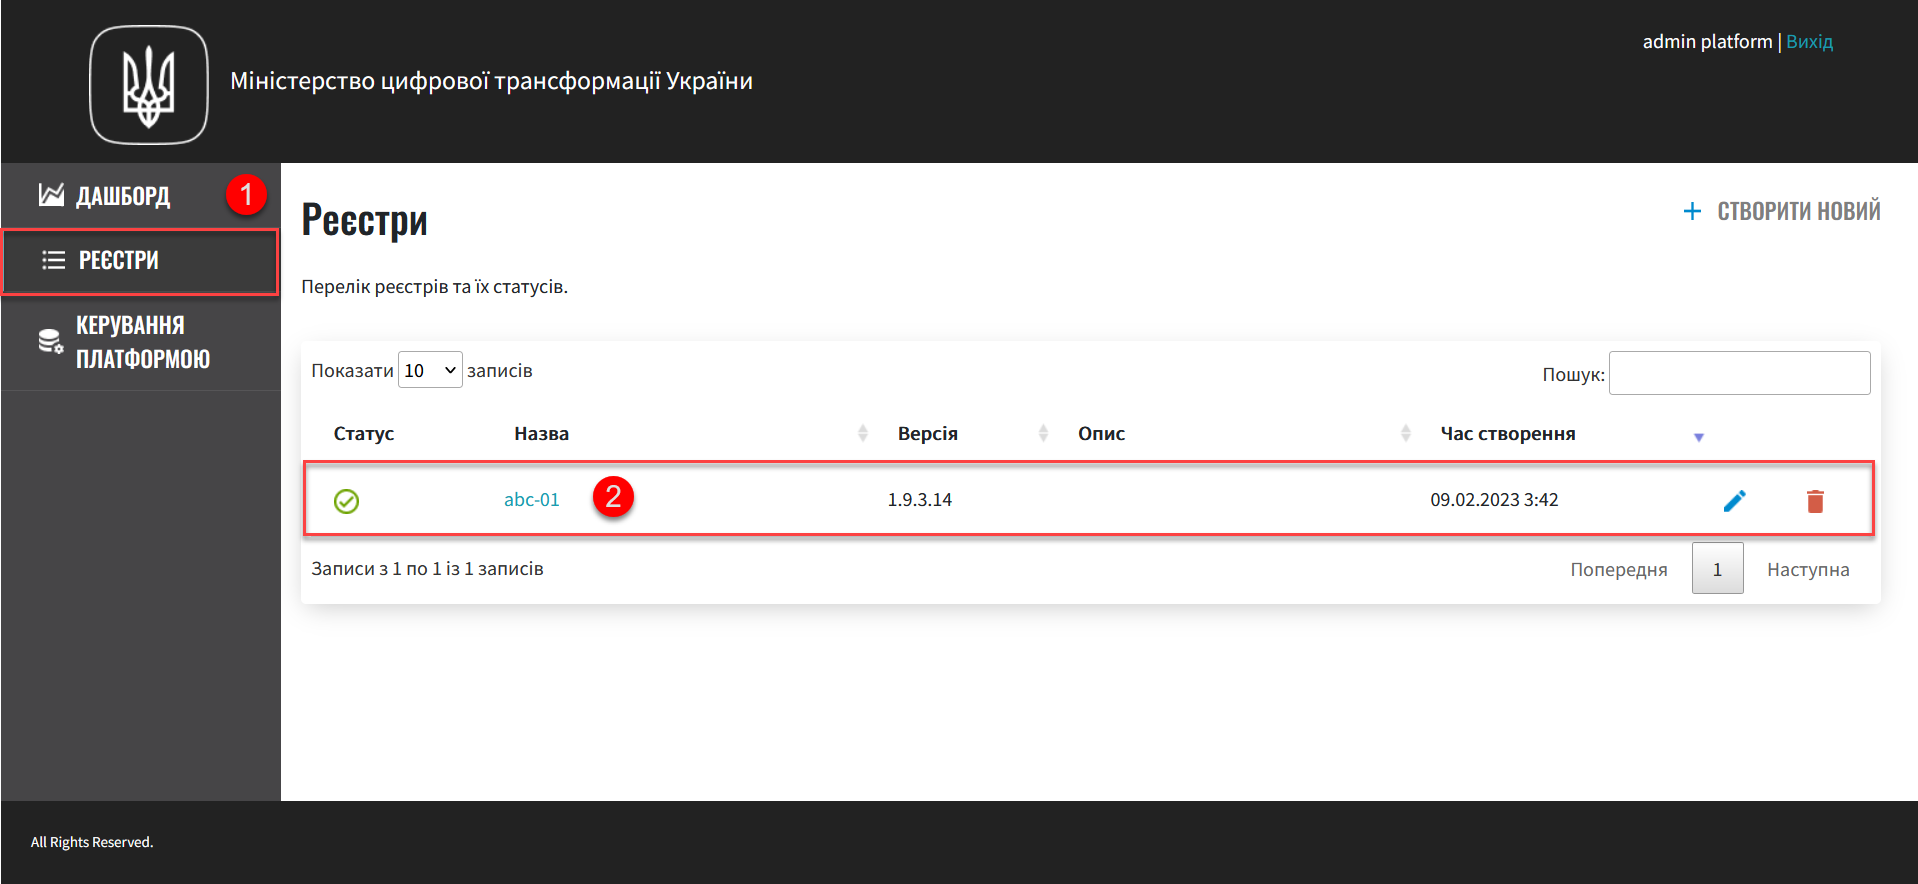
Sign in to the Control Plane admin console as a registry administrator.

-
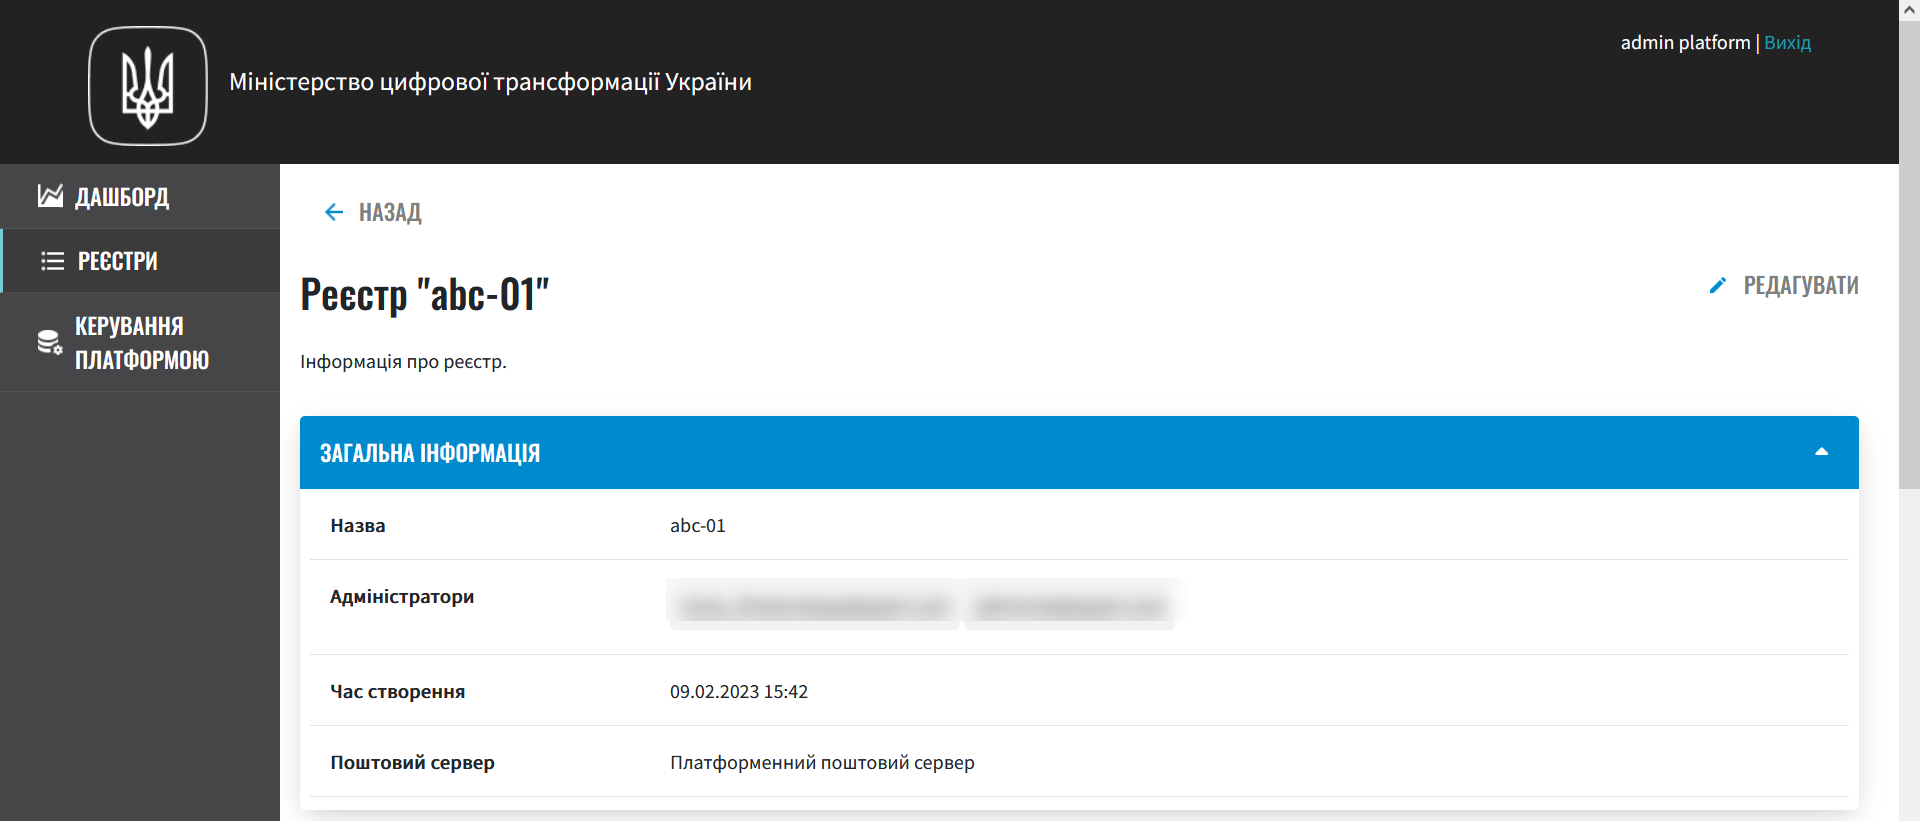
Open the Registries section and open your registry.
You can only configure external integrations when editing a registry.
- Here is the general procedure:
-
-
First, create a registry.
-
Then an administrator can configure external integrations and secure exchange gateway (SEG).
-
After the configuration is applied, the Service Entry and the service authorization secret are deployed automatically.
-
-
Expand the Setting up interaction with other systems section and click
Add external system.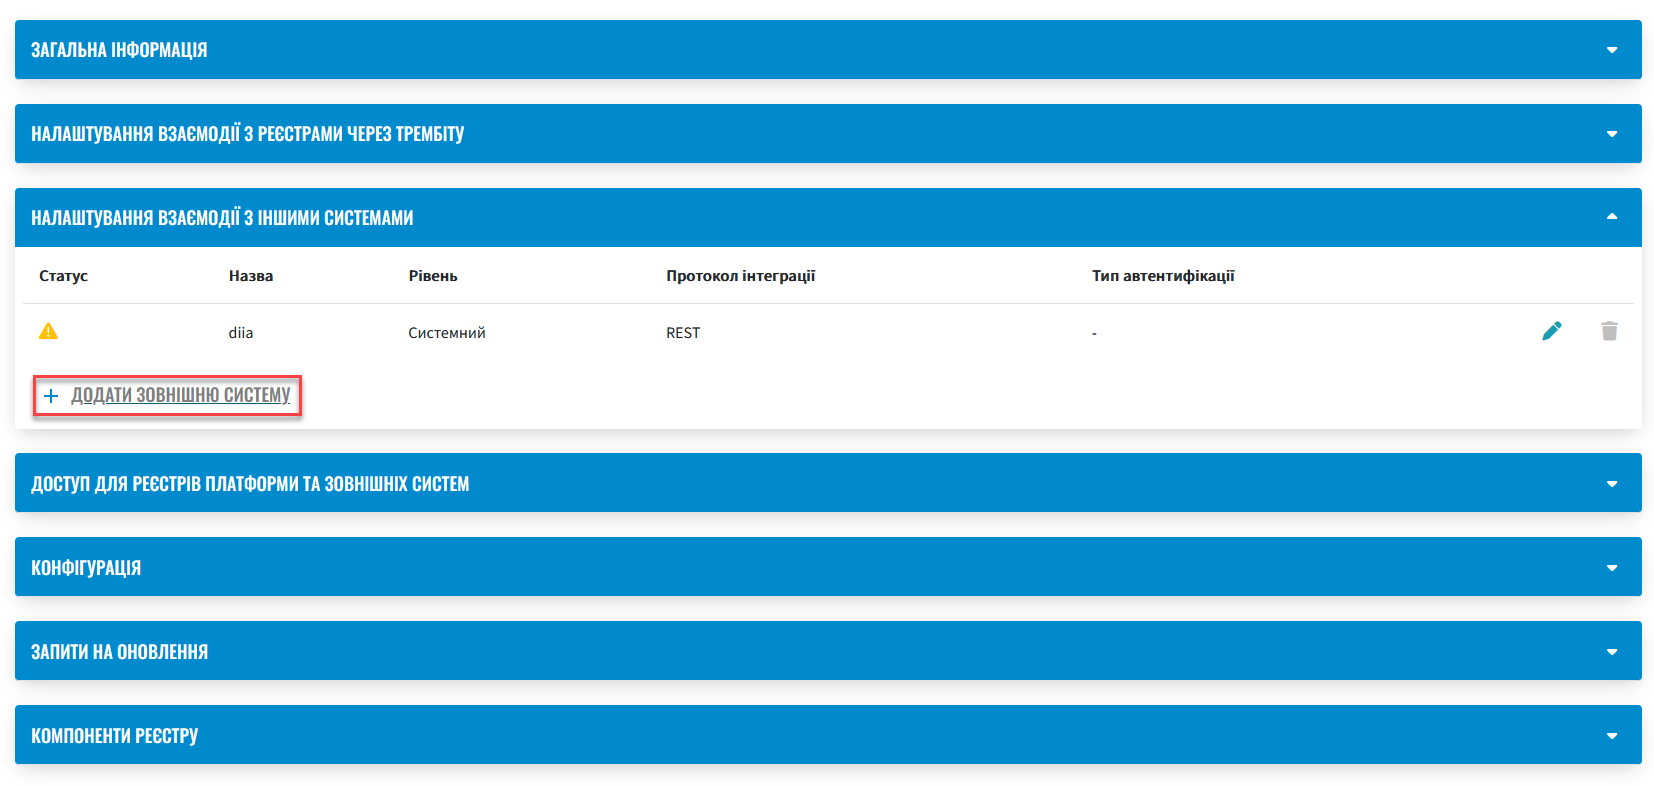
-
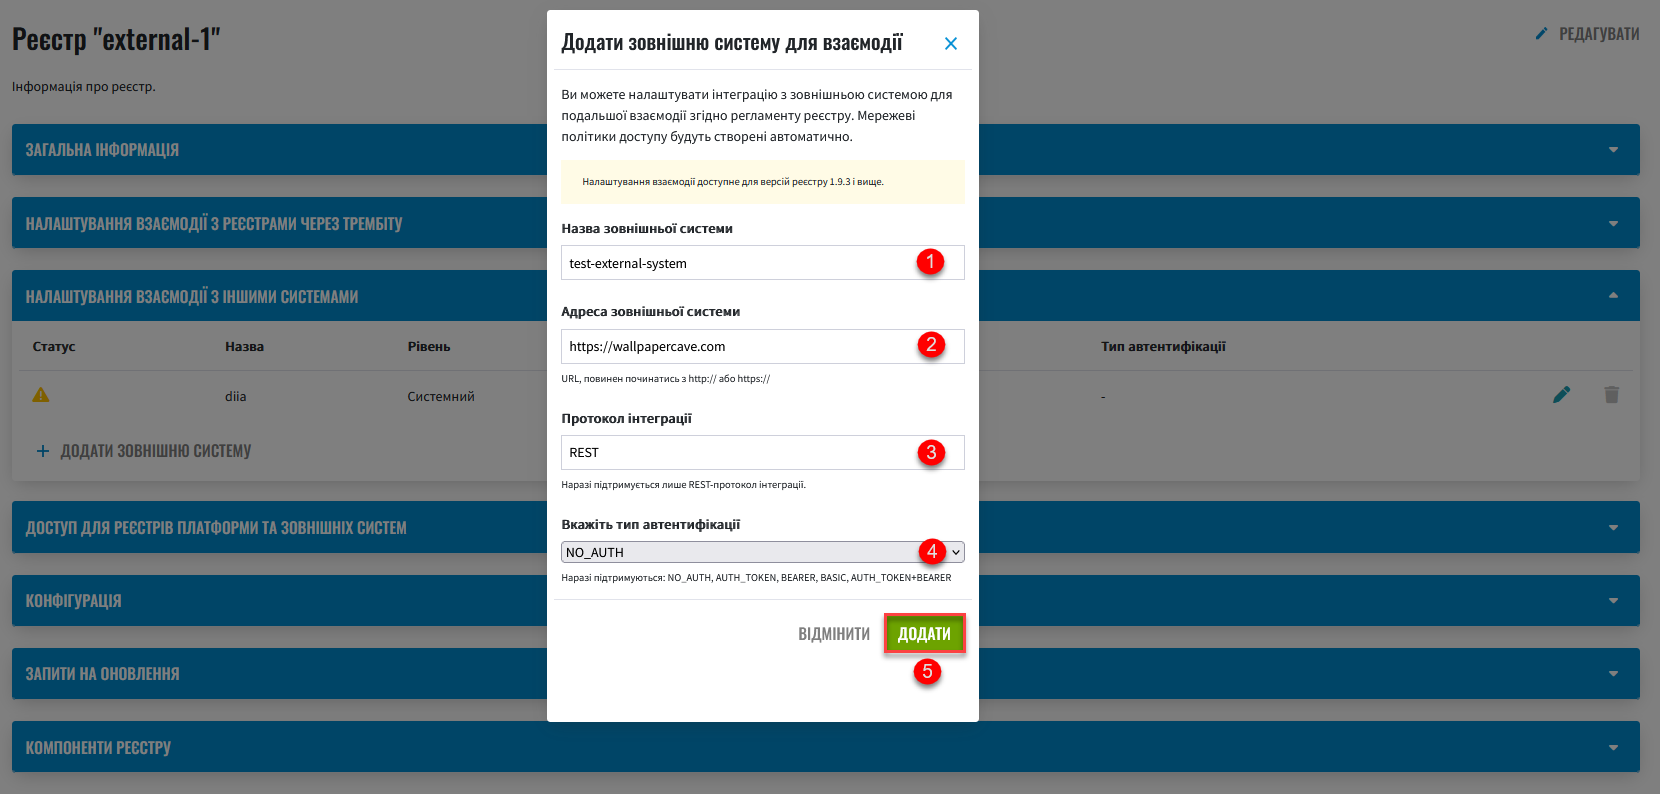
In the Add external system for interaction window that opens, configure the external integration with the registry regulations.
Network access policies are created automatically. -
External system name: Enter the name of the system to integrate with.
The name does not affect the integration, but you cannot change it once you apply the registry configuration.
-
External system address: Enter the base URL of the server to connect to. For example,
https://wallpapercave.com.The URL must start with
http://orhttps://, meaning that the external service will be accessible through port80or443, respectively.These settings are automatically added to the Service Entry YAML configuration (see the steps further in this topic).
-
Integration protocol: REST is the only supported option.
-
Select an authentication type: Select NO_AUTH from a dropdown list. This method allows accessing public resources without authorization.
The Platform supports the following authentication methods:
NO_AUTH-
An authentication method that does not require any credentials or authentication tokens to access a specific resource or service. This means that anyone can access the resource without restrictions or identity verification.
AUTH_TOKEN-
AUTH_TOKEN is short for "authentication token," which is a fragment of data used to grant a user or system access to a specific resource or service. Authentication tokens are typically used in web applications, APIs, and other network systems to ensure secure and efficient access to resources. Tokens come in various forms, such as random strings of characters, encrypted data, or JSON web tokens (JWT) that contain information about the user and expiration time.
BEARER-
BEARER authentication method is used in HTTP-based communication. It is based on security tokens called bearer tokens.
In this method, the client requesting access to a secured resource includes a bearer token in the request’s
Authorizationheader, which is usually a long string of characters representing the user’s identity and permissions. The server then verifies the token’s validity and grants access to the secured resource.The bearer token can be obtained through a separate authentication process, such as OAuth or OpenID Connect, and is used in APIs for managing access to resources. Since the bearer token is included in the request header, it can be easily intercepted. Therefore, it is essential to ensure its secure transmission, for example, by using an HTTPS connection.
BASIC-
BASIC authentication method is used in the HTTP protocol to protect web resources from unauthorized access. This method involves transmitting a username and password as unencrypted text in the HTTP request header.
In BASIC authentication, the server requests the username and password from the client, and then verifies that they match the authentication records. If the username and password match the authentication records, the server grants access to the protected resource. If records do not match, the server returns an error code (usually
401).Most web servers and applications support BASIC authentication. However, since the username and password are sent in plain text, BASIC authentication is not a reliable authentication method. Therefore, it is essential to ensure connection protection through encryption, for example, using an HTTPS protocol.
AUTH_TOKEN+BEARER-
A combined authentication method is usually used to protect access to APIs. This method uses two types of tokens: the "access token" (bearer token) and the "authentication token" (
AUTH_TOKEN). This method involves a two-step authorization process with obtaining an access token (BEARER) based on an authentication token (AUTH_TOKEN).How bearer tokens are cached
The Platform provides efficient caching of authorization tokens for external integrations when using a REST connector, part of the
bpmsservice.Caching the tokens obtained for external integrations improves performance by avoiding unnecessary authentication requests.
The token’s time to live (TTL) is determined by the
exp(expiration time) JWT claim in the authorization token. For details on this JWT specification, refer to RFC 7519.After the date and time specified in the
expclaim have passed, the verification system rejects the token, and the Platform requests a new one.Caching will not take place if the
expclaim is missing.
-
-
Click
Addto save your settings.As a result, the system creates a registry configuration update request.
-
In registry settings, scroll down to the Update requests section and click the view icon 👁 to open your request.
The system automatically confirms the changes and saves them to the registry configuration deploy-templates/values.yaml file. 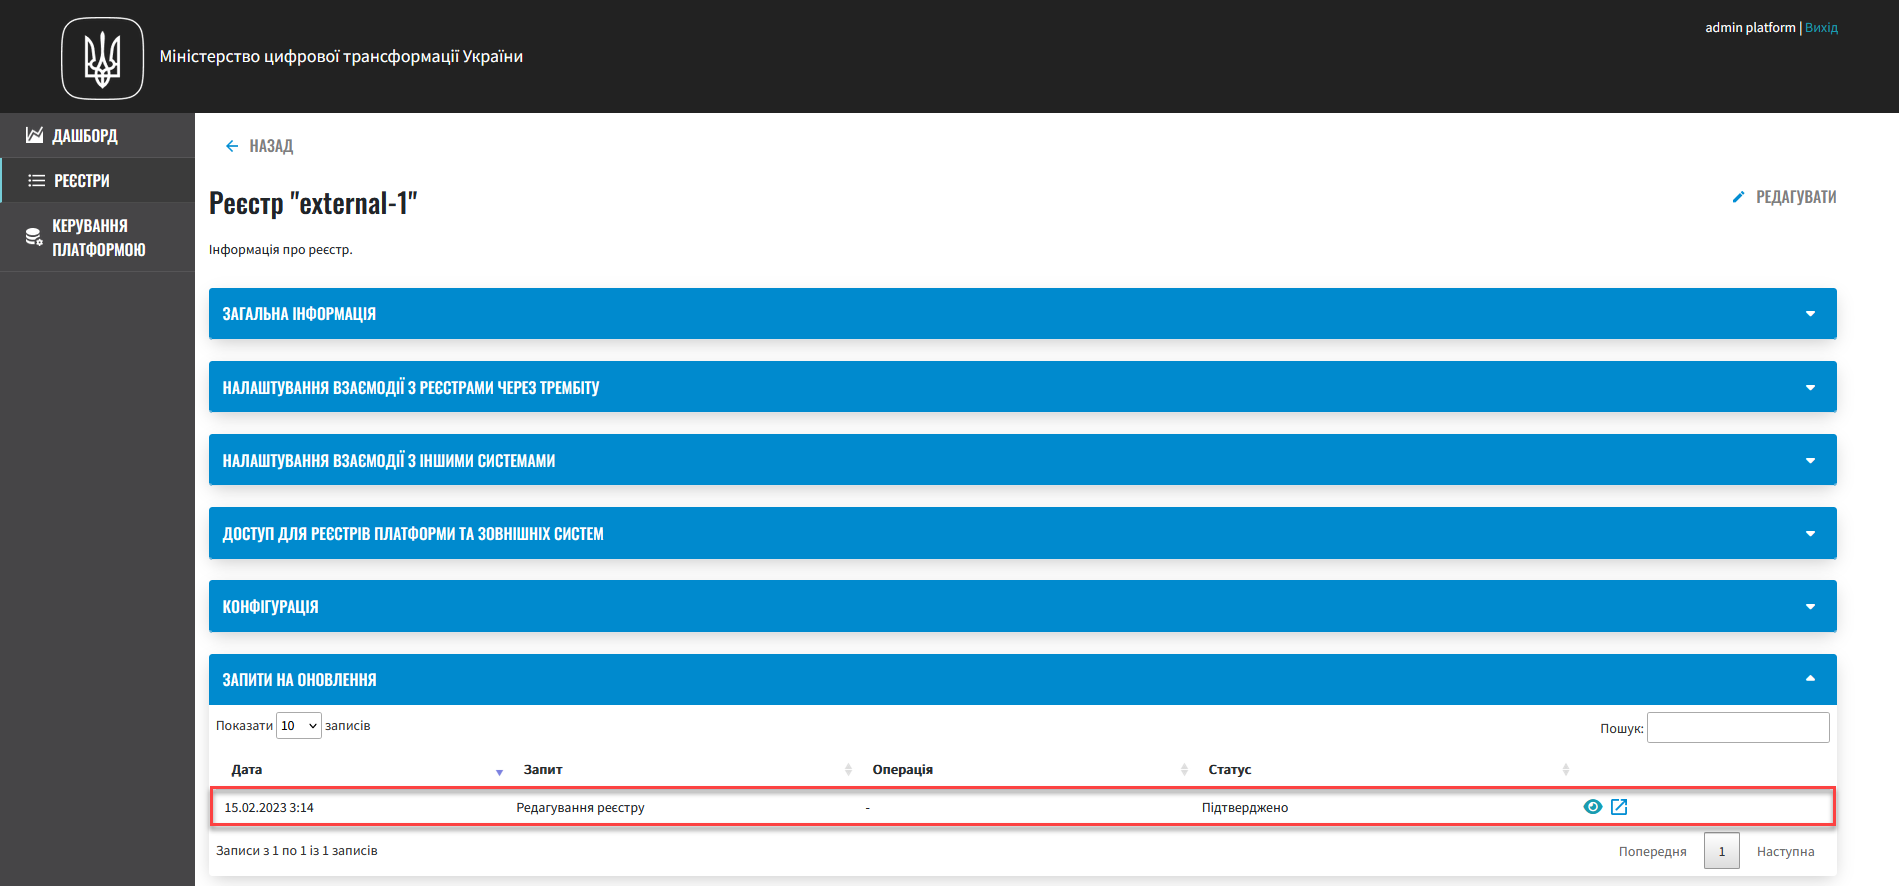
-
Review the parameters added to the configurations in the Update request window.
The comparison window provides a convenient way of reviewing the differences between the two versions: the current (left) and the new (right). In our example, the configuration looks like this:
Example 1. Configuring an external integration using the NO_AUTH method in deploy-templates/values.yamlexternal-systems: test-external-system: url: https://wallpapercave.com type: registry protocol: REST auth: type: NO_AUTH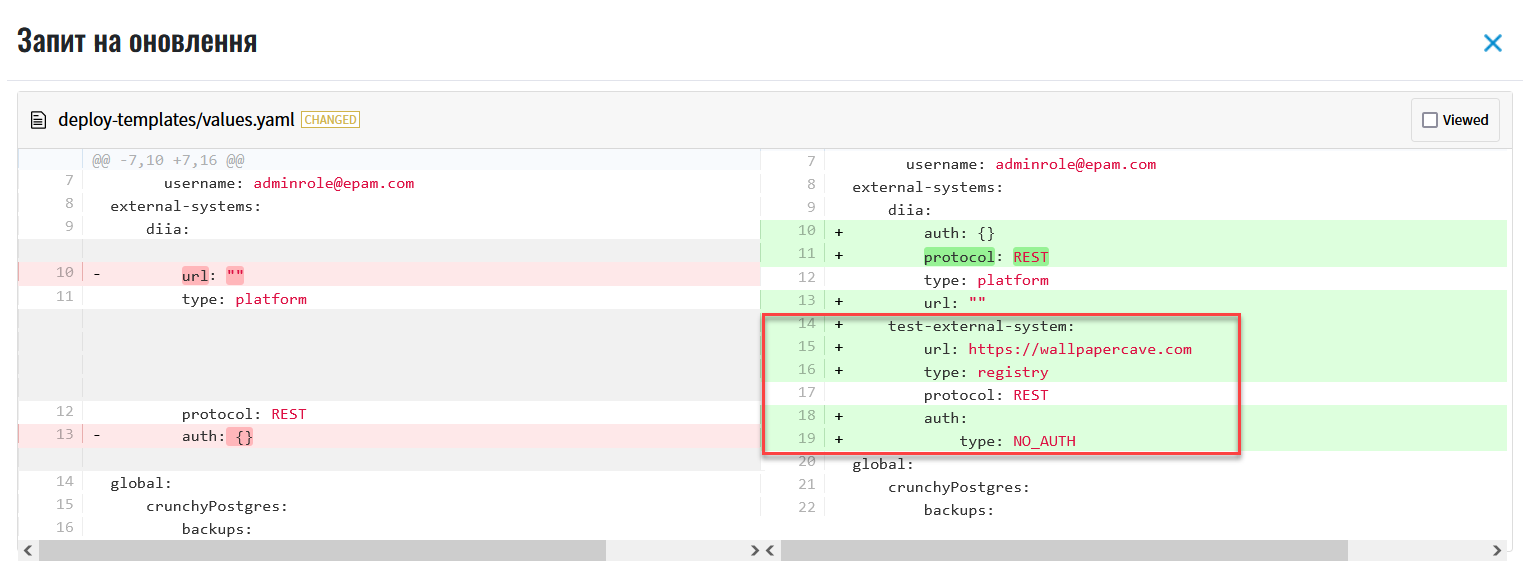
Review the integration settings for the selected system.
You can edit or cancel these settings using edit (🖉) or delete (🗑) icons.

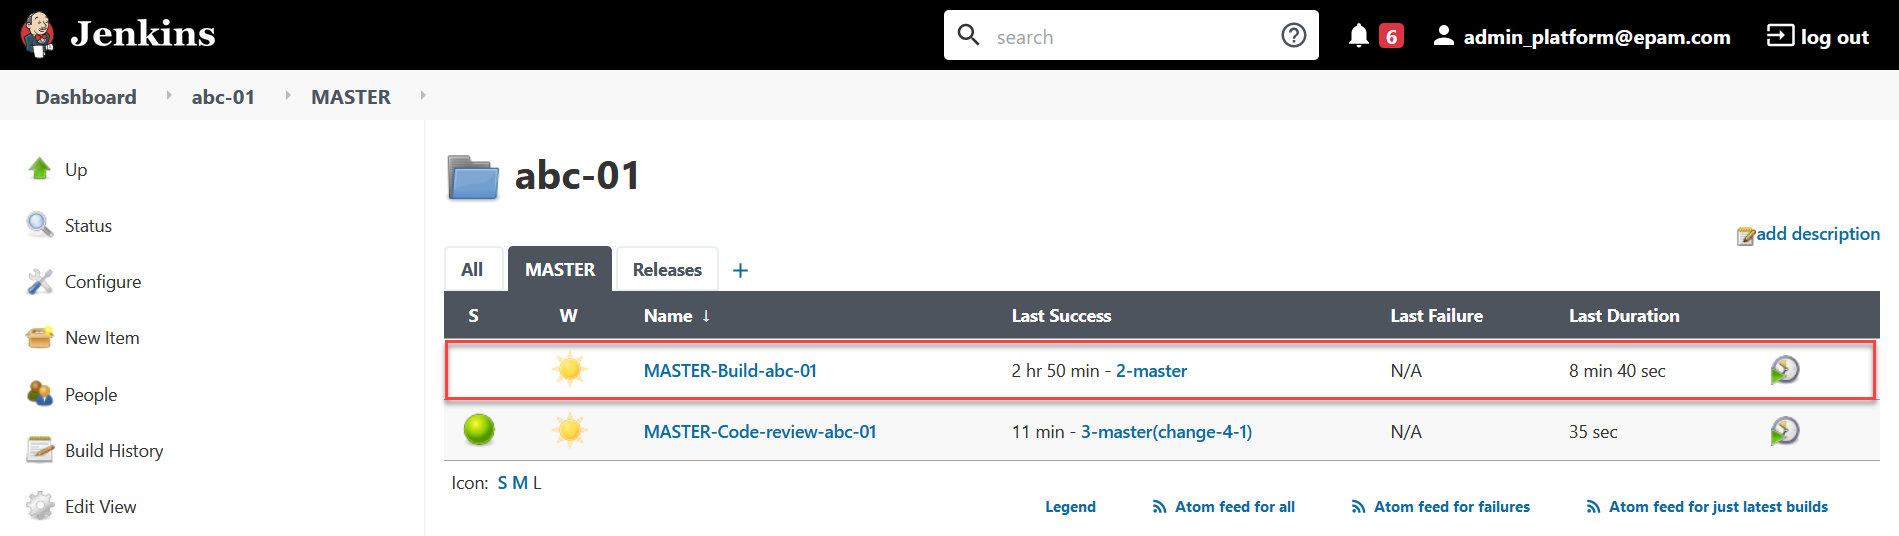
As a result, the MASTER-Build-
<registry-name>pipeline starts. It applies the integration settings you provided. -
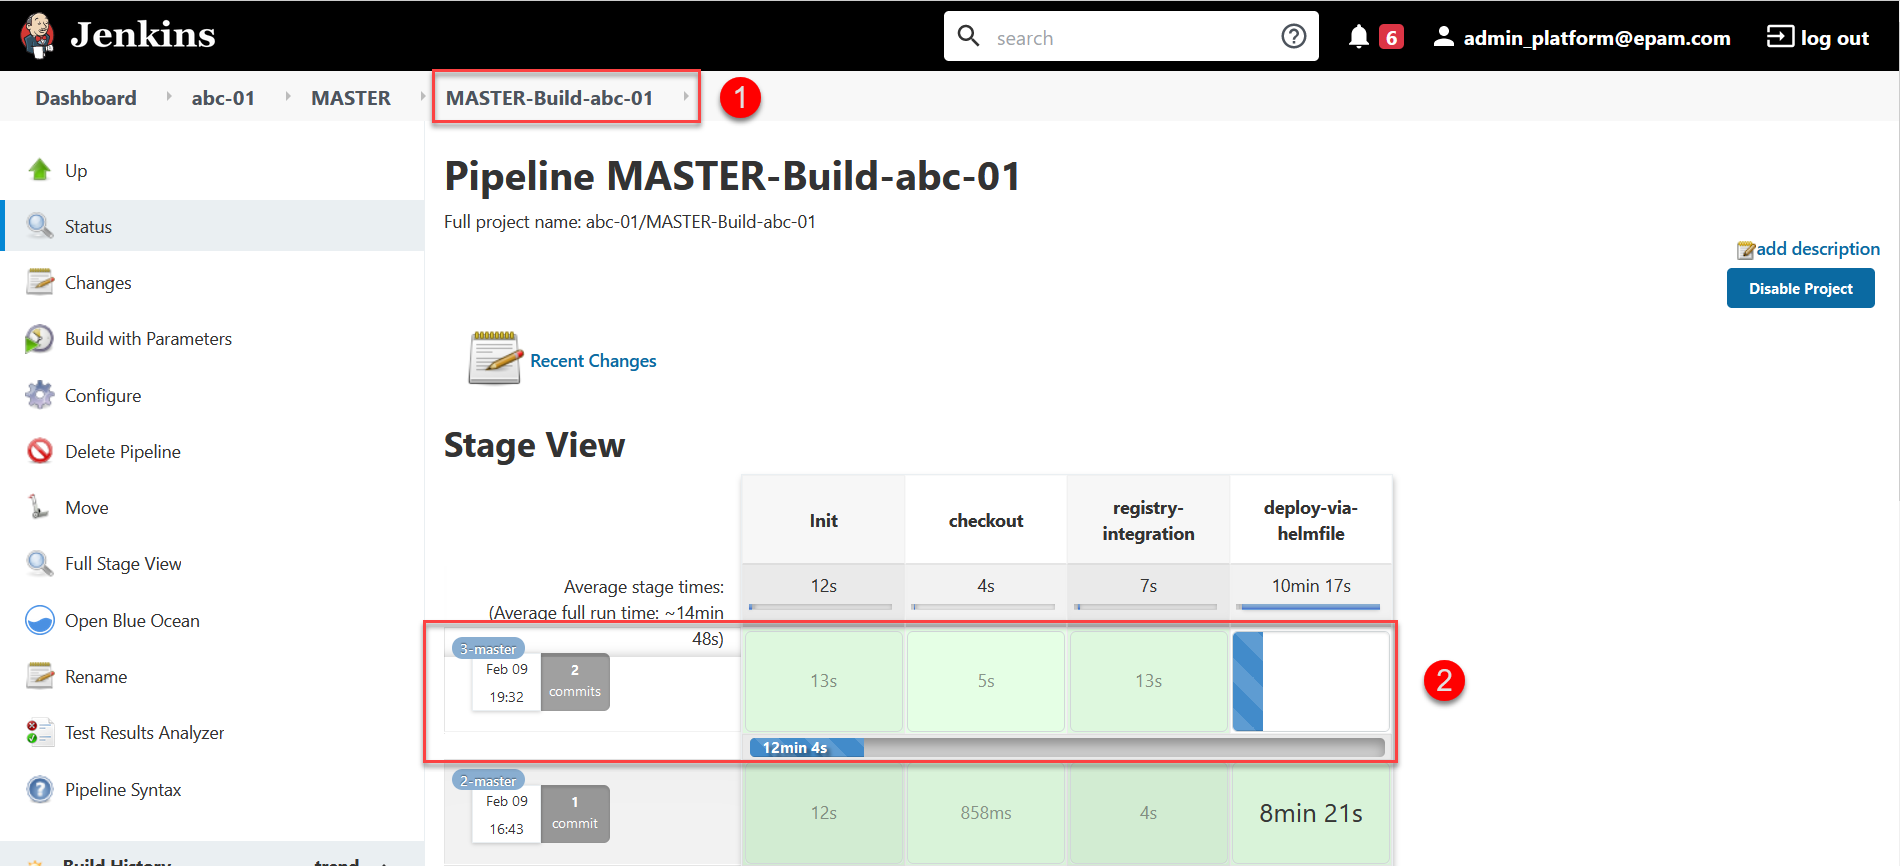
Wait until the build is completed. This may take up to 15 minutes.
To monitor the build status and result, use the link in the CI column.

-
Once the build is completed successfully, the system applies your configuration and creates a new Service Entry in your registry project. You can check the result in the Openshift console.
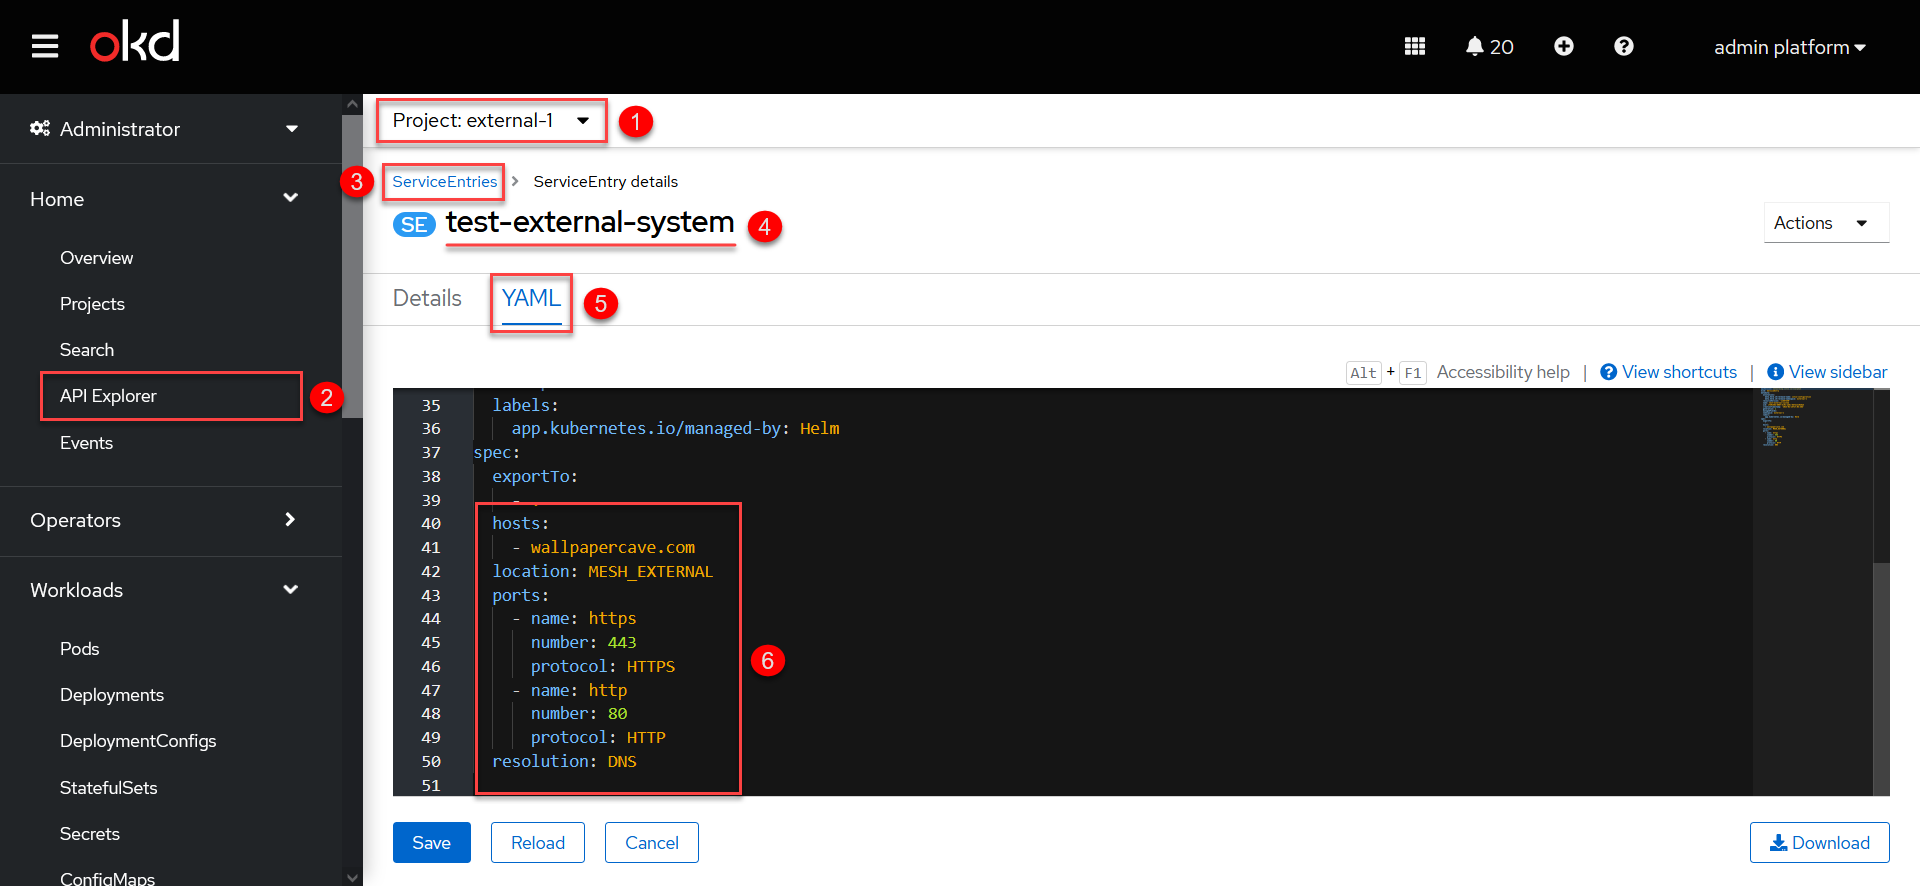
-
Configure additional parameters at the registry regulations level in the bp-trembita/configuration.yml file.
External system integration parameters may look like this:
Example 2. External integration parameters in the registry regulations version 1.9.3 or laterexternal-systems: #provide the name of the system with which the integration is configured system-name: #specify the types of allowed operations operations: get-operation: resource-path: "/get" method: "GET"For details on configuring the regulations, see REST connector: configuring the regulations.
-