Configuring internal SMTP server
| 🌐 This document is available in both English and Ukrainian. Use the language toggle in the top right corner to switch between versions. |
1. General description
An internal SMTP server is a Platform component that sends notifications to users.
During Platform installation it is deployed as the smtp-server project in the OpenShift.
| Since only the web interface is accessible externally and all other ports are isolated within the cluster, which significantly enhances security, only sending emails is enabled. Receiving emails using this mail service is disabled. |
In this topic, DNS_WILDCARD refers to the cluster’s domain name.
|
User web interface is available via the following URL: https://mail.<DNS_WILDCARD>/
Administrator web interface is available via the following URL: https://mail.<DNS_WILDCARD>/admin
2. Managing DNS records
2.1. Generating DNS records
Sign in to the administrator web interface.
You can find the credentials in the mailu-admin-credentials secret in the smtp-server project. Add @<DNS_WILDCARD> to username.
|
In the side menu, under Administration, select Mail domains. On the page that opens, click the Details icon in the Actions column next to your domain name.

On the page that opens, click Regenerate keys in the upper-right corner. This gives you a list of DNS records that you need to add to your public DNS zone (1 – MX, 3 – TXT).
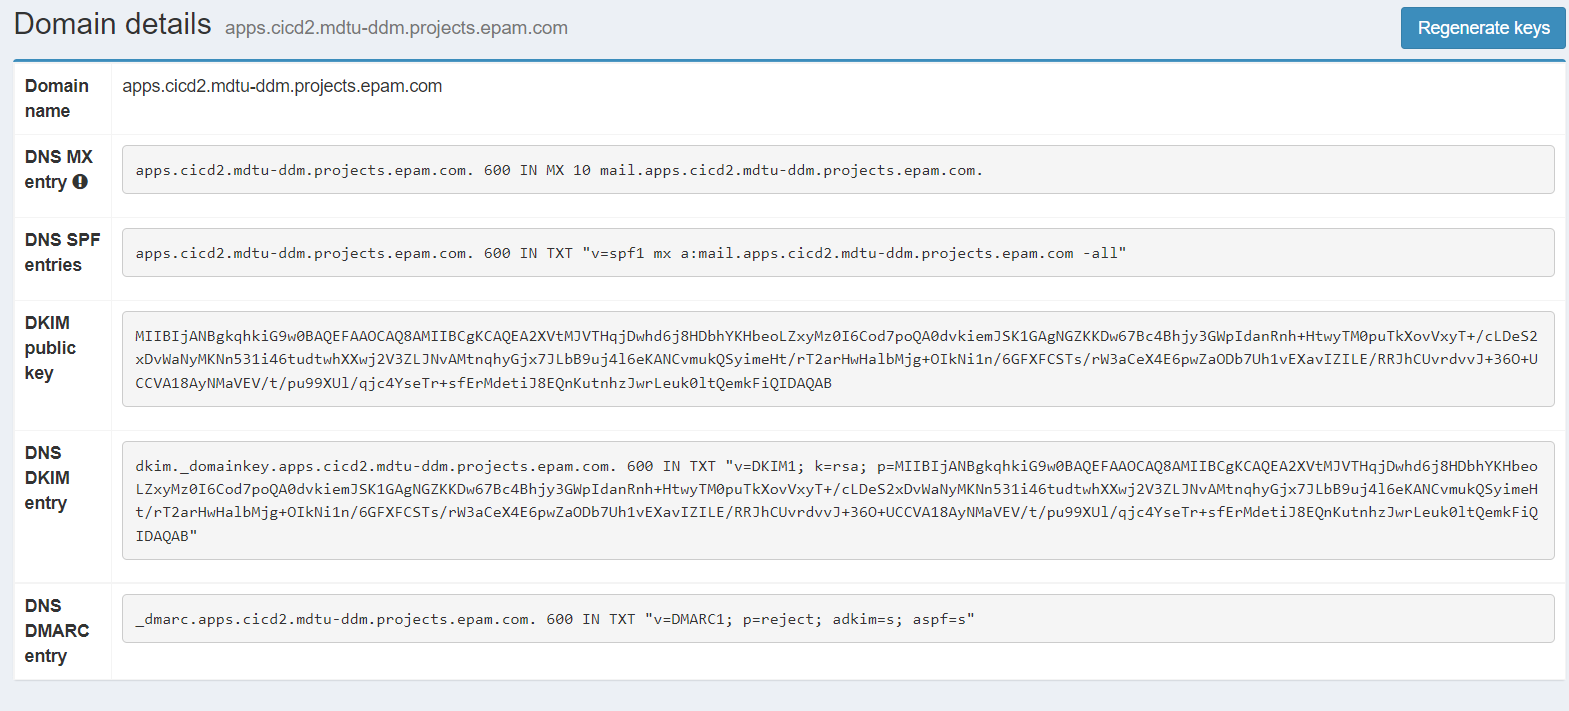
You need to add the public IP address of the gateway through which outbound traffic passes to the generated DNS SPF record. In case of AWS deployment, this will be the Elastic IP of the Platform’s NAT gateway.
"v=spf1 mx a:mail.<DNS_WILDCARD> ip4:12.34.56.78 -all"
For example, if your gateway IP is 12.34.56.78, then the record will look like this:
"v=spf1 mx a:mail.<DNS_WILDCARD> ip4:12.34.56.78 -all"
Add records to the zone’s DNS.
|
Route53 in AWS has a limit on the length of a TXT record. This may cause the following error when adding a In this case, divide the text part of the record with the public key roughly in half using three characters: double quotes, space, double quotes. For example, the following TXT part:
will look like this:
|
2.2. Checking the DNS records
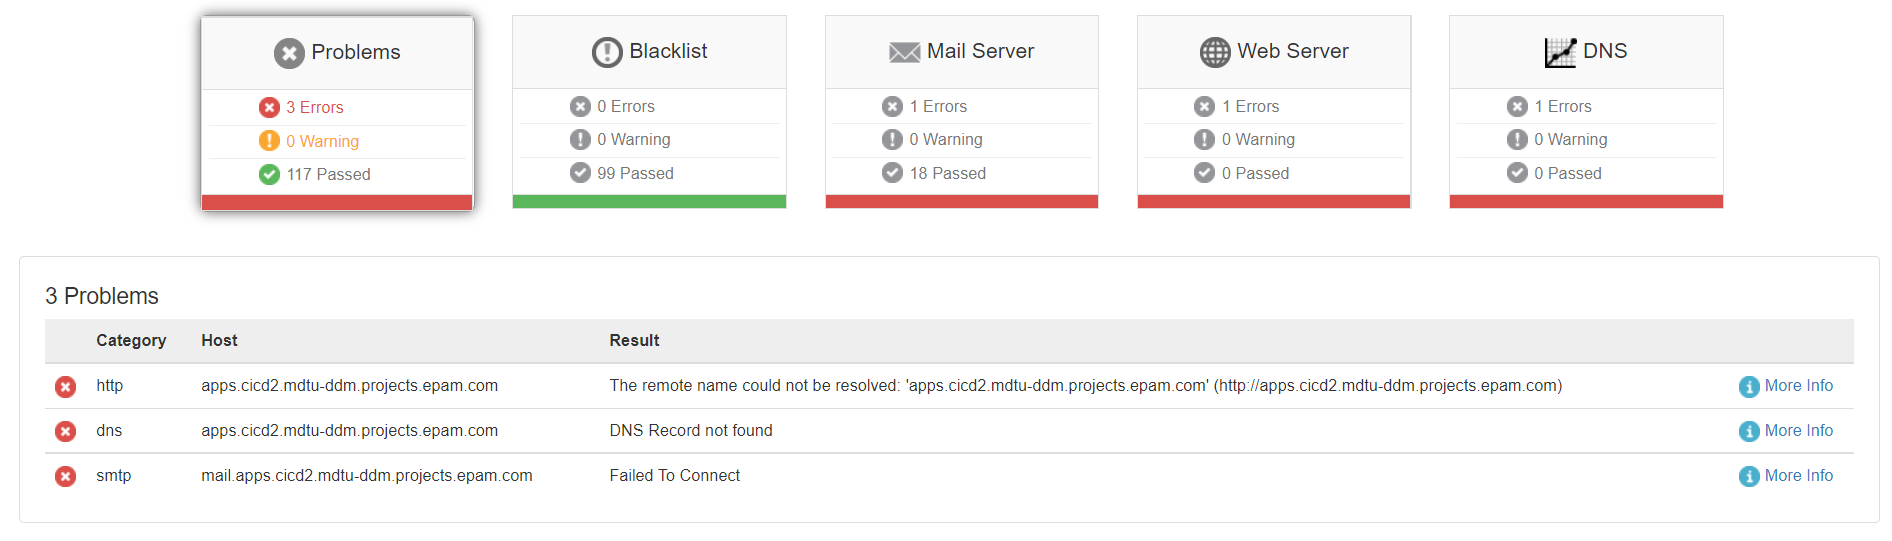
After the records are updated on the provider’s DNS servers, we recommend checking the settings using the mxtoolbox service.
Enter your <DNS_WILDCARD> into the Email Address or Domain Name field and click the Check Email Health button. Wait for the test results.
If you get only these three errors, it means the settings are correct:
3. Obtaining permission to send emails in AWS
When deploying the Platform on AWS, all traffic from port 25 (SMTP) is blocked by default[1].
You need to create an AWS support request: Request to remove email sending limitations. Request processing time is up to 48 hours.
| Request field | Value |
|---|---|
Email address |
Your email where the reply should be sent. |
Use case description |
Explain why you need to remove the restrictions. Provide relevant details of your notification setup. For example:
All openshift cluster nodes have one common NAT gateway (<NAT gateway resource ID or ARN>) with EIP <your Elastic IP address>. So could you please remove email sending limitation from EIP <your Elastic IP address> assigned to NAT gateway? |
Elastic IP address - optional |
The IP address of the Platform’s NAT Gateway |
Reverse DNS record - optional |
Leave this field empty |
4. Checking emails using apptoolbox
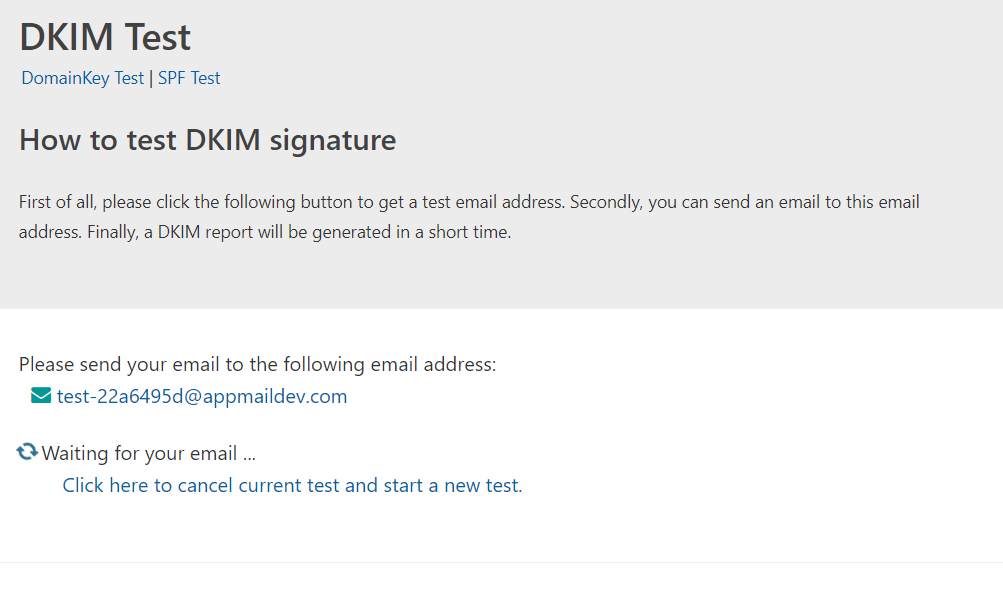
Open the apptoolbox website and click Next step.
The service will generate an email address where you need to send an email from the Platform’s SMTP server.
To send an email, go to the user web interface at https://mail.<DNS_WILDCARD>/ and sign in.
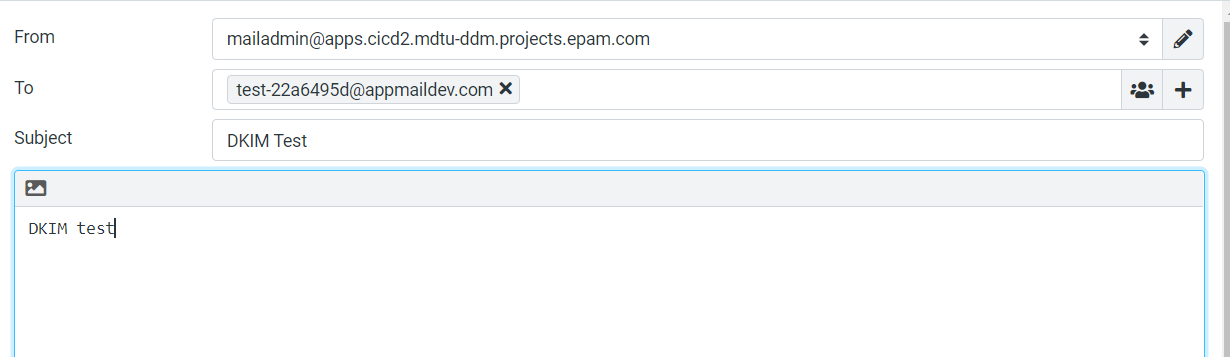
In the side menu on the left, click Compose to create an email. Enter the test email address generated by apptoolbox into the To field. The subject and body of the email do not matter.
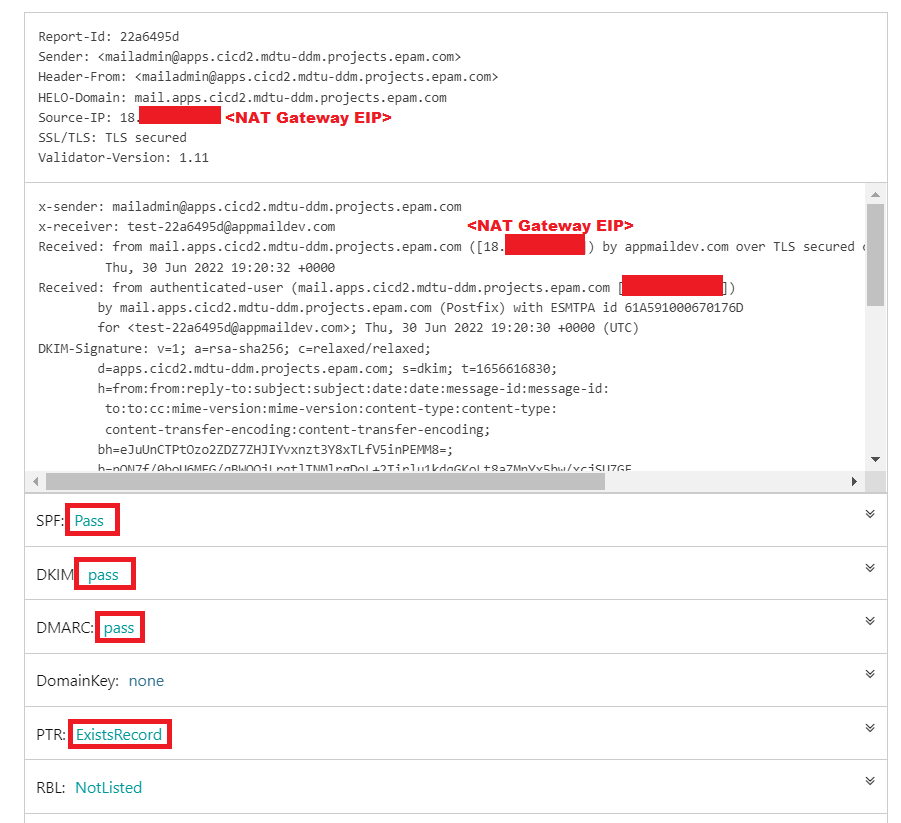
Send the email and return to the apptoolbox website. In a few seconds, the letter should be delivered, and you will receive a reply from the service. If configured correctly, the response should look like this: