Form modeling process
| 🌐 This document is available in both English and Ukrainian. Use the language toggle in the top right corner to switch between versions. |
1. Introduction
Our Platform leverages the capabilities of Form IO, an open framework for creating UI forms, enhanced by our unique components to ensure a seamless process of form creation and management. This document provides an overview of the form modeling process within the Regulations administrator portal, with detailed descriptions of the modeling aspects.
UI forms designed for registration business processes simplify data input, viewing, signing, and searching. These forms integrate both with the Data Factory API and individual business processes. To interact with the Business process management service (BPMS), forms are linked to user tasks via a Form key. Depending on the task type, the administrative portal offers a range of built-in templates for UI forms (for more details, see Business process extensions (Element templates)).
|
You can access the Regulations administrator portal through Quick links section in the Control Plane administrative panel. To do this:
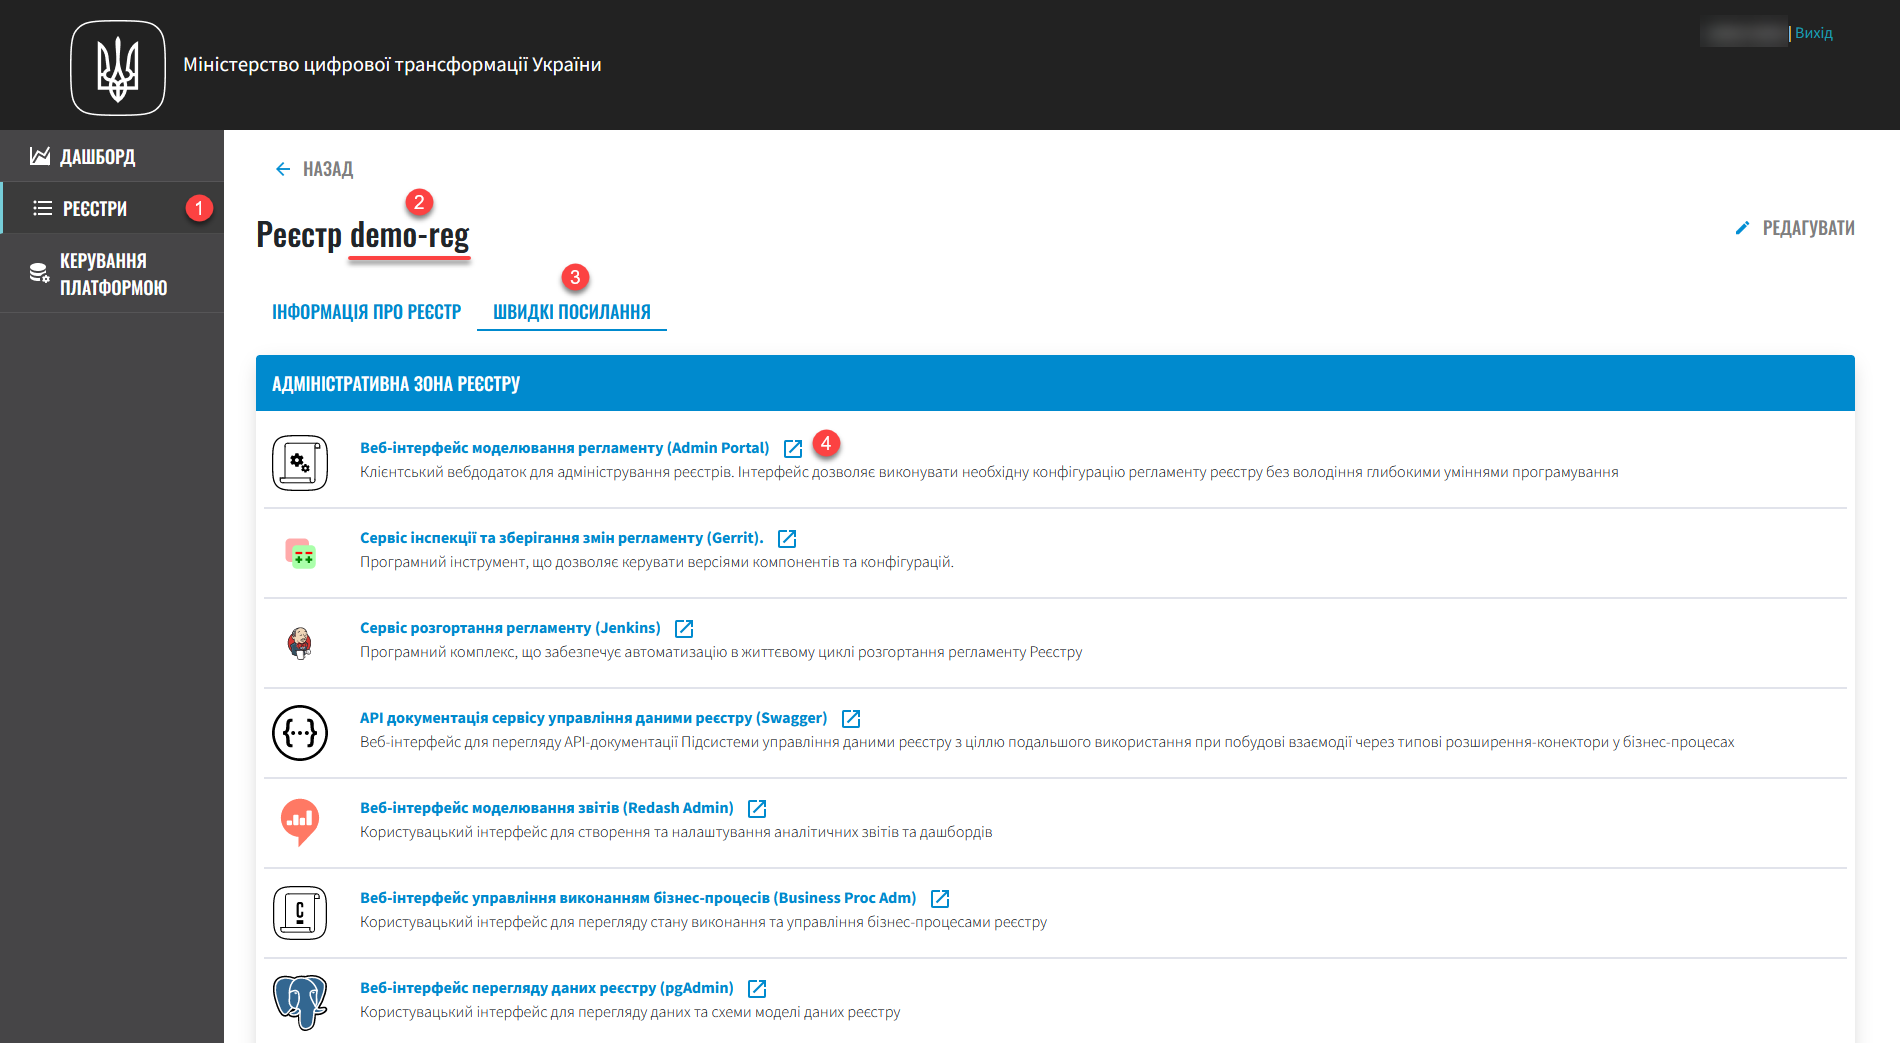
|
2. Steps of UI forms modeling
|
The UI form modeling process is demonstrated using the construction of the most commonly used Text Field component, which allows modeling text fields for data input and viewing within business processes. You can view a complete list of components for modeling UI forms in the UI form modeling components section. |
2.1. Creating the simplest data input UI form for a business process
-
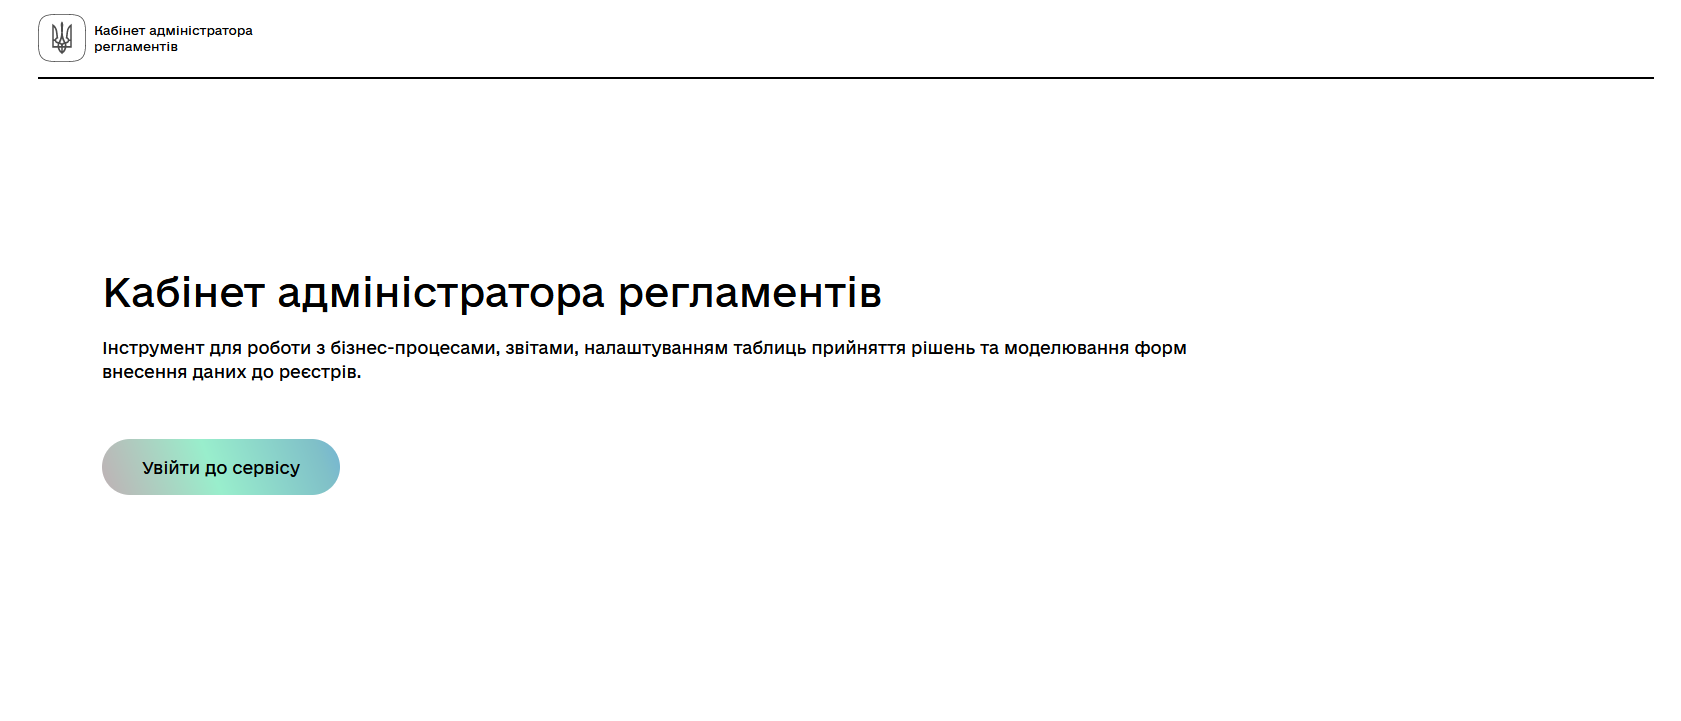
Open the Regulations administrator portal.
-
Create a new candidate version by clicking on the name of the Regulations administrator portal and selecting Create a new request. Creating a new request means creating a new git branch within the regulations. We recommend working in isolated versions of changes.
Learn more about regulation versions at Creating merge requests.
Alternatively, you may choose to make changes to UI forms directly in the master version at your discretion. This can be useful, for example, when quick changes are needed, and so on.
-
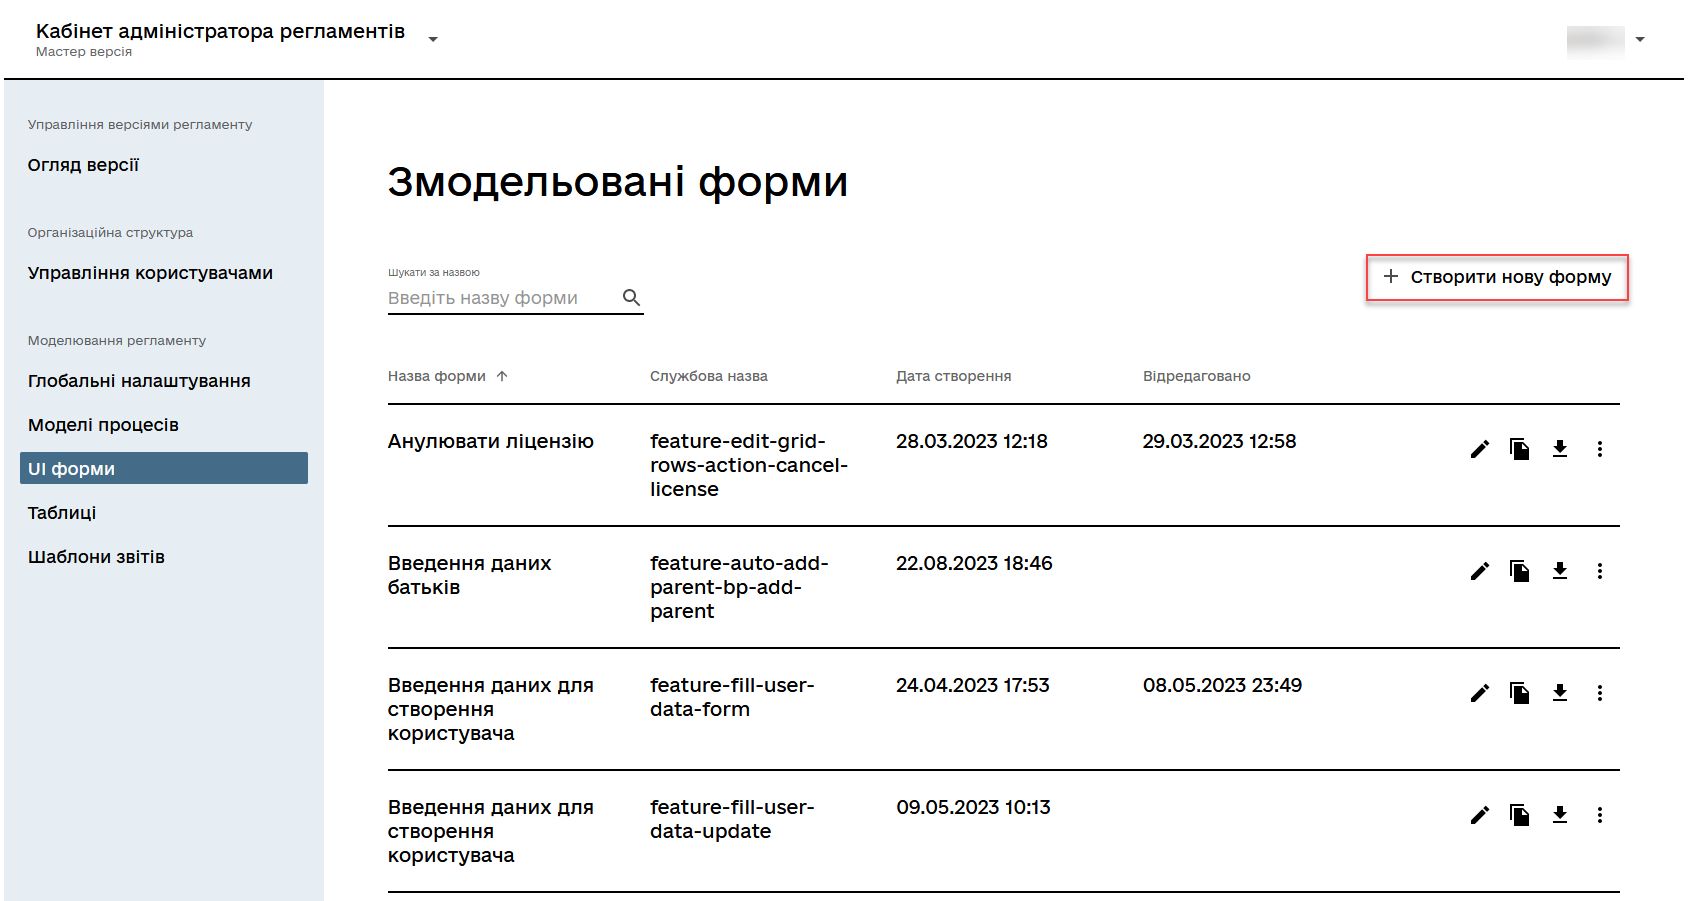
Go to the UI Forms section. You will see a list of modeled forms used in business processes.

-
Create a new form by clicking the Create new form button.
-
On the General tab, fill in the following fields:
-
In the Form’s business name field, enter the value
Create a new directory record. -
In the Form’s service name field, enter the
update-dict-bp-add-namevalue.The Form’s service name must be unique within the registry instance. Permissible characters include Latin letters, digits, "-", with "-" not allowed at the beginning or end of the technical name. 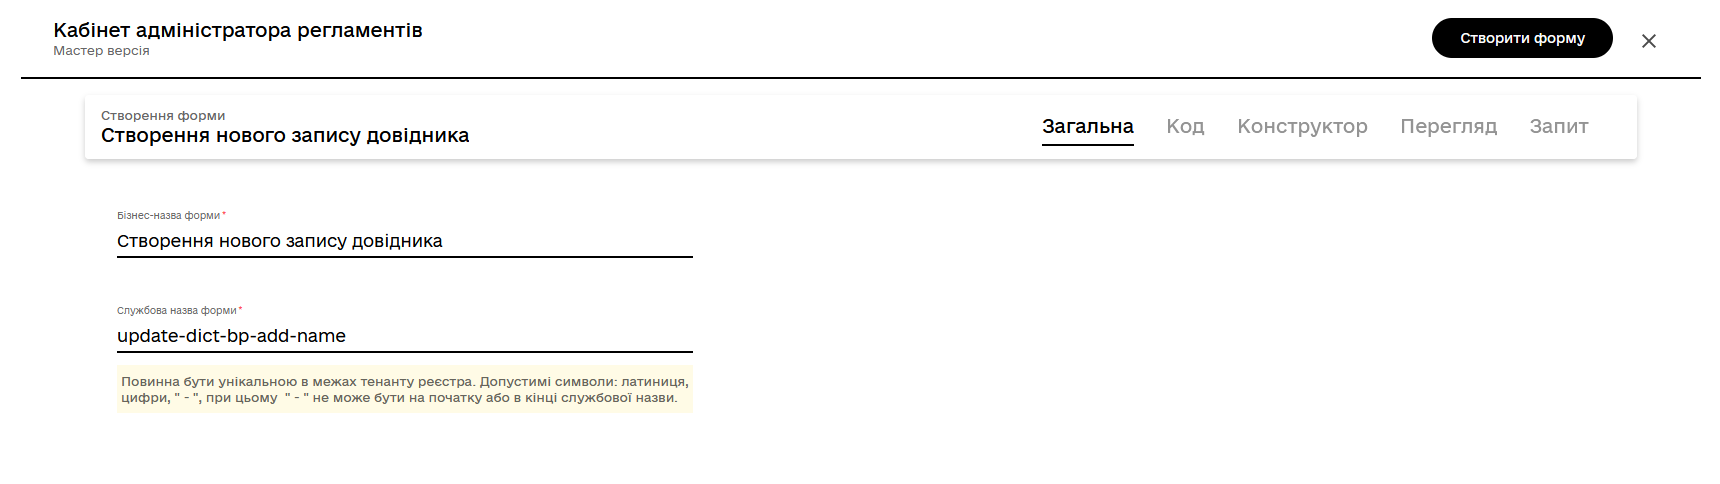
-
-
Open the Builder tab and proceed to model the UI form components.
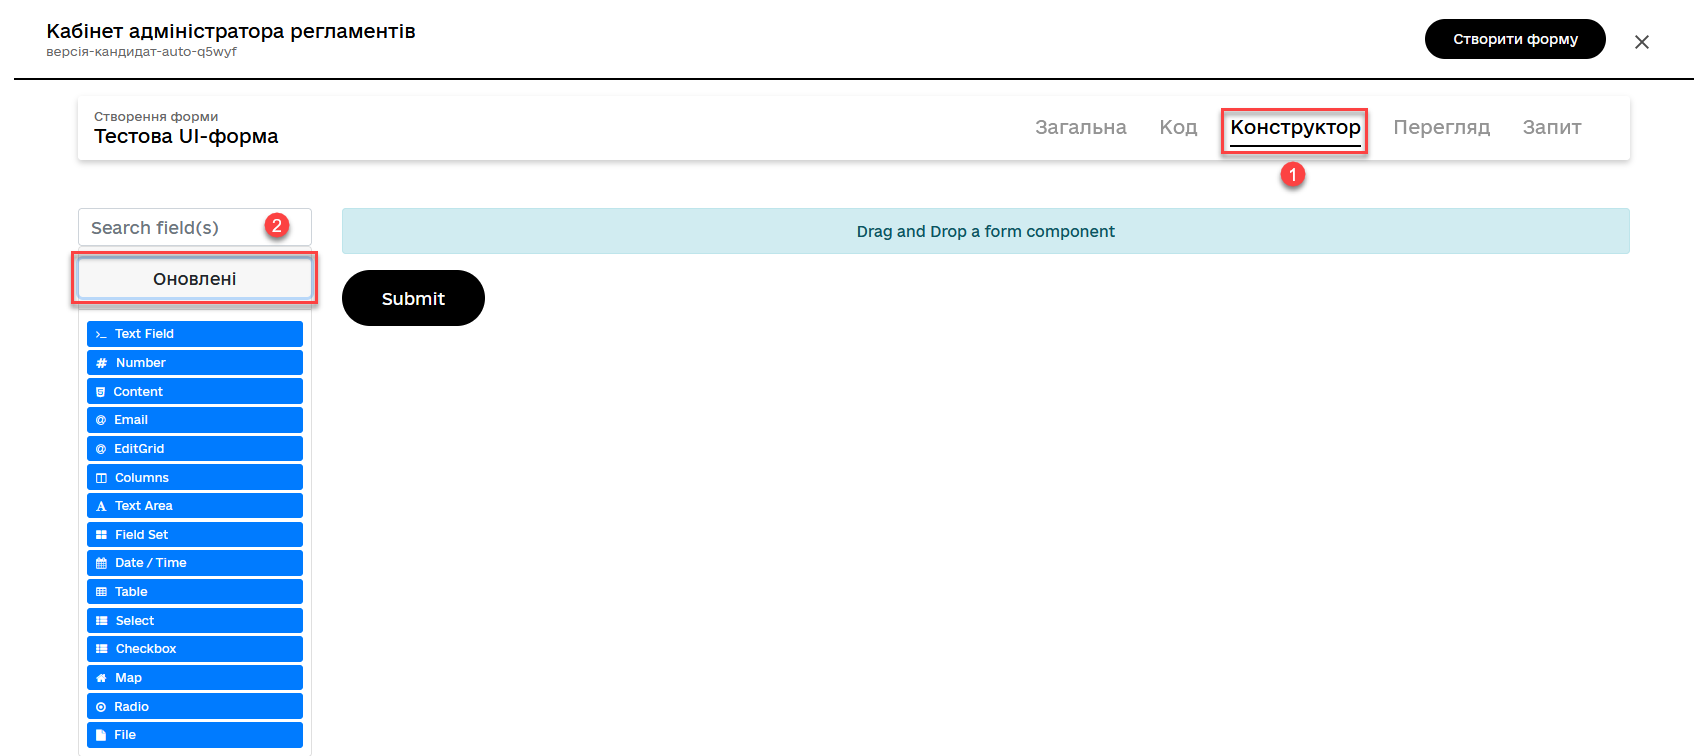
Use components from the Updated list. -
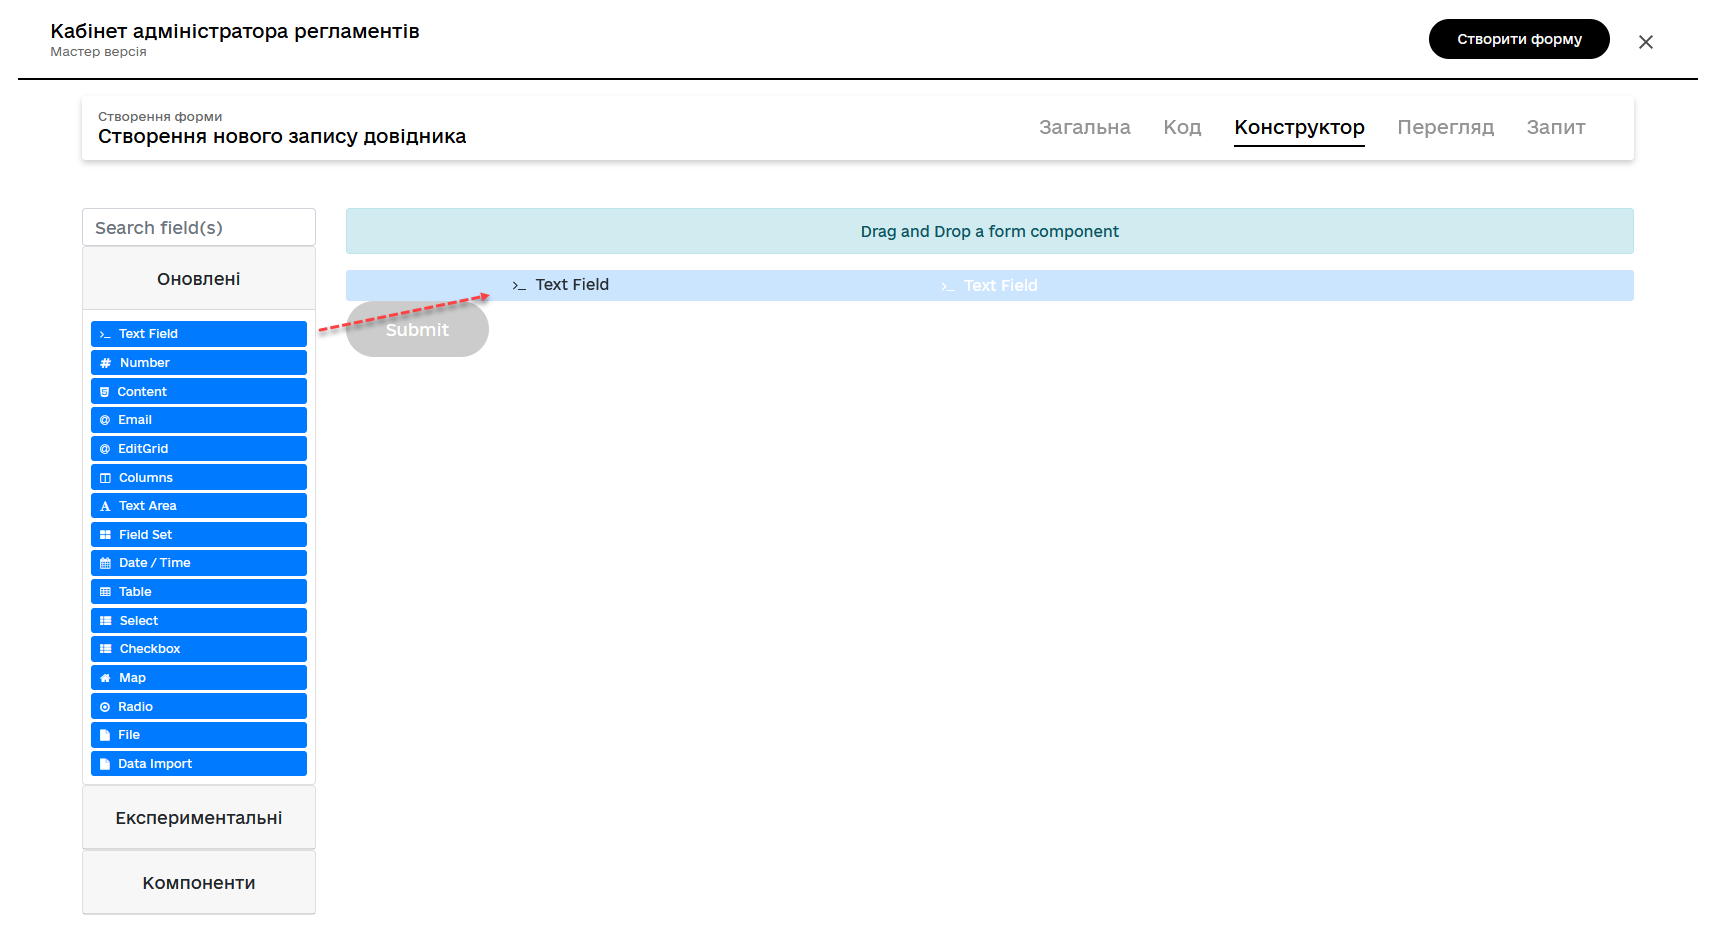
Drag the Text Field component to the modeling panel.
-
In the new window, configure the component settings as needed:
-
Go to the Display tab. In the Label field, enter the
Name of the chemical factorvalue.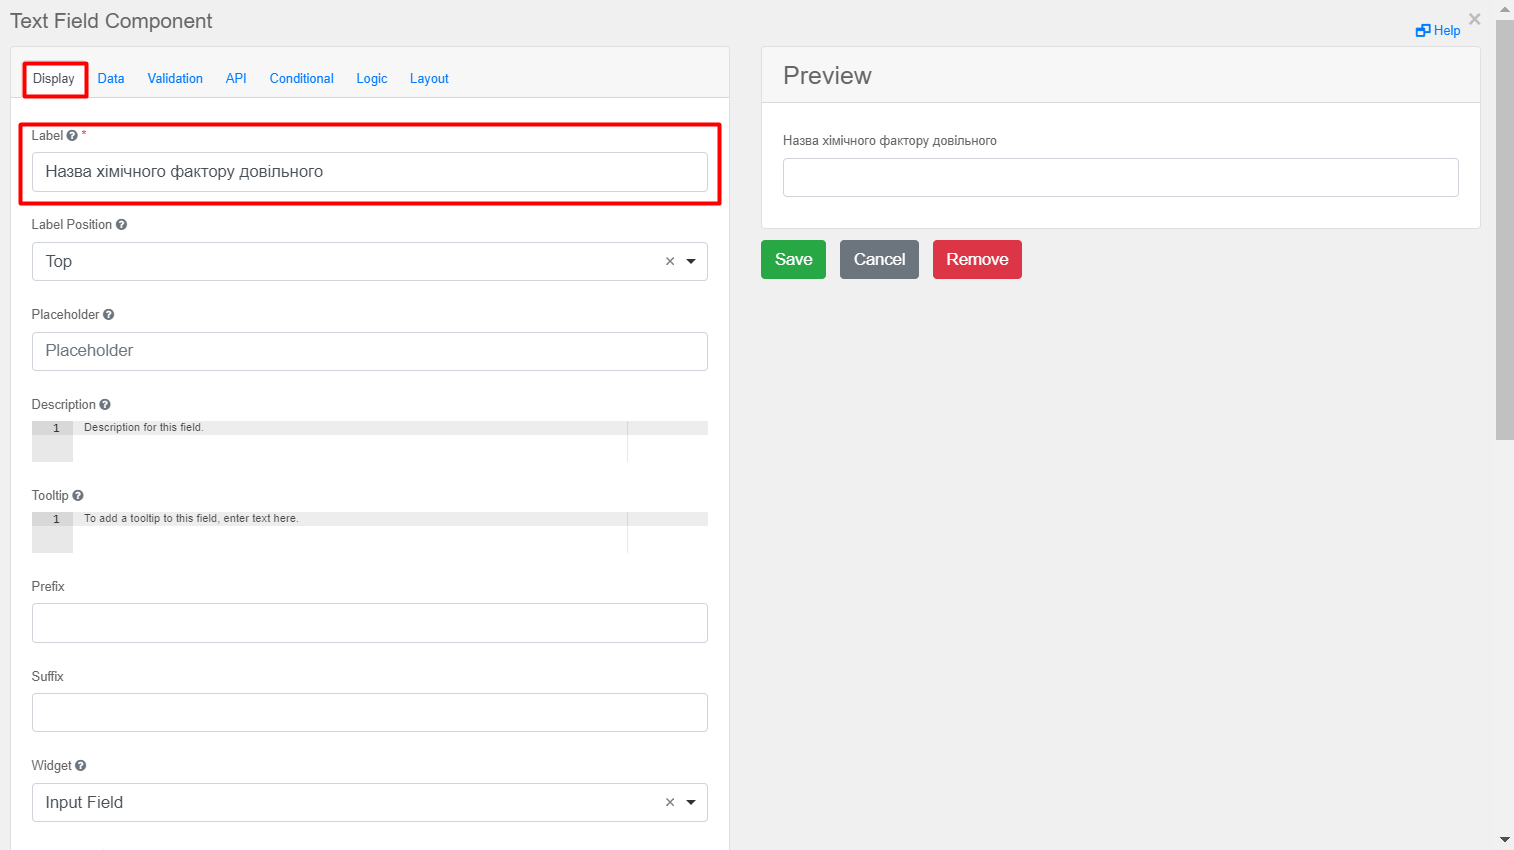
-
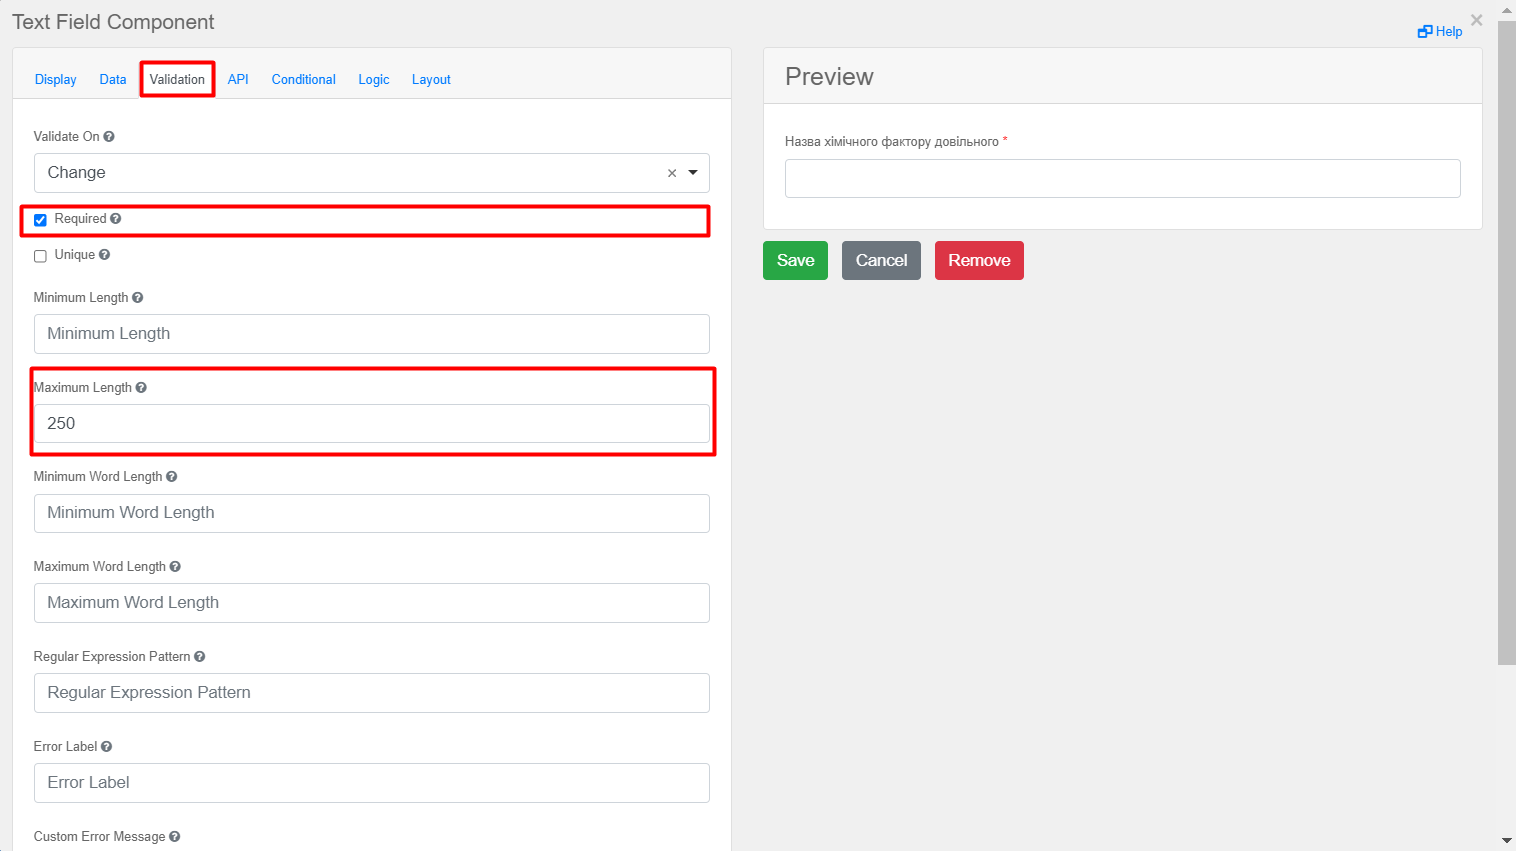
Switch to the Validation tab.
-
Check the box for the Required parameter.
-
Fill in the Maximum Length field with a value of
250.
-
-
Open the API tab. In the Property Name field, enter
name.
-
Click Save to save the changes to the component settings.
-
-
Add the next Text Field component following a similar process. Drag it from the left panel and configure the following settings:
-
On the Display tab, find the Label field and enter
Basis for adding the factor.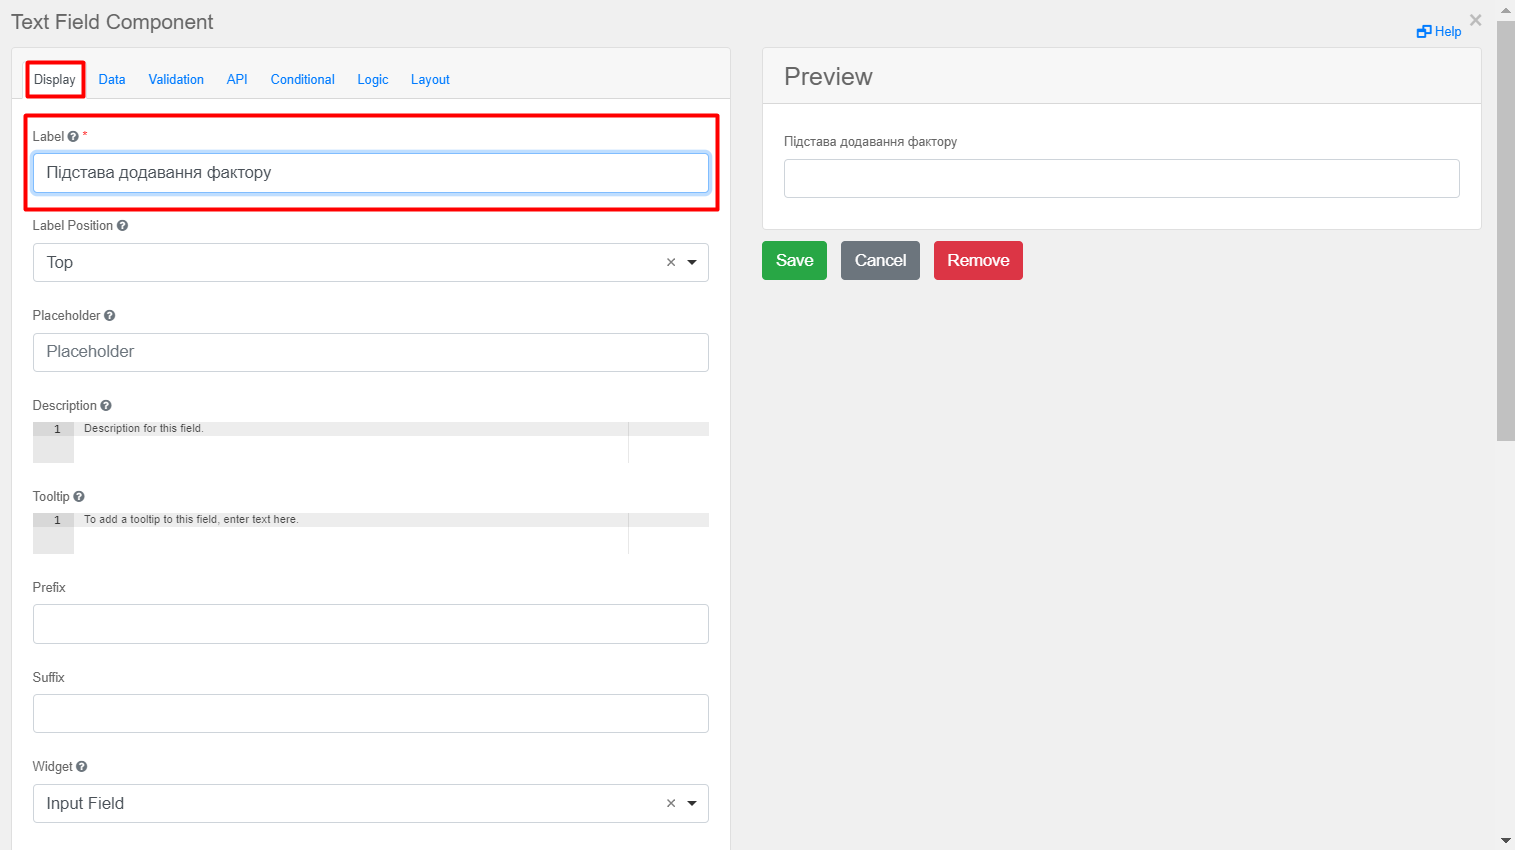
-
Switch to the API tab and enter
notesin the Property Name field.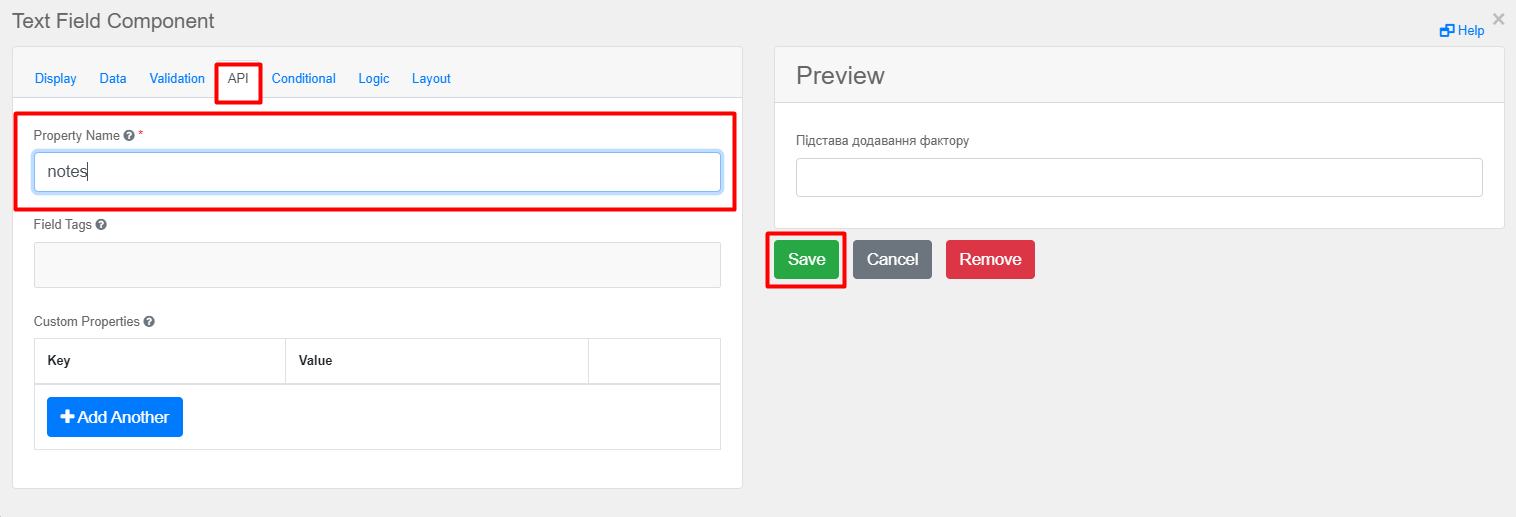
-
Click Save to save the changes to the component settings.
-
-
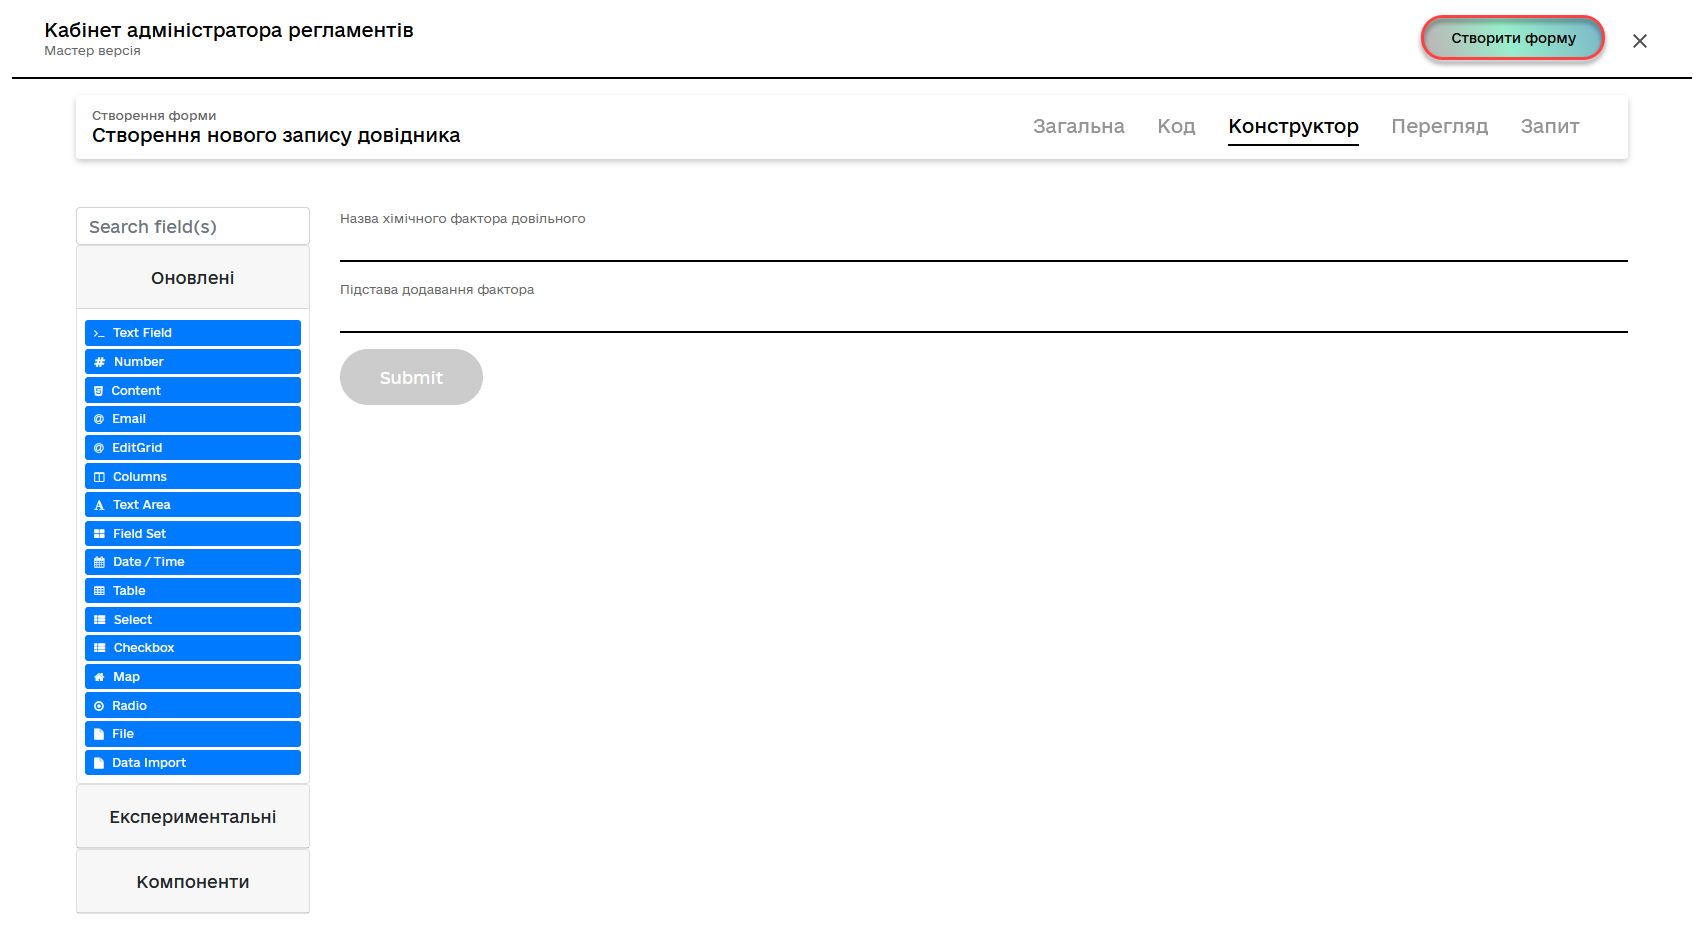
Complete the creation of the UI form by clicking the Create form button in the upper right corner of the page.
-
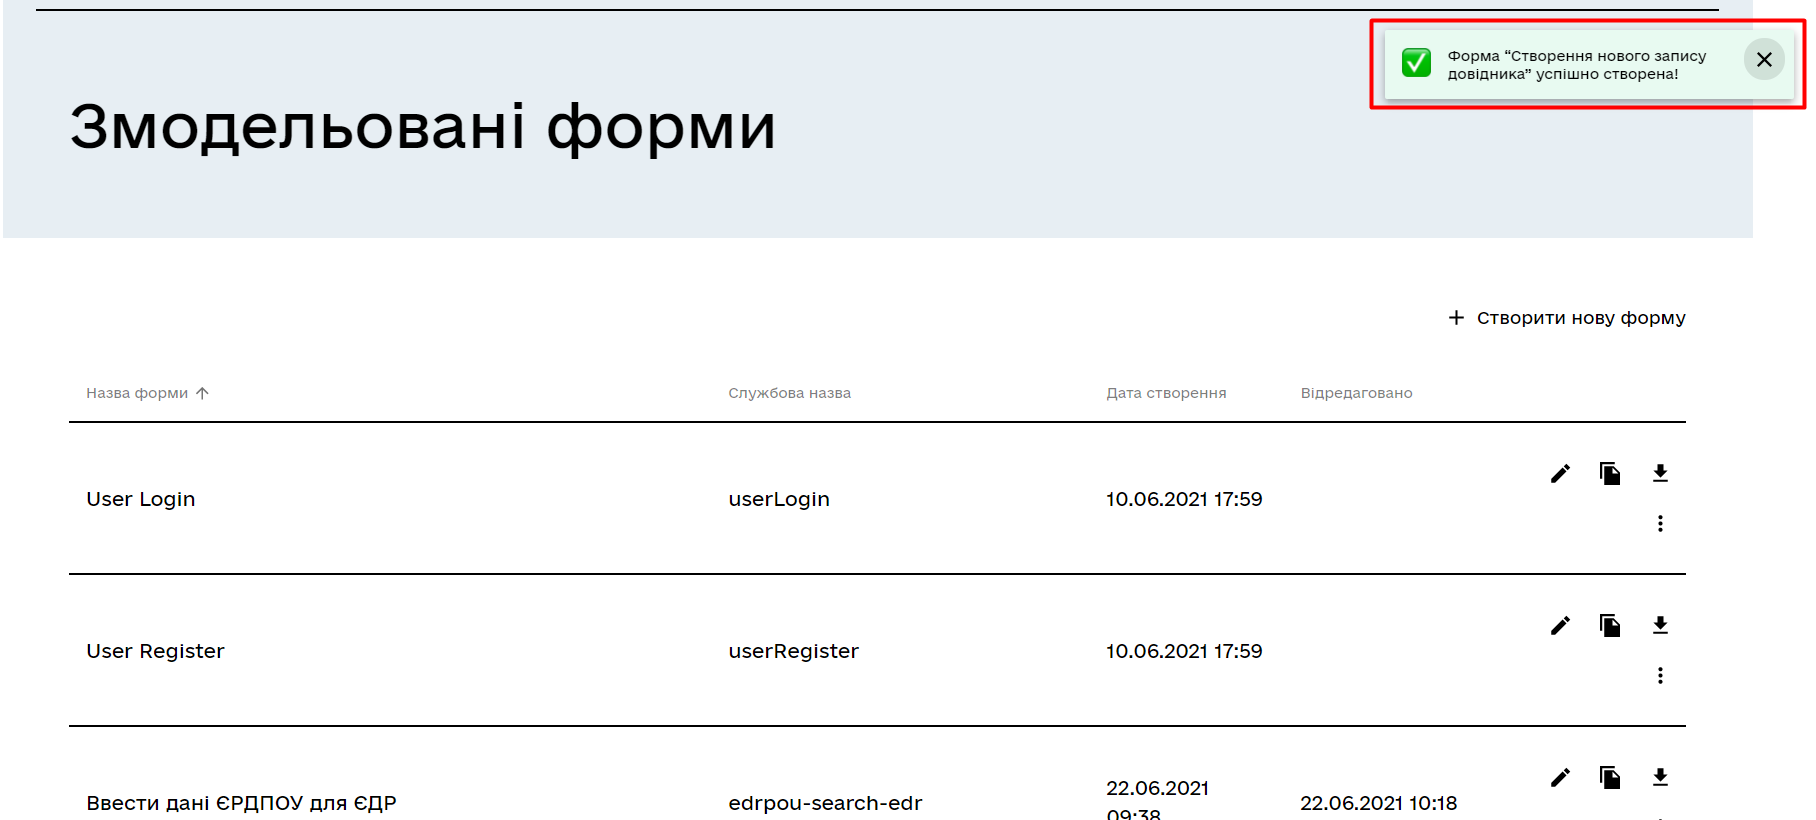
After modeling the form, you will be automatically redirected to the list of modeled forms, where you will see a message confirming its successful creation.
2.2. Creating UI form for signing data with qualified electronic signatures (QES)
|
-
Create a new form by clicking the
Create new formbutton. -
On the General tab, fill in the following fields:
-
In the Form’s business name field, enter the value
Signing a new directory record of chemical factors. -
In the Form’s service name field, enter the value
update-dict-bp-sign-add-name.Form’s service name must be unique within the registry instance. Permissible characters include Latin letters, digits, "-", with "-" not allowed at the beginning or end of the technical name. 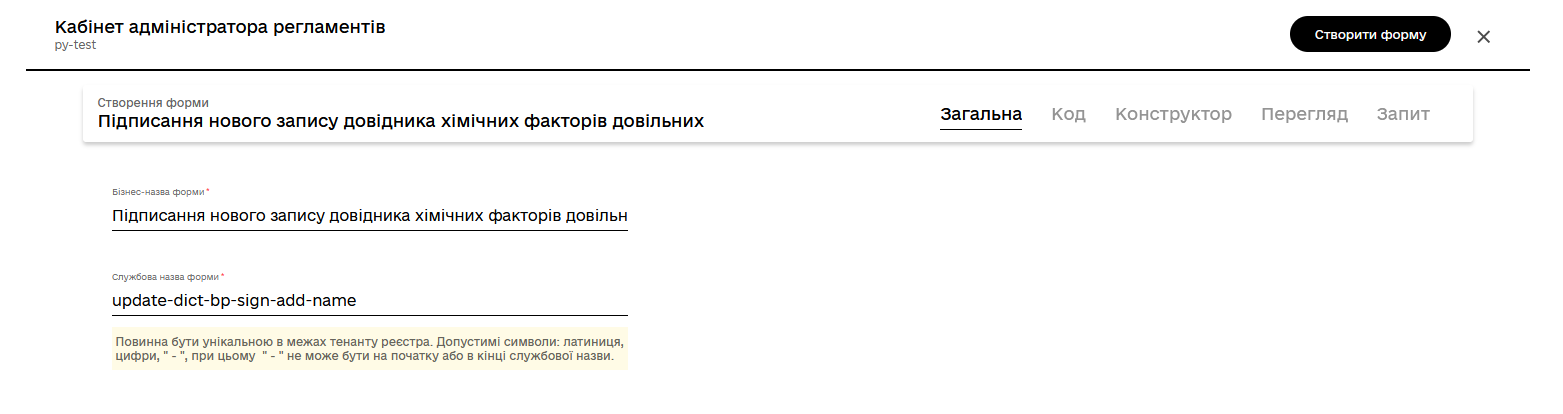
-
-
Open the Builder tab and proceed to model the UI form components.
Use components from the Updated list. -
Drag the Text Field component to the modeling panel.
-
In the new window, configure the component settings as follows:
-
Go to the Display tab. In the Label field, enter the
Name of the chemical factorvalue. -
Check the Disabled checkbox.

-
Switch to the Validation tab.
-
Check the Required checkbox.
-
Fill in the Maximum Length field with a value of 250.
-
-
Open the API tab. In the Property Name field, enter
name. -
Click
Saveto save the changes to the component settings.
-
-
Add the next Text Field component following a similar process. Drag it from the left panel and configure the following settings:
-
On the Display tab, find the Label field and enter
Basis for adding the factor. -
Check the Disabled checkbox.
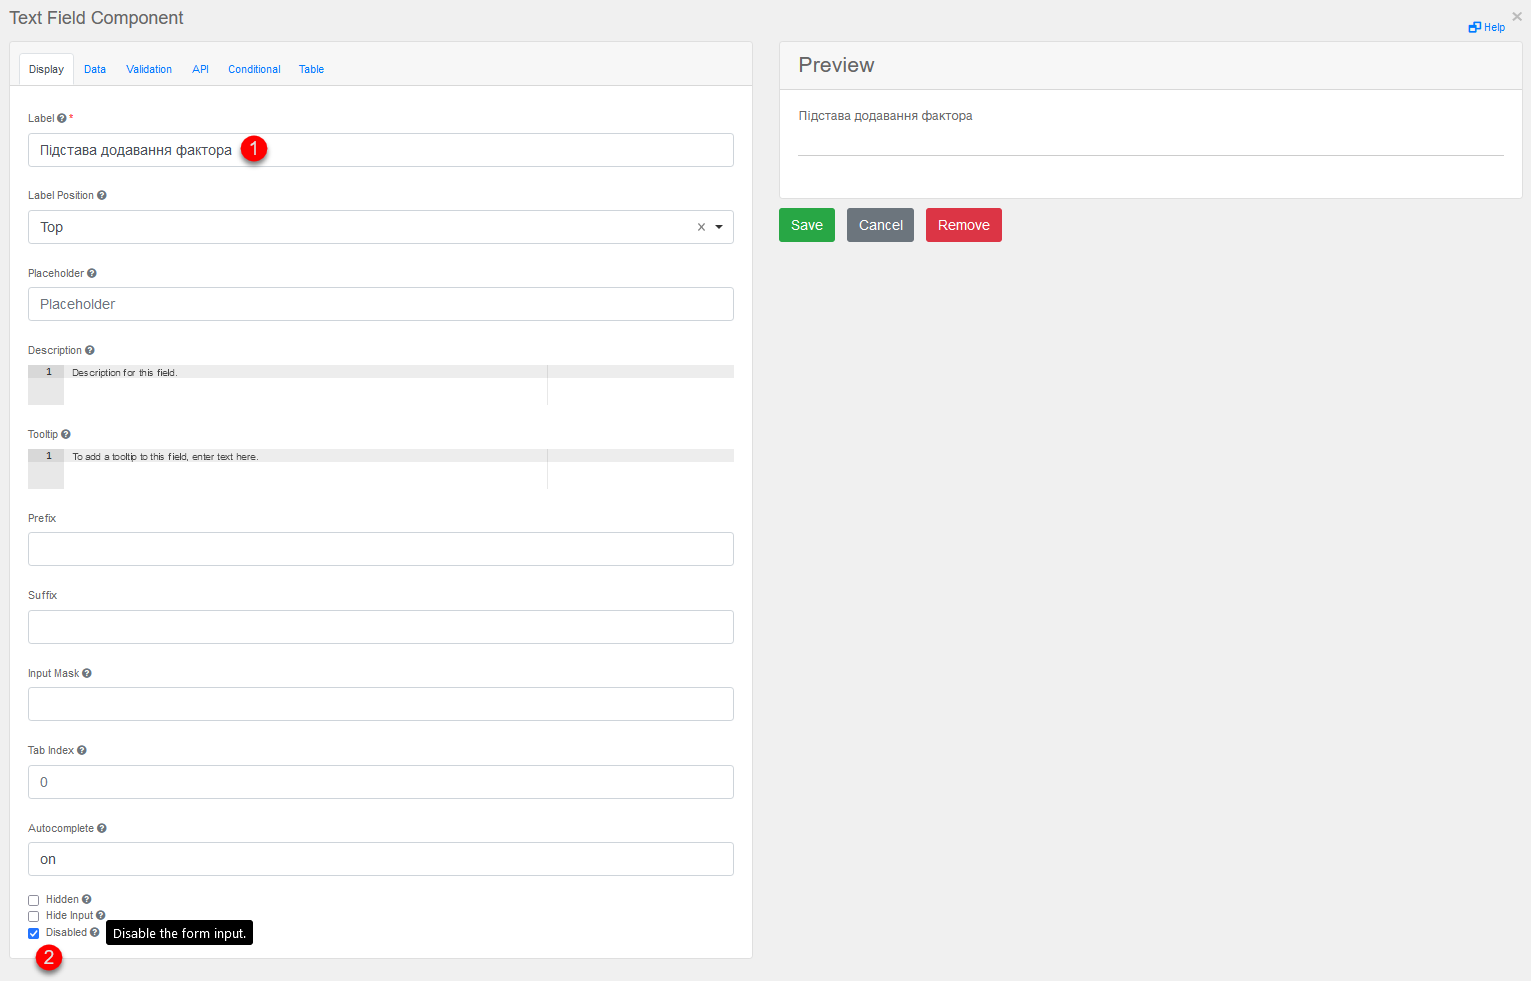
-
Switch to the API tab and enter
notesin the Property Name field. -
Click
Saveto save the changes to the component settings.
-
-
Complete the creation of the UI form by clicking the
Create formbutton in the upper right corner of the page.Please note that the modeled form fields are available for viewing only and are highlighted in gray. This prevents accidental or intentional editing of data that needs to be signed, ensuring their integrity. 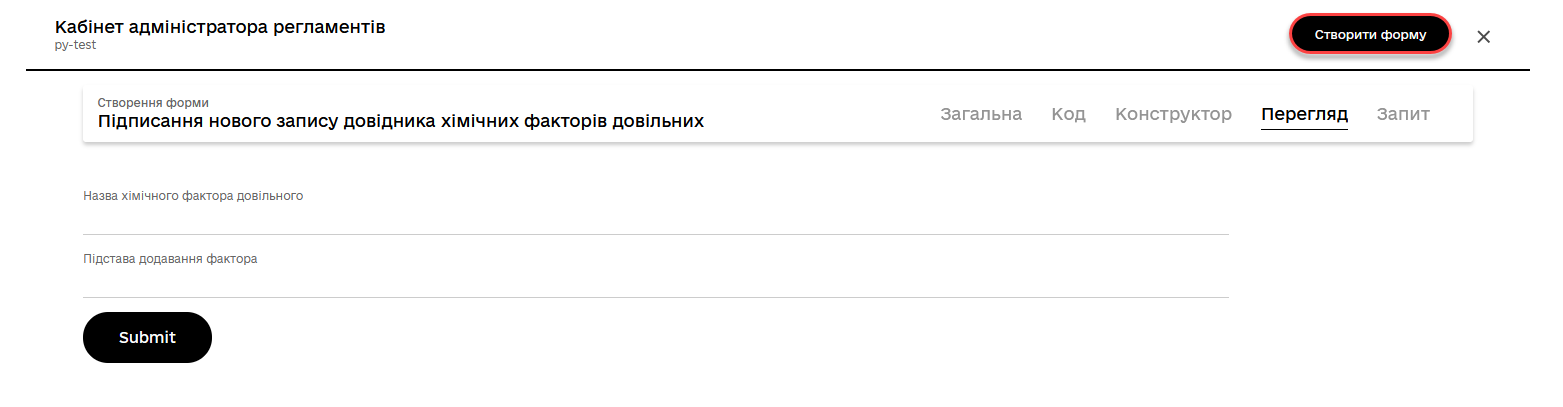
-
After modeling the form, you will be automatically redirected to the list of modeled forms, where you will see a message confirming its successful creation.
3. Publishing changes in the registry regulations
| If you made changes to forms directly in the master version, the changes will be published automatically. |
After creating any artifacts—UI forms, business processes, etc.—in your candidate version of the regulations, you need to apply the changes to the master version. This allows you to publish them.
|
Learn more about applying changes to the master version of the regulation at Reviewing and managing the candidate version settings. |
| If you are an advanced user working on the regulations development, using a local git environment, Gerrit tools, and Jenkins for publishing and deploying changes, we recommend reviewing Deploying registry regulations in Gerrit. |