Managing registry resources
| 🌐 This document is available in both English and Ukrainian. Use the language toggle in the top right corner to switch between versions. |
The Control Plane administrative panel provides flexible management of parameters using the power of the Platform. It is an effective tool for managing resources used by containers within your registry instance, ensuring optimal performance and efficiency.
| Resource management is available both during registry deployment and registry updating. |
-
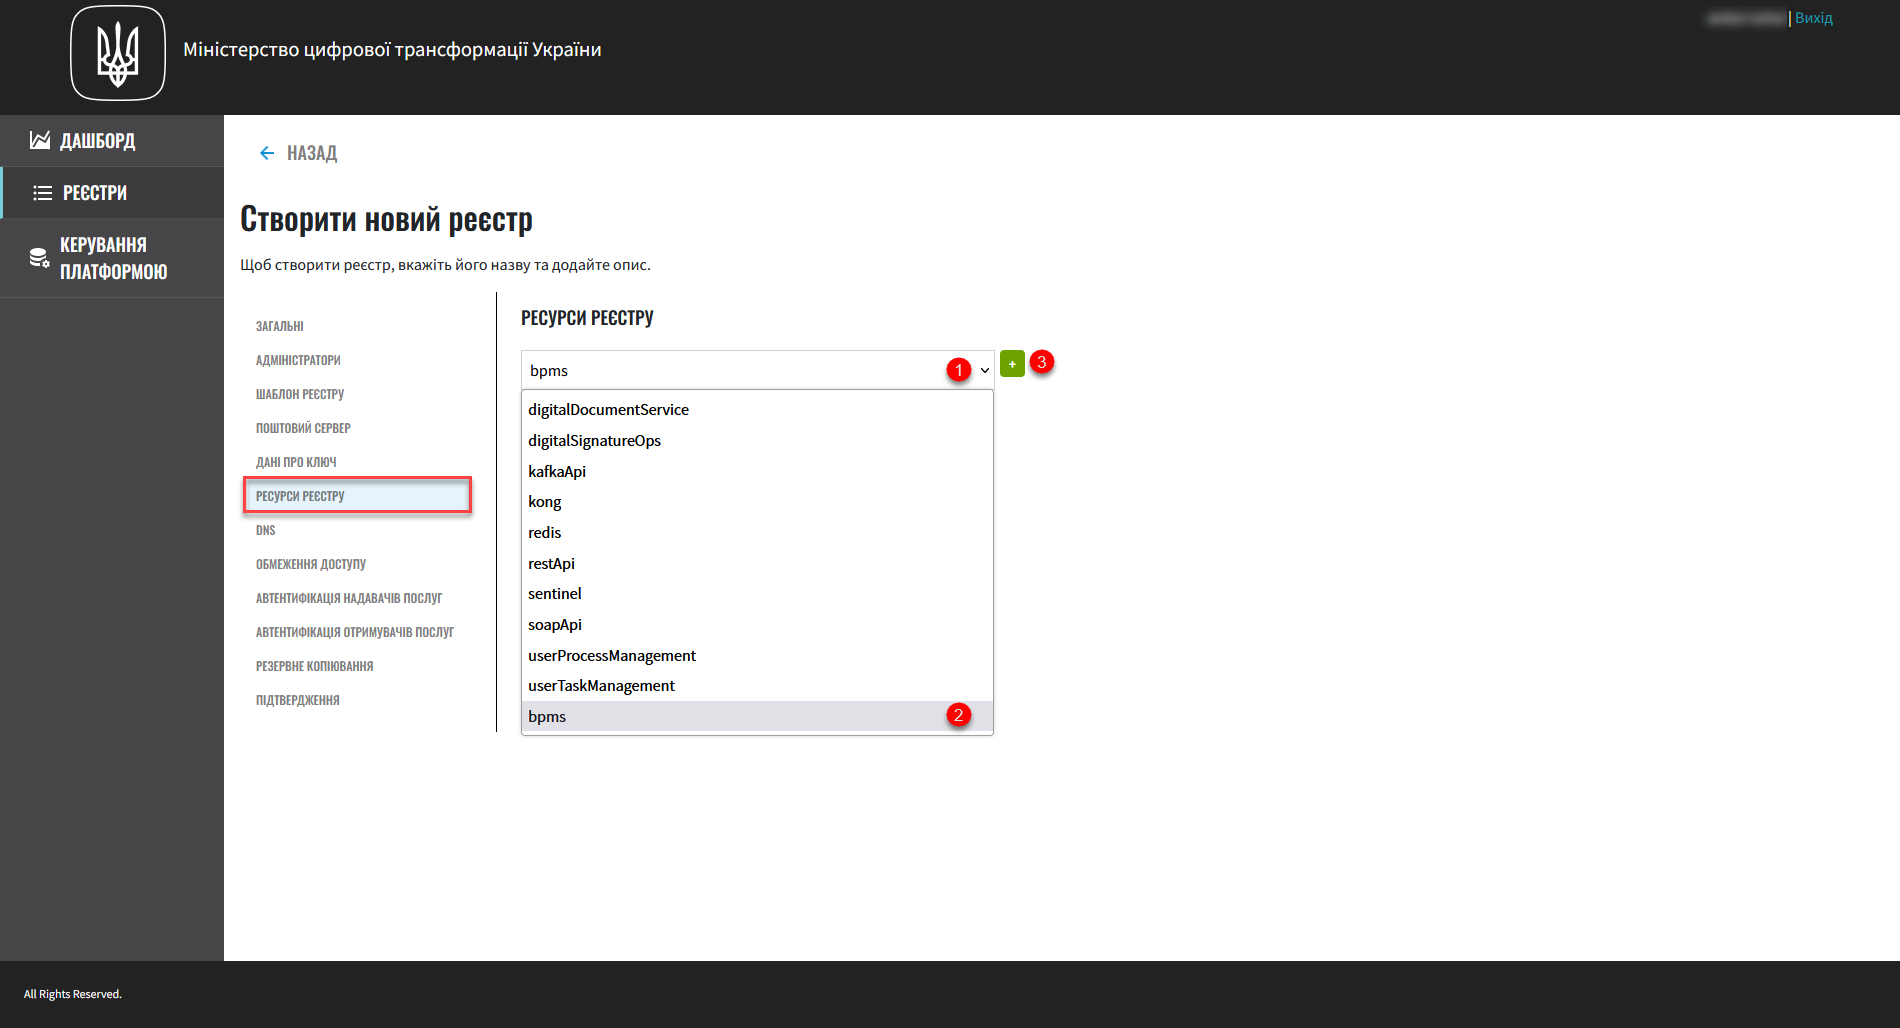
Choose a service from the list to configure its resources and click on the
+(Add).During registry deployment, all available services are configured and pre-populated with corresponding values for requests, limits, and default environment variables.
Even if services are removed from the list, the Platform will apply the standard configuration during registry deployment.
-
Set custom values for resources.
- Istio sidecar
-
Sidecar is an additional container that runs alongside the main container in an OpenShift pod. Istio uses the sidecar approach to make changes to the network configuration without modifying the application itself.
-
Activate the Enabled parameter. This parameter indicates whether Istio sidecar is enabled for this specific service.
-
Configure the Requests and Limits parameters.
These parameters specify the optimal (Requests) and maximum (Limits) resources to be allocated for the Istio sidecar.
Requests represent the minimum resources guaranteed by OpenShift for the container. In our example, it is 350m CPU and 128Mi memory for the Istio sidecar. If the container requires more resources, and they are available, OpenShift can provide them.
Limits represent the maximum resources allowed for the container by OpenShift. In our example, it is 350m CPU and 128Mi memory for the Istio sidecar. If the container tries to use more resources, it may be forcibly stopped or demoted to a lower priority in the deployment queue on the nodes.
-
- Container
-
Container is the main container with the application.
-
Configure the Requests and Limits parameters.
These parameters specify the optimal (Requests) and maximum (Limits) resources to be allocated for the main container.
Requests represent the minimum resources guaranteed by OpenShift for the container. In our example, it is
1CPU and2Gimemory for the main container. If the container requires more resources, and they are available, OpenShift can provide them.Limits represent the maximum resources allowed for the container by OpenShift. In our example, it is
1CPU and2Gimemory for the main container. If the container tries to use more resources, it may be forcibly stopped or demoted to a lower priority in the deployment queue on the nodes. -
Environment variables are dynamic name-value pairs stored in the system and can be used by various programs. They are particularly useful in containerized and distributed environments like the registry platform, where each container or pod can have its own environment variables. This allows individual control over the configuration and behavior of each container or pod.
The
JAVA_OPTSvariable is used to configure the JVM (Java Virtual Machine) parameters.In this case, the specified parameters
-Xms1536mand-Xmx1536mset the minimum (-Xms) and maximum (-Xmx) memory size that the JVM can use.You can remove environment variables from the settings by clicking on the -button.
-
-
Click
Next, if this is a registry deployment step orConfirm, if it’s a configuration update.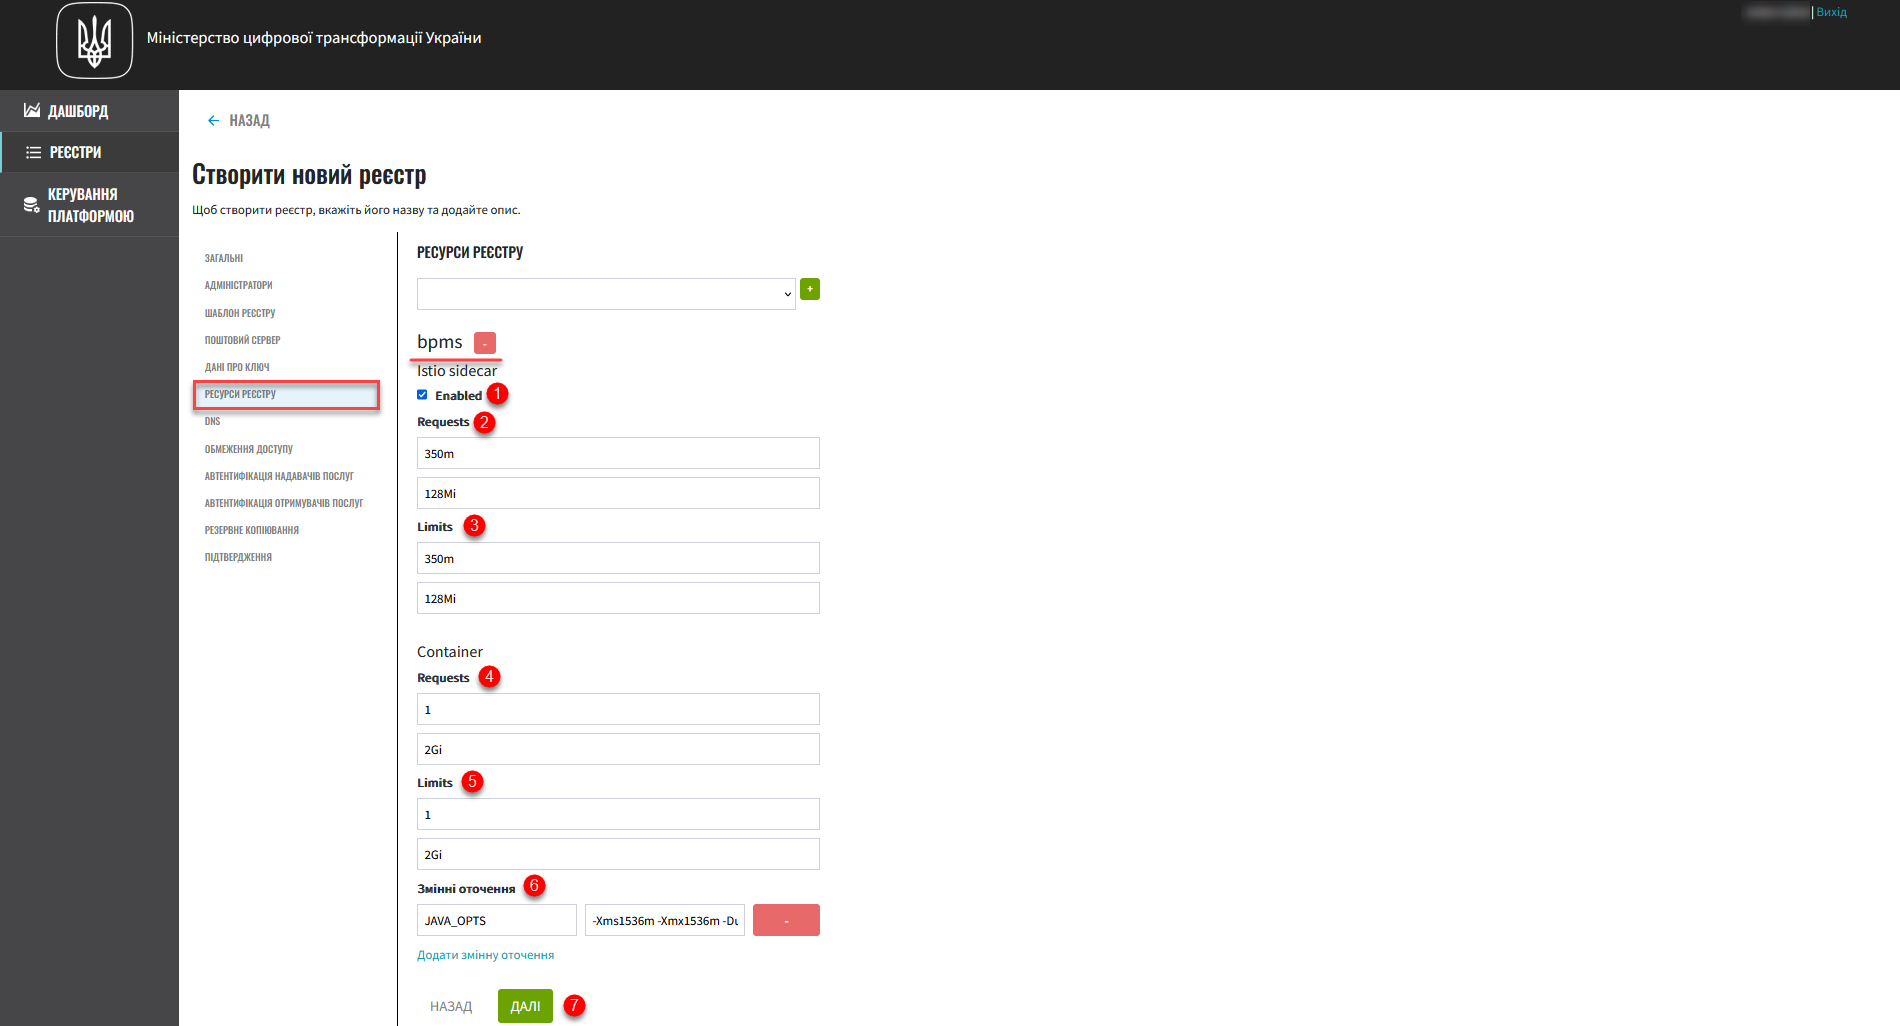 When editing the registry, an update request with the status
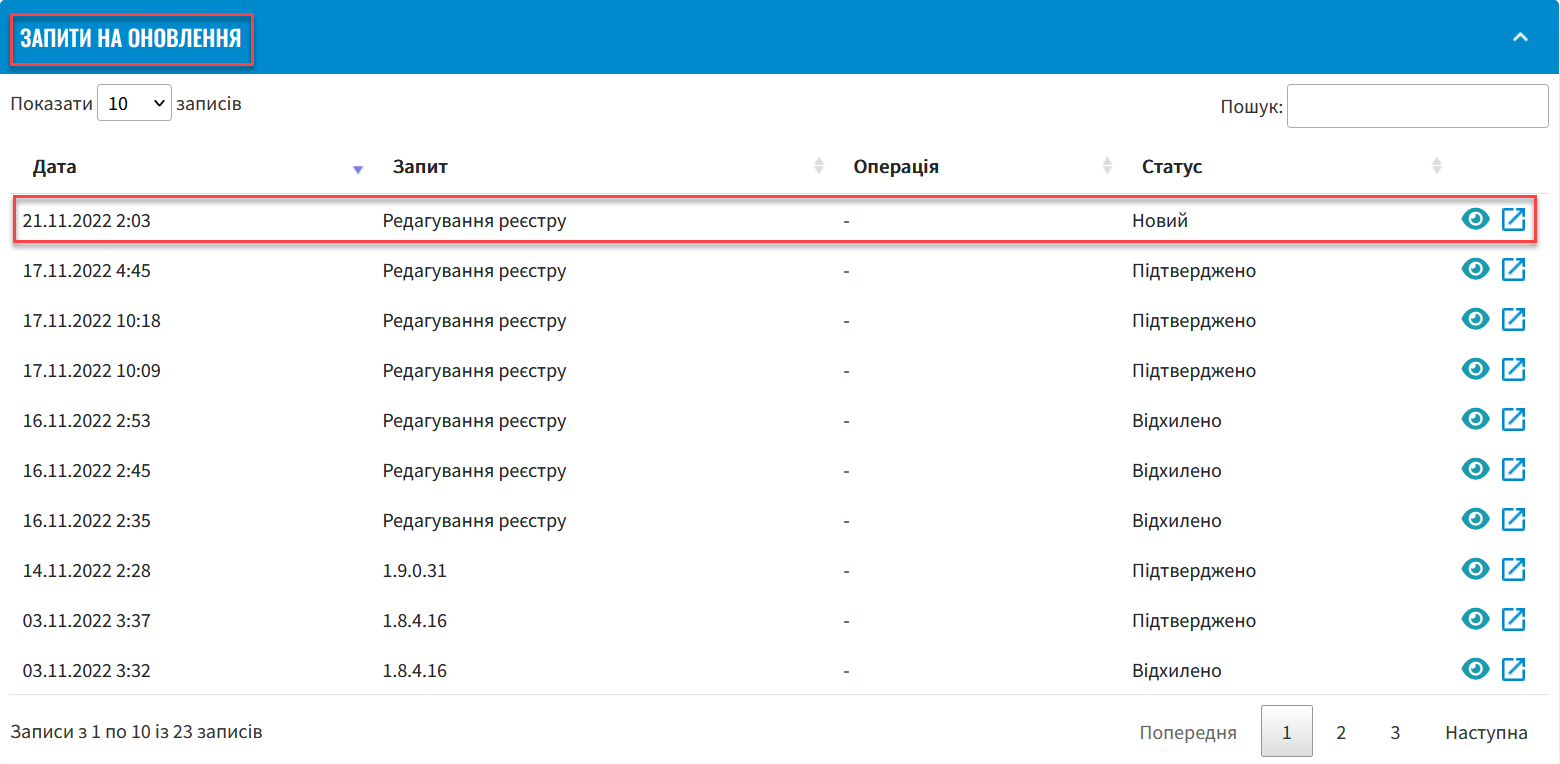
 Newwill be generated.
-
Go back to the Registries section, scroll down the page, and find the Update requests.
-
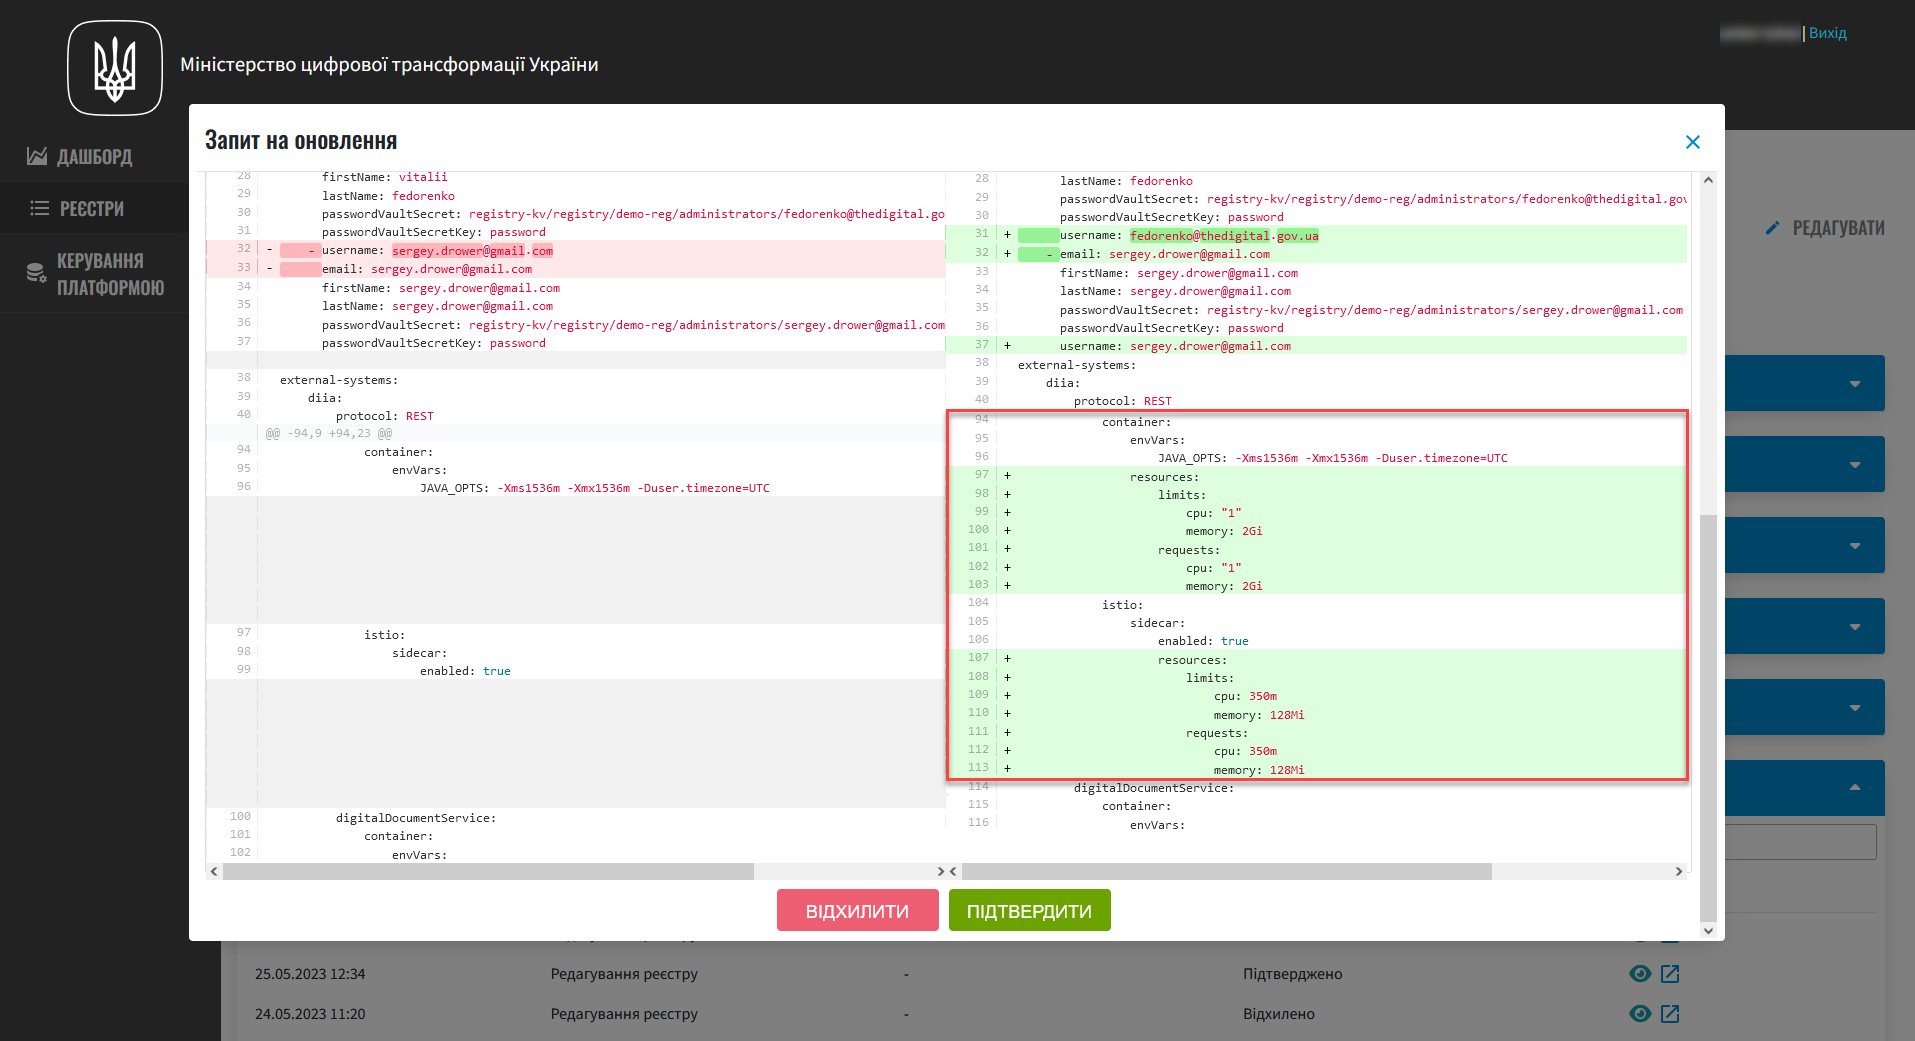
Open the generated request by clicking on the preview icon — 👁.
The proposed changes will be applied to the deploy-templates/values.yaml file configuration upon confirmation. -
In the new window, compare the two versions of the changes, ensure the data you entered is correct, and click
Confirm.