Deploying demo registry with reference examples
| 🌐 This document is available in both English and Ukrainian. Use the language toggle in the top right corner to switch between versions. |
You can deploy a demo-registry with reference examples of a registry regulations modeling. The structure of such regulations is the same as the typical regulations structure, used for any registry deployed on the Platform.
Regulations of the demo-registry includes reference examples marked with the reference- prefix, and testing examples marked with feature- prefix. They can be examples of .bpmn business process schemes, .json-forms for process data, .xml-schemes for the deployment of registry data models, and other file types.
It’s important to remark that these reference examples, as well as other examples, were developed by specialists from the core-team of the Platform. Existing ones are continuously updated, and new ones are added with every release. This approach allows you stay updated on the latest tendencies and practices of regulations modelling, experiment and test different scenarios in controlled environments.
1. Deployment of demo-registry and regulations
To deploy a demo-registry and copy regulations with ready examples, take the following steps:
-
Create a new "demo" registry according to the instructions on the followig page: Deploying a registry.
-
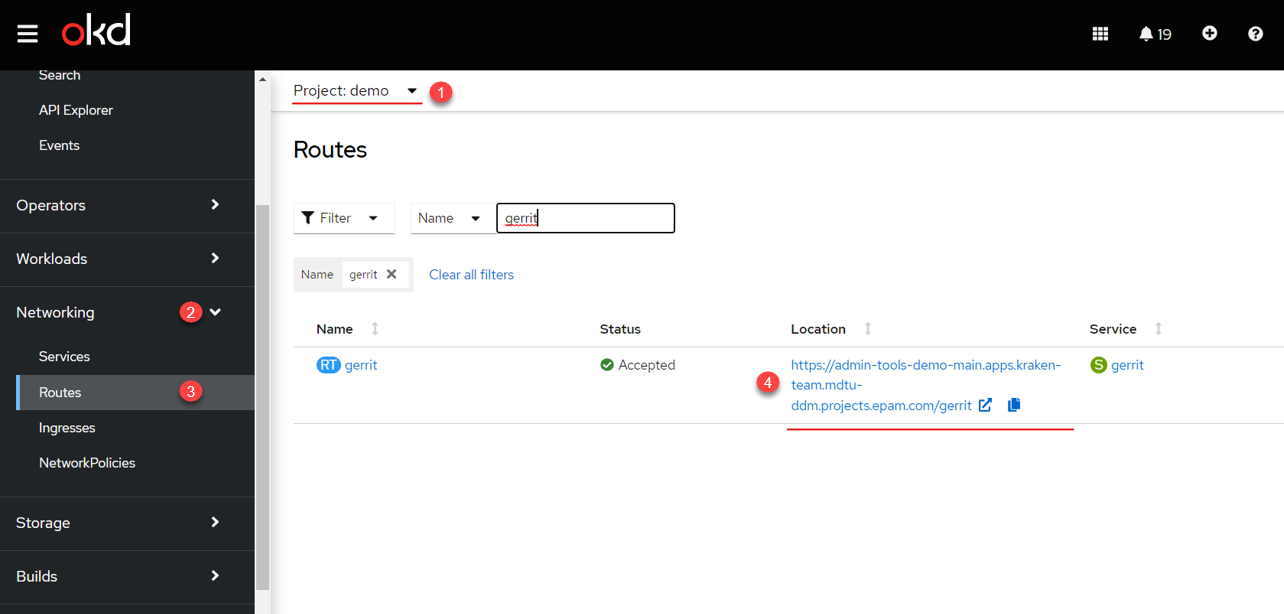
Navigate to the OpenShift > Home > Projects console and find
control-planeproject.Open Networking > Routes section and follow the link to
control-plane-consolecomponent.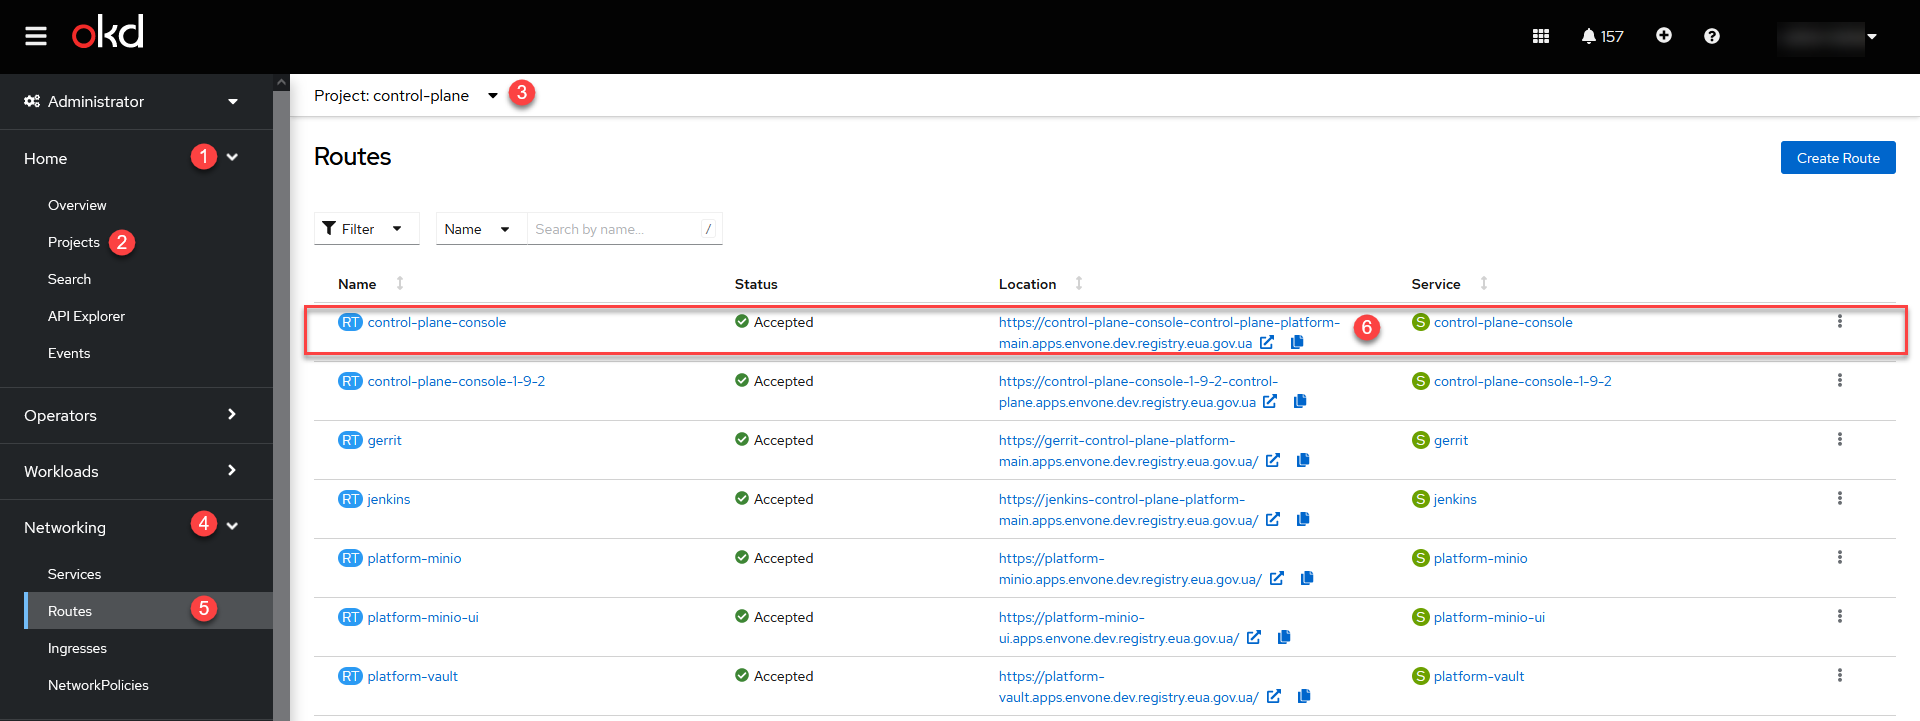
-
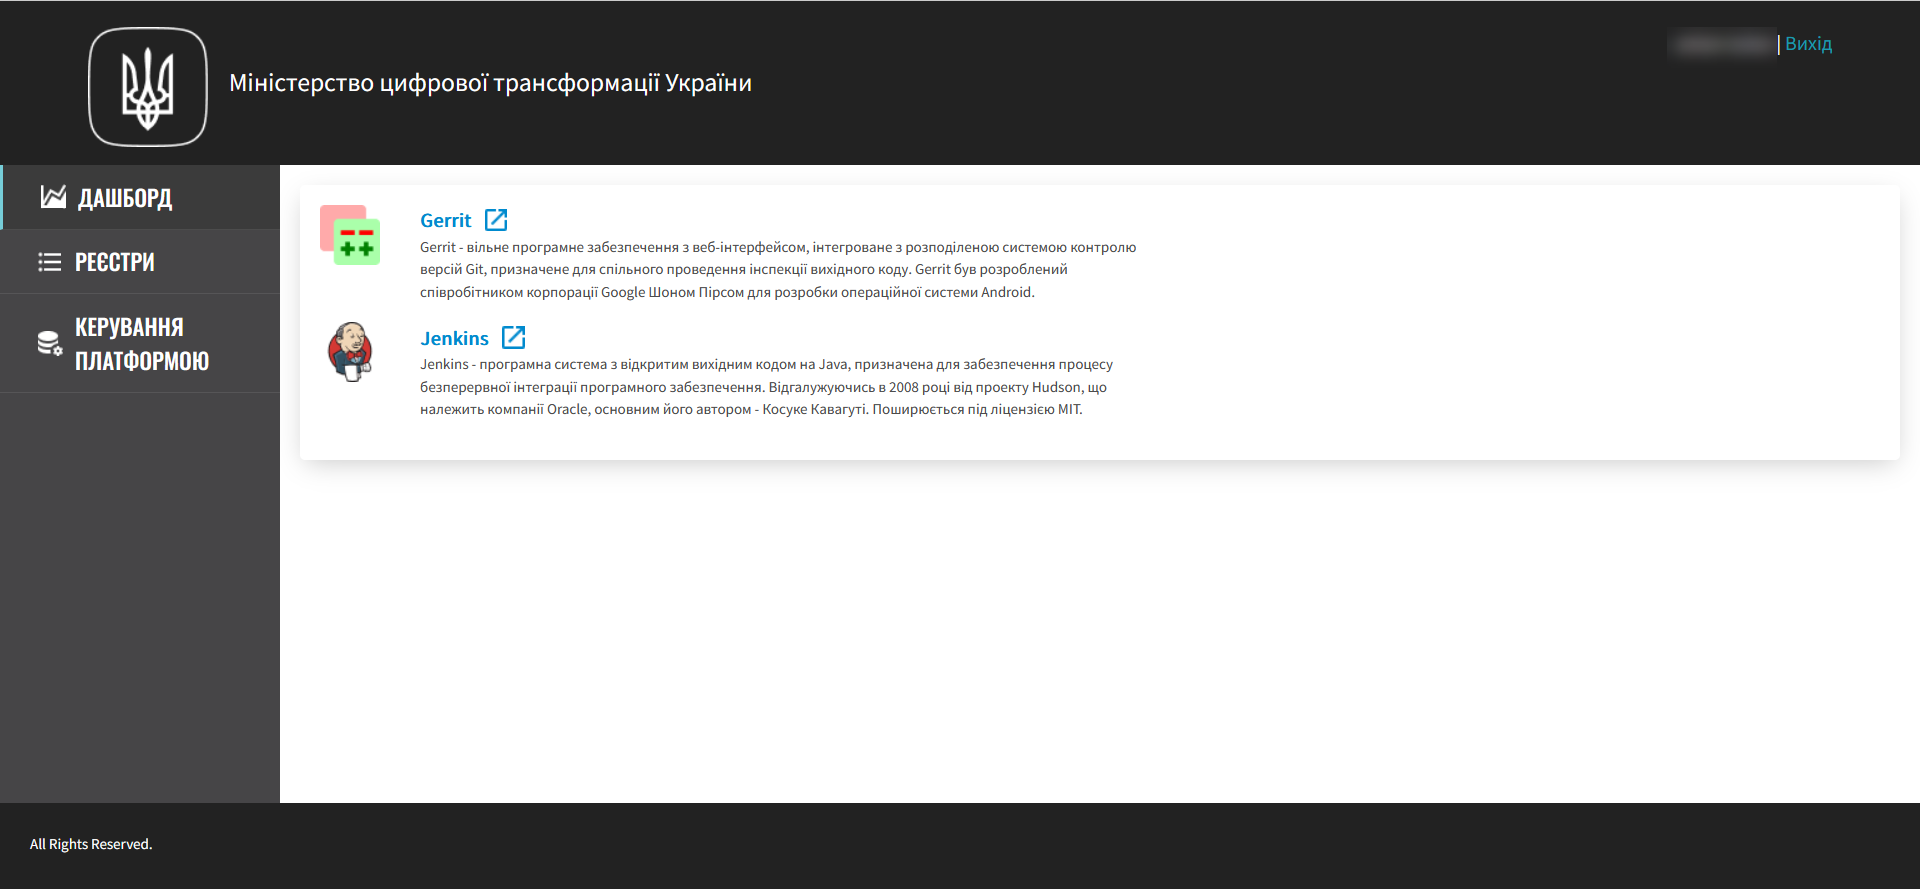
Navigate to Control Plane > Dashboard console and follow the link to Gerrit central component.
-
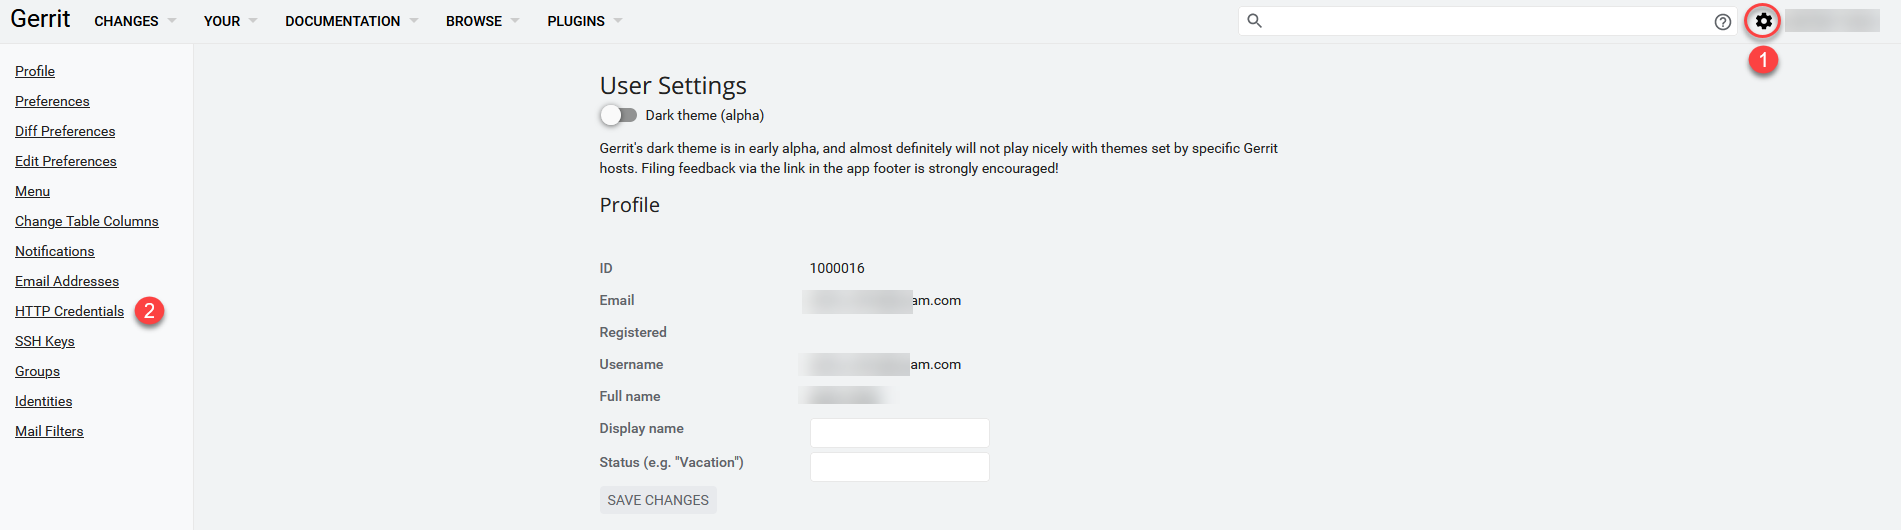
Navigate to Gerrit account configuration and find HTTP Credentials section.
-
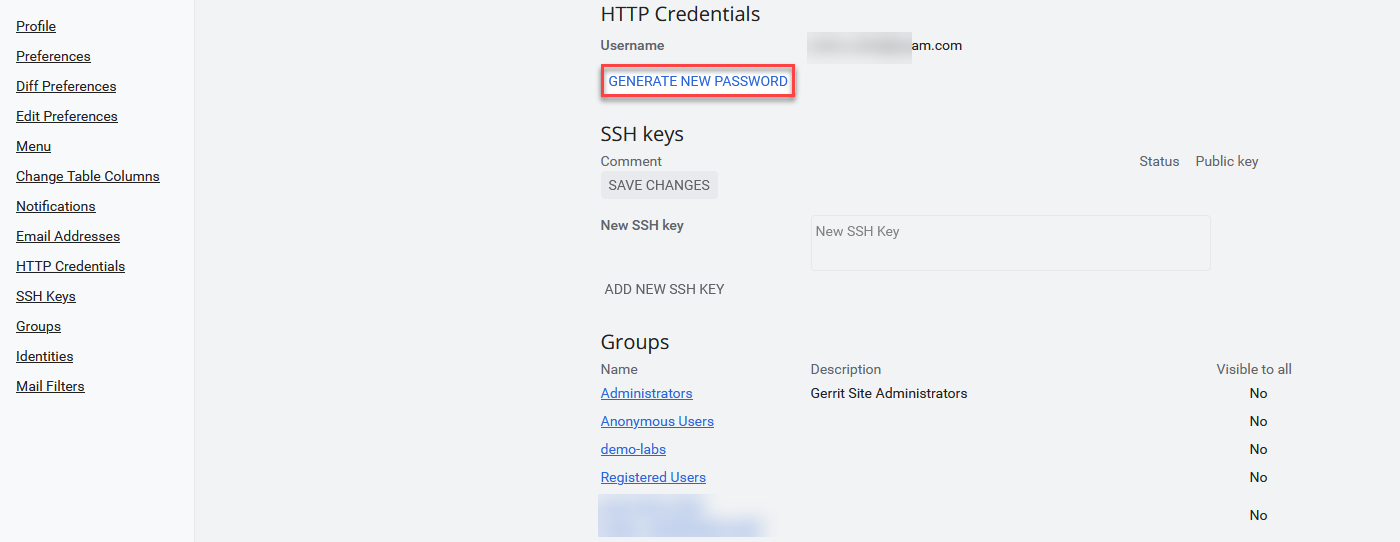
Generate a new HTTP-password and copy it to Notepad.
This HTTP-password is needed further for authentification in order to clone the consent-data Gerrit-repository. -
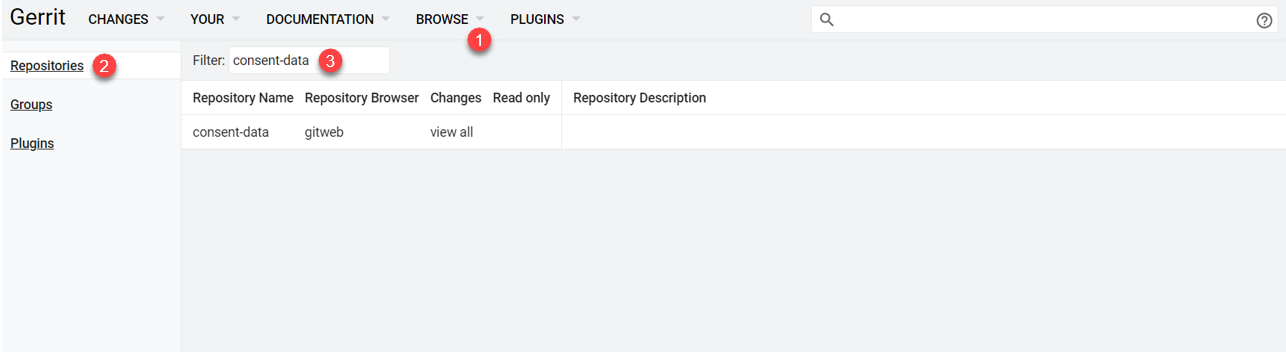
Open Browse > Repositories tab and find consent-data in the Filter field.
-
Clone the consent-data repository to your local machine the following way:
-
Select the Anonymous HTTP tab (by default) and copy the
Clone with commit-msg hookcommand.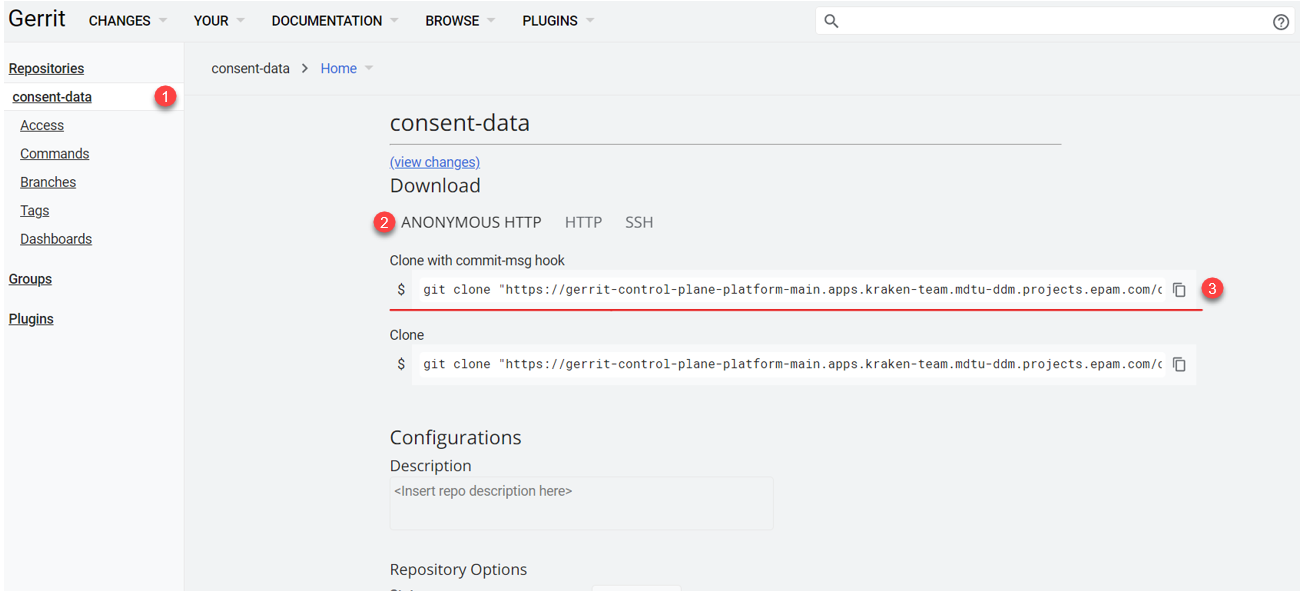
It is imperative to use
commit-msg hookoption when cloning the repository.One of the key elements of Gerrit is using "hooks". Hooks are scripts that are executed before or after particular Git events, like
git commitorgit push.*Clone with commit-msg hook* command in Gerrit allows you to clone a repository while automatically adding a special `commit-msg hook` to the local repository. This hook automatically generates a unique *Change-Id* for every new commit. Gerrit uses *Change-Id* to monitor different versions of the change.
-
Open Git Bash and navigate to the directory where you need to copy consent-data:
Navigation to the target directorycd <path/to/your/local/directory> -
Paste the copied Clone with commit-msg hook command Clone with commit-msg hook and press Enter.
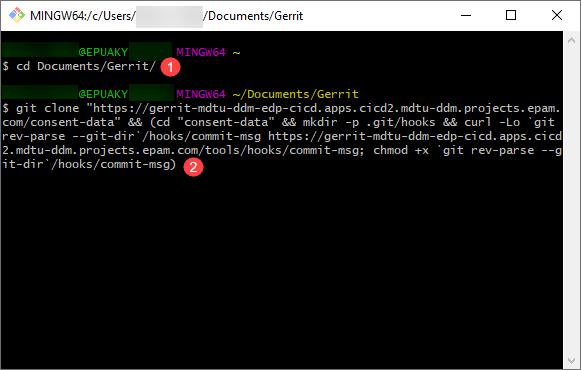
Wait until the repository is completely cloned.
-
-
Navigate to the OpenShift > Home > Projects console and find the project with the created
demodemo-registry.Open the Networking > Routes section and follow the link to the registry Gerrit component.
-
Navigate to Gerrit account configuration and find HTTP Credentials section.
-
Generate a new HTTP-password and copy it to Notepad.
This HTTP-password is needed further for authentification in order to clone and interact with the Gerrit-repository that includes registry-regulations regulations. -
Open Browse > Repositories tab and find registry-regulations in the Filter field.
After deploying the registry, Gerrit will have empty regulations registry-regulations. You need to fill it in. -
Clone the registry-regulations repository to your local machine the following way:
-
Select the Anonymous HTTP tab (by default) and copy the
Clone with commit-msg hookcommand.It is imperative to use
commit-msg hookoption when cloning the repository.One of the key elements of Gerrit is using "hooks". Hooks are scripts that are executed before or after particular Git events, like
git commitorgit push.Clone with commit-msg hook command in Gerrit allows you to clone a repository while automatically adding a special
commit-msg hookto the local repository. This hook automatically generates a unique Change-Id for every new commit. Gerrit uses Change-Id to monitor different versions of the change. -
Open Git Bash and navigate to the directory where you need to copy consent-data:
Navigation to the target directorycd <path/to/your/local/directory> -
Paste the copied Clone with commit-msg hook command Clone with commit-msg hook and press Enter.
Wait until the repository is completely cloned.
-
-
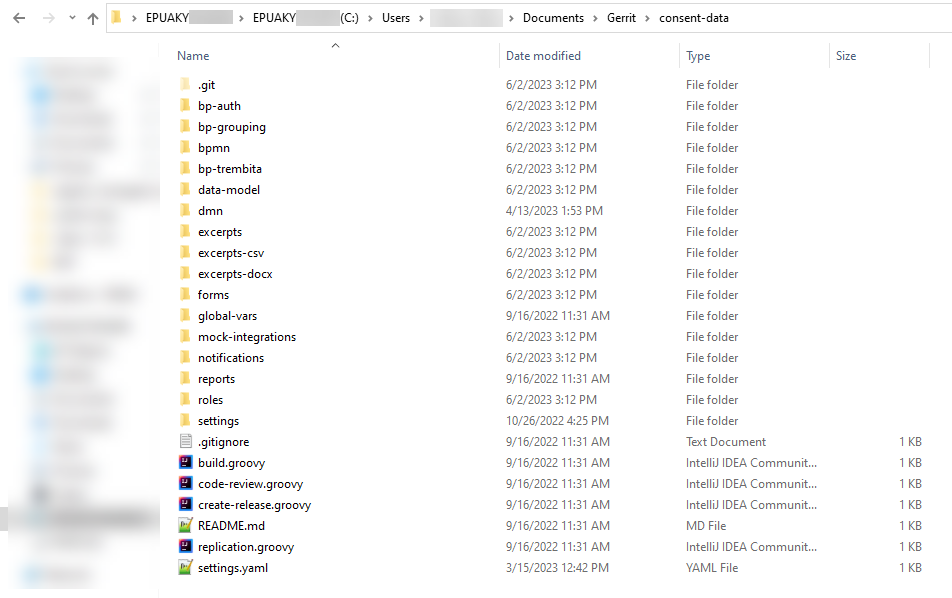
On the local machine copy the contents of consent-data repository, and then paste (replacing original files) it to registry-regulations.
Be sure to move the contents of consent-data repository without .git system directory. If the demo-registry is not expected to be configured for connection to "Diia", then it is important to delete diia directory from the registry-regulations repository, which can be found via the following path: ./notifications/diia. Otherwise, regulations deployment will fail. -
Publish the changes in demo-registry regulations. Regulations entities like data model, business process or forms will become available for use in user portals after publishing, including Regulations administrator portal (
admin-portal), officer portal (officer-portal) and citizen portal (citizen-portal).Fill in the regulations in registry-regulations Gerrit online-repository of the registry on this step. -
Prepare
commitwith the changes to registry-regulations and send it to the repository. To do this, execute commands in Git Bash terminal in the following order:git add --allThis command adds all the new, changed or deleted files in the current catalog and subcatalogs to the
stageindex for subsequent commit. Basically, it prepares all the changes on the project togit commitcommand.git commit -m "added demo registry data"Git commitcommand creates a new commit with the changes previously added to the index withgit addcommand. The-moption allows you to add a short message to the commit in order to describe the changes made. In this case, the message is:"added demo registry data".
-
-
After sending the changes, follow the link to Gerrit that will appear in the terminal.
The path to registry Gerrit will be as follows:
https://admin-tools-<openshift-project-name>.<dns-wildcard>/gerrit
-
<openshift-project-name>— name of the new registry (in this case —demo). -
<dns-wildcard>— name of OpenShift environment where the registry is deployed.
-
-
Wait until
MASTER-Code-review-registry-regulationscode check system pipeline is executed. You can check the progress by following the corresponding link at the bottom of the page in Gerrit.As a result of a successful check, your change request will get
VERIFIED +1status. -
Confirm the application of changes as moderator by clicking
CODE-REVIEW+2button.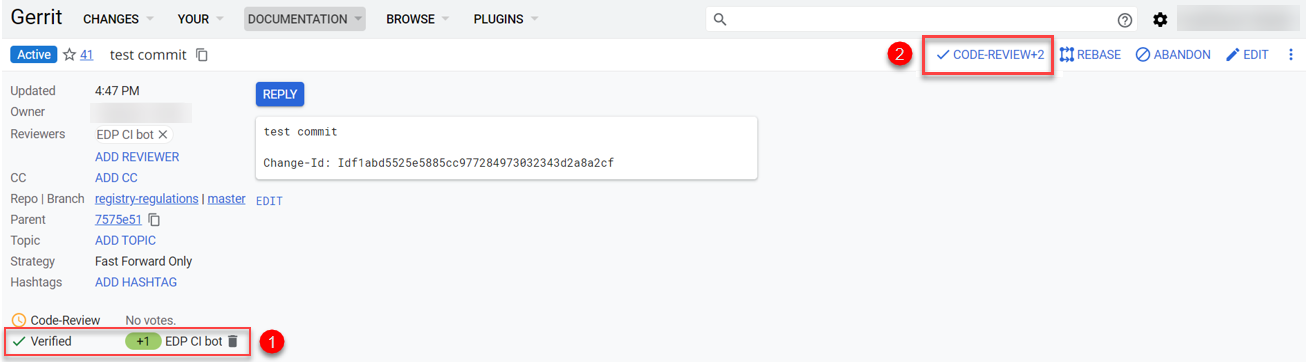
-
Apply the changes to the
masterbranch of the repository that contains regulations, by clickingSUBMIT, which will executegit mergeof the changes.As a result,
MASTER-Build-registry-regulationspipeline automatically publishes the regulations. You can check the progress by following the corresponding link at the bottom of the page in Gerrit.After successful publication, reference examples marked with
reference-prefix, and testing examples marked withfeature-prefix will become available in the demo-registry regulations. -
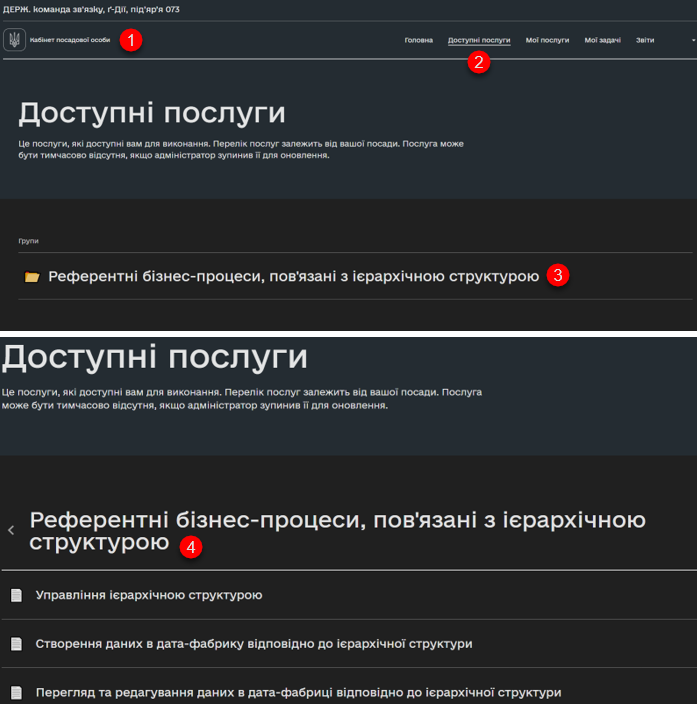
Navigate to the Administrative portal and check if entities like business processes and UI-forms are available. The service name of reference examples will contain the
reference-prefix.The Administrator portal is accessed via the following link: https://admin-tools-<registry-name>.<dns-wildcard>. 
The same reference business processes will become available as services in officer and citizen portals.
2. Demo-registry regulations content description
The content of demo-registry regulations is the same as the typical regulations structure, used for any registry deployed on the Platform (see more — Registry regulations structure).
Regulations of the demo-registry includes reference examples marked with the reference- prefix, and testing examples marked with feature- prefix. They can be examples of .bpmn- business process schemes, .json-forms for process data, .xml-schemes for the deployment of registry data models, and other file types.
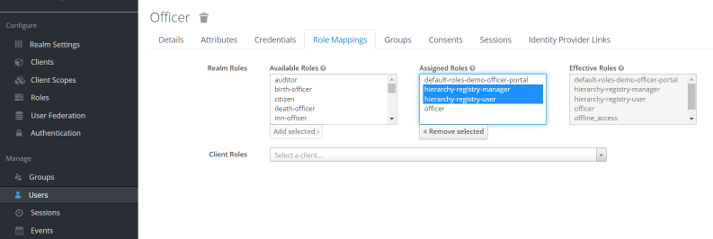
In order to let an officer get access to a corresponding reference process, you need to create a user in <registry-name>-officer realm for the corresponding registry in Keycloak service, and give this user the corresponding access rights.
Access rights can differ according to the registry logic. They can be common officer rights, like the -officer role, or specific, like the officer responsible for hierarchy structure management — hierarchy-registry-manager.
| Find more information on creating users and managing their access rights in the following section: Creating users in the system. |
The list of roles supported by demo-registry regulations is available in roles/*.yml files. Officer roles are listed in roles/officer.yml file, and citizen roles can be found in roles/citizen.yml file.
To view the processes associated with feature-examples, use the op-regression role in Keycloak. With this role functionality testing processes like JUEL-function or delegate checking will become available in the portal.
To view the processes associated with reference-examples, use the op-reference role in Keycloak.
Roles of the demo-registry regulationsroles/officer.yml
|
To check access rights for each corresponding role, see regulations authorization files bp-auth/*.yml.
Access rights for officers are defined in bp-auth/officer.yml file, while for citizens the file is bp-auth/citizen.yml. External systems authorization is defined in bp-auth/external-system.yml file.
Access to demo-registry business processes for the corresponding rolesbp-auth/officer.yml
|
3. Reference examples
Reference examples of regulations modeling are described on the pages of the following section: Best practices.