Embedded subprocess
| 🌐 This document is available in both English and Ukrainian. Use the language toggle in the top right corner to switch between versions. |
1. Overview
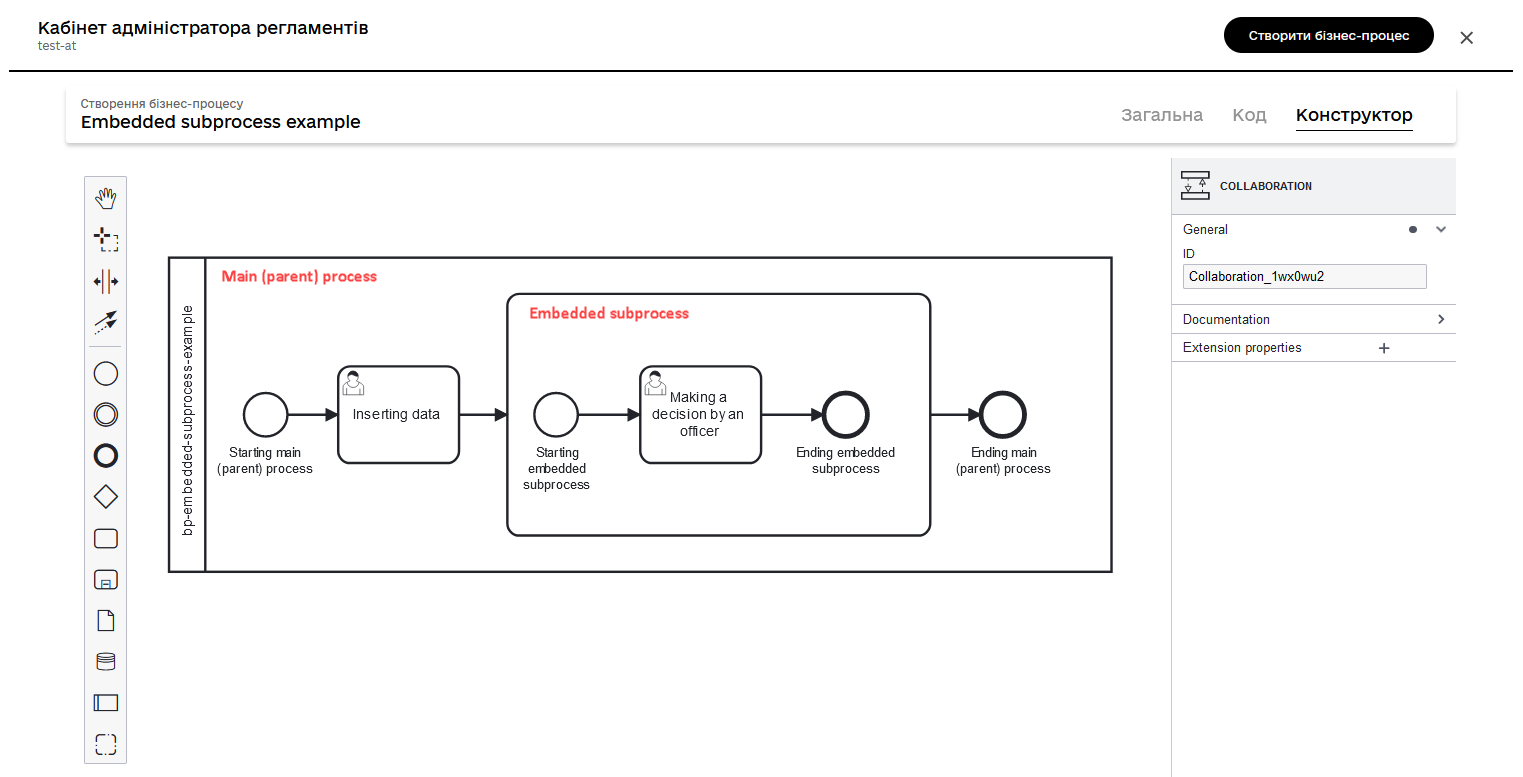
An Embedded subprocess is a subprocess that is configured and run inside the main (parent) business process.
|
An embedded subprocess allows the user to avoid running two business processes separately, leaving the Portal every time to start each process. Embedding a subprocess provides a smooth transfer between business processes without separating the main process and the subprocess. For example, the main process has a purpose of entering contract data, but it requires approval of the changes by an authorized officer. This approval process logically fits into an embedded subprocess, thus having a dedicated process for everything, and still fitting into one sequence flow. |
An embedded subprocess must only contain one none start event[1].
On embedded subprocess activation, a Start event initiates it. The subprocess remains active while at least one element in its container is active. At the end of the last element of the subprocess, meaning the final event, the subprocess ends, and the output sequence flow continues in the Parent[2] process.
2. Using embedded subprocess in modeling
We’ll show how to use the Embedded Subprocess BPMN-element with a data input business process (_further in this text — main or parent process) and changes approval embedded subprocess (_further in this text — subprocess) as an example.
|
At the modeling stage, create 1 pool with a business process and save it in one .bpmn file. |
2.1. Process modelling stages
To model 2 processes (in our case — the main process and the subprocess), using Embedded subprocess element, we’ll go through the following stages:
2.2. Creating a pool for the business process
Model a pool for the main process by taking the following steps:
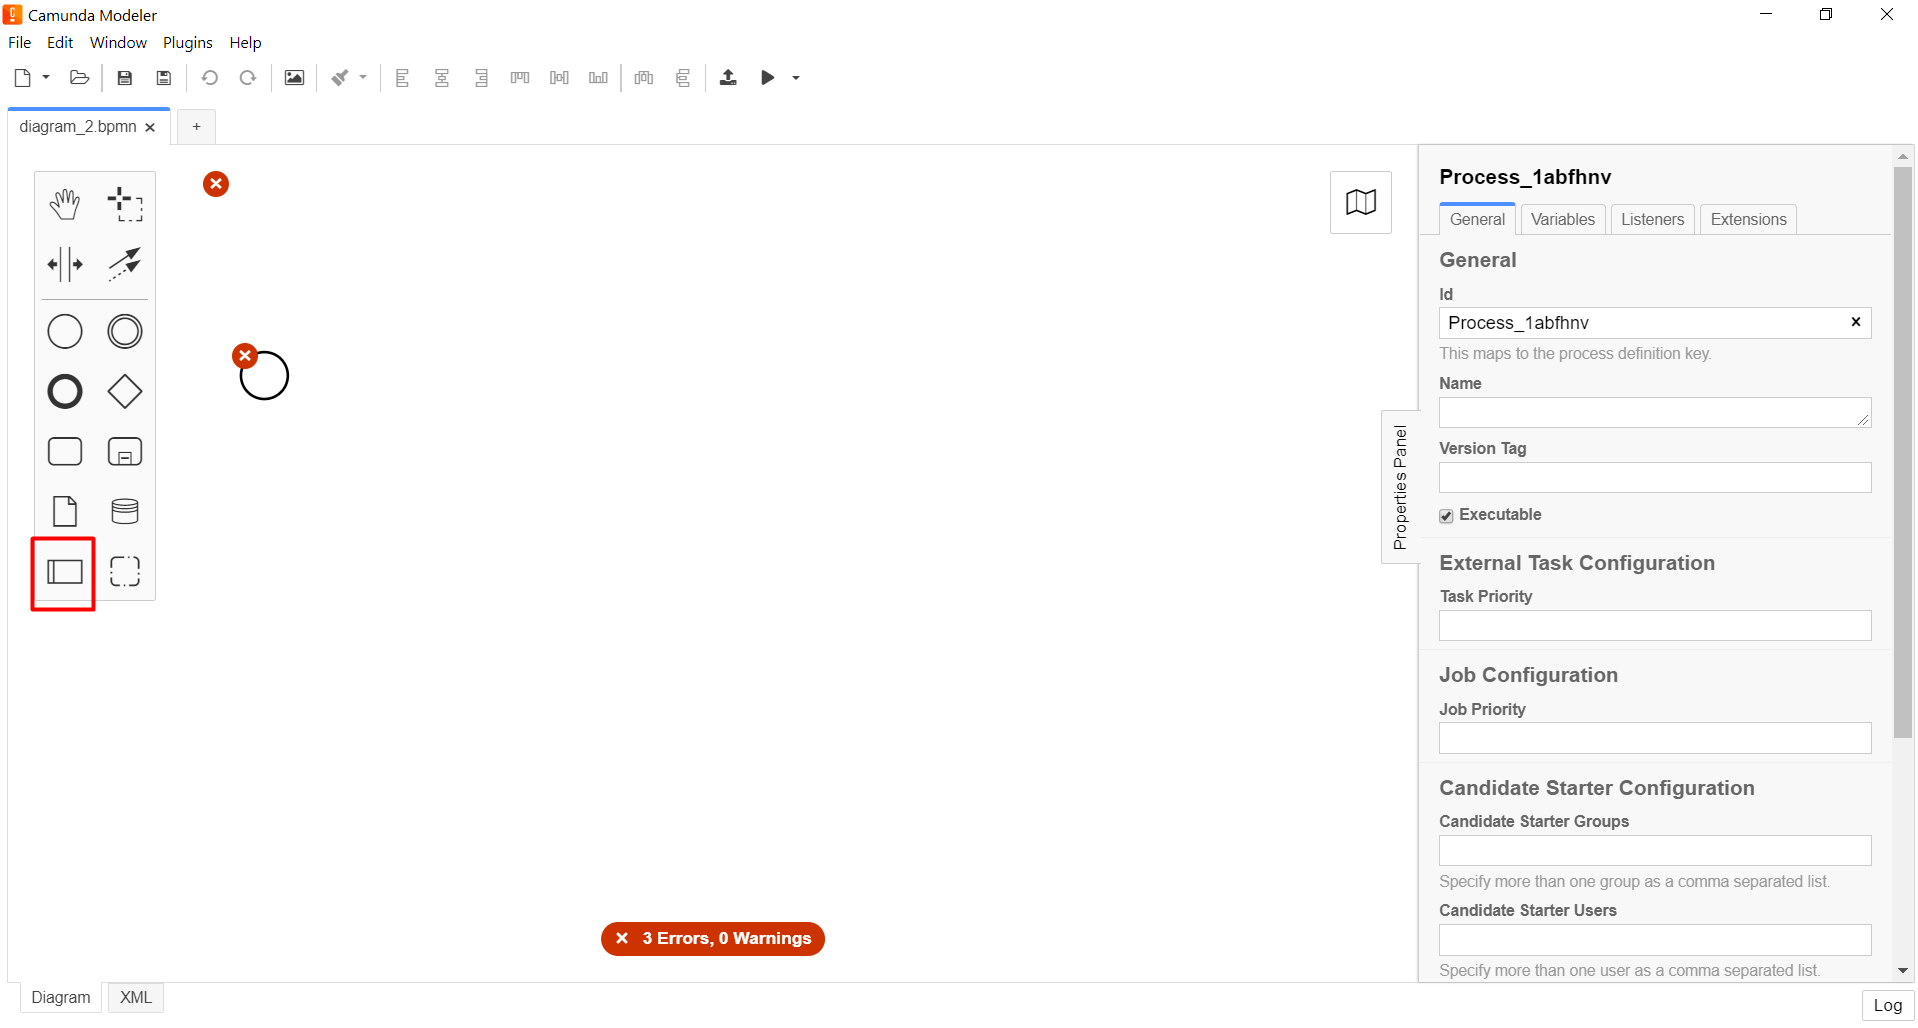
| Modeling of business process diagram must be performed within the Create Pool/Participant element. |
-
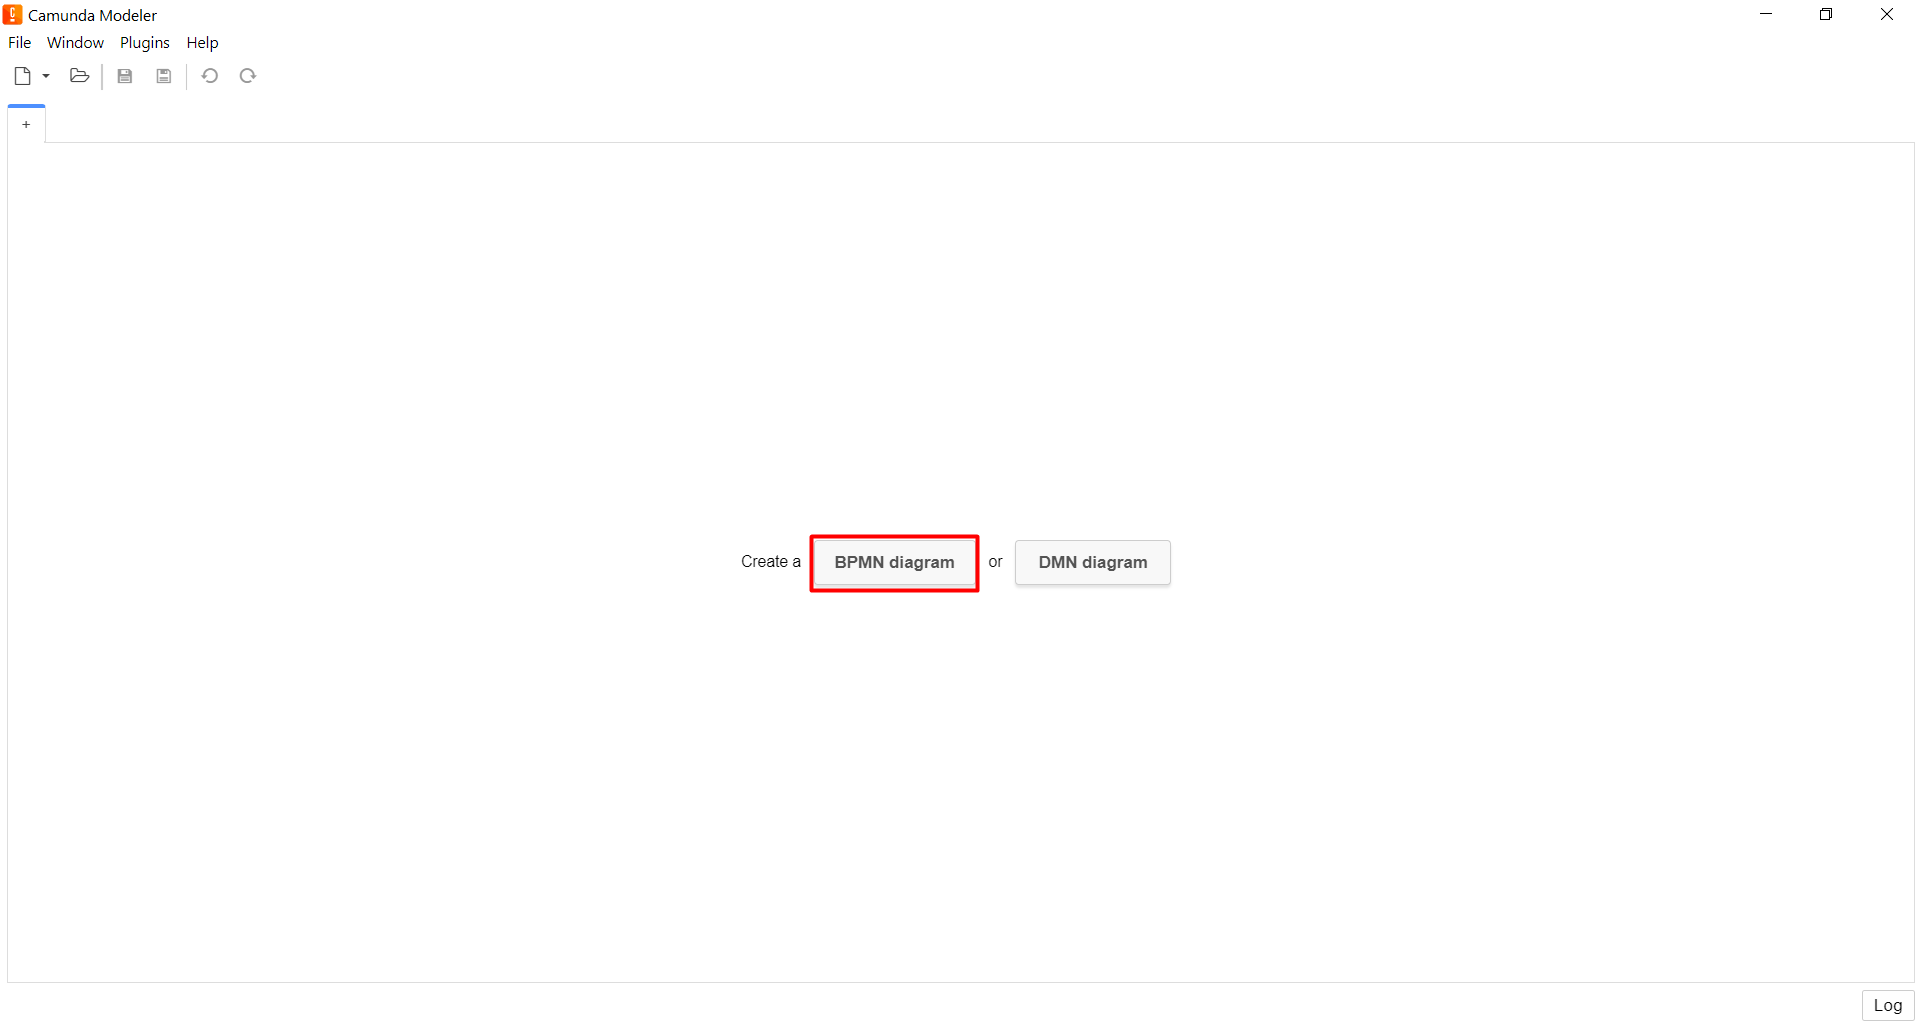
Open Camunda Modeler and create a new BPMN diagram by clicking File → New File → BPMN Diagram in the top left corner.
-
On the left panel, find the Create pool/Participant element and drag it to the modeling canvas.
-
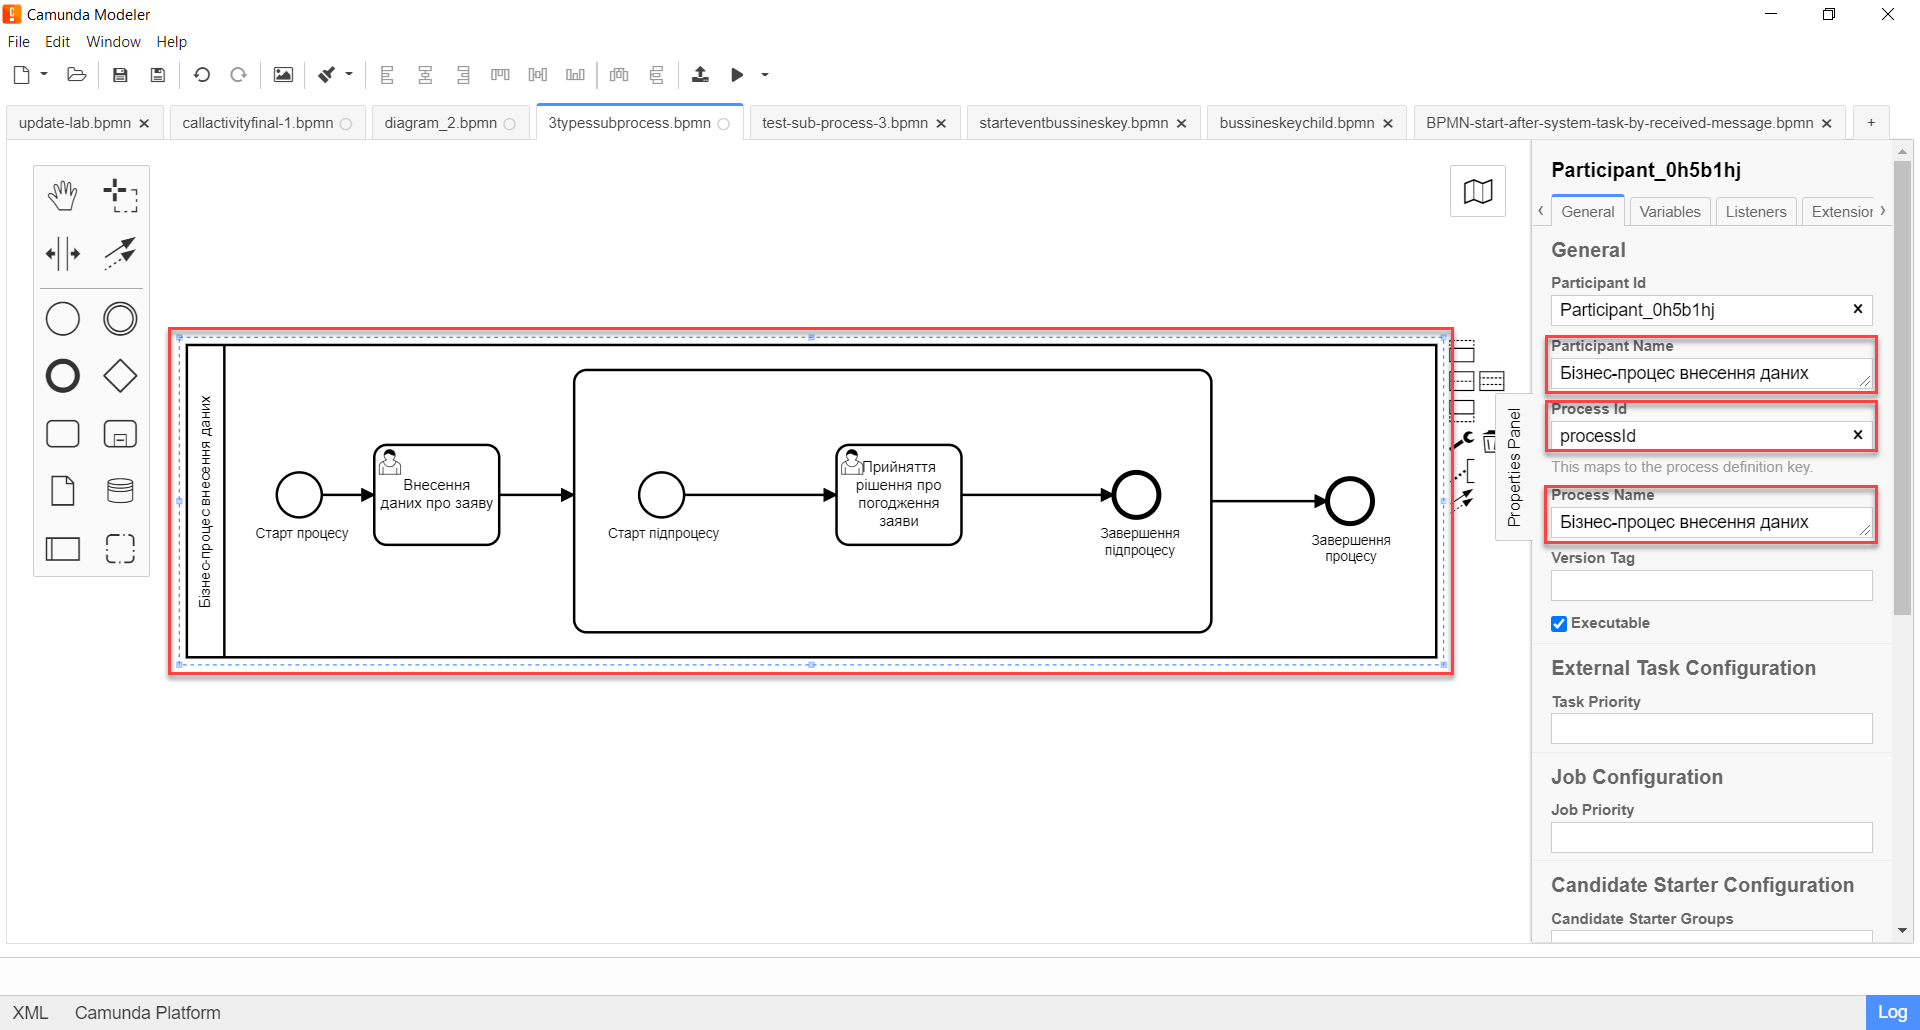
Fill in the following fields with the corresponding values:
-
In the
Participant Namefield, enter the name of the pool —Data input business process. -
In the
Process idfield, enter business process ID (for example,processId). -
In the
Process Namefield, enter business process name —Data input business process.
-
2.3. Modeling main process start event
Create a start event by taking the following steps:
-
On the left panel, find CreateStartEvent element and drag it to the modeling canvas.
-
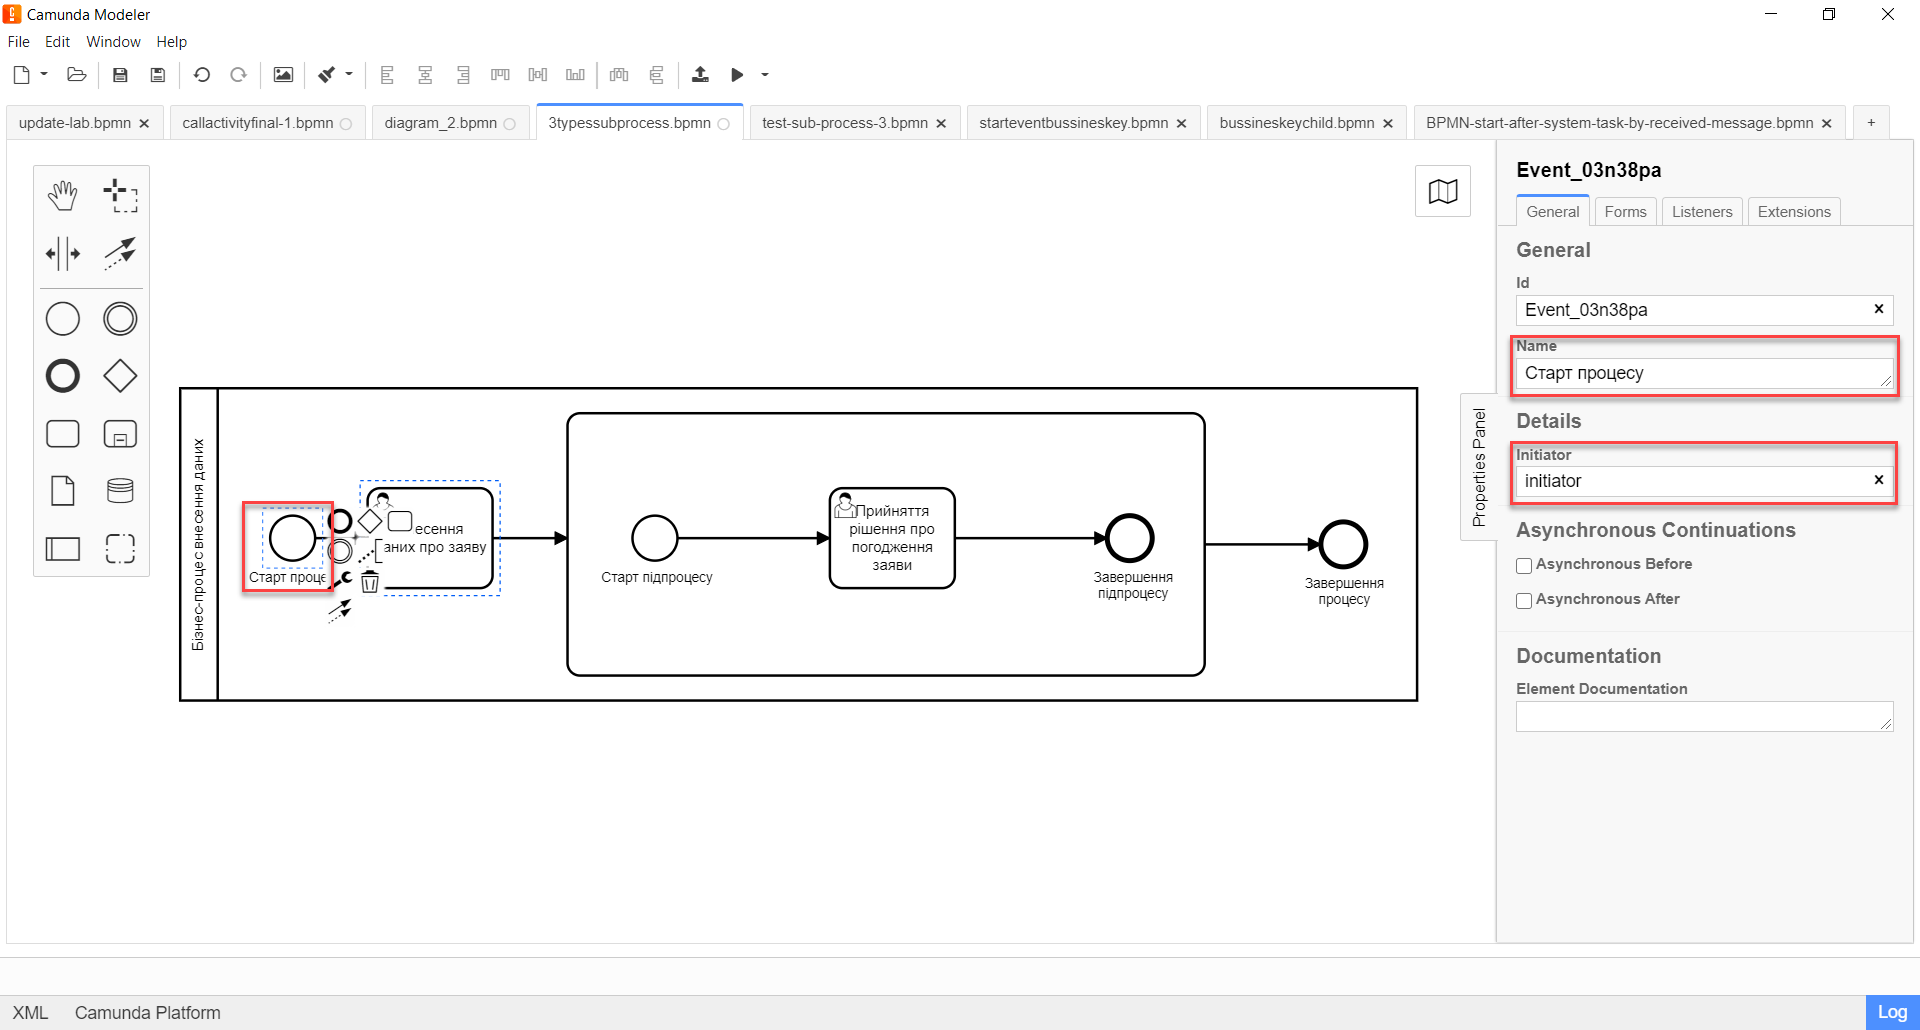
On the right panel, fill in the following parameters with the corresponding values:
-
In the
Namefield, enter name for the start event —Process start. -
In the
Initiatorfield, enterinitiator.initiator— is a special variable set for the user who started the process.
-
2.4. Modelling the user task for entering online order data
To create a user task for data entering, take the following steps:
-
Create a new task, define its type by clicking the key icon and selecting User Task from the menu.
-
On the right panel, click
Open Catalog, select User Form template, and clickApplyto confirm. -
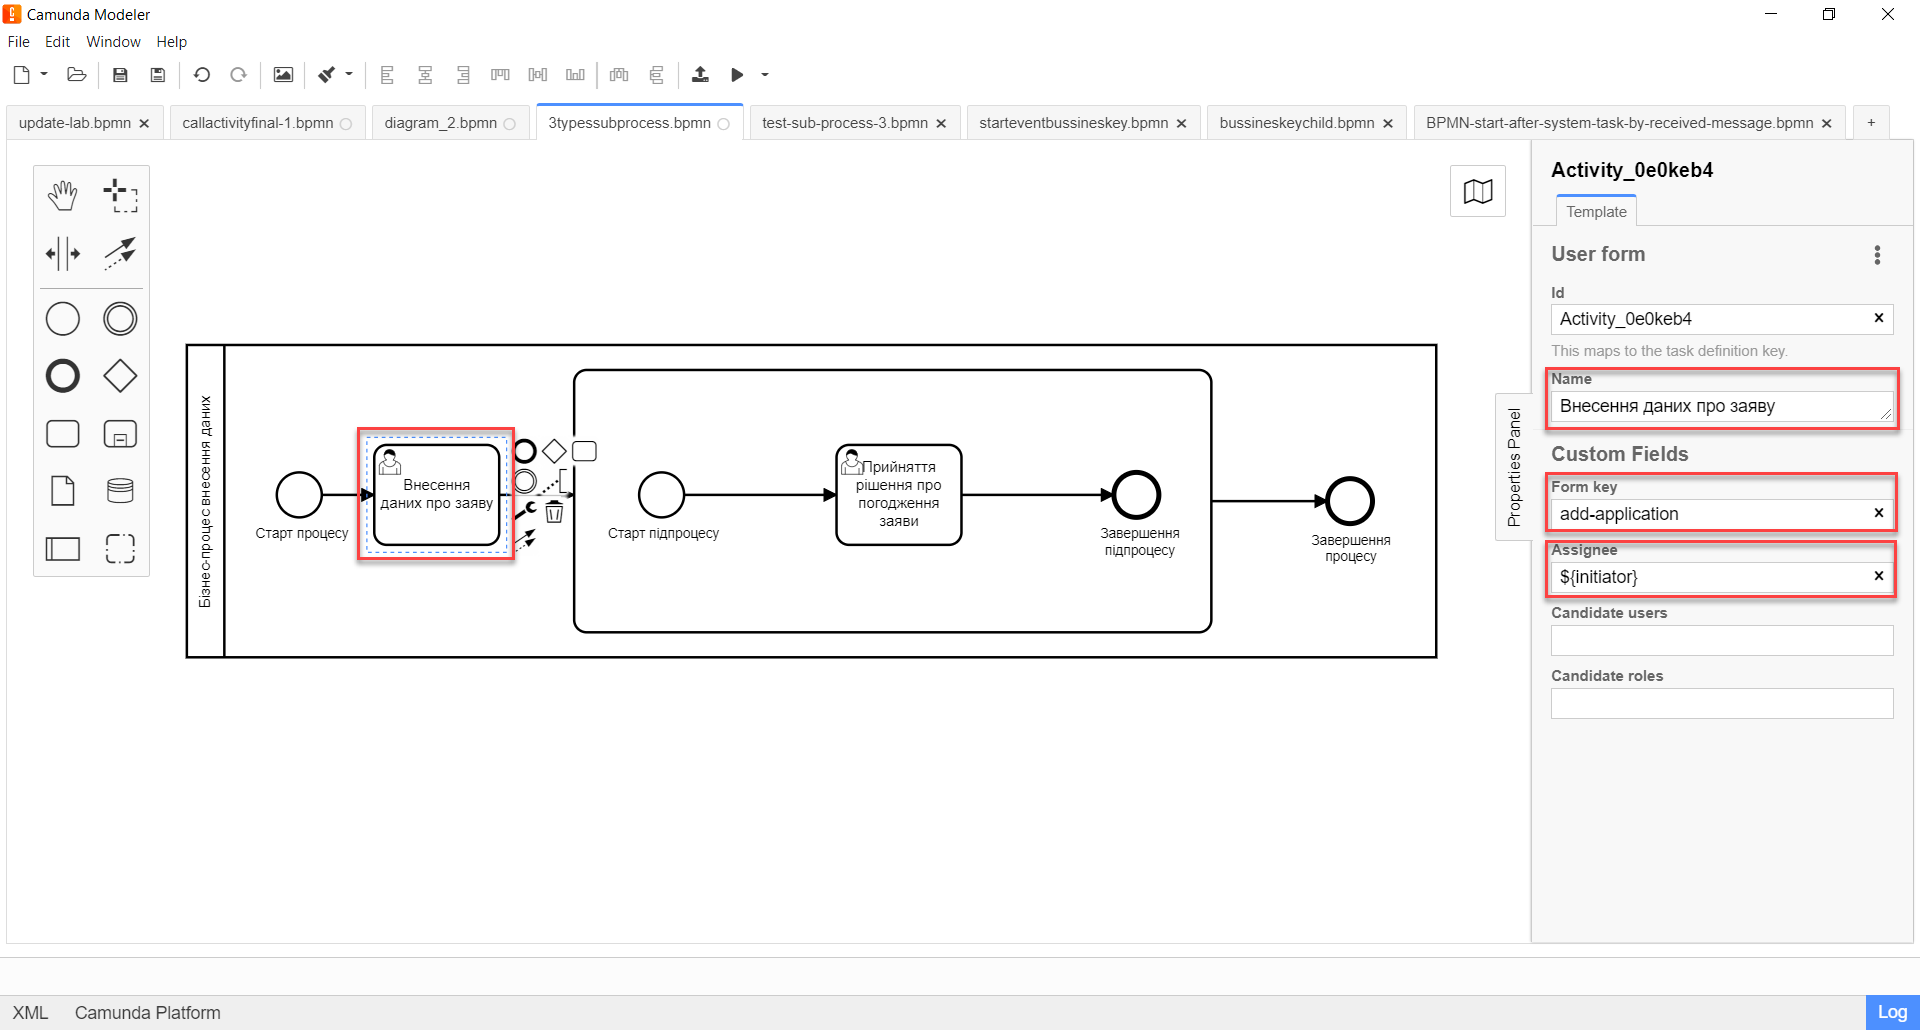
On the right panel, fill in the following fields:
-
In the
Idfield, set task ID —user-form-1. -
In the
Namefield, enter task name —Order data form. -
In the
Form keyfield, enter form key that will correspond with the form service name —add-order-bp-add-order-test. -
In the
Assigneefield, enter the variable of the user who initiated the process instance —${initiator}.
-
2.5. Modelling embedded subprocess
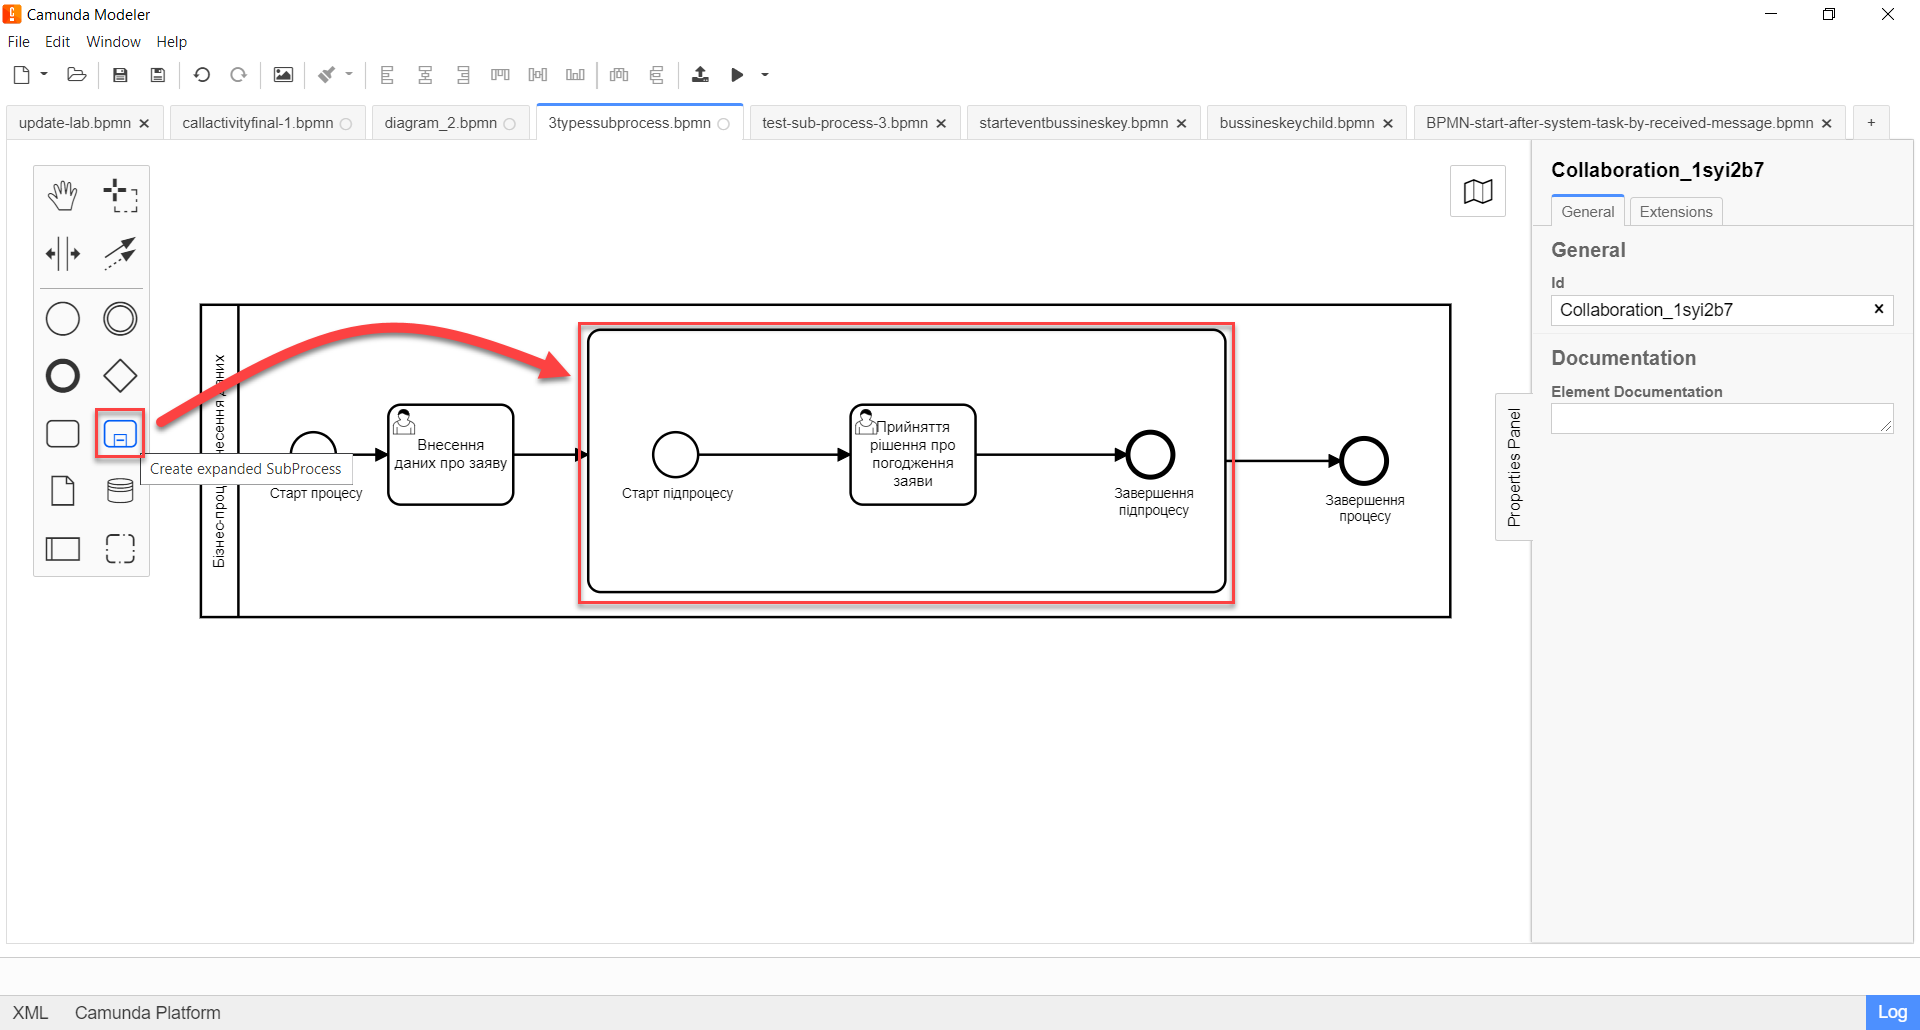
Next, we need to model the embedded subprocess. It is configured inside a dedicated container within the same pool.
-
On the left panel, find the Create expanded SubProcess element, and drag it into the pool.
-
Next, model the three elements within the subprocess:
-
subprocess start event;
-
user task for changes approval;
-
subprocess end event.
-
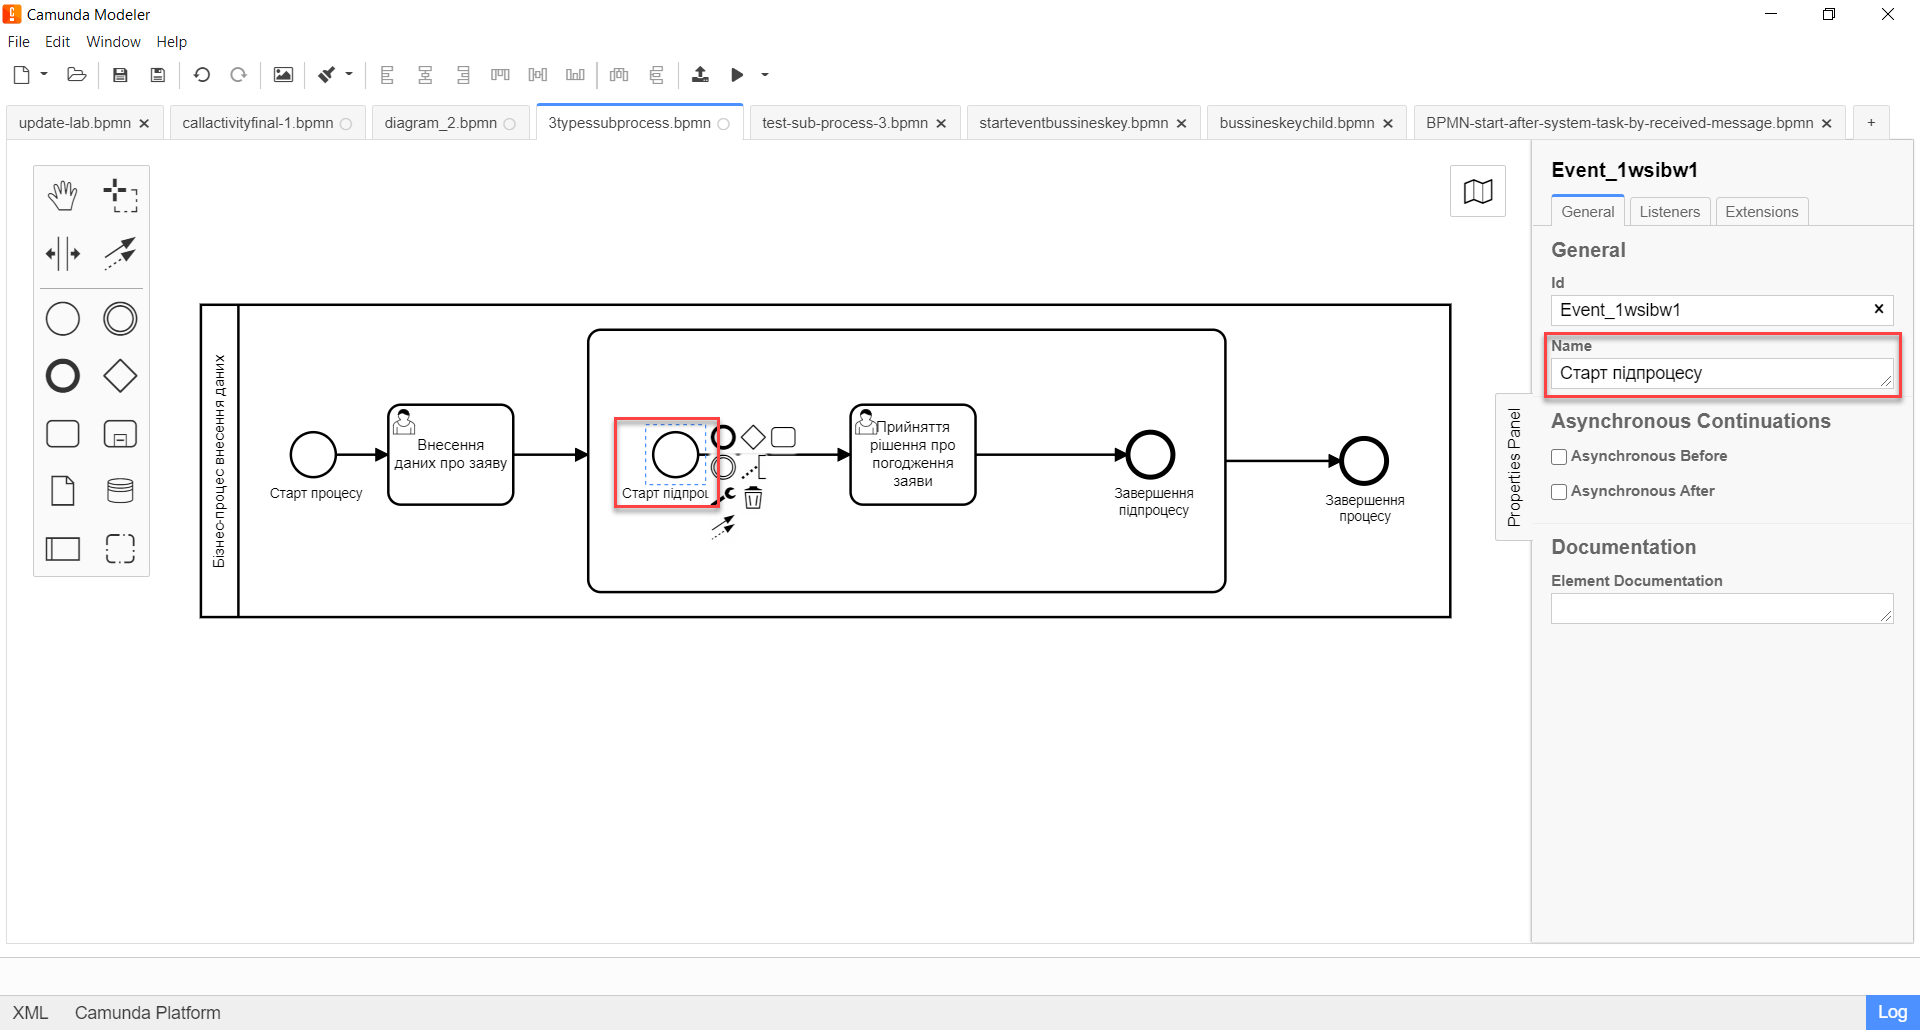
2.5.1. Modelling subprocess start event
Configure subprocess start event.
| As opposed to configuring the main process, subprocess start event is added automatically, along with the Create expanded SubProcess container. |
On the right panel, fill in the Name field with the start event name — Subprocess start.
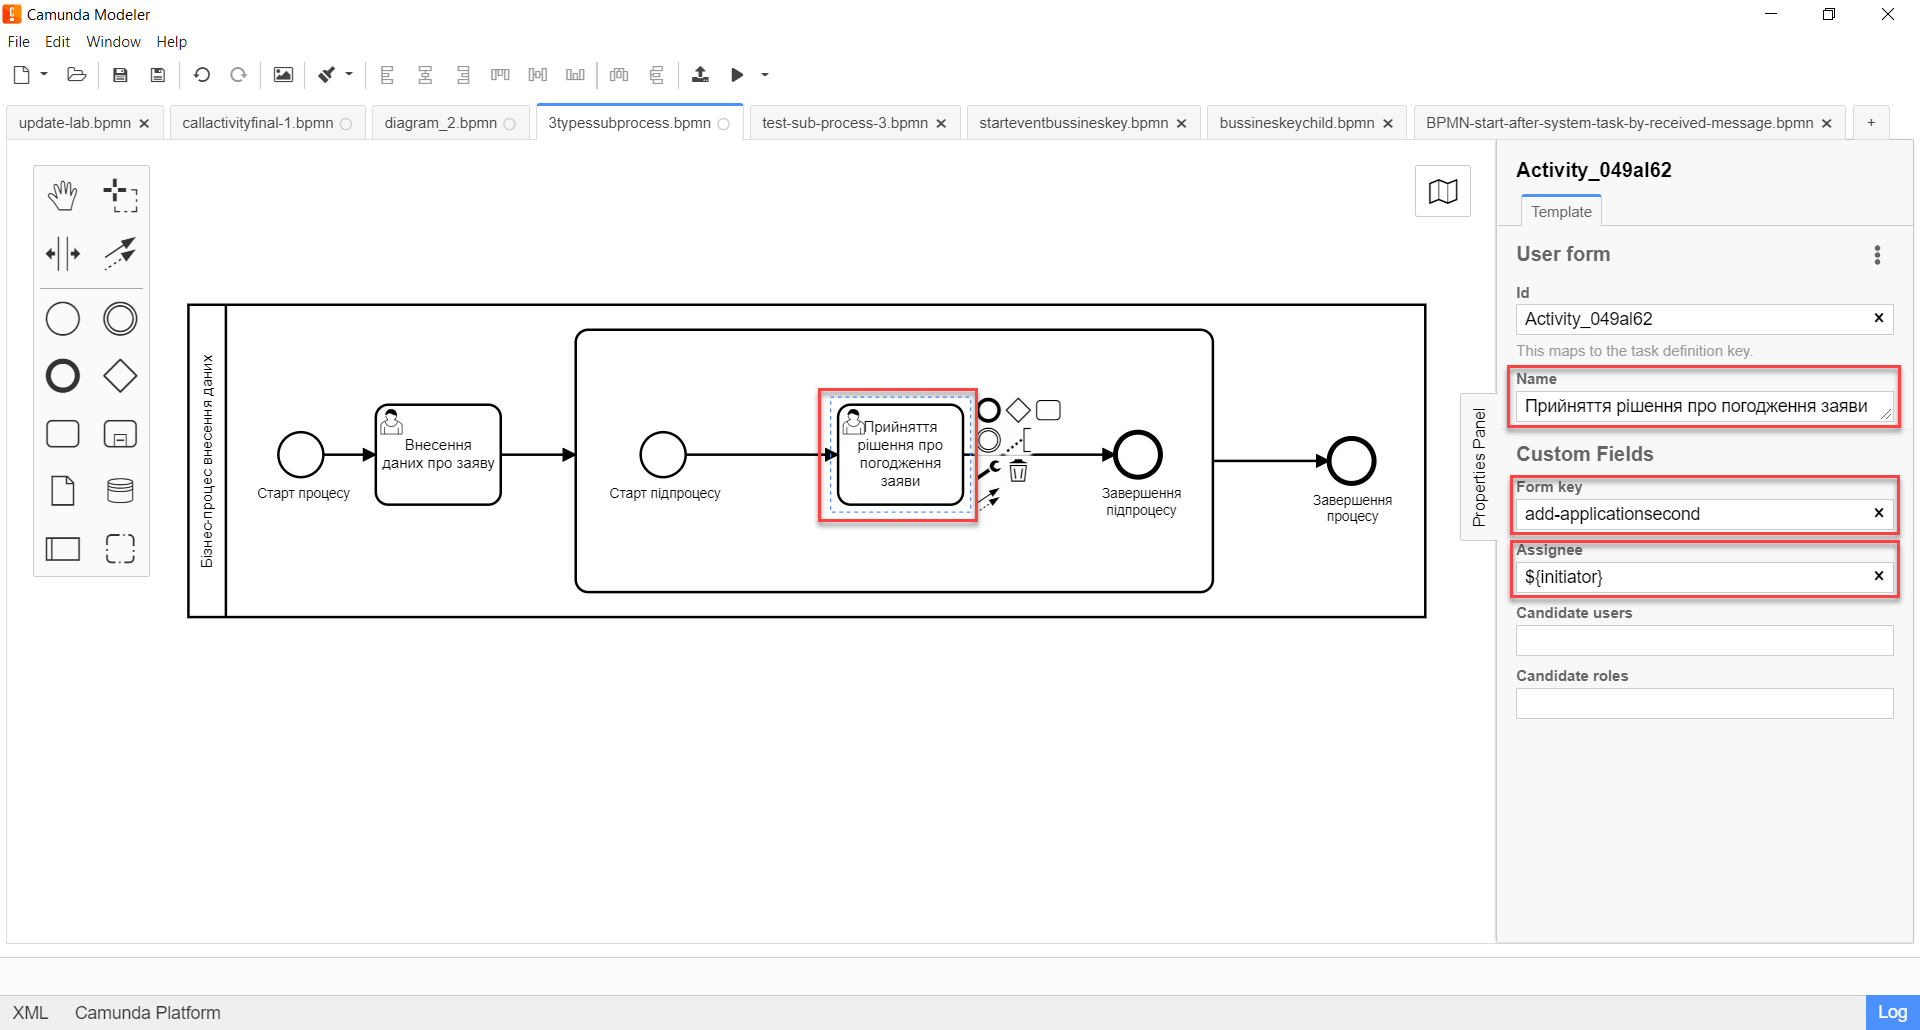
2.5.2. Creating the changes approval user task
Create the user task for changes approval by taking the following steps:
-
Create a new task, define its type by clicking the key icon, and selecting User Task from the menu.
-
On the right panel, click
Open Catalog, select User Form template, and clickApplyto confirm. -
On the configuration panel, fill in the following fields:
-
In the
Namefield, enter task name —Making decision on contract approval. -
In the
Form keyfield, enter the form key that corresponds with the service name of the form —add-applicationsecond. -
In the
Assigneefield, enter the variable used to store the user that initiated the instance —${initiator}.
-
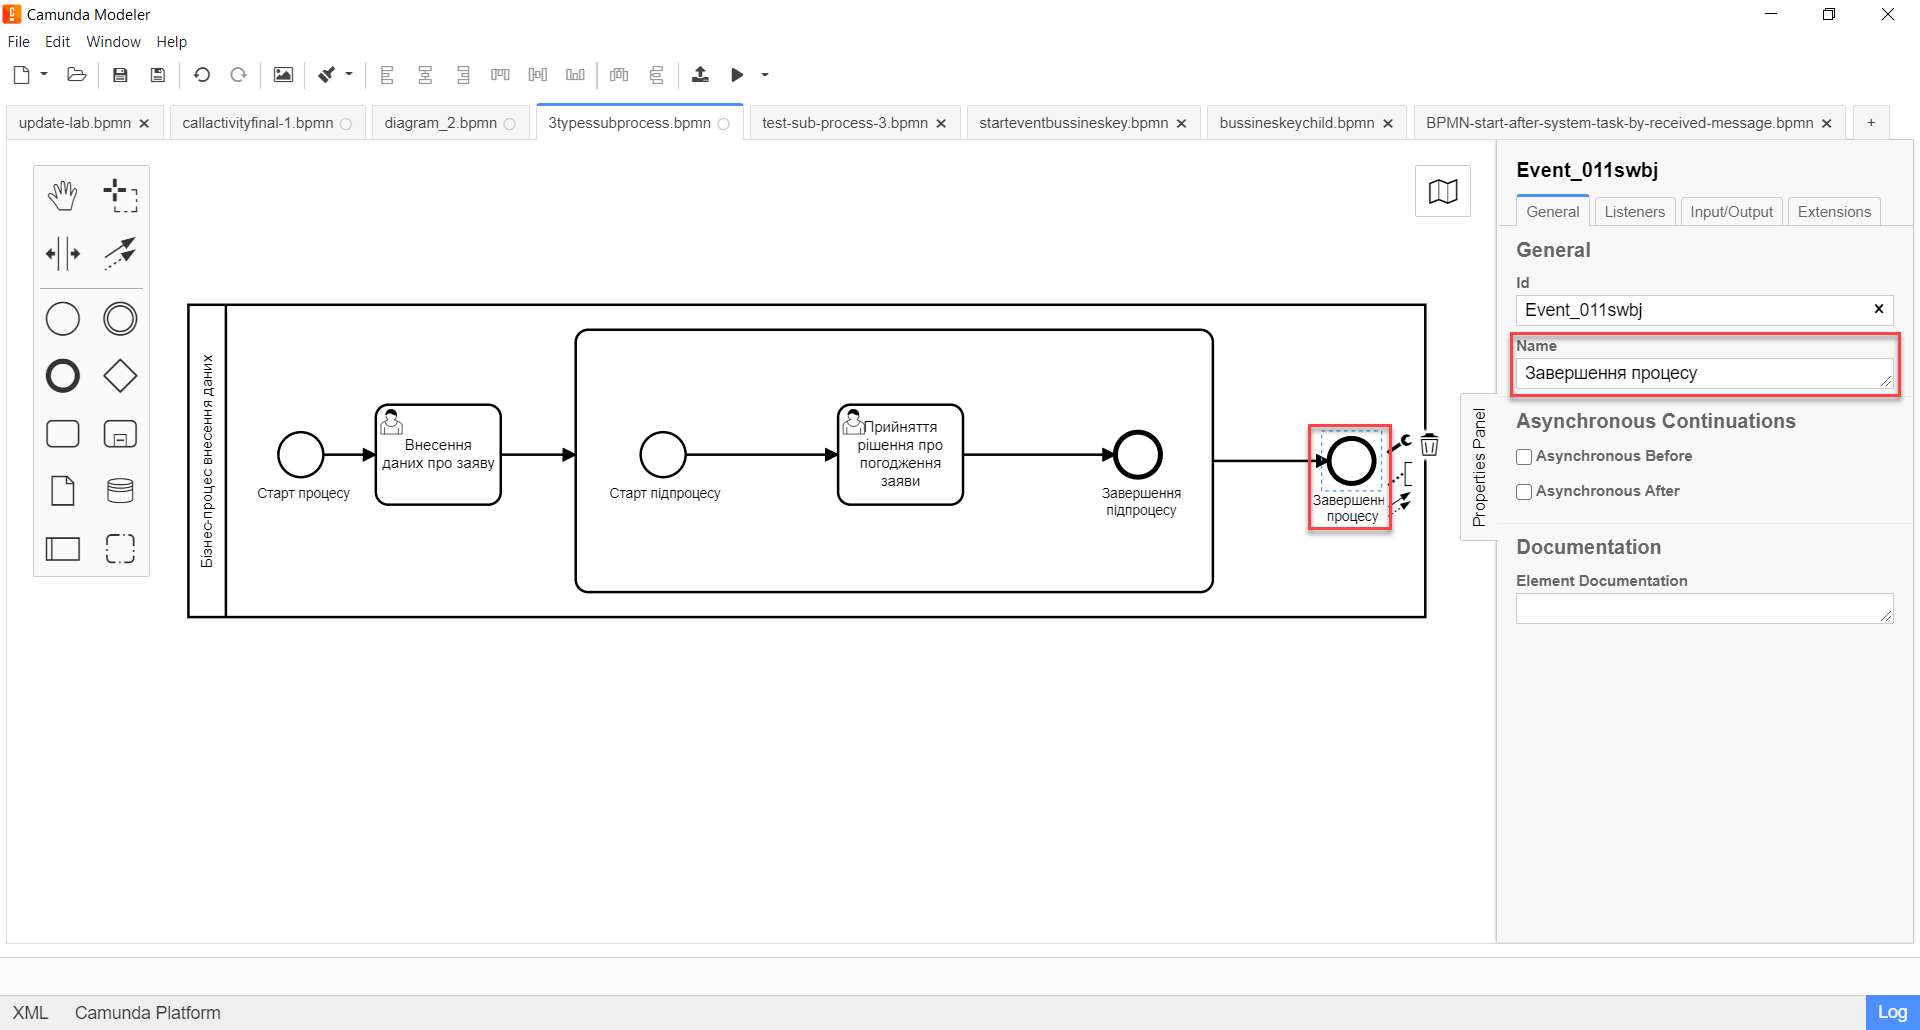
2.5.3. Modelling subprocess end event
-
Create subprocess end event.
-
On the right panel, for the
Nameparameter, enter the valueSubprocess end.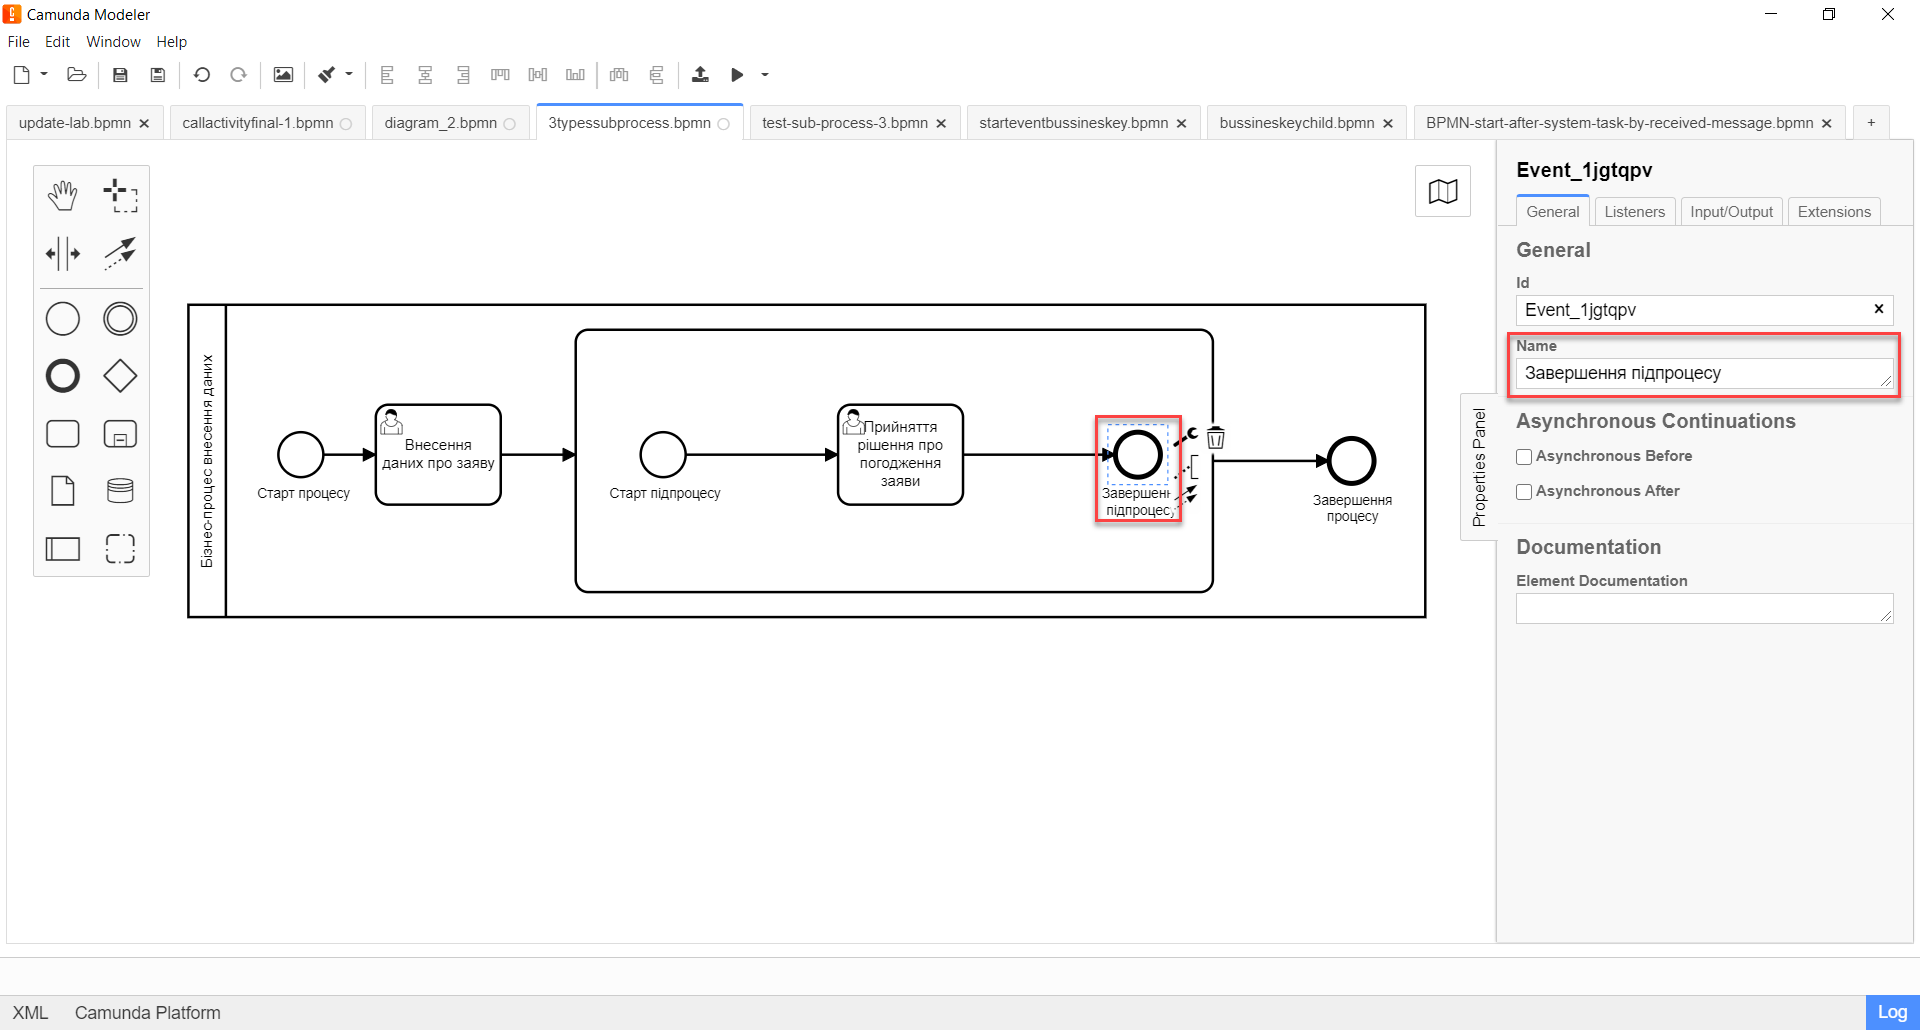
2.6. Modeling main process end event
-
Create main process end event.
-
On the right panel, for the
Nameparameter, enter the valueProcess end.