EKS OIDC Integration⚓︎
This page is a detailed guide on integrating Keycloak with the edp-keycloak-operator to serve as an identity provider for AWS Elastic Kubernetes Service (EKS). It provides step-by-step instructions for creating necessary realms, users, roles, and client configurations for a seamless Keycloak-EKS collaboration. Additionally, it includes guidelines on installing the edp-keycloak-operator using Helm charts.
Prerequisites⚓︎
- EKS Configuration is performed;
- Helm v3.10.0 is installed;
- Keycloak is installed.
Configure Keycloak⚓︎
To prepare Keycloak for integration with the edp-keycloak-operator, follow the steps below:
-
Ensure that the openshift realm is created.
-
Create the orchestrator user and set the password in the Master realm.
-
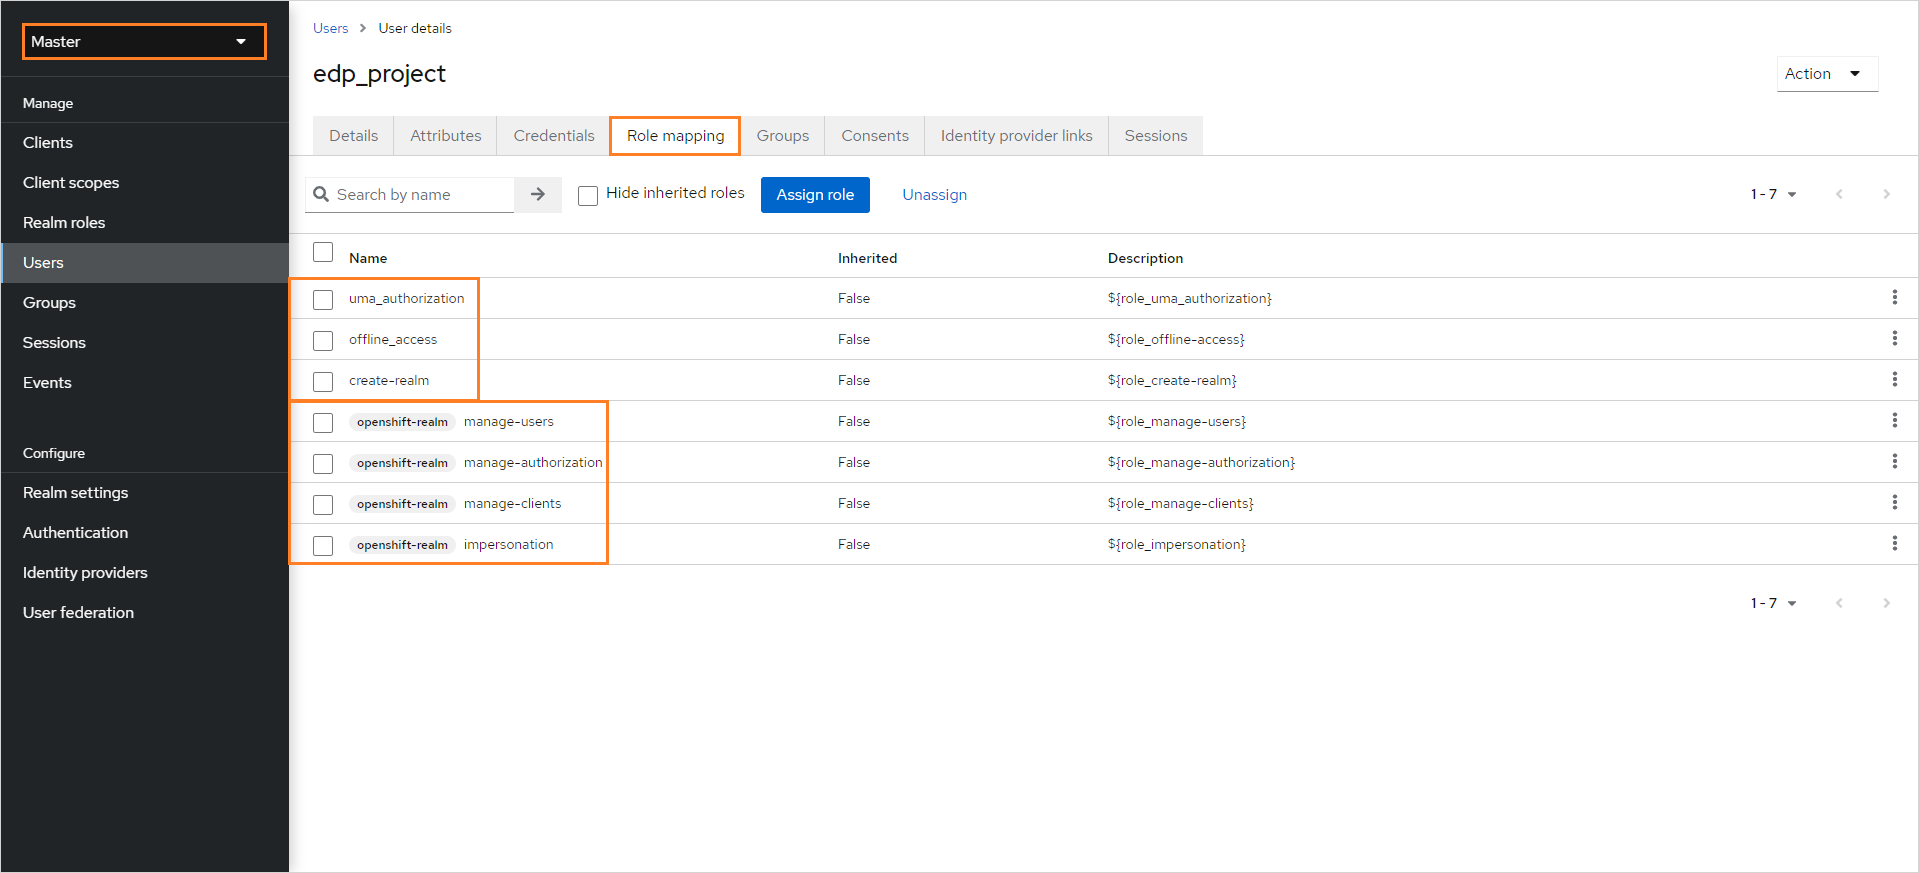
In the Role Mapping tab, assign the proper roles to the user:
-
Realm Roles:
- create-realm;
- offline_access;
- uma_authorization.
-
Client Roles
openshift-realm:- impersonation;
- manage-authorization;
- manage-clients;
- manage-users.
-
Install Keycloak Operator⚓︎
To install the Keycloak operator, follow the steps below:
-
Add the
epamedpHelm chart to a local client: -
Install the Keycloak operator:
Connect Keycloak Operator to Keycloak⚓︎
The next stage after installing Keycloak is to integrate it with the Keycloak operator. It can be implemented with the following steps:
-
Create the keycloak secret that will contain username and password to perform the integration. Set your own password. The username must be orchestrator:
-
Create the Keycloak Custom Resource with the Keycloak instance URL and the secret created in the previous step:
-
Create the KeycloakRealm Custom Resource:
-
Create the KeycloakRealmGroup Custom Resource for both administrators and developers:
-
Create the KeycloakClientScope Custom Resource:
apiVersion: v1.edp.epam.com/v1 kind: KeycloakClientScope metadata: name: groups-keycloak-eks namespace: security spec: name: groups realm: control-plane description: "Group Membership" protocol: openid-connect protocolMappers: - name: groups protocol: openid-connect protocolMapper: "oidc-group-membership-mapper" config: "access.token.claim": "true" "claim.name": "groups" "full.path": "false" "id.token.claim": "true" "userinfo.token.claim": "true" -
Create the KeycloakClient Custom Resource:
-
Create the KeycloakRealmUser Custom Resource for both administrator and developer roles:
apiVersion: v1.edp.epam.com/v1 kind: KeycloakRealmUser metadata: name: keycloakrealmuser-sample namespace: security spec: realm: control-plane username: "administrator" firstName: "John" lastName: "Snow" email: "administrator@example.com" enabled: true emailVerified: true password: "12345678" keepResource: true requiredUserActions: - UPDATE_PASSWORD groups: - eks-oidc-administratorapiVersion: v1.edp.epam.com/v1 kind: KeycloakRealmUser metadata: name: keycloakrealmuser-sample namespace: security spec: realm: control-plane username: "developers" firstName: "John" lastName: "Snow" email: "developers@example.com" enabled: true emailVerified: true password: "12345678" keepResource: true requiredUserActions: - UPDATE_PASSWORD groups: - eks-oidc-developers -
As a result, Keycloak is integrated with the AWS Elastic Kubernetes Service. This integration enables users to log in to the EKS cluster effortlessly using their kubeconfig files while managing permissions through Keycloak.
